“Hey, you got any idea for something quick and festive for the cookout?” My friend texted me just hours before the neighborhood Fourth of July party. Honestly, I was bracing for a scramble, but then I remembered those fresh red white and blue popsicles with fruit layers I’d been tinkering with all week. I wasn’t sure how layering fresh fruit into popsicles would really work, but the colors and flavors just seemed perfect for summer.
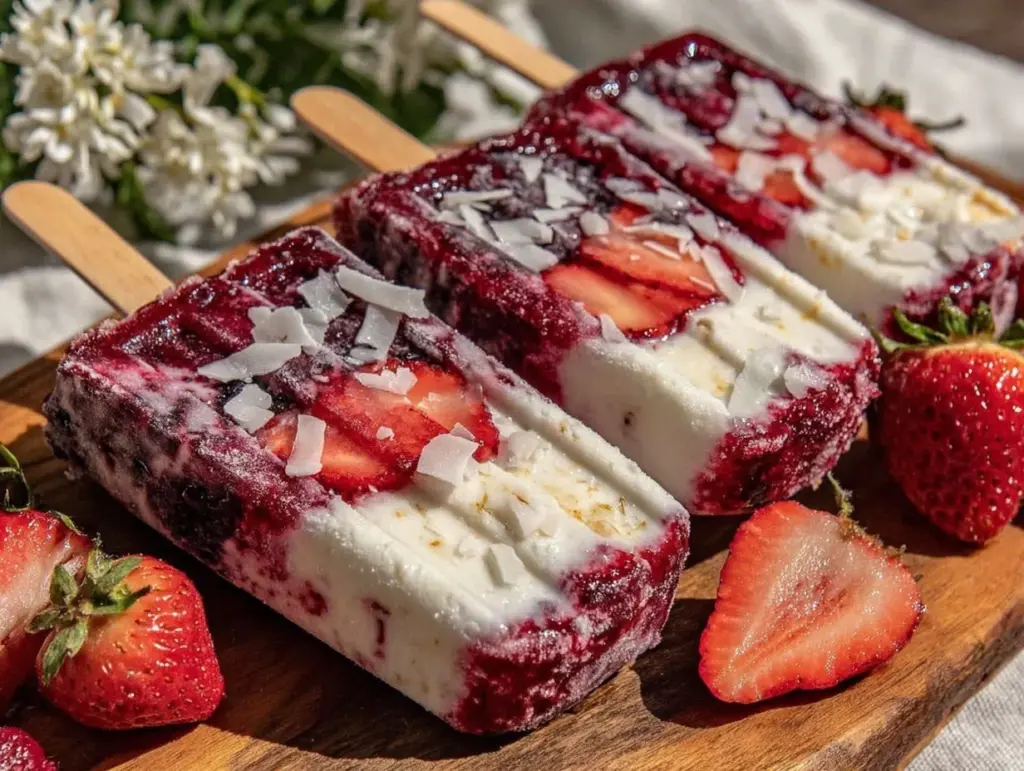
That afternoon, in my cluttered kitchen with the sun pouring through the window, I started chopping strawberries, blueberries, and layering coconut yogurt for the white middle. The whole process felt like a happy accident—something simple yet unexpectedly charming. I wasn’t aiming for perfection; just something that looked fun and tasted refreshing. When the popsicles came out, the layered colors were a little uneven but honestly, it just added to their homemade appeal.
The best part? They vanished before the grill was even cool. Kids adored the sweet, fruity bites while adults nodded approvingly at the fresh-tasting layers. No artificial colors, just real ingredients you can trust. I realized then why this recipe stuck: it’s approachable, festive, and the kind of treat you want to make again because it’s fun to share. Plus, it’s perfect for those moments when you need a quick, cool fix but still want to impress without fuss.
So, if you’ve ever wanted a popsicle that’s both nostalgic and fresh, with layers that actually look like the flag (give or take a few drips), these fresh red white and blue popsicles with fruit layers might just become your new summer go-to. They’re easy, colorful, and honestly, a little bit charming in their imperfect, fruity glory.
Why You’ll Love This Fresh Red White and Blue Popsicles Recipe
After making these popsicles multiple times in one week (I’m not even kidding), I can say with confidence this recipe hits all the right notes for a summer treat. Here’s why it could be your new favorite:
- Quick & Easy: Ready in about 10 minutes prep time, then just freeze. Perfect when you want something fast for an impromptu celebration or just a hot afternoon.
- Simple Ingredients: No weird additives or artificial dyes—just fresh fruit, coconut yogurt, and a touch of honey or agave. You might already have these in your kitchen.
- Perfect for Summer Gatherings: Whether it’s a backyard BBQ, patriotic event, or just a sunny day, these popsicles bring the festive vibe without the fuss.
- Crowd-Pleaser: Kids love the natural sweetness, and adults appreciate the refreshing, light flavors. It’s a rare treat that pleases everyone.
- Unbelievably Delicious: The combination of tart strawberries, creamy coconut yogurt, and juicy blueberries creates a texture and flavor that feels indulgent yet healthy.
This isn’t just another popsicle recipe. The secret lies in the layering technique—you gently build the fruit and yogurt in steps, so the colors stay vibrant and don’t mix into a boring purple blob. Also, using coconut yogurt instead of plain yogurt adds a subtle tropical twist and creamy texture that sets these apart.
Honestly, the recipe stuck with me because it’s more than just dessert—it’s a conversation starter at any party, a way to sneak in fresh fruit, and a playful nod to summer traditions all in one. And if you want to impress without stress, this layered fruit popsicle recipe is your answer.
What Ingredients You Will Need
This recipe uses simple, wholesome ingredients to deliver bold flavor and satisfying texture without the fuss. Most of these are pantry staples or easily found fresh produce, making it ideal for last-minute popsicle cravings or planned celebrations.
- For the Red Layer:
- 1 ½ cups fresh strawberries, hulled and sliced (or frozen, thawed)
- 2 tablespoons honey or agave syrup (optional, to sweeten)
- 1 tablespoon lemon juice (brightens the flavor)
- For the White Layer:
- 1 cup plain coconut yogurt (full-fat for creaminess, I recommend So Delicious brand for best texture)
- 1 teaspoon vanilla extract (adds warmth)
- 1-2 tablespoons maple syrup or honey (adjust sweetness to taste)
- For the Blue Layer:
- 1 ½ cups fresh blueberries (can use frozen, just thaw first)
- 2 tablespoons water or freshly squeezed lemon juice
- 1 tablespoon honey or agave (optional)
- Extras:
- Popsicle molds with sticks
- Optional: fresh mint leaves for garnish or flavor layering
You can swap coconut yogurt for Greek yogurt if you prefer a tangier white layer. For a dairy-free and allergy-friendly version, make sure to pick a plant-based yogurt that sets well when frozen. If you want to play with the red layer, raspberries can be a nice substitute for strawberries, and blackberries work well for the blue layer, although they might give a slightly different texture.
Equipment Needed
- Popsicle molds: Any standard size works, but I find silicone molds easier for unmolding without breaking the popsicles.
- Blender or food processor: For pureeing the fruit layers smoothly.
- Mixing bowls and spoons: For combining ingredients separately before layering.
- Measuring cups and spoons: To keep the layers consistent and balanced.
- Knife and cutting board: For prepping fresh fruit.
If you don’t have popsicle molds, small paper cups with wooden sticks work well as an alternative. Just be sure to freeze them on a flat surface and cover the top with foil to hold the sticks upright. I’ve had good luck using a silicone spatula to loosen popsicles from molds without cracking. For budget-friendly options, check your local dollar store for molds or repurpose small containers you already have.
Preparation Method

- Prepare the Red Layer: Place strawberries, honey, and lemon juice in a blender. Puree until smooth but still slightly textured (about 30 seconds). Pour about ⅓ of this mixture into the popsicle molds, filling them up to about one-third full. Tap the molds gently on the counter to remove air bubbles. Freeze for 30-40 minutes until the layer is firm but not rock solid.
- Make the White Layer: In a bowl, stir together coconut yogurt, vanilla extract, and maple syrup until smooth. Spoon or carefully pour the yogurt mixture over the frozen red layer, filling the molds to two-thirds full. Freeze again for about 30 minutes until set. A tip here: spread the yogurt layer gently to avoid breaking the red layer underneath.
- Create the Blue Layer: Blend blueberries with water and honey until smooth. Pour this final layer over the white, filling the molds to the top. Insert popsicle sticks if your molds don’t have built-in slots. Return to the freezer for at least 4 hours or overnight for best results.
- Unmold and Serve: To remove, briefly run warm water over the outside of the molds (just a few seconds) to loosen. Pull gently on the sticks, and the popsicles should slide out cleanly, showcasing those beautiful red, white, and blue layers.
Watch for the texture of each layer as it freezes — the red and blue layers should be firm but not icy, and the white layer creamy and set. If the red or blue layer is too runny, add a small amount of chia seeds or a bit of gelatin (if not vegan) to help thicken before freezing next time.
Pro tip: prepping layers on a baking sheet that fits your molds makes transferring easier and keeps your freezer neat. Also, stirring the fruit purees occasionally during blending helps keep the texture consistent.
Cooking Tips & Techniques
Layered popsicles can be a bit fiddly, but here’s what I learned through trial and error to keep them looking sharp and tasting fresh:
- Freeze Layers Properly: Don’t rush the freezing between layers. If they’re not firm enough, the layers will bleed together. A quick press test with your finger helps determine readiness.
- Use Slightly Thickened Purees: If your fruit mixture is too watery, the layers won’t hold. Blending with a bit of chia seed or straining excess juice can help keep your layers vibrant and separate.
- Balance Sweetness: Fruits vary in sweetness depending on season and ripeness. Taste your purees before layering and adjust honey or maple syrup accordingly.
- Work Quickly: Keep your molds in the freezer while prepping to prevent the layers from melting and mixing. Also, freezing in batches helps avoid soggy whites or muddled colors.
- Unmolding Tricks: If your popsicles are stubborn, placing the molds in warm water for 10 seconds usually loosens them. Avoid soaking, or you’ll get drips.
I once tried layering blueberry puree first and strawberries last—huge mess! Blueberries tend to stain, so red on bottom and blue on top works best. Also, experimenting with different yogurts changed the texture completely—coconut yogurt gave that perfect creamy bite that Greek yogurt couldn’t match in this case.
Variations & Adaptations
- Dietary Tweaks: Swap coconut yogurt for almond or soy yogurt if you prefer a different plant-based option. Using Greek yogurt works for a higher protein twist but expect a tangier white layer.
- Seasonal Fruit Variations: In summer, fresh stone fruits like peaches or cherries can replace strawberries for the red layer. For the blue, blackberries or purple grapes make a beautiful, rich color.
- Flavor Twists: Add fresh mint leaves or a splash of lime juice to the red or blue layers for a refreshing herbal note. A sprinkle of cinnamon or ginger in the white layer adds warmth.
- Cooking Methods: If you don’t have popsicle molds, try freezing the layers in silicone muffin cups and serve as mini frozen bites on toothpicks.
- Personal Experiment: I once made a version with a layer of homemade roasted red pepper puree (inspired by my roasted red pepper hummus) for a savory twist—it was surprisingly good for a grown-up palette!
Serving & Storage Suggestions
These fresh red white and blue popsicles are best served straight from the freezer on a warm day. Their bright colors make them a festive addition to any summer gathering or patriotic celebration.
Try presenting them on a platter lined with fresh mint or edible flowers to amp up the appeal. They pair wonderfully with light summer snacks like fresh fruit salads or even something savory like a crispy buffalo cauliflower bites to balance the sweetness.
For storage, keep the popsicles tightly covered in the molds or wrapped in plastic wrap to prevent freezer burn. They last up to two weeks in the freezer but are best eaten within a few days for peak freshness. To re-soften slightly before serving, let them sit at room temperature for 5 minutes—this helps bring out the flavors and makes them easier to bite into without melting messily.
Flavors meld a bit over time, making them taste even sweeter and creamier, so sometimes I make them a day ahead intentionally.
Nutritional Information & Benefits
Each popsicle (approximate) provides about 70–90 calories, mainly from natural fruit sugars and coconut yogurt fats. They’re low in saturated fat and free from processed sugars if you skip the optional sweeteners.
Strawberries and blueberries are packed with antioxidants and vitamin C, supporting immune health and adding anti-inflammatory benefits. Coconut yogurt contributes healthy fats and probiotics, which aid digestion and gut health.
This recipe is naturally gluten-free, dairy-free (if using plant-based yogurt), and can be made vegan easily. It’s a refreshing, guilt-free treat that fits well within most balanced diets, especially when you consider how much fresh fruit you’re sneaking in.
Conclusion
Fresh red white and blue popsicles with fruit layers are exactly the kind of simple summer recipe that feels special without demanding hours in the kitchen. They bring together fresh produce, a bit of creamy sweetness, and a playful patriotic vibe that’s hard to resist.
Whether you’re making them for a party or a quiet afternoon snack, these popsicles invite you to customize with whatever fruits or flavors you love. I keep coming back to this recipe because it’s fun, forgiving, and a neat way to enjoy fresh fruit during the hot months.
Next time you’re craving something cool and colorful, give this recipe a try—you just might find it becomes your signature summer treat. And if you do, I’d love to hear how you tailored it to your taste or paired it with other favorites like herb and garlic cheese ball bites for a balanced snack spread.
Here’s to fresh flavors and easy celebrations!
FAQs About Fresh Red White and Blue Popsicles with Fruit Layers
Can I use frozen fruit instead of fresh for the popsicles?
Yes! Just thaw frozen fruit before blending to avoid icy popsicles. Frozen fruit works well year-round and can give a slightly different texture but still tastes great.
How do I keep the layers from mixing together?
Freezing each layer until firm before adding the next is key. Patience helps here—about 30-40 minutes per layer in a standard freezer usually does the trick.
What if I don’t have popsicle molds?
You can use small paper cups or silicone muffin tins and insert wooden sticks. Cover the top with foil to hold sticks upright while freezing.
Can I make these popsicles ahead of time?
Absolutely! They keep well in the freezer for up to two weeks. Just wrap the molds or popsicles tightly to prevent freezer burn.
Is there a way to make the white layer less sweet?
Yes, reduce or omit the maple syrup or honey in the coconut yogurt layer for a tangier, less sweet flavor. Adjust to your taste preference.
Pin This Recipe!
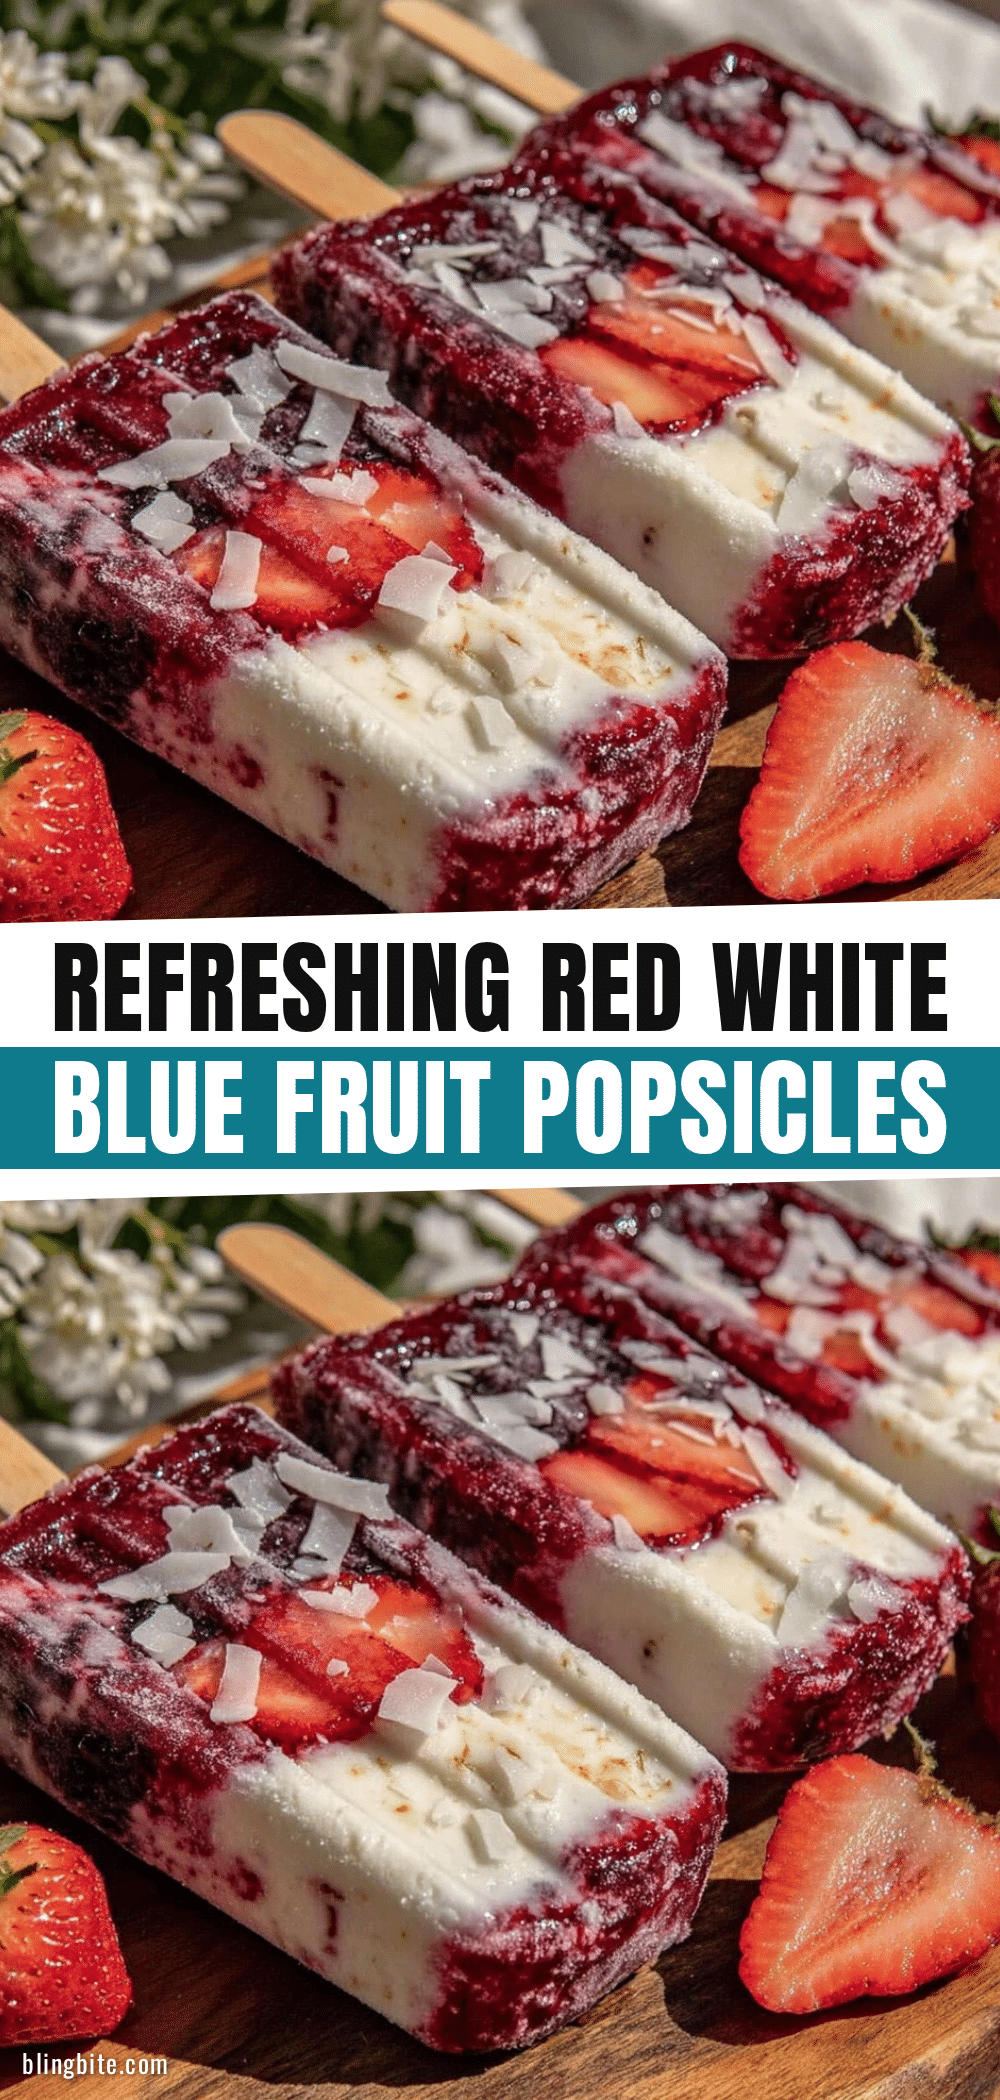
Fresh Red White and Blue Popsicles Easy Layered Fruit Recipe for Summer
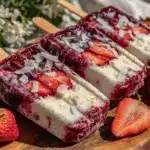
These fresh red, white, and blue layered popsicles combine strawberries, coconut yogurt, and blueberries for a quick, festive, and refreshing summer treat perfect for gatherings.
- Prep Time: 10 minutes
- Cook Time: 5 hours
- Total Time: 5 hours 10 minutes
- Yield: 8 popsicles 1x
- Category: Dessert
- Cuisine: American
Ingredients
- 1 ½ cups fresh strawberries, hulled and sliced (or frozen, thawed)
- 2 tablespoons honey or agave syrup (optional, to sweeten)
- 1 tablespoon lemon juice
- 1 cup plain coconut yogurt (full-fat recommended)
- 1 teaspoon vanilla extract
- 1–2 tablespoons maple syrup or honey (adjust sweetness to taste)
- 1 ½ cups fresh blueberries (can use frozen, thawed)
- 2 tablespoons water or freshly squeezed lemon juice
- 1 tablespoon honey or agave (optional)
- Optional: fresh mint leaves for garnish or flavor layering
- Popsicle molds with sticks
Instructions
- Prepare the Red Layer: Place strawberries, honey, and lemon juice in a blender. Puree until smooth but still slightly textured (about 30 seconds). Pour about one-third of this mixture into the popsicle molds, filling them up to about one-third full. Tap the molds gently on the counter to remove air bubbles. Freeze for 30-40 minutes until the layer is firm but not rock solid.
- Make the White Layer: In a bowl, stir together coconut yogurt, vanilla extract, and maple syrup until smooth. Spoon or carefully pour the yogurt mixture over the frozen red layer, filling the molds to two-thirds full. Freeze again for about 30 minutes until set. Spread the yogurt layer gently to avoid breaking the red layer underneath.
- Create the Blue Layer: Blend blueberries with water and honey until smooth. Pour this final layer over the white, filling the molds to the top. Insert popsicle sticks if your molds don’t have built-in slots. Return to the freezer for at least 4 hours or overnight for best results.
- Unmold and Serve: To remove, briefly run warm water over the outside of the molds (just a few seconds) to loosen. Pull gently on the sticks, and the popsicles should slide out cleanly, showcasing the red, white, and blue layers.
Notes
Freeze each layer until firm before adding the next to prevent mixing. Use slightly thickened purees or add chia seeds to thicken watery fruit mixtures. Work quickly and keep molds in the freezer while prepping. To unmold, briefly run warm water over molds. Coconut yogurt adds a creamy texture; Greek yogurt can be used for a tangier white layer. Variations include substituting fruits and adding fresh mint or spices.
Nutrition
- Serving Size: 1 popsicle
- Calories: 80
- Sugar: 10
- Sodium: 15
- Fat: 3
- Saturated Fat: 2.5
- Carbohydrates: 14
- Fiber: 2
- Protein: 1
Keywords: popsicles, summer treat, layered fruit popsicles, red white and blue, patriotic dessert, coconut yogurt, healthy popsicles, easy summer recipe


