
“Did you ever find yourself staring at an empty lunchbox and thinking, ‘What on earth am I going to pack today?'” That was me last week — juggling work calls and a toddler who suddenly decided sandwiches were no longer acceptable. So, I rummaged through the fridge, grabbed some pizza sauce and cheese, and threw together these Easy Freezer Friendly Pizza Pinwheel Lunchbox Rolls. Honestly, at first I was skeptical. I thought, how good can pizza rolls be when you’re rushing? But after the first batch came out soft, cheesy, and perfectly portable, I was hooked.
They quickly became my go-to solution for not just lunches but quick snacks and even a surprise dinner rescue when nothing else sounded good. The smell of melting mozzarella and savory pepperoni wafting through the kitchen — oh, that’s comfort in a bite. What’s funny is how these pinwheels started as a bit of a happy accident on a hectic weekday, and now, I make them in batches to freeze and pull out whenever life gets crazy.
What really makes these pizza pinwheel lunchbox rolls stick in my routine is the ease and the fact that they travel well. No soggy bread, no mess, just neat little bites bursting with flavor. I find myself smiling quietly at how something so simple can feel like a small celebration in the middle of a chaotic day. So yeah, these rolls aren’t just a recipe — they’re a little lifesaver in my kitchen.
Why You’ll Love This Recipe
After making these pizza pinwheel lunchbox rolls more times than I can count, here’s why I keep coming back:
- Quick & Easy: You can make a batch from start to finish in under 45 minutes — perfect for busy weeknights or when you need last-minute lunches.
- Simple Ingredients: No fancy or hard-to-find items here. Most of the ingredients are pantry staples or easy to grab from any grocery store.
- Perfect for Lunchboxes: These rolls are compact and mess-free, making them ideal for kids’ lunches or even adult snacks on the go.
- Freezer Friendly: Make a big batch, freeze extras, and defrost when needed. It’s a huge time saver!
- Crowd-Pleaser: Whether it’s for a casual party or family dinner, these rolls always get rave reviews from both kids and adults.
- Unbelievably Delicious: The combination of soft bread, savory pizza sauce, melty cheese, and pepperoni is a total winner.
What sets these apart from just another pizza roll recipe? It’s the balance — not too doughy, not too greasy, and with just the right amount of sauce and cheese. I also love that the dough is soft enough to keep these rolls tender after freezing, thanks to a little extra olive oil and careful kneading. Honestly, these pizza pinwheel lunchbox rolls feel like a little treat wrapped up in a practical package — just the way I like my comfort food.
What Ingredients You Will Need
This recipe uses simple, wholesome ingredients to deliver bold flavor and satisfying texture without the fuss. Most are pantry and fridge staples, so you probably already have everything on hand — or can easily swap with what you do.
- For the dough:
- All-purpose flour (3 ½ cups / 440g) – I prefer King Arthur for consistent results
- Active dry yeast (2 ¼ tsp / 1 packet)
- Sugar (1 tbsp) – helps feed the yeast and browns the crust nicely
- Salt (1 tsp)
- Warm water (1 ¼ cups / 300ml) – about 110°F (43°C) for perfect yeast activation
- Olive oil (2 tbsp) – adds tenderness and keeps the rolls soft after freezing
- For the filling:
- Pizza sauce (¾ cup / 180ml) – store-bought or homemade, depending on your love for shortcuts
- Shredded mozzarella cheese (2 cups / 200g) – freshly shredded melts better than pre-shredded
- Pepperoni slices (about 20-25 slices) – or substitute with cooked sausage, ham, or veggies for variety
- Italian seasoning (1 tsp) – optional, but it adds a nice subtle herbal touch
- Additional:
- Egg wash (1 egg beaten with 1 tbsp water) – for that golden, glossy finish
If you want to switch things up, almond flour can replace part of the all-purpose flour for a gluten-reduced version, though the texture changes a bit. If dairy is an issue, try a vegan cheese alternative and vegan pizza sauce — just watch the melting behavior. For a fresh twist in summer, swap pepperoni for sliced grilled veggies or fresh basil.
Equipment Needed
Here’s what I use to get these pizza pinwheel lunchbox rolls just right:
- Large mixing bowl – for proofing the yeast and mixing dough
- Wooden spoon or silicone spatula – handy for initial mixing
- Stand mixer with dough hook (optional) – makes kneading easier but totally not necessary
- Rolling pin – for rolling out the dough evenly
- Baking sheet lined with parchment paper – keeps rolls from sticking and makes cleanup a breeze
- Sharp knife or pizza cutter – to slice the rolled dough into perfect pinwheels
- Pastry brush – to apply the egg wash for a beautiful golden finish
If you don’t have a stand mixer, no worries — hand kneading works fine. Just be patient and knead for about 10 minutes until the dough feels smooth and elastic. I also recommend investing in a good rolling pin if you bake often; it makes rolling dough evenly so much simpler. For budget-friendly options, a clean wine bottle can double as a rolling pin in a pinch!
Preparation Method
- Activate the yeast: In a large bowl, combine warm water (1 ¼ cups/300ml) and sugar (1 tbsp). Sprinkle the active dry yeast (2 ¼ tsp) over the top and stir gently. Let it sit for 5-10 minutes until foamy and bubbly — this tells you the yeast is alive and kicking.
- Mix the dough: Add the olive oil (2 tbsp), salt (1 tsp), and about 3 cups (375g) of the flour to the yeast mixture. Stir with a wooden spoon or spatula until it starts coming together.
- Knead the dough: Turn the dough out onto a floured surface and knead, adding the remaining ½ cup (65g) flour gradually as needed, for about 8-10 minutes until smooth and elastic. If you’re using a stand mixer, attach the dough hook and knead on medium speed for about 5-6 minutes.
- First rise: Lightly oil a clean bowl, place the dough inside, and cover with a damp towel or plastic wrap. Let it rise in a warm place for 1 to 1.5 hours or until doubled in size. You’ll notice the dough puffing up and feeling pillowy — that’s your cue!
- Prepare the filling: While the dough rises, shred the mozzarella and slice the pepperoni. Mix the pizza sauce with Italian seasoning if using.
- Roll out the dough: Once risen, punch the dough down gently and transfer it to a lightly floured surface. Roll it into a rectangle about 12×16 inches (30x40cm), roughly ¼ inch (6mm) thick.
- Assemble the pinwheels: Spread the pizza sauce evenly over the dough, leaving about an inch border along one long edge. Sprinkle shredded mozzarella evenly on top, then layer the pepperoni slices.
- Roll and slice: Starting from the edge with sauce and cheese, carefully roll the dough into a tight log. Pinch the seam to seal. Using a sharp knife or pizza cutter, slice the log into 1 to 1 ½ inch (2.5 to 4 cm) thick pinwheels.
- Prepare for baking or freezing: Place the pinwheels cut-side up on a parchment-lined baking sheet, about 1 inch (2.5 cm) apart. Brush the tops with egg wash for a golden finish.
- Bake fresh or freeze: For fresh rolls, bake in a preheated oven at 375°F (190°C) for 18-22 minutes or until golden and bubbly. For freezing, place the unbaked pinwheels on the baking sheet in the freezer until firm (about 2 hours), then transfer to a freezer-safe bag or container.
- Reheating from frozen: Bake frozen pinwheels in a preheated oven at 375°F (190°C) for 25-30 minutes until cooked through and golden brown.
Pro tip: If the dough feels sticky while rolling, dust lightly with flour but don’t overdo it — too much flour can make the rolls tough. Also, slice gently to keep the pinwheels intact. When baking, keep an eye on the tops; if they brown too fast, tent with foil halfway through.
Cooking Tips & Techniques
Making perfect pizza pinwheel lunchbox rolls is all about a few key tricks I learned the hard way:
- Yeast activation: Don’t rush this step. If the yeast doesn’t foam, it’s likely dead or the water was too hot/cold — start over to avoid dense dough.
- Kneading: Proper kneading develops gluten which makes the dough stretchy and soft. Under-kneaded dough tears easily and bakes dense. Use the windowpane test if you’re curious — stretch a small piece thinly; if it doesn’t tear, you’re good.
- Rolling evenly: Keeping the dough even thickness ensures the pinwheels bake at the same rate. Uneven dough leads to some parts burnt while others stay doughy.
- Tight rolling: Roll the dough snugly but not too tight or filling will squish out during baking.
- Freezing: Freeze pinwheels individually on the sheet before bagging to avoid sticking together — makes grabbing a few at a time so easy.
One time, I got impatient and skipped the first rise — disaster. The rolls were flat and chewy. Lesson learned: patience pays off with soft, fluffy rolls. Also, multitasking while waiting for the dough to rise is a lifesaver — I usually prep a quick roasted red pepper hummus or tidy up the kitchen.
Variations & Adaptations
These pizza pinwheel lunchbox rolls are versatile and easy to tweak for different tastes or dietary needs. Here are some ideas I’ve tried or want to try next:
- Vegetarian version: Swap pepperoni for sautéed mushrooms, spinach, and bell peppers. I added some caramelized onions once — so good!
- Gluten-free option: Use a gluten-free pizza dough mix and adjust water slightly. Dough may be stickier, so handle carefully.
- Spicy twist: Add a sprinkle of crushed red pepper flakes in the sauce or layer in some sliced jalapeños for a little heat.
- Cheese variety: Mix mozzarella with sharp cheddar or provolone for richer flavor. I once tried a smoky gouda swap, and it was a hit at a potluck.
- Alternative proteins: Replace pepperoni with cooked Italian sausage or chopped grilled chicken for a heartier roll.
For different cooking methods, these rolls can also be warmed gently in an air fryer for a crispier outside or steamed briefly for a softer bite. Whatever variation you choose, these pinwheels adapt well — making them a reliable recipe to customize based on your pantry and cravings.
Serving & Storage Suggestions
These pinwheel rolls are best served warm, fresh from the oven, when the cheese is perfectly melty and the dough still soft. They’re great for lunchboxes, served alongside a crisp salad or veggie sticks. I sometimes pair them with a simple dipping sauce — ranch or extra pizza sauce works wonders.
To store, keep any leftovers in an airtight container in the fridge for up to 3 days. For longer storage, freeze unbaked pinwheels as described above or freeze baked rolls wrapped tightly; they reheat nicely in the oven or microwave.
When reheating, cover loosely with foil to keep moisture in and prevent drying out. Flavors actually deepen after a day or two, so leftovers can taste even better than fresh. These pizza rolls also travel well for picnics or packed lunches.
Nutritional Information & Benefits
On average, one pizza pinwheel provides about 150-180 calories, depending on size and filling. They offer a nice balance of carbs from the dough, protein from the cheese and pepperoni, and fats from the olive oil and toppings.
Using olive oil in the dough adds heart-healthy monounsaturated fats, while mozzarella provides calcium and protein. Swapping pepperoni for veggies boosts fiber and vitamins. These rolls are a balanced treat that fits well into an active lifestyle.
They’re not low-calorie snacks, but portion control is easy thanks to their size. For gluten-free or dairy-free diet needs, the recipe adapts well with appropriate substitutions. If you’re interested in other nourishing, easy meals, the Italian wedding soup with turkey meatballs is another wholesome, family-friendly favorite.
Conclusion
These Easy Freezer Friendly Pizza Pinwheel Lunchbox Rolls are a little slice of convenience and comfort rolled into one. I love how they bring together simple ingredients into a fun, handheld meal that feels both satisfying and special. Whether you’re packing lunches, feeding a crowd, or just need a quick bite, these rolls fit the bill without fuss or fancy steps.
Feel free to tweak the fillings and seasonings to suit your tastes — that’s part of the joy of this recipe. Personally, I keep a batch in the freezer at all times; they’ve saved me during more than one busy morning or unexpected hangry moment! If you make them, I’d love to hear how you customize your pinwheels or any tricks you picked up along the way.
Thanks for stopping by and happy rolling!
FAQs About Easy Freezer Friendly Pizza Pinwheel Lunchbox Rolls
Can I use store-bought pizza dough instead of making my own?
Absolutely! Store-bought dough works well and cuts down prep time. Just roll it out and fill as instructed. Keep in mind it might be a bit softer or denser depending on the brand.
How long do frozen pinwheels keep in the freezer?
They’re best eaten within 2-3 months. Beyond that, they can dry out or lose flavor. Make sure to store them in airtight freezer bags or containers.
Can I add other toppings like olives or bell peppers?
Yes! Feel free to customize the filling with your favorite pizza toppings. Just slice ingredients thinly to help them cook through evenly inside the rolls.
What’s the best way to reheat leftover rolls?
Reheat in a 350°F (175°C) oven for 10-15 minutes covered loosely with foil to keep them moist. You can also microwave briefly, but the oven yields better texture.
Are these rolls suitable for school lunches?
Definitely! They’re compact, not messy, and taste great cold or at room temperature. Kids usually love them, making them a lunchbox winner.
Pin This Recipe!

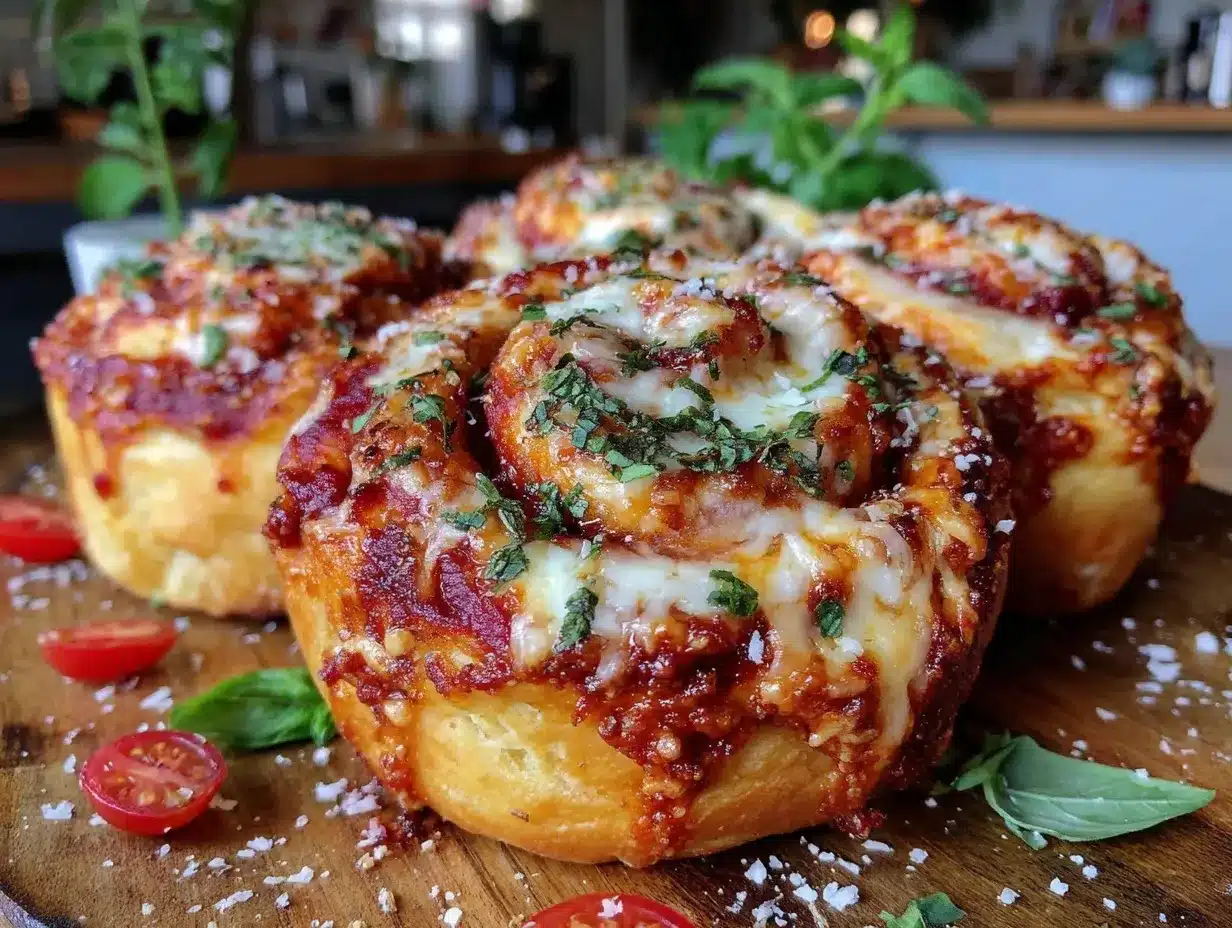
Easy Freezer Friendly Pizza Pinwheel Lunchbox Rolls

Soft, cheesy, and portable pizza pinwheel rolls perfect for quick meals, lunchboxes, and freezer-friendly snacks. Made with simple ingredients and easy to customize.
- Prep Time: 15 minutes
- Cook Time: 22 minutes
- Total Time: 1 hour 45 minutes
- Yield: 20-25 pinwheels 1x
- Category: Snack
- Cuisine: Italian-American
Ingredients
- 3 ½ cups all-purpose flour (440g)
- 2 ¼ tsp active dry yeast (1 packet)
- 1 tbsp sugar
- 1 tsp salt
- 1 ¼ cups warm water (110°F / 43°C) (300ml)
- 2 tbsp olive oil
- ¾ cup pizza sauce (180ml)
- 2 cups shredded mozzarella cheese (200g)
- 20–25 pepperoni slices
- 1 tsp Italian seasoning (optional)
- 1 egg beaten with 1 tbsp water (egg wash)
Instructions
- Activate the yeast: In a large bowl, combine warm water and sugar. Sprinkle the active dry yeast over the top and stir gently. Let it sit for 5-10 minutes until foamy and bubbly.
- Mix the dough: Add olive oil, salt, and about 3 cups of flour to the yeast mixture. Stir until it starts coming together.
- Knead the dough: Turn dough onto a floured surface and knead, adding remaining ½ cup flour gradually as needed, for 8-10 minutes until smooth and elastic. Alternatively, knead with a stand mixer dough hook on medium speed for 5-6 minutes.
- First rise: Lightly oil a clean bowl, place dough inside, cover with damp towel or plastic wrap. Let rise in a warm place for 1 to 1.5 hours or until doubled in size.
- Prepare the filling: Shred mozzarella and slice pepperoni. Mix pizza sauce with Italian seasoning if using.
- Roll out the dough: Punch down dough and roll into a 12×16 inch rectangle about ¼ inch thick on a floured surface.
- Assemble pinwheels: Spread pizza sauce evenly over dough leaving 1 inch border on one long edge. Sprinkle mozzarella and layer pepperoni slices.
- Roll and slice: Roll dough tightly from the edge with sauce and cheese into a log. Pinch seam to seal. Slice into 1 to 1 ½ inch thick pinwheels.
- Prepare for baking or freezing: Place pinwheels cut-side up on parchment-lined baking sheet about 1 inch apart. Brush tops with egg wash.
- Bake fresh or freeze: Bake at 375°F (190°C) for 18-22 minutes until golden and bubbly. For freezing, freeze unbaked pinwheels on baking sheet until firm (about 2 hours), then transfer to freezer-safe bag or container.
- Reheat from frozen: Bake frozen pinwheels at 375°F (190°C) for 25-30 minutes until cooked through and golden brown.
Notes
If dough feels sticky while rolling, dust lightly with flour but avoid over-flouring to keep rolls tender. Slice gently to keep pinwheels intact. Tent with foil if tops brown too fast during baking. Freeze pinwheels individually on baking sheet before bagging to prevent sticking. Use windowpane test to check kneading. Store leftovers in airtight container in fridge up to 3 days or freeze unbaked or baked rolls for up to 2-3 months.
Nutrition
- Serving Size: 1 pinwheel
- Calories: 165
- Sugar: 2
- Sodium: 350
- Fat: 7
- Saturated Fat: 3.5
- Carbohydrates: 20
- Fiber: 1
- Protein: 7
Keywords: pizza pinwheels, freezer friendly, lunchbox rolls, quick meals, pizza rolls, easy snack, kid-friendly, portable food


