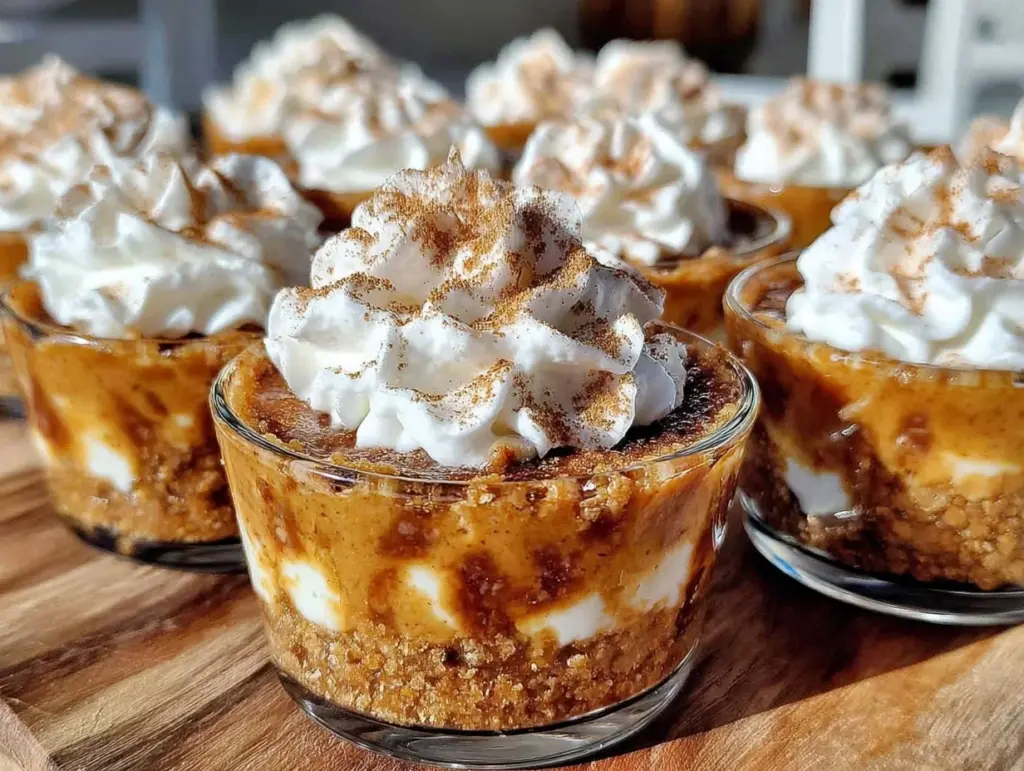
There’s this itch in my brain when the leaves start turning, and honestly, it’s not just about sweaters or pumpkin spice lattes. What I want—right now, this very second—is a dessert that feels like fall in every bite but doesn’t wreck my evening with hours in the kitchen. I have everything except the patience for a long bake. So, that’s how Creamy No-Bake Pumpkin Pie Cheesecake Cups came to be a staple in my autumn rotation.
It’s funny how this recipe snuck up on me. I was looking at a can of pumpkin (yes, just plain old pumpkin puree), and instead of the usual pie, I thought, “Why not make something that tastes like pumpkin pie but with a silky cheesecake twist—no oven required?” The texture has to be just right; creamy but firm enough to hold in a cup, with a crust that cracks just the way it should. And the spices? They have to sing without shouting.
What sticks with me is that quiet moment after the first bite—this isn’t just pumpkin pie or cheesecake alone, but something that feels like a cozy hug in dessert form. It’s that kind of recipe you come back to when you want easy, familiar, but still a little special. I trust you’ll get that feeling too as you dig into these cups.
Why You’ll Love This Recipe
I’ve tested this recipe multiple times, tweaking it until the balance felt just right, and the results are always worth it. Here’s why these Creamy No-Bake Pumpkin Pie Cheesecake Cups have earned a permanent spot on my fall dessert list:
- Quick & Easy: Ready in under 30 minutes with no oven fuss, perfect for impromptu gatherings or fall evenings when you don’t want to heat up the kitchen.
- Simple Ingredients: No need for obscure items—just pantry staples like pumpkin puree, cream cheese, and a few fall spices.
- Perfect for Fall Entertaining: Whether it’s a cozy family dinner or a weekend with friends, these individual cups look charming and taste like a seasonal celebration.
- Crowd-Pleaser: Every time I bring these to a potluck, they disappear fast—kids and adults alike can’t get enough of that creamy pumpkin flavor.
- Unbelievably Delicious: The spice blend is subtle but complex, and the texture is smooth with just enough crunch from the crust to keep things interesting.
What sets this recipe apart is the no-bake element combined with a perfectly balanced cheesecake filling that uses whipped cream folded in for lightness. I also love swapping out the usual graham cracker crust for a spiced gingersnap base—it adds that little extra zing that feels very “fall” without overpowering the pumpkin.
Honestly, this recipe isn’t just dessert; it’s a mood. It’s the kind of treat that makes you pause, savor, and feel like you’re doing something nice for yourself without any hassle. If you’re after a fuss-free way to bring cozy vibes to your table, this is it.
What Ingredients You Will Need
This recipe uses simple, wholesome ingredients to deliver bold flavor and satisfying texture without the fuss. Most of these are pantry staples or easy to find in any grocery store during the fall season.
- For the crust:
- Gingersnap cookies, crushed (about 1 ½ cups) – I recommend Stroopwafel style or any brand with a good snap and spice balance.
- Unsalted butter, melted (6 tablespoons / 85 grams) – adds richness and helps the crust hold together.
- A pinch of ground cinnamon (optional) – to enhance the warm spices.
- For the pumpkin cheesecake filling:
- Cream cheese, softened (8 ounces / 225 grams) – use full-fat for the creamiest texture.
- Pumpkin puree (1 cup / 245 grams) – not pumpkin pie filling; plain canned pumpkin works best.
- Powdered sugar (¾ cup / 90 grams) – dissolves smoothly for perfect sweetness.
- Heavy cream (1 cup / 240 ml) – whipped to soft peaks to lighten the filling.
- Vanilla extract (1 teaspoon) – adds depth.
- Ground cinnamon (1 teaspoon), ground nutmeg (½ teaspoon), ground ginger (½ teaspoon), ground cloves (¼ teaspoon) – the classic pumpkin pie spice blend.
- Optional: a pinch of salt to balance flavors.
- For garnish:
- Whipped cream or a dollop of sour cream (for tangy contrast)
- Toasted pecans or a sprinkle of cinnamon
If you want a gluten-free option, almond flour mixed with a bit of ground cinnamon and butter works as a crust substitute. For dairy-free needs, swap cream cheese with a plant-based alternative and use full-fat coconut cream instead of heavy cream.
Equipment Needed
- Mixing bowls – one large for the crust, another for the filling
- Electric hand mixer or stand mixer – for whipping the cream cheese and heavy cream smoothly
- Measuring cups and spoons – to keep ingredients accurate
- Food processor or plastic bag and rolling pin – to crush the gingersnap cookies
- Individual serving cups or small mason jars – for assembly and presentation
- Spatula – to fold whipped cream gently into the pumpkin mixture
If you don’t have a food processor, I’ve often crushed cookies by placing them in a sealed bag and rolling over them with a rolling pin or even a heavy pan. It’s slower but gets the job done (and sometimes I like the chunkier texture it leaves).
For whipping cream, if you don’t own a mixer, a good old-fashioned whisk can work, though it takes more elbow grease. A handheld electric mixer is my go-to for speed and consistency, especially when making other recipes like the creamy herb and garlic cheese ball bites.
Preparation Method
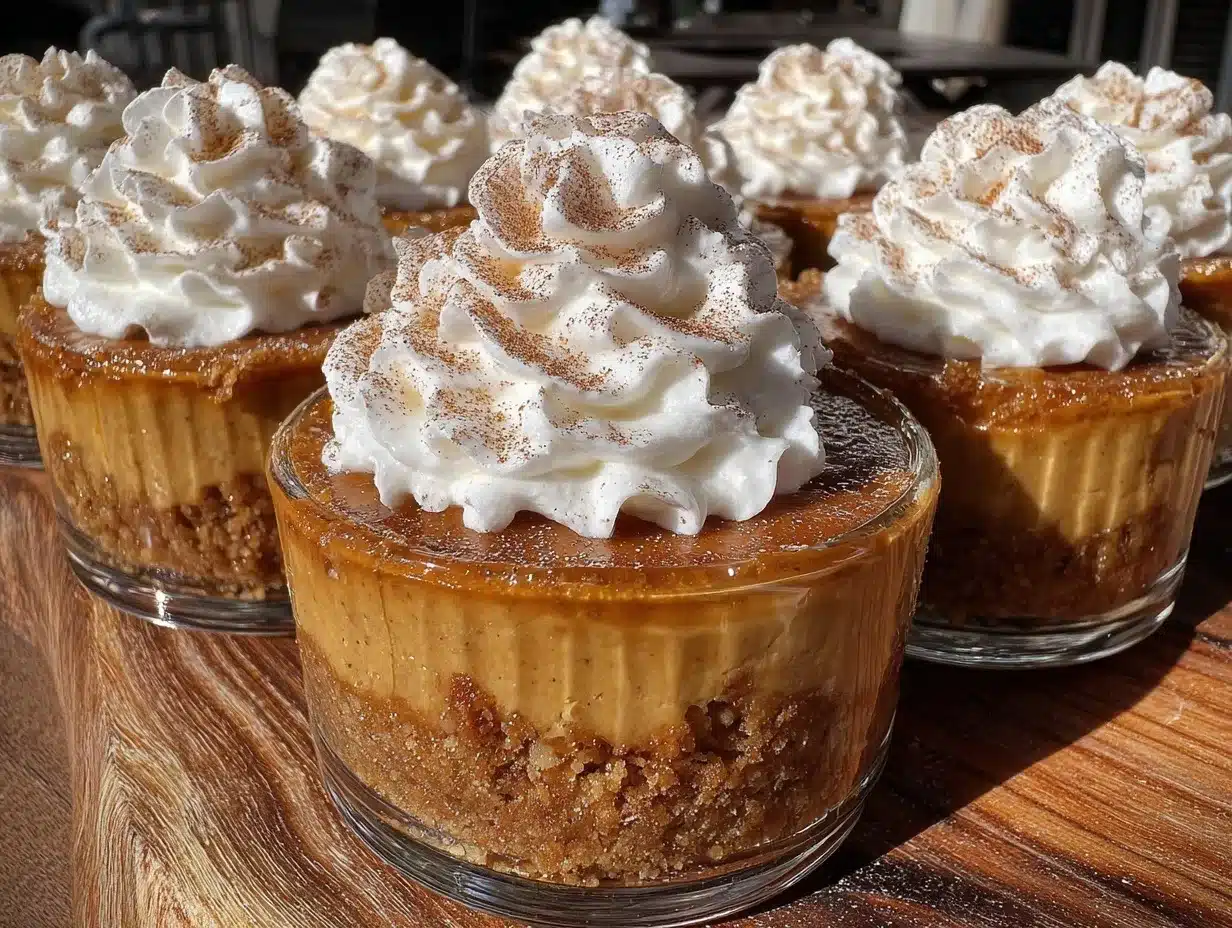
- Prepare the crust: Crush the gingersnap cookies into fine crumbs using a food processor or by placing them in a sealed plastic bag and rolling with a rolling pin. Transfer crumbs to a bowl and stir in the melted butter and cinnamon until the mixture looks like wet sand. (This should take about 5 minutes.)
- Assemble the crust in cups: Spoon about 2 tablespoons (30 grams) of the crust mixture into each serving cup. Press down firmly with the back of a spoon or your fingers to form a compact base. Chill in the fridge while preparing the filling. (Chilling helps the crust set and prevents sogginess later.)
- Make the pumpkin cheesecake filling: In a large bowl, beat the softened cream cheese with an electric mixer until smooth and creamy (about 2 minutes). Add powdered sugar and vanilla extract, and mix until fully combined and silky.
- Add pumpkin and spices: Stir in the pumpkin puree, cinnamon, nutmeg, ginger, cloves, and salt. Mix until evenly incorporated. The mixture will be thick but smooth.
- Whip the cream: In a separate bowl, whip the heavy cream until soft peaks form. Be careful not to overwhip — it should be fluffy but not grainy.
- Fold whipped cream into pumpkin mixture: Gently fold the whipped cream into the pumpkin-cheesecake base using a spatula. This step is key to getting those light, creamy cups. Fold just until no streaks remain.
- Fill the cups: Spoon or pipe the pumpkin cheesecake filling over the chilled crusts, smoothing the tops. Return the cups to the fridge and let them chill for at least 2 hours, ideally 4, to set properly.
- Garnish and serve: Just before serving, add a dollop of whipped cream or sour cream and sprinkle with toasted pecans or a dash of cinnamon for an extra touch.
Pro tip: If you’re short on time, you can freeze the cups for about 30 minutes to speed up setting. Just don’t forget to take them out a bit before serving to soften slightly.
When I first tried this recipe, folding the whipped cream in gently was a make-or-break moment. Too rough, and the filling turns dense; too light, and it won’t hold its shape. Once I nailed that balance, the texture was perfect every time.
Cooking Tips & Techniques
Getting the texture right in these no-bake pumpkin pie cheesecake cups is all about technique. A few tips I’ve picked up that might save you some trial-and-error:
- Softening cream cheese: Make sure the cream cheese is room temperature before mixing. Cold cream cheese will clump and leave you with lumps in the filling.
- Whipping cream just right: Stop whipping as soon as soft peaks form. Overwhipping makes it grainy and hard to fold in smoothly.
- Folding technique: Use a rubber spatula and fold gently in a circular motion, scraping the sides and bottom. Think “lifting” the mixture rather than stirring.
- Crust pressing: Press the crust firmly in the cups. Loose crumbs won’t hold shape and will make the dessert messy to eat.
- Chilling time: Don’t rush the chilling. The texture improves significantly after a few hours as flavors meld and the filling firms up.
My biggest early mistake was skipping the chilling step and trying to serve immediately — the filling was too soft and runny, which was a total bummer. Now, I plan the timing so these cups have a good chill window, especially if I’m serving alongside dishes like red wine-braised short ribs with creamy polenta for a proper fall feast.
Variations & Adaptations
You can easily tweak this recipe to fit different diets or flavor preferences. Here are some of my favorite variations:
- Vegan version: Use dairy-free cream cheese and coconut cream whipped instead of heavy cream. Swap butter for coconut oil in the crust. The texture is slightly different but still delicious.
- Spice it up: Add ½ teaspoon of ground cardamom or pumpkin pie spice blend instead of individual spices for a twist. I once added a hint of cayenne for a subtle warmth that surprised guests.
- Crust alternatives: Use crushed gingersnaps, graham crackers, or even crushed pecans for a nutty base. For a gluten-free crust, almond flour or gluten-free cookie crumbs work well.
- Flavor twists: Swirl in some caramel sauce or maple syrup into the filling for extra sweetness and fall vibes. I especially love a drizzle of maple on top just before serving.
- Mini cheesecake bites: Pour the mixture into mini muffin tins lined with paper cups for bite-sized treats perfect for parties.
Once, I made a batch replacing pumpkin with roasted butternut squash and it was surprisingly tasty—milder but just as creamy. You might like experimenting with that if you want to try something a bit different but still seasonal, reminiscent of the creamy roasted butternut squash soup that’s also great for fall menus.
Serving & Storage Suggestions
These pumpkin pie cheesecake cups are best served chilled, straight from the fridge. The creamy texture and spiced flavors hit their peak when cold, and the crust stays crisp.
For presentation, serve in clear cups or small jars so the layers are visible—it’s a simple trick that makes the dessert feel special without extra effort. Garnish with a small sprig of fresh thyme or a few toasted pecans for an autumnal touch.
If serving at a party, keep them in the fridge until just before guests arrive. You can prepare them a day ahead, which makes entertaining stress-free. Store leftovers in an airtight container in the refrigerator for up to 3 days.
To reheat (if you must), let the cup come to room temperature for about 15 minutes, but honestly, they’re better cold. Flavors tend to develop and mellow after a day, so sometimes I make them a day early to let the spices really sing.
These cups pair beautifully with a hot cup of chai or coffee and can be part of a fall dessert spread alongside dishes like the puff pastry baked brie with cranberry chutney, creating a cozy and impressive fall table.
Nutritional Information & Benefits
Each serving of these pumpkin pie cheesecake cups provides a satisfying balance of fats and proteins, mainly from cream cheese and heavy cream, which contribute to a creamy texture and lasting fullness. Pumpkin puree is low in calories but rich in fiber, vitamin A, and antioxidants, offering a nutritious boost to this indulgent dessert.
Estimated per serving (makes 6 cups): approximately 320 calories, 25g fat, 15g carbohydrates, and 4g protein.
This dessert is gluten-free if you use gluten-free crust ingredients. It’s not low-calorie but feels like a treat worth savoring, especially when balanced with wholesome meals. For dairy-free versions, swapping ingredients as mentioned keeps it accessible to those with allergies or intolerances.
From a wellness perspective, I appreciate that this recipe uses real cream cheese and pumpkin rather than artificial flavors or pre-made fillings. It feels honest, which matters when I want to enjoy dessert and still feel good about what I’m eating.
Conclusion
Honestly, these Creamy No-Bake Pumpkin Pie Cheesecake Cups have become my go-to when I want a dessert that’s both fuss-free and shows up big on flavor. They’re easy enough to whip up on a weeknight yet elegant enough for a holiday table.
Feel free to customize the spices or crust to fit what you have on hand or your taste buds’ mood. That’s what I love most about this recipe—it’s forgiving and flexible without losing that cozy, autumnal charm.
If you give them a try, I’d love to hear how you made them your own or what pairings worked best for you. It’s a simple recipe with a lot of heart, like the kind of dish you want to keep coming back to every fall.
Here’s to easy, creamy, pumpkin-spiced happiness in a cup.
FAQs
Can I make these pumpkin pie cheesecake cups ahead of time?
Yes! They actually taste better after chilling for several hours or overnight. Just keep them covered in the refrigerator.
What if I don’t have gingersnap cookies for the crust?
You can substitute graham crackers, digestive biscuits, or even crushed pecans mixed with a bit of butter for a nutty base.
Can I freeze these no-bake cheesecake cups?
Freezing is possible but not ideal since the texture of the cream cheese and whipped cream can change. If you do freeze, thaw in the fridge overnight before serving.
How can I make this dessert vegan or dairy-free?
Use dairy-free cream cheese alternatives and coconut cream for whipping. Swap butter in the crust with coconut oil or vegan margarine.
Is it necessary to chill the cups for several hours?
Yes, chilling is key for the filling to firm up and the crust to set, ensuring the right texture and flavor melding.
Pin This Recipe!
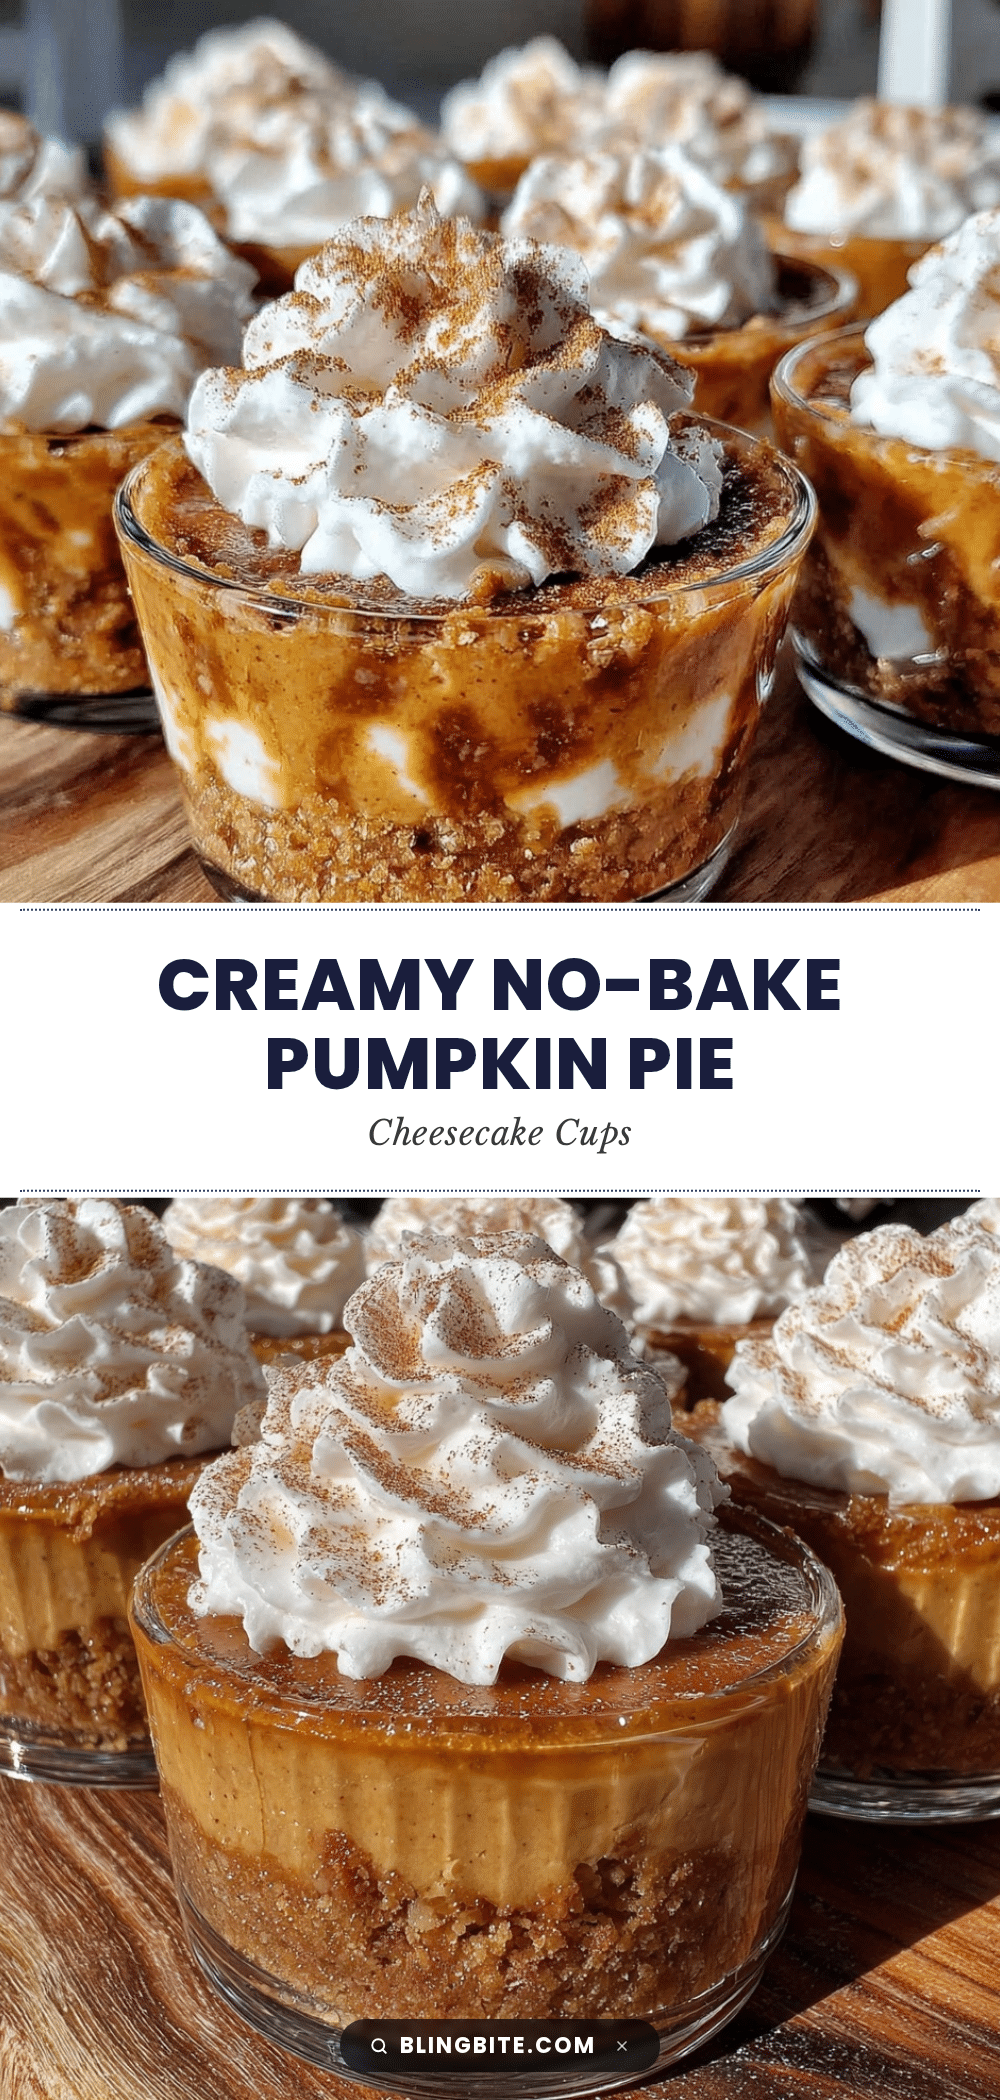
Creamy No-Bake Pumpkin Pie Cheesecake Cups
A quick and easy no-bake dessert that combines the flavors of pumpkin pie with a silky cheesecake twist, perfect for fall gatherings and cozy evenings.
- Prep Time: 15 minutes
- Cook Time: 0 minutes
- Total Time: 2 hours 15 minutes
- Yield: 6 servings 1x
- Category: Dessert
- Cuisine: American
Ingredients
- 1 ½ cups gingersnap cookies, crushed (or Stroopwafel style)
- 6 tablespoons unsalted butter, melted (85 grams)
- Pinch of ground cinnamon (optional)
- 8 ounces cream cheese, softened (225 grams)
- 1 cup pumpkin puree (245 grams)
- ¾ cup powdered sugar (90 grams)
- 1 cup heavy cream (240 ml)
- 1 teaspoon vanilla extract
- 1 teaspoon ground cinnamon
- ½ teaspoon ground nutmeg
- ½ teaspoon ground ginger
- ¼ teaspoon ground cloves
- Pinch of salt (optional)
- Whipped cream or dollop of sour cream (for garnish)
- Toasted pecans or sprinkle of cinnamon (for garnish)
Instructions
- Crush the gingersnap cookies into fine crumbs using a food processor or by placing them in a sealed plastic bag and rolling with a rolling pin. Transfer crumbs to a bowl and stir in the melted butter and cinnamon until the mixture looks like wet sand. (About 5 minutes)
- Spoon about 2 tablespoons (30 grams) of the crust mixture into each serving cup. Press down firmly with the back of a spoon or your fingers to form a compact base. Chill in the fridge while preparing the filling.
- In a large bowl, beat the softened cream cheese with an electric mixer until smooth and creamy (about 2 minutes). Add powdered sugar and vanilla extract, and mix until fully combined and silky.
- Stir in the pumpkin puree, cinnamon, nutmeg, ginger, cloves, and salt. Mix until evenly incorporated. The mixture will be thick but smooth.
- In a separate bowl, whip the heavy cream until soft peaks form. Be careful not to overwhip — it should be fluffy but not grainy.
- Gently fold the whipped cream into the pumpkin-cheesecake base using a spatula. Fold just until no streaks remain.
- Spoon or pipe the pumpkin cheesecake filling over the chilled crusts, smoothing the tops. Return the cups to the fridge and let them chill for at least 2 hours, ideally 4, to set properly.
- Just before serving, add a dollop of whipped cream or sour cream and sprinkle with toasted pecans or a dash of cinnamon for an extra touch.
Notes
Use room temperature cream cheese for smooth filling. Stop whipping cream at soft peaks to avoid grainy texture. Press crust firmly to avoid crumbly base. Chill for at least 2 hours for best texture. For gluten-free crust, substitute almond flour with cinnamon and butter. For dairy-free, use plant-based cream cheese and coconut cream.
Nutrition
- Serving Size: 1 cup
- Calories: 320
- Fat: 25
- Carbohydrates: 15
- Protein: 4
Keywords: pumpkin pie, no-bake cheesecake, fall dessert, pumpkin cheesecake cups, easy pumpkin dessert, autumn dessert, no oven dessert


