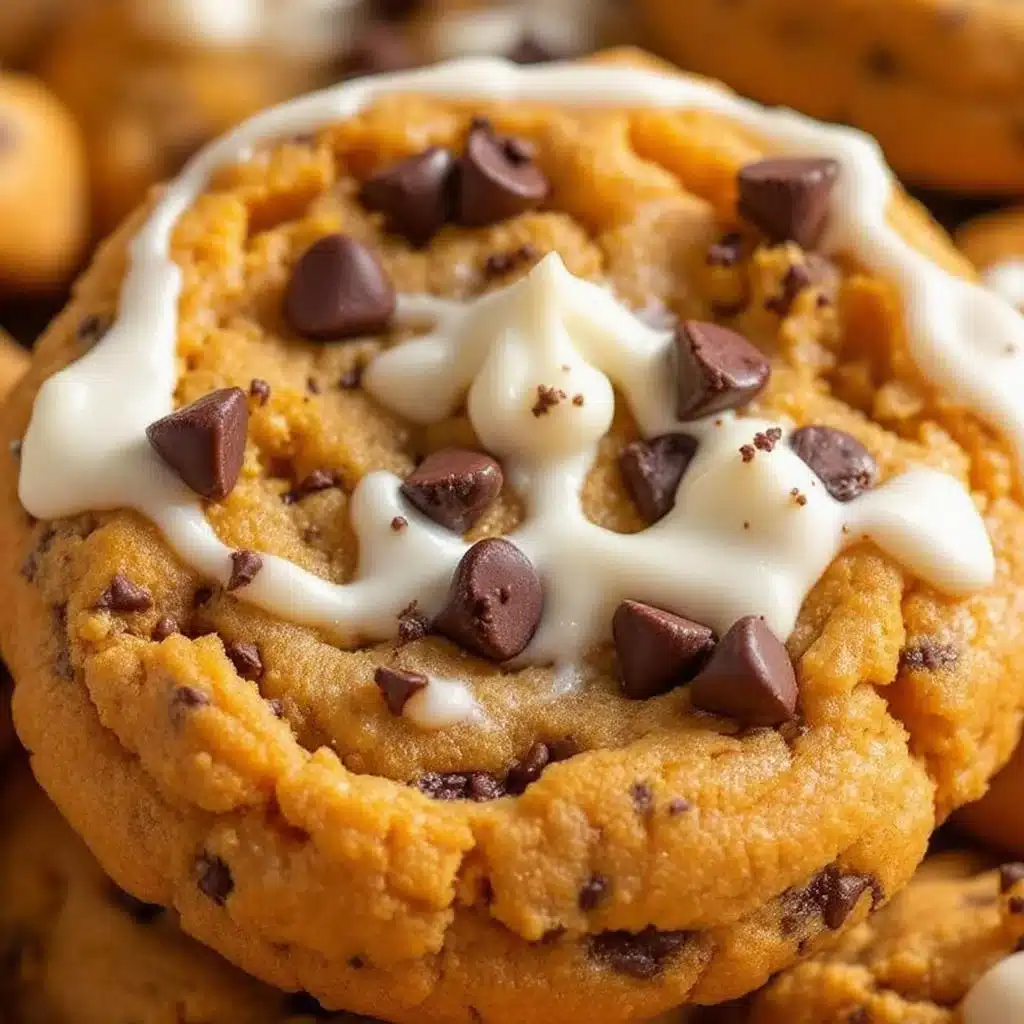
I burned chocolate chip pumpkin cookies three times before I understood what I was doing wrong. Not burned like “oh, a little dark on the bottom.” Burned like the smoke alarm went off and my neighbor texted to ask if everything was okay. The problem wasn’t me — it was how wet pumpkin is and how I kept ignoring that fact. I wanted a cookie that tasted like fall in a bakery case, not a cakey muffin masquerading as a cookie. So I kept testing, kept failing, and eventually landed on this version that actually works. It’s crisp on the edges, soft in the middle, and the cream cheese icing is not negotiable. You could skip it, but why would you?
The first time I got it right, I was honestly surprised. I pulled the tray out of the oven and the edges had that perfect golden-brown crackle. The chocolate chips were still slightly melted on top. I let them cool just enough to smear on the cream cheese icing — not too thick, not too thin — and took a bite standing over the counter. That’s when I knew I had something worth sharing. These cookies taste like everything good about autumn without being heavy or overly spiced. They’re the kind of cookie you make for a weekend baking session and then hide from your family so you can have one later with your coffee. Not that I’ve done that. Okay, I’ve done that.
Why You’ll Love This Recipe
These chocolate chip pumpkin cookies with cream cheese icing solve the biggest problem with pumpkin baking — that soggy, underdone texture that haunts so many recipes. I’ve tested this dozens of times to get the ratios right, and I promise you won’t end up with flat discs or raw centers.
- Quick & Easy — From start to finish, you’re looking at about 40 minutes. The dough comes together in one bowl, no mixer required if you’ve got a strong arm and a wooden spoon.
- Simple Ingredients — Nothing weird here. Canned pumpkin, butter, sugar, flour, chocolate chips, and cream cheese. You probably have most of this already if you bake even occasionally.
- Perfect for Fall Gatherings — These cookies disappear fast at potlucks, Thanksgiving dessert tables, or just a cozy afternoon with hot cider. They look fancy but take zero effort to decorate.
- Crowd-Pleaser — Kids love the chocolate chips, adults love the cream cheese icing, and everyone loves that they’re not too sweet. I’ve had people who “don’t like pumpkin” eat three in one sitting.
- Unbelievably Delicious — The texture is what gets people. The edges have a slight chew, the center stays soft and tender, and the icing adds that tangy richness that cuts through the pumpkin spice.
What makes these different from every other pumpkin cookie recipe out there? It’s the technique. I drain the pumpkin puree slightly to remove excess moisture, and I use melted butter instead of softened for a better texture. It sounds like a small thing, but it changes everything. No gummy middles, no spread-out pancakes. Just a perfect cookie that actually tastes like pumpkin and chocolate together, not one overpowering the other.
Honestly, this is the recipe I turn to when I want to impress people without spending all day in the kitchen. It’s comfort food that feels special but doesn’t require a pastry degree. And that cream cheese icing? I’ve been known to make extra just to eat with a spoon.
What Ingredients You Will Need
This recipe uses simple, pantry-friendly ingredients that come together to create something genuinely special. The key is understanding how each ingredient works in the context of pumpkin baking — because pumpkin is not your average baking ingredient.
- All-purpose flour — 2 cups (240g). Spoon and level your flour, don’t scoop straight from the bag. Too much flour makes dense cookies, and nobody wants that.
- Baking soda — 1 teaspoon. Helps the cookies rise and spread just enough.
- Baking powder — ½ teaspoon. Gives a little extra lift without making them puffy.
- Ground cinnamon — 1½ teaspoons. The backbone of pumpkin spice flavor.
- Ground nutmeg — ½ teaspoon. Freshly grated if you have it, but pre-ground works fine.
- Ground ginger — ½ teaspoon. Adds warmth without being spicy.
- Ground cloves — ¼ teaspoon. Just enough for depth. Don’t overdo it — cloves can get aggressive fast.
- Salt — ½ teaspoon. Balances the sweetness and makes the pumpkin flavor pop.
- Unsalted butter — ½ cup (1 stick, 113g), melted and slightly cooled. Melted butter gives these cookies a chewier texture than creamed butter would. I use Kerrygold when I can find it, but any good-quality butter works.
- Light brown sugar — ¾ cup (150g), packed. Brown sugar adds moisture and that subtle molasses flavor that pairs perfectly with pumpkin.
- Granulated sugar — ¼ cup (50g). Just enough for sweetness without making the cookies spread too thin.
- Large egg — 1, at room temperature. If you forget to take it out of the fridge, set it in warm water for 5 minutes.
- Vanilla extract — 2 teaspoons. Pure vanilla, not imitation. It makes a difference here.
- Pumpkin puree — ¾ cup (about 170g). Not pumpkin pie filling — make sure you grab the plain puree. I like Libby’s because it’s consistently thick. If your pumpkin puree looks watery, blot it with a paper towel before using.
- Semi-sweet chocolate chips — 1 cup (about 175g). I prefer Ghirardelli or Guittard for the best melt. You can use dark chocolate if you want less sweetness.
For the Cream Cheese Icing:
- Cream cheese — 4 oz (half a block), softened. Full-fat cream cheese gives the best texture and flavor. Philadelphia is my go-to.
- Unsalted butter — 2 tablespoons (28g), softened.
- Powdered sugar — 1 cup (120g), sifted if it’s lumpy.
- Vanilla extract — ½ teaspoon.
- Milk or heavy cream — 1-2 tablespoons, to thin the icing to the right consistency.
Substitution note: If you’re dairy-free, you can use a plant-based cream cheese and butter alternative. The texture will be slightly different, but it still works. For a gluten-free version, swap the all-purpose flour with a 1:1 gluten-free baking flour blend that contains xanthan gum.
Equipment Needed
You don’t need a fancy kitchen to make these cookies, but a few tools make the process smoother.
- Large mixing bowl — Any bowl works, but a wide one makes mixing easier.
- Whisk — For combining dry ingredients evenly.
- Rubber spatula or wooden spoon — For folding the dough together without overmixing.
- Measuring cups and spoons — Accuracy matters in baking. Use dry measuring cups for flour and sugar, liquid measuring cups for pumpkin and vanilla.
- Kitchen scale (optional but recommended) — Weighing your flour gives the most consistent results. I resisted buying one for years, and now I wish I’d done it sooner.
- Baking sheets — 2 large sheets, preferably light-colored aluminum. Dark sheets can cause the bottoms to burn before the centers are done.
- Parchment paper or silicone baking mats — Parchment paper is cheaper and disposable. Silicone mats are reusable and work great too.
- Cookie scoop — A 1.5-tablespoon scoop gives uniform cookies that bake evenly. If you don’t have one, use two spoons.
- Cooling rack — Lets air circulate so the cookies don’t get soggy on the bottom.
- Electric mixer or hand whisk — For the cream cheese icing. A hand whisk works if your cream cheese is properly softened, but a mixer makes it smoother.
If you don’t have a cooling rack, you can transfer the cookies to a clean cutting board or even a plate — just flip them after a minute so they don’t steam themselves.
Preparation Method
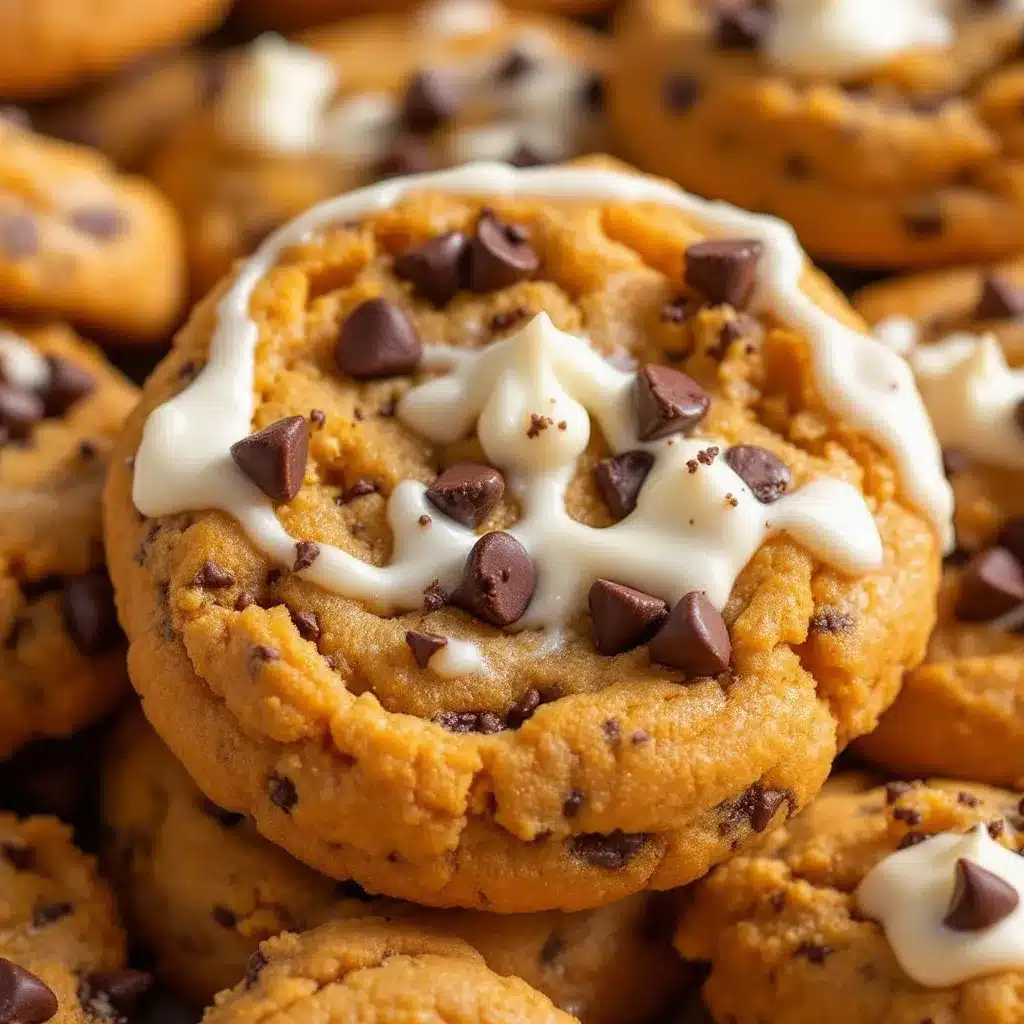
Let’s make these cookies. I’ll walk you through every step so you don’t end up with the burnt disasters I started with.
- Preheat your oven to 350°F (175°C). Line two baking sheets with parchment paper or silicone mats. This is not a step to skip — parchment paper prevents sticking and makes cleanup so much easier.
- Prepare the pumpkin puree. Measure out ¾ cup of pumpkin puree and spread it on a paper towel-lined plate. Place another paper towel on top and press gently to absorb excess moisture. Let it sit while you prepare the dry ingredients. This step is the secret to avoiding soggy cookies. You’ll be shocked how much liquid comes out.
- Whisk the dry ingredients together. In a medium bowl, combine 2 cups flour, 1 teaspoon baking soda, ½ teaspoon baking powder, 1½ teaspoons cinnamon, ½ teaspoon nutmeg, ½ teaspoon ginger, ¼ teaspoon cloves, and ½ teaspoon salt. Whisk until everything is evenly distributed. Set aside.
- Mix the wet ingredients. In a large bowl, combine the melted butter (cooled so it’s not hot), ¾ cup packed brown sugar, and ¼ cup granulated sugar. Stir until smooth and no lumps remain. Add the egg and 2 teaspoons vanilla extract, then stir until fully incorporated. The mixture should look glossy and smell amazing already.
- Add the pumpkin. Fold in the blotted pumpkin puree. Don’t overmix — just stir until the pumpkin is evenly distributed. The batter will look a little thick and shiny.
- Combine wet and dry. Add the dry ingredients to the wet mixture in two additions, folding gently with a rubber spatula after each addition. Stop mixing as soon as you no longer see streaks of flour. Overmixing develops gluten and makes cookies tough.
- Fold in the chocolate chips. Add 1 cup of chocolate chips and fold them in with a few gentle strokes. Reserve a handful of chips to press into the tops of the cookies before baking — this makes them look bakery-style.
- Chill the dough. This step is crucial. Cover the bowl with plastic wrap and refrigerate for at least 30 minutes, or up to 24 hours. Chilling firms up the butter and allows the flavors to meld. If you skip this, your cookies will spread into flat, sad discs. Trust me on this one — I learned the hard way.
- Scoop and shape. Once chilled, use a cookie scoop or two spoons to portion the dough into 1.5-tablespoon balls. Place them on the prepared baking sheets about 2 inches apart. Press a few extra chocolate chips onto the tops of each dough ball.
- Bake. Bake one sheet at a time for 10-12 minutes, or until the edges are set and lightly golden. The centers will look slightly underdone — that’s exactly what you want. They’ll continue cooking from residual heat after you pull them out. My oven runs hot, so I start checking at 10 minutes.
- Cool on the baking sheet. Let the cookies rest on the hot baking sheet for 5 minutes. This allows them to finish setting up without overbaking. Then transfer them to a cooling rack to cool completely before icing.
- Make the cream cheese icing. While the cookies cool, beat together 4 oz softened cream cheese and 2 tablespoons softened butter until smooth and fluffy. Add 1 cup powdered sugar and ½ teaspoon vanilla, then beat until combined. Add milk or heavy cream 1 tablespoon at a time until the icing reaches a spreadable consistency. It should be thick enough to hold its shape but thin enough to spread easily.
- Ice the cookies. Once the cookies are completely cool, spread or drizzle the cream cheese icing over the tops. Don’t rush this step — if the cookies are even slightly warm, the icing will melt and slide right off.
Let the iced cookies set for about 15 minutes before serving. The icing will firm up slightly, making them easier to stack and transport.
Cooking Tips & Techniques
After all those failed batches, I’ve learned a few things worth passing along.
Blot your pumpkin. I cannot stress this enough. Pumpkin puree is basically pumpkin water. If you don’t remove some of that moisture, your cookies will turn into flat, gummy discs. A few paper towels and 30 seconds of gentle pressing make all the difference. You’ll lose maybe a tablespoon of puree, but you’ll gain cookies that actually hold their shape.
Use room temperature ingredients. The egg and cream cheese should be at room temperature for the best texture. Cold ingredients don’t emulsify properly, which can lead to a grainy or separated dough. If you forgot to set them out, place the egg in a bowl of warm water for 5 minutes and microwave the cream cheese in 5-second bursts until softened but not melted.
Don’t overmix the dough. This is the most common mistake I see in baking. Mix until the flour just disappears into the wet ingredients. A few streaks are fine — they’ll work themselves out as you scoop. Overmixing develops gluten, which makes cookies tough and dense instead of tender.
Chill the dough. I know it’s tempting to skip this step when you’re craving cookies, but chilling is non-negotiable. The cold butter solidifies, which means the cookies spread less and bake up thicker. Plus, the flavors have time to meld and deepen. I’ve made these with a 30-minute chill and a 24-hour chill, and the overnight batch was noticeably better.
Bake one sheet at a time. If you crowd the oven with two sheets, the heat circulates unevenly and you’ll end up with some cookies overdone and others underdone. It takes longer, but it’s worth it. While one sheet bakes, keep the other in the fridge so the dough stays cold.
Watch for visual cues. Every oven runs differently, so rely on your eyes more than the timer. The edges should be set and lightly browned, but the centers should still look soft and slightly puffed. If the centers look fully set, they’re overbaked.
Variations & Adaptations
One of the best things about this recipe is how flexible it is. Here are some ways to make it your own.
- Spice it up. Add ¼ teaspoon of cardamom or allspice for a more complex flavor profile. I tried this on a whim one rainy Sunday and now I can’t go back. The cardamom adds a floral note that pairs beautifully with the cream cheese icing.
- Swap the chocolate chips. White chocolate chips work surprisingly well here — they add sweetness that balances the pumpkin spice. Or try butterscotch chips for a totally different flavor. Dark chocolate chips (60-70% cacao) are great if you prefer less sweetness.
- Add nuts. Fold in ½ cup of toasted pecans or walnuts along with the chocolate chips. Toast them first in a dry pan over medium heat for 3-4 minutes until fragrant. It brings out their natural oils and adds crunch.
- Make them gluten-free. Substitute the all-purpose flour with a 1:1 gluten-free baking flour blend. I’ve tested this with Bob’s Red Mill 1:1 Baking Flour and the texture was nearly identical to the original. Just make sure your blend contains xanthan gum for structure.
- Turn them into sandwich cookies. Bake the cookies without chocolate chips, then sandwich two cookies together with extra cream cheese icing in the middle. It’s decadent, but sometimes that’s exactly what you need.
- Pumpkin spice variation. If you don’t have individual spices, use 2½ teaspoons of pumpkin pie spice blend instead of the cinnamon, nutmeg, ginger, and cloves. It’s not quite as nuanced, but it works in a pinch.
I once made a batch with chopped crystallized ginger folded in, and they were incredible — spicy, sweet, and totally unexpected. Don’t be afraid to experiment. Cookies are forgiving.
Serving & Storage Suggestions
These cookies are best served slightly warm, but the icing needs to be fully set first. If you want warm cookies, reheat them in a 300°F oven for 3-4 minutes after icing. The microwave works too, but it can make the icing melt and get messy.
For presentation, I like to arrange them on a rustic wooden board or a simple white platter. A light dusting of cinnamon on top of the icing makes them look extra special, especially for holiday gatherings. They pair beautifully with a hot cup of coffee, spiced chai, or even a glass of cold milk.
Storage: Store iced cookies in an airtight container in the refrigerator for up to 5 days. The cream cheese icing needs to stay chilled if you’re keeping them longer than a few hours. Layer them between sheets of parchment paper so the icing doesn’t stick to the lid or other cookies.
Freezing: You can freeze the un-iced baked cookies for up to 3 months. Wrap them tightly in plastic wrap, then place them in a freezer-safe bag. When you’re ready to serve, thaw them at room temperature, then whip up a fresh batch of icing. Alternatively, freeze the cookie dough balls on a baking sheet, then transfer them to a freezer bag. Bake directly from frozen, adding 2-3 minutes to the baking time.
One thing I’ve noticed — these cookies actually taste better the next day. The flavors meld overnight, and the texture becomes even more tender. If you can resist eating them all on day one, you’ll be rewarded on day two.
Nutritional Information & Benefits
Per cookie (based on 24 cookies with icing): approximately 180 calories, 9g fat, 24g carbohydrates, 2g protein, 15g sugar, 1g fiber. These are estimates and will vary based on exact ingredients and portion sizes.
Pumpkin is packed with vitamin A (from beta-carotene), which supports eye health and immune function. It’s also a good source of fiber and potassium. The cream cheese icing adds calcium and a touch of protein, though let’s be honest — we’re not eating these for the health benefits.
If you’re looking to make these a little more nutrient-dense, you can swap half the all-purpose flour for whole wheat pastry flour. It adds fiber and a subtle nutty flavor without making the cookies dense. I’ve tried this and the texture stays surprisingly tender.
Dietary considerations: These cookies contain gluten, dairy, and eggs. For a dairy-free version, use plant-based butter and cream cheese alternatives. For an egg-free version, substitute with a flax egg (1 tablespoon ground flaxseed mixed with 3 tablespoons water, let sit for 5 minutes). The texture will be slightly different, but still delicious.
Conclusion
These chocolate chip pumpkin cookies with cream cheese icing are the recipe I wish I’d had years ago when I kept pulling burnt, flat, disappointing cookies out of my oven. They’re the result of trial and error, patience, and a stubborn refusal to accept that pumpkin cookies just “don’t work.” They do work — you just need the right technique.
Whether you’re baking for a fall party, a Thanksgiving dessert table, or just because it’s Tuesday and you deserve something good, these cookies deliver. They’re forgiving enough for beginner bakers but impressive enough to serve to guests who think they’ve tried every pumpkin recipe out there.
I’d love to hear how yours turn out. Did you add nuts? Try a different spice blend? Make them into sandwich cookies? Drop a comment below and let me know — I read every single one and I genuinely love hearing about your kitchen victories. And if you’re looking for more cozy fall recipes, don’t miss my creamy roasted butternut squash soup or these savory butternut squash galette — they’re perfect companions for a crisp autumn afternoon.
Happy baking, friends. Your kitchen is about to smell incredible.
Frequently Asked Questions
Can I use homemade pumpkin puree instead of canned?
Yes, but you’ll need to strain it thoroughly. Homemade pumpkin puree tends to be much more watery than canned. After making your puree, place it in a cheesecloth-lined strainer over a bowl and let it drain for at least an hour. Then blot it with paper towels before using. Canned pumpkin is more consistent, which is why I usually recommend it for baking.
Why did my cookies spread too much?
This usually happens for one of three reasons: the dough wasn’t chilled long enough, the butter was too warm when you mixed it, or you didn’t blot enough moisture from the pumpkin. Next time, make sure your melted butter has cooled to room temperature, chill the dough for the full 30 minutes, and blot that pumpkin thoroughly. Also check that your baking soda is fresh — old leavening agents lose their power.
Can I skip the cream cheese icing?
You absolutely can, but the cookies will be less special. The icing adds a tangy richness that balances the pumpkin spice and chocolate. If you want to skip it, try dusting the warm cookies with powdered sugar or a cinnamon-sugar mixture instead. The cookies are good on their own, but the icing is what makes them unforgettable.
How do I know when the cookies are done baking?
Look for set edges that are lightly golden brown. The centers should still look slightly soft and puffed — they’ll continue cooking from residual heat on the baking sheet. If the centers look fully set and dry, they’re overbaked. When in doubt, pull them out a minute early. Underbaked cookies are fixable; overbaked ones are not.
Can I make these cookies ahead of time for a party?
Yes, and I actually recommend it. Bake the cookies up to 2 days in advance and store them in an airtight container at room temperature. Make the cream cheese icing the day of your event and ice the cookies just before serving. The cookies stay tender, and the icing stays fresh and creamy. If you’ve already iced them, store them in the fridge and let them sit at room temperature for 15 minutes before serving.
Pin This Recipe!
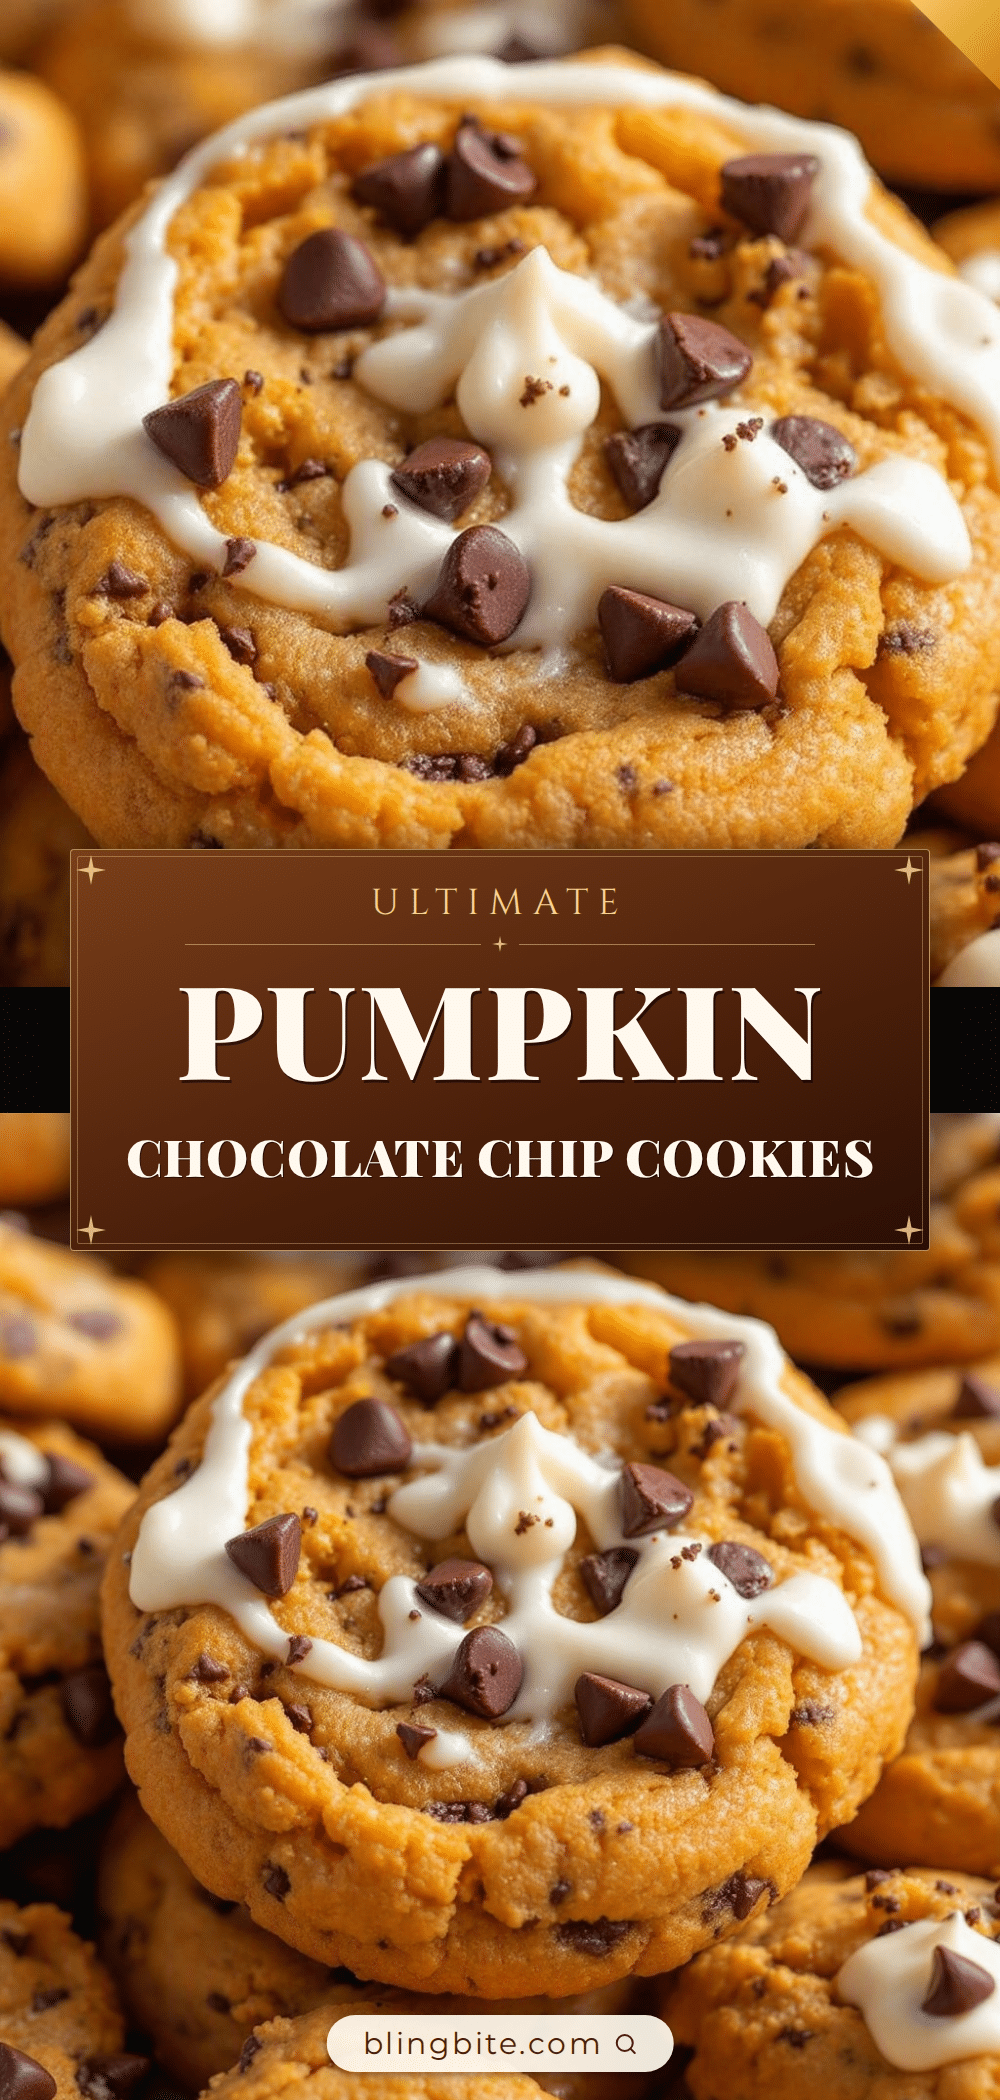
Perfect Chocolate Chip Pumpkin Cookies with Cream Cheese Icing
These chocolate chip pumpkin cookies with cream cheese icing are crisp on the edges, soft in the middle, and perfectly spiced for fall. The secret is blotting the pumpkin puree to remove excess moisture, ensuring a chewy, bakery-style cookie every time.
- Prep Time: 15 minutes
- Cook Time: 12 minutes
- Total Time: 40 minutes
- Yield: 24 cookies 1x
- Category: Dessert
- Cuisine: American
Ingredients
- 2 cups (240g) all-purpose flour
- 1 teaspoon baking soda
- ½ teaspoon baking powder
- 1½ teaspoons ground cinnamon
- ½ teaspoon ground nutmeg
- ½ teaspoon ground ginger
- ¼ teaspoon ground cloves
- ½ teaspoon salt
- ½ cup (1 stick, 113g) unsalted butter, melted and slightly cooled
- ¾ cup (150g) packed light brown sugar
- ¼ cup (50g) granulated sugar
- 1 large egg, at room temperature
- 2 teaspoons vanilla extract
- ¾ cup (about 170g) pumpkin puree (not pumpkin pie filling)
- 1 cup (about 175g) semi-sweet chocolate chips
- 4 oz (half a block) cream cheese, softened
- 2 tablespoons (28g) unsalted butter, softened
- 1 cup (120g) powdered sugar, sifted if lumpy
- ½ teaspoon vanilla extract
- 1–2 tablespoons milk or heavy cream
Instructions
- Preheat your oven to 350°F (175°C). Line two baking sheets with parchment paper or silicone mats.
- Prepare the pumpkin puree: Measure out ¾ cup of pumpkin puree and spread it on a paper towel-lined plate. Place another paper towel on top and press gently to absorb excess moisture. Let it sit while you prepare the dry ingredients.
- Whisk the dry ingredients together: In a medium bowl, combine 2 cups flour, 1 teaspoon baking soda, ½ teaspoon baking powder, 1½ teaspoons cinnamon, ½ teaspoon nutmeg, ½ teaspoon ginger, ¼ teaspoon cloves, and ½ teaspoon salt. Whisk until evenly distributed. Set aside.
- Mix the wet ingredients: In a large bowl, combine the melted butter (cooled), ¾ cup packed brown sugar, and ¼ cup granulated sugar. Stir until smooth. Add the egg and 2 teaspoons vanilla extract, then stir until fully incorporated.
- Add the pumpkin: Fold in the blotted pumpkin puree until evenly distributed. The batter will look thick and shiny.
- Combine wet and dry: Add the dry ingredients to the wet mixture in two additions, folding gently with a rubber spatula after each addition. Stop mixing as soon as no streaks of flour remain.
- Fold in the chocolate chips: Add 1 cup of chocolate chips and fold in with a few gentle strokes. Reserve a handful of chips to press into the tops of the cookies before baking.
- Chill the dough: Cover the bowl with plastic wrap and refrigerate for at least 30 minutes, or up to 24 hours.
- Scoop and shape: Once chilled, use a cookie scoop or two spoons to portion the dough into 1.5-tablespoon balls. Place them on the prepared baking sheets about 2 inches apart. Press a few extra chocolate chips onto the tops of each dough ball.
- Bake: Bake one sheet at a time for 10-12 minutes, or until the edges are set and lightly golden. The centers will look slightly underdone.
- Cool on the baking sheet: Let the cookies rest on the hot baking sheet for 5 minutes. Then transfer them to a cooling rack to cool completely before icing.
- Make the cream cheese icing: While the cookies cool, beat together 4 oz softened cream cheese and 2 tablespoons softened butter until smooth and fluffy. Add 1 cup powdered sugar and ½ teaspoon vanilla, then beat until combined. Add milk or heavy cream 1 tablespoon at a time until the icing reaches a spreadable consistency.
- Ice the cookies: Once the cookies are completely cool, spread or drizzle the cream cheese icing over the tops. Let the iced cookies set for about 15 minutes before serving.
Notes
Blot the pumpkin puree to remove excess moisture for best texture. Chill the dough for at least 30 minutes to prevent spreading. Bake one sheet at a time for even results. The cookies taste even better the next day.
Nutrition
- Serving Size: 1 cookie
- Calories: 180
- Sugar: 15
- Sodium: 120
- Fat: 9
- Saturated Fat: 5
- Carbohydrates: 24
- Fiber: 1
- Protein: 2
Keywords: chocolate chip pumpkin cookies, pumpkin cookies with cream cheese icing, fall cookies, pumpkin dessert, easy pumpkin cookies


