Flour dusted across the counter when the smoke detector started its high-pitched scream. I stood there, spatula in hand, staring at a baking sheet that looked more like a geological survey than a batch of cookies. The edges were black. The centers were liquid gold, but not in the good way. In the “my kitchen is now a hazard zone” way. It was 7:00 PM on a Tuesday, the kids were begging for dessert, and I had exactly zero patience for a trip to the store. Let’s face it, we’ve all been there. That moment where you realize your “bakery-style” cookies are actually just “burnt-tasting charcoal discs.”
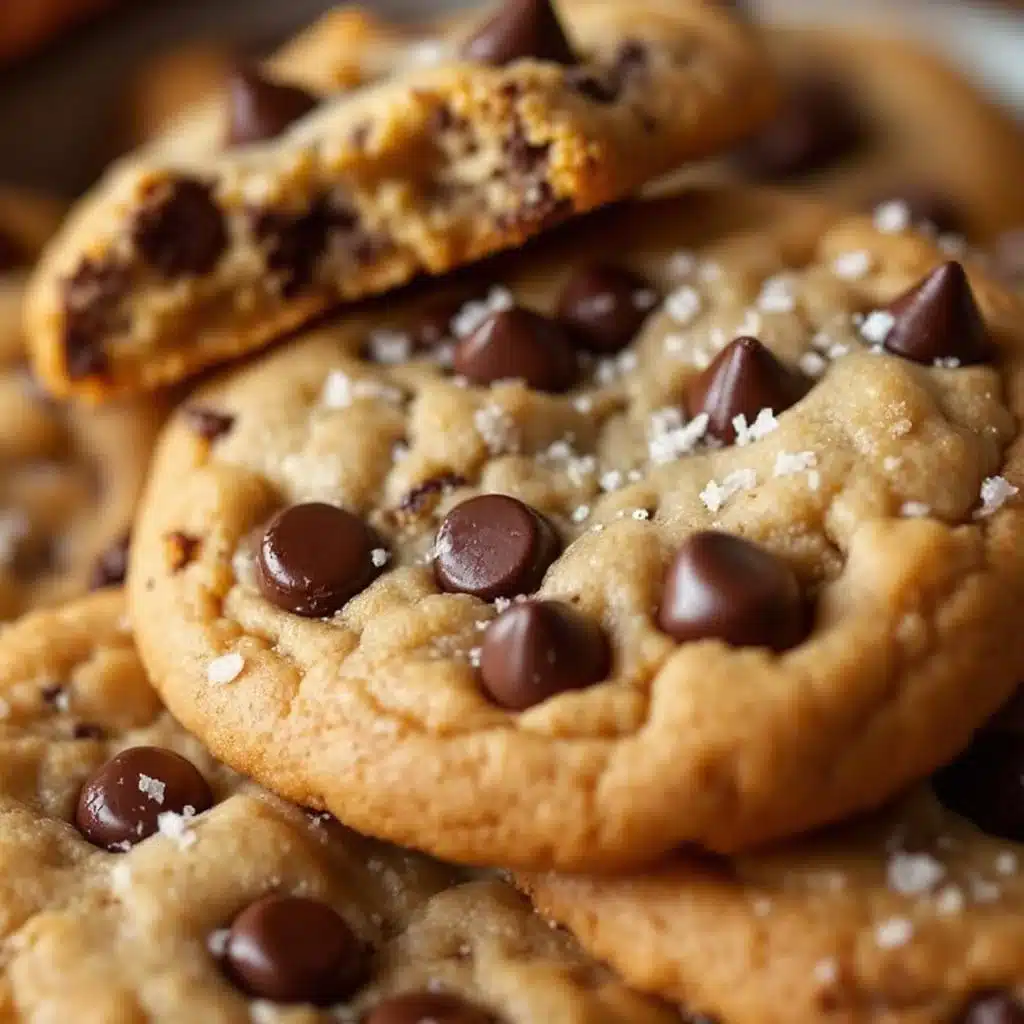
I scraped the worst of it into the trash, my heart sinking. But then, I looked at the backup dough chilling in the fridge. This was the batch I’d been tweaking for weeks, trying to get that elusive crisp-on-the-outside, chewy-in-the-middle texture that makes you close your eyes when you take a bite. I popped the new tray in, set the timer for two minutes less than usual, and held my breath. When they came out, they were golden. Perfectly, impossibly golden. Crispy lace edges that shattered slightly when you touched them, but a center that was soft and warm.
I handed one to my son. He took a bite, paused, and then went back for another. That’s the moment you know you’ve nailed it. It wasn’t about perfection; it was about understanding how heat and fat interact. These crispy bakery-style chocolate chip cookies aren’t just a recipe; they’re a redemption story for anyone who has ever burned a batch of cookies. And honestly? They’re the only ones I make now.
Why You’ll Love This Recipe
There is a specific kind of magic that happens when you crack into a cookie that has been baked just right. It’s not just sugar and flour; it’s texture. This recipe is built on the foundation of high-ratio chocolate chips and a specific browning technique that creates those lacy, crispy edges that define the “bakery style” look. I’ve tested this dough in every oven I have access to, from my home gas range to my friend’s electric convection oven, and the results are consistently reliable.
- Crispy Edges, Chewy Center: The secret lies in the butter temperature and the chilling time. You get that satisfying crunch around the rim with a soft, gooey core that doesn’t fall apart.
- Simple Pantry Staples: You don’t need fancy ingredients. Just good butter, brown sugar, white sugar, eggs, vanilla, flour, baking soda, salt, and plenty of chocolate chips. If you have these, you’re halfway done.
- Perfect for Any Occasion: Whether it’s a last-minute snack after soccer practice or a treat to bring to a potluck, these cookies travel well and stay fresh for days.
- Crowd-Pleaser Guaranteed: Kids love the crunch. Adults love the deep toffee flavor from the brown sugar. It’s a win-win that makes hosting stress-free.
- Unbelievably Delicious: The combination of semi-sweet and dark chocolate chips adds complexity that plain milk chocolate just can’t match. It’s next-level comfort food.
What makes this different from the dozens of other cookie recipes out there? It’s the attention to detail in the mixing process. We’re not just dumping ingredients together. We’re creaming the butter and sugars until they are pale and fluffy to incorporate air, then browning the butter slightly for a nutty depth of flavor. It’s a small step that makes a huge difference. This isn’t just another chocolate chip cookie; it’s the one you’ll keep coming back to because it actually tastes like something from a high-end bakery, minus the price tag.
What Ingredients You Will Need
This recipe relies on the quality of your base ingredients. Since there aren’t many of them, each one plays a crucial role in the final texture and flavor. You want to use real butter, not margarine, and don’t skimp on the salt. The right balance of salt is what makes the chocolate taste chocolatey. Here is what you need to gather before you start mixing.
- Unsalted Butter: 1 cup (2 sticks or 226g), softened but still cool. I recommend using a high-fat butter like Kerrygold or Plugra for the best flavor and texture. If your butter is too soft, your cookies will spread too much.
- Brown Sugar: 1 1/2 cups (300g), packed. Dark brown sugar adds a deeper molasses flavor and more moisture, which helps with the chewiness. Light brown sugar works too, but dark is better for that bakery taste.
- Granulated White Sugar: 1/2 cup (100g). This sugar helps create the crispy edges. It doesn’t hold moisture like brown sugar, so it encourages spreading and crisping.
- Eggs: 2 large eggs, room temperature. Room temperature eggs emulsify better with the butter, creating a smoother dough. Cold eggs can cause the butter to seize up.
- Vanilla Extract: 2 teaspoons. Use pure vanilla extract, not imitation. The flavor of vanilla is prominent in these cookies, so quality matters.
- All-Purpose Flour: 2 1/4 cups (280g). Spoon and level your flour. Do not scoop directly from the bag, as this packs it down and leads to dry, cakey cookies.
- Baking Soda: 1 teaspoon. This helps the cookies spread and brown. Make sure it’s not old; if it’s been open for more than six months, replace it.
- Salt: 1 teaspoon fine sea salt. This balances the sweetness and enhances the chocolate flavor.
- Chocolate Chips: 2 cups (340g). I use a mix of semi-sweet and dark chocolate chips. Ghirardelli or Guittard are my go-to brands because they have a high cocoa butter content and melt beautifully.
For the best results, chill your dough for at least 24 hours. This allows the flour to fully hydrate and the flavors to meld. If you’re in a hurry, you can skip this, but the texture won’t be quite as good. Also, consider adding a sprinkle of flaky sea salt on top right after they come out of the oven. It adds a nice crunch and visual appeal.
Equipment Needed
You don’t need a lot of fancy gadgets to make these cookies, but having the right tools makes the process smoother and the results more consistent.
- Mixing Bowls: One large bowl for the wet ingredients and one medium bowl for the dry ingredients. Glass or stainless steel are best because they don’t retain heat.
- Electric Mixer: A hand mixer or stand mixer makes creaming the butter and sugar much easier. You can do it by hand, but it takes more elbow grease.
- Measuring Cups and Spoons: Accurate measurements are key in baking. Use standard measuring cups for dry ingredients and liquid measuring cups for wet ones.
- Baking Sheets: Heavy-gauge aluminum baking sheets are ideal because they conduct heat evenly. Avoid thin, flimsy sheets that can warp.
- Parchment Paper: Always line your baking sheets with parchment paper. This prevents sticking and makes cleanup a breeze. It also helps the cookies bake evenly.
- Cooling Rack: A wire cooling rack allows air to circulate under the cookies, preventing them from getting soggy on the bottom.
- Ice Cream Scoop: A cookie scoop ensures uniform size, so all your cookies bake at the same rate. It also saves time and keeps your hands clean.
If you don’t have a cookie scoop, a tablespoon works fine, just be consistent with the size. Also, make sure you have a timer. Baking is timing-sensitive, and it’s easy to get distracted. A good oven thermometer is also a smart investment, as many home ovens are not calibrated correctly.
Preparation Method
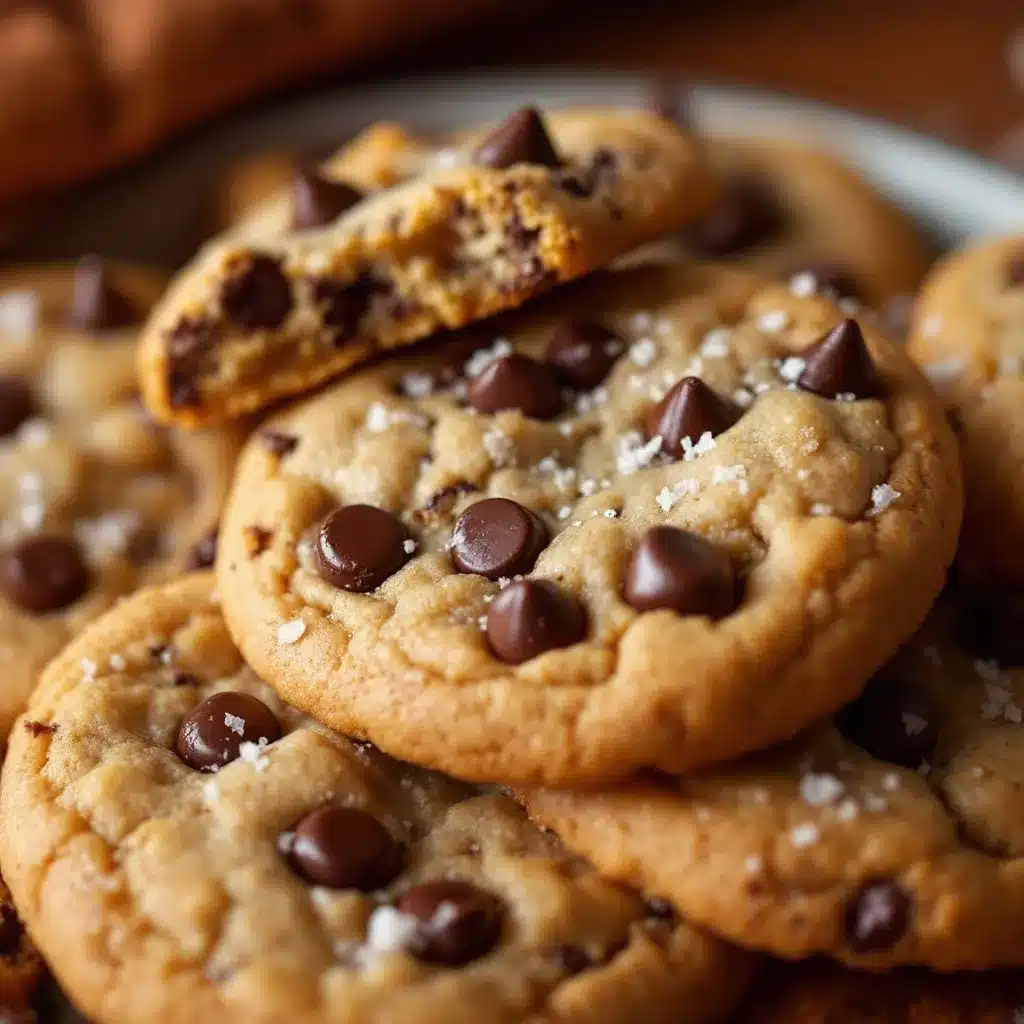
Getting these crispy bakery-style chocolate chip cookies right comes down to a few simple steps. Follow them closely, and you’ll be rewarded with perfect results every time.
- Cream the Butter and Sugars: In a large bowl, beat the softened butter, brown sugar, and white sugar together on medium-high speed for about 3-4 minutes. The mixture should look pale, fluffy, and slightly aerated. This step is crucial for the texture. (Time: 4 minutes)
- Add Eggs and Vanilla: Add the eggs one at a time, beating well after each addition. Scrape down the sides of the bowl with a spatula to ensure everything is incorporated. Mix in the vanilla extract. (Time: 2 minutes)
- Combine Dry Ingredients: In a separate medium bowl, whisk together the flour, baking soda, and salt. Make sure there are no lumps of baking soda or salt. (Time: 1 minute)
- Combine Wet and Dry: Gradually add the dry ingredients to the wet ingredients, mixing on low speed until just combined. Do not overmix. Overmixing develops gluten, which makes cookies tough. (Time: 1-2 minutes)
- Fold in Chocolate Chips: Use a spatula to gently fold in the chocolate chips. Be careful not to crush them. You want distinct chunks of chocolate in every bite. (Time: 1 minute)
- Chill the Dough: Cover the bowl with plastic wrap and refrigerate for at least 24 hours. This is the secret to thick, chewy cookies with crispy edges. If you’re impatient, chill for at least 1 hour, but 24 hours is best. (Time: 24 hours or 1 hour)
- Preheat Oven: Preheat your oven to 350°F (175°C). Line two large baking sheets with parchment paper. (Time: 10 minutes)
- Scoop Dough: Use a cookie scoop or tablespoon to drop mounds of dough onto the prepared baking sheets. Leave about 2 inches between each mound, as they will spread. (Time: 5 minutes)
- Bake: Bake for 9-11 minutes, or until the edges are golden brown and the centers are still soft. The cookies will continue to cook on the hot pan after you take them out. (Time: 10 minutes)
- Cool: Let the cookies cool on the baking sheet for 5 minutes, then transfer them to a wire rack to cool completely. (Time: 5 minutes)
Keep an eye on the cookies during the last minute of baking. Ovens vary, and you want to pull them out when they are just barely set in the middle. If they look fully set in the oven, they will be overcooked once they cool.
Cooking Tips & Techniques
Even experienced bakers make mistakes with cookies. Here are some tips to help you avoid common pitfalls and ensure your cookies turn out perfectly.
- Butter Temperature Matters: Your butter should be cool to the touch but soft enough to leave an indent when you press it. If it’s melted, your cookies will spread too much. If it’s too hard, they won’t spread enough.
- Don’t Overmix: Once you add the flour, mix only until the dough comes together. Overmixing leads to tough, dense cookies.
- Chill Your Dough: This cannot be stressed enough. Chilling the dough solidifies the fat, which prevents the cookies from spreading too much in the oven. It also allows the flavors to develop.
- Use an Oven Thermometer: Many ovens are off by 25-50 degrees. An inexpensive oven thermometer can help you ensure your oven is actually at the temperature you think it is.
- Rotate Your Pans: If your oven has hot spots, rotate your baking sheets halfway through the baking time for even browning.
- Underbake Slightly: Pull the cookies out when the edges are set but the centers are still soft. They will finish cooking on the hot pan.
I once tried to speed up the process by skipping the chill time, and the result was a flat, greasy mess. Don’t make my mistake. Take the time to chill your dough, and you’ll be rewarded with thick, bakery-quality cookies.
Variations & Adaptations
While the classic chocolate chip version is my favorite, this dough is versatile and can be adapted to suit different tastes and dietary needs.
- White Chocolate Macadamia: Swap the chocolate chips for white chocolate chips and add 1 cup of chopped macadamia nuts. It’s a tropical twist that’s equally delicious.
- Double Chocolate: Add 1/4 cup of cocoa powder to the dry ingredients and use dark chocolate chips for an intense chocolate flavor.
- Gluten-Free: Use a 1-to-1 gluten-free flour blend in place of the all-purpose flour. Make sure the blend contains xanthan gum, or add 1/2 teaspoon to the dry ingredients.
- Chewy vs. Crispy: For chewier cookies, use more brown sugar and less white sugar. For crispier cookies, use more white sugar and bake for an extra minute.
- Add-Ins: Feel free to add chopped nuts, dried cranberries, or even bacon bits for a sweet and savory combination.
I recently tried adding a tablespoon of cornstarch to the dry ingredients, which made the cookies even softer and cake-like. It was a nice change of pace, but I always come back to the original recipe for that perfect crispy-chewy balance.
Serving & Storage Suggestions
These cookies are best served slightly warm, straight out of the oven. They pair beautifully with a cold glass of milk or a hot cup of coffee. For a special treat, serve them with a scoop of vanilla ice cream and a drizzle of warm caramel sauce.
To store, keep the cookies in an airtight container at room temperature for up to 5 days. Place a slice of bread in the container to help keep them soft. If you want to freeze the dough, scoop it onto a baking sheet and freeze until solid, then transfer to a freezer bag. You can bake them directly from frozen, adding 1-2 minutes to the baking time.
The flavors of these cookies actually improve after a day or two, as the ingredients have time to meld. So if you can wait, let them sit for 24 hours before serving. They are also great for gifting. Package them in a tin or a decorative box with a ribbon for a thoughtful homemade gift.
Nutritional Information & Benefits
While these cookies are a treat, they are made with simple, wholesome ingredients. Here is an estimated nutritional breakdown per cookie (assuming 24 cookies from the recipe):
- Calories: 220
- Fat: 12g
- Carbohydrates: 28g
- Protein: 3g
- Fiber: 1g
- Sugar: 18g
Butter provides fat-soluble vitamins A and D, while eggs are a good source of protein and choline. Dark chocolate chips contain antioxidants and can be a source of iron and magnesium. Of course, these cookies are high in sugar and calories, so enjoy them in moderation. They are a perfect indulgence for a weekend treat or a special occasion.
Conclusion
Making crispy bakery-style chocolate chip cookies doesn’t have to be complicated. With a few simple techniques and high-quality ingredients, you can create cookies that rival those from your favorite bakery. The key is patience—letting the dough chill and watching the cookies closely in the oven. I hope this recipe becomes a staple in your home, just as it has in mine. They are perfect for sharing, gifting, or just enjoying all to yourself.
Feel free to experiment with different chocolate chips or add-ins to make the recipe your own. I’d love to hear how they turn out for you. Leave a comment below with your thoughts or share a photo of your baked goods. Happy baking!
Frequently Asked Questions
Why are my cookies flat?
This usually happens if the butter is too soft or if the dough wasn’t chilled long enough. Make sure your butter is cool but soft, and chill the dough for at least 24 hours for thick cookies.
Can I use margarine instead of butter?
It’s not recommended. Margarine has a higher water content and less fat than butter, which can affect the texture and flavor of the cookies. Real butter is key for that rich, bakery-style taste.
How do I store leftover cookies?
Store them in an airtight container at room temperature for up to 5 days. You can also freeze the baked cookies for up to 3 months. Thaw them at room temperature before serving.
Can I freeze the cookie dough?
Yes! Scoop the dough onto a baking sheet and freeze until solid. Then transfer to a freezer bag. You can bake them from frozen, just add 1-2 minutes to the baking time.
What type of chocolate chips is best?
I recommend using a mix of semi-sweet and dark chocolate chips for the best flavor balance. High-quality brands like Ghirardelli or Guittard melt beautifully and have a rich cocoa flavor.
Pin This Recipe!

Crispy Bakery-Style Chocolate Chip Cookies: Easy Recipe

These crispy bakery-style chocolate chip cookies feature lacy, crunchy edges and a soft, chewy center. Made with high-quality ingredients and a simple chilling technique, they deliver a high-end bakery taste at home.
- Prep Time: 30 minutes
- Cook Time: 10 minutes
- Total Time: 40 minutes
- Yield: 24 cookies 1x
- Category: Dessert
- Cuisine: American
Ingredients
- 1 cup (2 sticks or 226g) unsalted butter, softened but cool
- 1 1/2 cups (300g) packed dark brown sugar
- 1/2 cup (100g) granulated white sugar
- 2 large eggs, room temperature
- 2 teaspoons pure vanilla extract
- 2 1/4 cups (280g) all-purpose flour, spooned and leveled
- 1 teaspoon baking soda
- 1 teaspoon fine sea salt
- 2 cups (340g) semi-sweet and dark chocolate chips
Instructions
- In a large bowl, beat the softened butter, brown sugar, and white sugar on medium-high speed for 3-4 minutes until pale, fluffy, and aerated.
- Add the eggs one at a time, beating well after each addition. Scrape down the sides of the bowl and mix in the vanilla extract.
- In a separate medium bowl, whisk together the flour, baking soda, and salt to remove lumps.
- Gradually add the dry ingredients to the wet ingredients, mixing on low speed until just combined. Do not overmix.
- Gently fold in the chocolate chips using a spatula.
- Cover the bowl with plastic wrap and refrigerate the dough for at least 24 hours (or at least 1 hour if in a hurry).
- Preheat oven to 350°F (175°C) and line two large baking sheets with parchment paper.
- Scoop mounds of dough onto the prepared baking sheets, leaving about 2 inches between each mound.
- Bake for 9-11 minutes, or until edges are golden brown and centers are still soft.
- Let cookies cool on the baking sheet for 5 minutes, then transfer to a wire rack to cool completely.
Notes
For best results, chill the dough for at least 24 hours to allow flavors to meld and prevent excessive spreading. Use an oven thermometer to ensure accurate temperature. Consider sprinkling flaky sea salt on top immediately after baking for added crunch and visual appeal. Do not overmix the dough once flour is added to avoid tough cookies.
Nutrition
- Serving Size: 1 cookie
- Calories: 220
- Sugar: 18
- Sodium: 150
- Fat: 12
- Saturated Fat: 7
- Carbohydrates: 28
- Fiber: 1
- Protein: 3
Keywords: chocolate chip cookies, bakery style cookies, crispy cookies, chewy cookies, easy cookie recipe, homemade cookies, baking