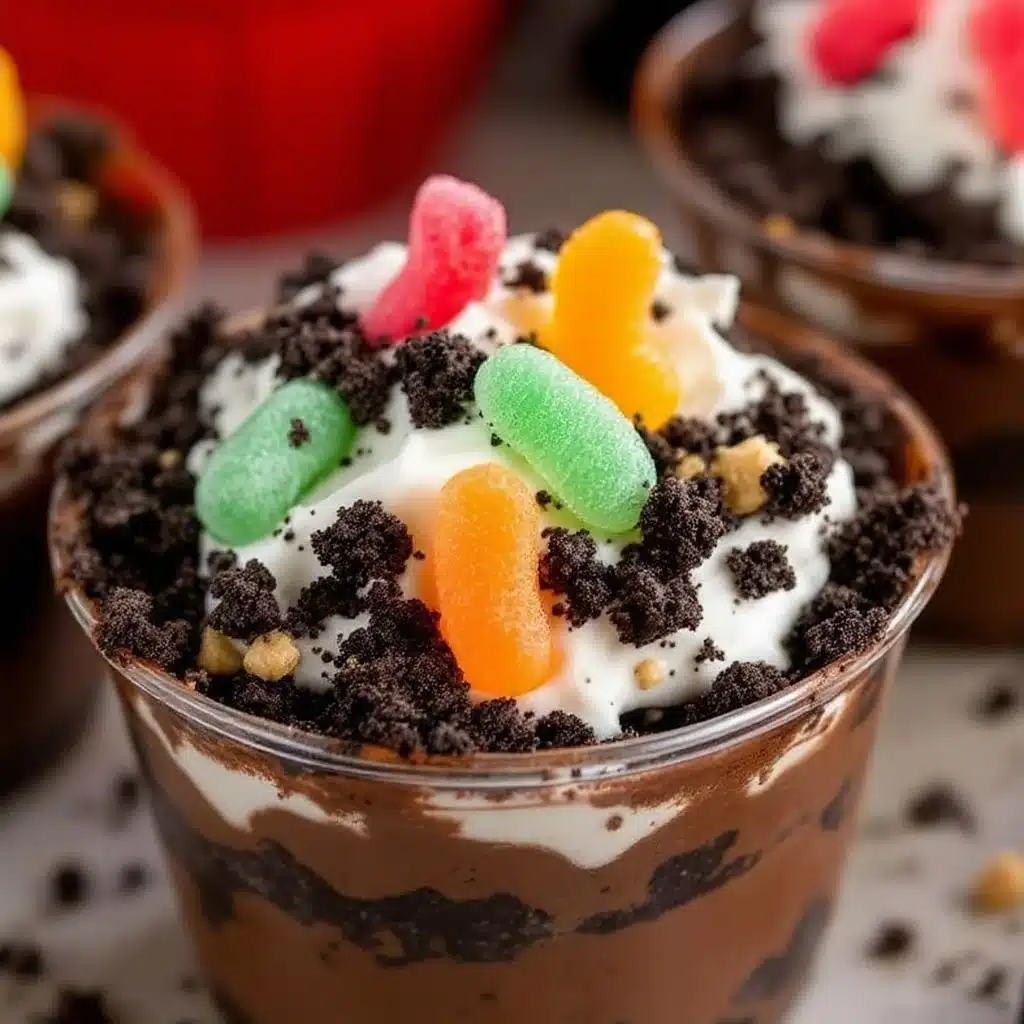
You know how some desserts look like they belong in a fancy French patisserie? Like, they’re so perfect you’re afraid to touch them? This isn’t that. This is messy. It’s supposed to be messy. I first made these fun no-bake dirt cups with Oreo crumble for a chaotic Tuesday afternoon when I had zero energy but a serious sweet tooth.
I was staring into my fridge, feeling that specific kind of hunger that only sugar can fix. I had a package of Oreos that was slightly stale, a tub of vanilla pudding, and some whipped cream that needed using up. Honestly, it was the perfect storm for a lazy kitchen experiment. I crumbled the cookies roughly, not carefully, because who has time for precision when you’re hungry?
The texture is everything here. You want that crunch of the cookie fighting against the soft, creamy pudding. It’s like eating a garden bed made of chocolate and vanilla. My kids loved digging in with spoons, getting crumbs on their noses, and pretending they were actual gardeners planting seeds in chocolate soil. It’s simple, it’s silly, and it’s incredibly satisfying.
What sticks with me isn’t the recipe itself, but the moment we sat on the couch, eating straight from the cups, laughing at how ridiculous it was to eat “dirt.” It’s a reminder that dessert doesn’t need to be complicated to be good. Sometimes it just needs to be fun. And honestly, the best part is knowing you can make this in under ten minutes.
Why You’ll Love This Recipe
This recipe isn’t just about throwing cookies into a cup. It’s about mastering the balance of textures and flavors that makes a simple dessert feel like a treat. I’ve tested this version multiple times to ensure the pudding stays creamy without getting too runny, and the cookie crumbs stay crunchy until the very last bite.
- Quick & Easy: Comes together in under 15 minutes, perfect for busy weeknights or last-minute cravings when you need something sweet fast.
- Simple Ingredients: No fancy grocery trips needed; you likely already have Oreos, pudding mix, and whipped topping in your kitchen.
- Perfect for Parties: Great for potlucks, birthday parties, or just a cozy movie night in.
- Crowd-Pleaser: Always gets rave reviews from kids and adults alike. It’s a nostalgic favorite that never fails.
- Unbelievably Delicious: The texture and flavor combo is next-level comfort food. The contrast between the crunch and the cream is addictive.
What makes this recipe different from the rest is the layering technique. Many people just dump everything in and mix it up, but that leads to soggy cookies and a mushy mess. By layering the ingredients, you preserve that essential crunch. It’s a small step that makes a huge difference in the eating experience.
This recipe isn’t just good—it is the kind that makes you close your eyes after the first bite. It’s comfort food reimagined—healthier, faster, but with the same soul-soothing satisfaction. Perfect for impressing guests without stress, or turning a simple meal into something memorable. Plus, it’s no-bake, so you don’t have to heat up your kitchen in the summer.
What Ingredients You Will Need
This recipe uses simple, wholesome ingredients to deliver bold flavor and satisfying texture without the fuss. The beauty of dirt cups lies in their accessibility. You don’t need specialty stores or hard-to-find items. Everything you need is probably already in your pantry or fridge. Here is what you’ll need to get started.
For the Cookie Crumbs
- Oreo Cookies: One package (about 14 cookies). Use the classic black-and-white sandwich cookies. I recommend keeping them in their original packaging until you’re ready to crumble to keep them fresh.
- Unsalted Butter: 2 tablespoons, melted. This helps the crumbs clump together slightly, making them easier to layer and giving them a richer flavor. You can skip this for a vegan version, but the texture will be drier.
For the Creamy Layer
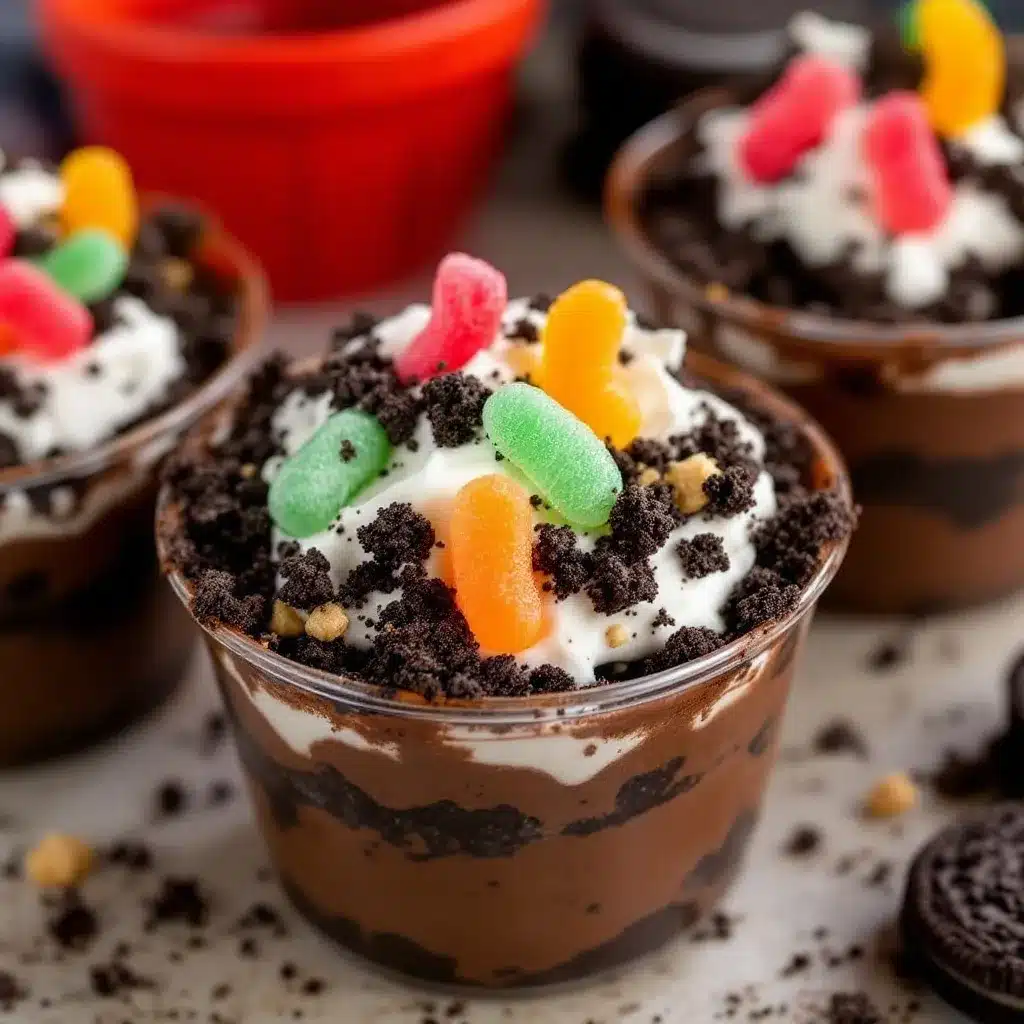
- Vanilla Pudding Mix: One 3.4-ounce box. Instant vanilla pudding is key here. I prefer brands like Jell-O for their consistent texture. Avoid the “light” versions as they often have a weird aftertaste.
- Milk: 2 cups of cold whole milk. Whole milk gives the pudding the richest, creamiest consistency. If you need dairy-free, use a high-quality plant-based milk like oat or almond milk.
- Heavy Cream: 1 cup, whipped. Or you can use a tub of Cool Whip for ease. Whipping your own cream adds a lightness that balances the dense pudding. If using Cool Whip, thaw it according to package directions.
For the Toppings
- Mini Oreo Cookies: A small handful for garnish. These add a nice visual contrast and an extra crunch on top.
- Gummy Worms: Optional, but highly recommended for the “fun” factor. They add a playful element that kids love. Use any flavor you like.
- Chocolate Chips: Mini semi-sweet chocolate chips. These add extra chocolatey bites and look like little pebbles in the dirt.
If you want to get fancy, you can add a drizzle of chocolate sauce or a dollop of caramel. But honestly, the classic combination is hard to beat. The key is to keep the ingredients fresh and cold, especially the pudding and whipped cream, to maintain that perfect texture.
Equipment Needed
You don’t need a lot of fancy gear for this recipe. A few basic kitchen tools will get the job done perfectly. Here is what you’ll need to have on hand.
- Food Processor or Ziplock Bag: To crush the Oreos. A food processor works fastest, but if you don’t want to wash it, put the cookies in a heavy-duty ziplock bag and crush them with a rolling pin. It’s satisfying and effective.
- Mixing Bowls: Two medium-sized bowls. One for the pudding and one for the whipped cream. Make sure they are clean and dry.
- Whisk or Electric Mixer: To beat the pudding mix with milk. An electric mixer makes this quicker, but a whisk works fine if you have the arm strength.
- Spatula: A rubber spatula is best for folding the whipped cream into the pudding. It ensures you don’t deflate the air you’ve whipped into the cream.
- Serving Cups: Clear plastic cups, mason jars, or small glass bowls. Clear containers are best so you can see the layers. If you’re serving a crowd, individual shot glasses work great.
I’ve found that using a food processor gives the most uniform crumbs, which looks nicer. But if you’re making this on a whim, the bag method is totally fine. The texture will be slightly chunkier, which some people actually prefer for a more rustic look.
Preparation Method
- Prepare the Cookie Crumbs: Start by taking the cookies out of the package. If you’re using a food processor, pulse the cookies until they are fine crumbs. If you’re using the bag method, seal the bag and crush them with a rolling pin or a heavy pan. Aim for a fine, sandy texture. (Time: 2-3 minutes)
- Melt the Butter: In a small microwave-safe bowl, melt the 2 tablespoons of unsalted butter. You can do this in the microwave for about 20-30 seconds, stirring halfway through. Let it cool slightly so it doesn’t melt the cookies. (Time: 1 minute)
- Combine Crumbs and Butter: Pour the melted butter over the cookie crumbs. Stir well with a fork until the crumbs are evenly coated and look like wet sand. This step is crucial for preventing the crumbs from being too dry. Set aside. (Time: 1 minute)
- Make the Pudding: In a medium mixing bowl, combine the instant vanilla pudding mix and the cold milk. Whisk vigorously for about 2 minutes, or until the mixture thickens and becomes smooth. Scrape the sides and bottom of the bowl to ensure there are no lumps. (Time: 3 minutes)
- Prepare the Whipped Cream: In a separate large bowl, whip the heavy cream until stiff peaks form. If you are using Cool Whip, just let it soften at room temperature for a few minutes until it’s spreadable. (Time: 3-5 minutes)
- Fold the Cream into Pudding: Add about one-third of the whipped cream to the pudding and stir to lighten it. Then, gently fold in the rest of the whipped cream using a spatula. Be careful not to overmix, or you’ll lose the airy texture. The mixture should be light and fluffy. (Time: 2 minutes)
- Layer the Cups: Take your serving cups. Start with a layer of the buttered cookie crumbs at the bottom. Then, add a layer of the pudding mixture. Repeat the layers: crumbs, pudding, crumbs. You can do two or three layers depending on the size of your cups. (Time: 5 minutes)
- Add Toppings: Finish with a final layer of cookie crumbs on top. Sprinkle mini chocolate chips over the crumbs. If you’re using gummy worms, tuck them into the crumbs so they look like they’re emerging from the dirt. Garnish with a mini Oreo on top. (Time: 2 minutes)
- Chill and Serve: Place the cups in the refrigerator for at least 30 minutes to set. This helps the flavors meld and the layers to firm up. Serve cold. (Time: 30 minutes)
Cooking Tips & Techniques
The biggest mistake people make with dirt cups is letting the cookies get soggy. To avoid this, make sure your cookie crumbs are well-coated with butter. The fat in the butter creates a barrier that slows down the absorption of moisture from the pudding. Also, try to eat them within 24 hours for the best texture.
Another tip is to keep your ingredients cold. If your pudding mix gets too warm while whisking, it won’t set properly. Use ice-cold milk and work quickly. If you’re making these ahead of time, store them in the fridge and add the gummy worms just before serving. Gummy worms can get slimy if they sit in the cold too long.
Don’t skip the folding step when combining the pudding and whipped cream. This is what gives the dessert its light, airy texture. If you just mix it all together, you’ll end up with a dense, heavy pudding. Take your time and be gentle. It’s worth the extra effort.
If you want to add a bit of crunch, you can mix some crushed peanuts or pretzel pieces into the cookie crumbs. It adds a salty contrast that pairs well with the sweet chocolate and vanilla. I’ve tried this variation, and it’s surprisingly good.
Variations & Adaptations
One of the best things about this recipe is how easy it is to customize. Here are a few variations you can try to keep things interesting.
- Chocolate Lovers: Swap the vanilla pudding mix for chocolate pudding mix. You can also use chocolate sandwich cookies instead of Oreos for a double chocolate experience. This is my personal favorite variation.
- Strawberry Shortcake: Use strawberry pudding mix and layer it with crushed vanilla wafers. Top with fresh sliced strawberries and whipped cream. It’s a fresh and fruity twist on the classic.
- Carrot Cake: Use vanilla pudding mixed with shredded carrots and chopped walnuts. Layer with crushed graham crackers. Top with a cream cheese frosting drizzle. It’s like eating carrot cake in a cup.
- Gluten-Free: Use gluten-free sandwich cookies and gluten-free pudding mix. Most major brands offer gluten-free options, so this is easy to adapt.
- Vegan: Use vegan Oreos and make the pudding with plant-based milk. Top with coconut whipped cream. It’s surprisingly creamy and delicious.
I’ve also tried adding a layer of peanut butter cups crushed into the crumbs. It adds a salty-sweet crunch that is absolutely addictive. Feel free to experiment with your favorite flavors. The base recipe is just a canvas for your creativity.
Serving & Storage Suggestions
These dirt cups are best served chilled. The cold temperature helps the pudding set and enhances the creamy texture. If you’re serving them at a party, arrange them on a platter with a variety of toppings. Let guests add their own gummy worms or chocolate chips for a fun interactive experience.
For storage, keep the cups covered in the refrigerator for up to 2 days. After that, the cookies will start to lose their crunch and become soft. If you need to make them ahead, you can prepare the components (crumbs, pudding, whipped cream) separately and assemble them just before serving. This ensures the best texture.
You can also freeze the pudding mixture before folding in the whipped cream. Thaw it in the fridge overnight, then fold in the whipped cream and assemble. This is a good option if you’re planning a large party.
Pair these dirt cups with a glass of cold milk or a cup of coffee. The contrast between the sweet dessert and the bitter coffee is a classic combination. They also go well with fruit salads or light salads if you’re serving them as part of a larger meal.
Nutritional Information & Benefits
While these dirt cups are a treat, they are also relatively simple in terms of ingredients. The main components are cookies, pudding, and whipped cream, which provide carbohydrates, fats, and some protein. A single serving (one cup) contains approximately 300-400 calories, depending on the size and toppings.
The Oreos provide a source of quick energy, while the pudding adds calcium and vitamin D. If you use whole milk, you get additional protein and healthy fats. For a healthier twist, you can use low-fat milk and light whipped topping to reduce the calorie count.
These cups are naturally gluten-free if you use gluten-free cookies, making them a safe option for those with celiac disease or gluten sensitivity. They are also easily adaptable for dairy-free or vegan diets.
From a wellness perspective, I believe in enjoying treats in moderation. These dirt cups are a fun way to satisfy a sweet tooth without spending hours in the kitchen. They’re perfect for special occasions or when you need a quick pick-me-up.
Conclusion
Fun no-bake dirt cups with Oreo crumble are the perfect dessert for any occasion. They’re easy to make, delicious to eat, and always a hit with kids and adults alike. The combination of crunchy cookies and creamy pudding is simply irresistible.
I hope you give this recipe a try. It’s a great way to use up leftover cookies or pudding mix, and it’s a fun activity to do with kids. Feel free to customize it with your favorite toppings and flavors. The possibilities are endless.
If you make this recipe, I’d love to hear how it turns out. Leave a comment below with your thoughts or share a photo of your creation. Don’t forget to tag me on social media so I can see your delicious results.
Happy baking! Or should I say, happy assembling? Enjoy every messy, delicious bite.
FAQs
Can I make dirt cups ahead of time?
Yes, you can make them up to 24 hours in advance. Store them in the refrigerator covered with plastic wrap. For best texture, add the gummy worms just before serving.
Can I use homemade whipped cream?
Absolutely. Homemade whipped cream works great. Just make sure it’s stiff enough to hold its shape when layered. You can sweeten it with a little powdered sugar if you like.
What can I use instead of Oreos?
You can use any sandwich cookies, like chocolate wafers or vanilla wafers. For a gluten-free option, use gluten-free sandwich cookies. The key is to have a cookie that crumbles easily.
How long do dirt cups last in the fridge?
They last for about 2 days in the refrigerator. After that, the cookies will become soggy. For best results, consume them within 24 hours.
Can I freeze dirt cups?
It’s not recommended to freeze assembled dirt cups because the cookies will become mushy when thawed. You can freeze the pudding mixture, but not the assembled dessert.
Pin This Recipe!

Fun No-Bake Dirt Cups: Easy Oreo Crumble Dessert

A messy, fun, and quick no-bake dessert featuring layers of Oreo cookie crumbs, creamy vanilla pudding, and whipped cream, topped with chocolate chips and gummy worms.
- Prep Time: 15 minutes
- Cook Time: 0 minutes
- Total Time: 45 minutes
- Yield: 4 servings 1x
- Category: Dessert
- Cuisine: American
Ingredients
- 1 package (about 14 cookies) Oreo Cookies
- 2 tablespoons unsalted butter, melted
- 1 box (3.4 ounces) instant vanilla pudding mix
- 2 cups cold whole milk
- 1 cup heavy cream, whipped
- Mini Oreo Cookies, for garnish
- Gummy Worms, optional
- Mini semi-sweet chocolate chips
Instructions
- Pulse Oreo cookies in a food processor or crush them in a ziplock bag with a rolling pin until fine crumbs form.
- Melt the unsalted butter in a microwave-safe bowl for 20-30 seconds and let it cool slightly.
- Pour the melted butter over the cookie crumbs and stir until evenly coated like wet sand.
- In a medium mixing bowl, whisk the instant vanilla pudding mix and cold milk vigorously for 2 minutes until thick and smooth.
- Whip the heavy cream in a separate large bowl until stiff peaks form.
- Lighten the pudding by stirring in one-third of the whipped cream, then gently fold in the remaining whipped cream until light and fluffy.
- Layer the dessert in serving cups: start with cookie crumbs, add pudding mixture, repeat layers, and finish with a top layer of crumbs.
- Sprinkle mini chocolate chips over the top layer and tuck in gummy worms if desired.
- Refrigerate for at least 30 minutes to set before serving.
Notes
Ensure cookie crumbs are well-coated with butter to prevent sogginess. Keep ingredients cold for best texture. Consume within 24 hours for optimal crunch. Do not freeze assembled cups as cookies will become mushy.
Nutrition
- Serving Size: 1 cup
- Calories: 350
- Sugar: 24
- Sodium: 250
- Fat: 22
- Saturated Fat: 12
- Carbohydrates: 35
- Fiber: 2
- Protein: 5
Keywords: no-bake dessert, Oreo dirt cups, easy pudding dessert, kid-friendly treats, quick snacks, chocolate dessert, gummy worms