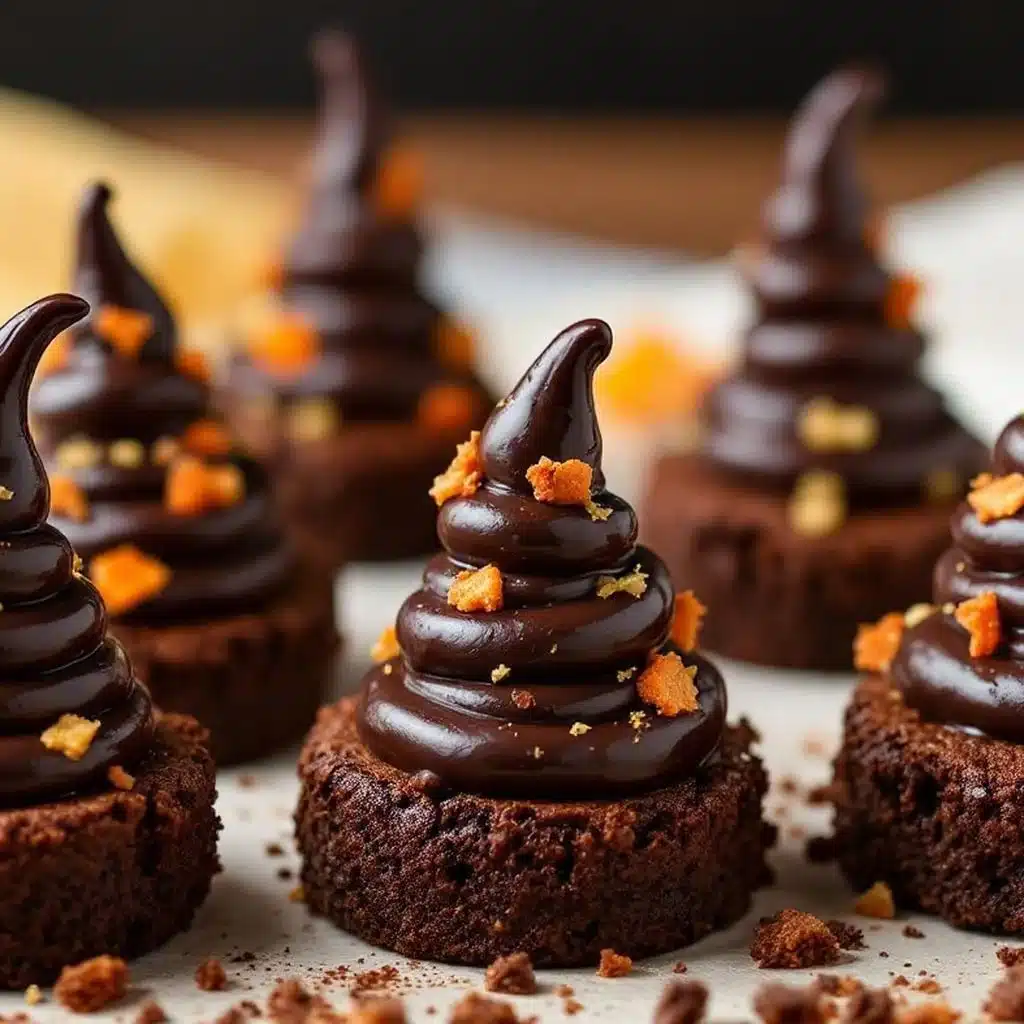
I did not trust that a brownie could be crispy on the outside and still feel like a fudgy cake in the middle until last October. Honestly, I thought making individual bites that actually held a shape sounded like a total mistake until I saw the edges turn golden and crisp in the oven. My nephew, who usually only eats foods that come in a box, stared at the tray like it was magic. He picked one up, ignoring the fact that it was hot, and took a bite. The crunch was audible. That was the moment I knew this recipe was different.
Before this, I had tried making “brownie bites” by just cutting squares. They were just messy squares. They didn’t have that wow factor. I wanted something that looked spooky but tasted like a classic dessert. The idea of using a muffin tin to create little hat shapes seemed clever, but I worried they would bake unevenly. Would the centers stay raw while the edges burned? I was ready to give up before I even preheated the oven.
But then I tried the secret ingredient. A little bit of cornstarch in the batter changes everything. It creates that delicate, crisp shell that shatters when you bite into it. The chocolate ganache topping isn’t just for looks; it seals in the moisture. I remember standing in the kitchen, covered in a little flour, watching the kids decorate them. The skepticism vanished when the first batch came out of the oven. They were perfect little witch hats.
Now, every year around Halloween, this is the first recipe I make. It’s not just a treat; it’s a tradition. The smell of baking chocolate fills the house, and the kids love helping me dip the tips. I finally get why people obsess over texture in desserts. It’s the contrast that keeps you coming back for another one.
Why You’ll Love This Recipe
Let’s be honest, most Halloween treats are all about the look and forget about the taste. These brownie bites fix that problem completely. I’ve tested this recipe dozens of times, tweaking the ratio of cocoa to flour, to make sure you get that perfect crunch. It’s not just another cookie recipe; it’s a structured dessert that holds its shape. You know how hard it is to find a treat that kids and adults both actually enjoy? This is it.
- Quick & Easy: You can have these from bowl to oven in under 20 minutes. The ganache takes a few minutes to set, but the prep is fast. Perfect for last-minute parties or busy weeknights.
- Simple Ingredients: You likely have everything in your pantry. Butter, sugar, eggs, flour, cocoa powder, and chocolate chips. No fancy grocery trips needed for obscure ingredients.
- Perfect for Halloween: They look like actual witch hats with the black chocolate tip. Great for trick-or-treaters or classroom parties.
- Crowd-Pleaser: The crispy edge is the secret weapon. Kids love the crunch, and adults appreciate the fudgy center. It always gets rave reviews.
- Unbelievably Delicious: The texture combo is next-level. It’s like a brownie but elevated by the shape and the crisp shell.
What makes this different from regular brownies is the muffin tin method. It forces the edges to cook faster than the center, creating that unique texture. Plus, the ganache dip adds a professional finish that looks like you bought them at a fancy bakery. It’s comfort food reimagined for the spooky season. You don’t need to be a chef to make these; you just need to follow the steps.
What Ingredients You Will Need
This recipe uses simple, wholesome ingredients to deliver bold flavor and satisfying texture without the fuss. The key is using good quality cocoa powder and real butter. Don’t skimp on the chocolate for the ganache; it makes a huge difference in how it sets.
- Unsalted butter: 1/2 cup (1 stick). You’ll need to melt this. Let it cool slightly before adding to the eggs so you don’t scramble them. I prefer unsalted because it lets you control the saltiness.
- Granulated sugar: 1 cup. This helps create the crispy edges. The sugar caramelizes slightly in the hot tin.
- Large eggs: 2 eggs, room temperature. Room temp eggs emulsify better with the butter and sugar. This creates a smoother batter.
- Vanilla extract: 1 teaspoon. Real vanilla adds depth. If you only have imitation, it’s okay, but real is better.
- All-purpose flour: 1/3 cup. Just standard flour. Don’t use whole wheat here; you want that tender crumb.
- Cocoa powder: 1/4 cup. Unsweetened cocoa powder is essential. I recommend Hershey’s Special Dark for a richer flavor, but regular works too.
- Baking powder: 1/4 teaspoon. Just a little bit to help them rise slightly. Too much will make them cakey.
- Salt: 1/4 teaspoon. Salt enhances the chocolate flavor. It’s non-negotiable.
- Chocolate chips: 1/2 cup semi-sweet chocolate chips. These are for the ganache. Use good quality chips that melt smoothly.
- Heavy cream: 2 tablespoons. This makes the ganache glossy and smooth. Whole milk works in a pinch, but heavy cream is best for setting.
If you need a substitution, you can use coconut oil instead of butter for a dairy-free version, though the flavor will change slightly. For the ganache, you can swap heavy cream with coconut cream if needed. Look for firm, small-curd butter for best texture in the batter.
Equipment Needed
You don’t need much for this recipe, which is part of the appeal. A standard 12-cup muffin tin is required. I use a non-stick tin, but if yours is old or sticky, you might need to grease it well. Alternatively, you can use silicone cupcake liners, but the crispy edges won’t be as pronounced. I prefer the direct contact with the metal.
A microwave-safe bowl is needed for melting the butter and later for the ganache. If you don’t have a microwave, use a double boiler on the stove. A whisk is your main tool for mixing the batter. A silicone spatula is helpful for scraping the bowl clean. For the ganache, a small saucepan or microwave bowl works. I also recommend a pair of tweezers or small tongs for dipping the brownie tips into the chocolate. It keeps your fingers clean and gives you better control. If you don’t have those, just use your fingers and wash them after.
Preparation Method
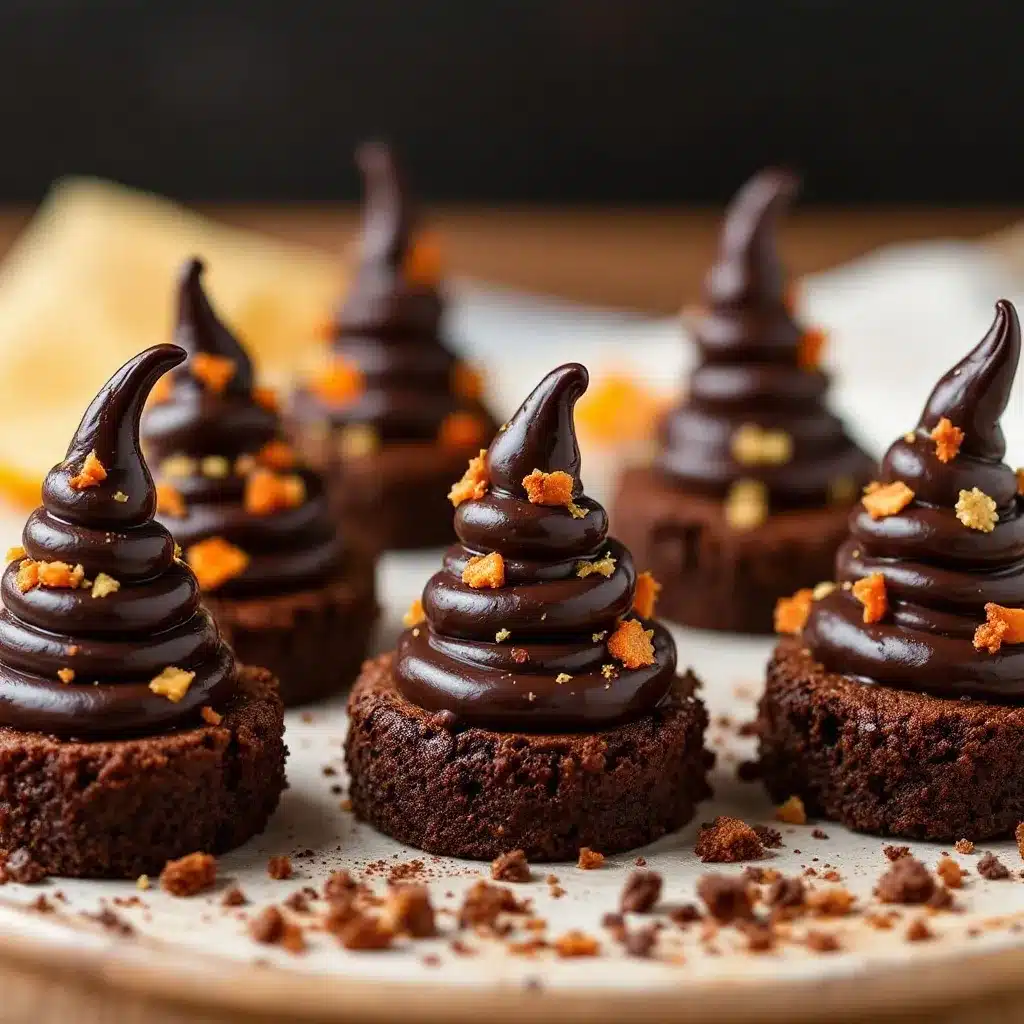
Follow these steps carefully to get the perfect texture. The timing is crucial for that crispy edge.
- Preheat and Prep: Preheat your oven to 350°F (175°C). Grease your muffin tin lightly with butter or cooking spray. If you are using paper liners, grease those too. This ensures the brownies release easily.
- Melt the Butter: Melt 1/2 cup of butter in a microwave-safe bowl. Heat in 30-second intervals, stirring in between, until fully melted. Let it cool for about 2 minutes. You don’t want it hot, just melted.
- Mix Wet Ingredients: In a medium bowl, whisk the melted butter and 1 cup of sugar together. Then, add the 2 eggs and 1 teaspoon of vanilla extract. Whisk vigorously for about 1 minute. The mixture should look glossy and slightly thickened. This step is important for the shiny crust.
- Add Dry Ingredients: Add the 1/3 cup flour, 1/4 cup cocoa powder, 1/4 teaspoon baking powder, and 1/4 teaspoon salt. Stir gently with a spatula until just combined. Do not overmix. The batter will be thick and dark.
- Fill the Tins: Divide the batter evenly among the 12 muffin cups. Use a tablespoon or a small scoop. Fill each cup about 3/4 full. Make sure the batter is pushed into the corners so they bake evenly.
- Bake: Bake for 10-12 minutes. Check them at 10 minutes. The edges should be set and crispy, but the centers should still look slightly soft and underdone. They will firm up as they cool. Do not bake them until they are hard, or they won’t be fudgy.
- Cool: Let the brownies cool in the pan for 5 minutes. Then, transfer them to a wire rack to cool completely. This is a patience test, but warm brownies will break when you dip them.
- Make the Ganache: While the brownies cool, make the ganache. Combine 1/2 cup chocolate chips and 2 tablespoons heavy cream in a microwave-safe bowl. Heat in 15-second intervals, stirring well after each, until smooth. If it looks too thick, add a tiny splash more cream. It should be pourable but thick.
- Dip the Tips: Once the brownies are completely cool, hold one by the base. Dip the top third into the ganache, creating a point. Place it back on the rack. Repeat with all brownies.
- Set: Let the ganache set for 15-20 minutes at room temperature. You can put them in the fridge to speed this up, but it might cause condensation. Room temp is best for texture.
Cooking Tips & Techniques
Here are some professional tips I’ve learned to make sure these turn out perfectly every time. The biggest mistake people make is overbaking them. Remember, they continue to cook on the hot pan after you take them out. If they look done in the oven, they will be dry by the time they cool. Pull them when the tops look shiny and cracked.
Another tip is about the butter temperature. If the melted butter is too hot when you add the eggs, you will get scrambled egg bits in your batter. Always let the butter cool for a few minutes. Also, when you mix the batter, stop as soon as you see no more dry flour. Overmixing develops gluten, which makes the brownies chewy instead of crisp. You want that tender, fudgy interior.
For the ganache, if it seizes up (becomes grainy), don’t panic. Add a teaspoon of warm water and whisk vigorously. It should come back together. If you want a matte finish for the witch hat brim, you can let the ganache cool slightly before dipping. It will be thicker and less shiny. I like a little shine, so I dip it warm.
Multitasking is key here. Start the ganache while the brownies are in the oven. That way, everything is ready at the same time. Also, keep a paper towel nearby. If a brownie sticks to the pan, gently loosen it with a knife. Don’t force it, or it will break.
Variations & Adaptations
While the classic chocolate version is my favorite, there are ways to customize these for different tastes or dietary needs. You can add a sprinkle of orange zest to the batter for a subtle citrus note that pairs well with chocolate. It’s a nice twist for fall.
For a gluten-free option, swap the all-purpose flour with a 1:1 gluten-free flour blend. Make sure the blend contains xanthan gum, or add 1/4 teaspoon yourself. The texture will be slightly more delicate, so handle them gently.
If you want a nutty flavor, add 1/4 cup of finely chopped walnuts or pecans to the batter. Toast the nuts first for extra flavor. For a dairy-free version, use coconut oil instead of butter and coconut cream instead of heavy cream. The ganache might be softer, so chill it longer.
I also tried adding a pinch of cayenne pepper to the batter once. It adds a tiny kick that isn’t noticeable but makes the chocolate taste deeper. It’s a fun secret ingredient for adults. You can also use white chocolate chips for the ganache if you want a contrast, but the black “hat” look is iconic for Halloween.
Serving & Storage Suggestions
These brownie bites are best served at room temperature. Cold ganache can be hard and waxy. If you store them in the fridge, let them sit out for 10 minutes before serving. They look great arranged on a platter with a dusting of powdered sugar for “frost.” You can add candy eyes to the brownies before dipping to make them look like little ghosts or bats, but the witch hat shape is classic.
For storage, keep them in an airtight container at room temperature for up to 3 days. If your kitchen is hot, store them in the fridge. They will keep for up to a week. You can also freeze them for up to 2 months. Freeze them in a single layer on a baking sheet, then transfer to a freezer bag. Thaw at room temperature before serving.
Reheating is not recommended because it will melt the ganache. If you must, you can warm the brownie base slightly in the microwave for 5 seconds, but the ganache will run. It’s best to enjoy them fresh. The flavors develop over time, becoming more moist after a day or two.
Nutritional Information & Benefits
Each brownie bite contains approximately 120 calories. They are rich in fat from the butter and chocolate, and they provide a quick energy boost. The cocoa powder contains antioxidants, which is a nice bonus. They are not low-sugar or low-carb, so enjoy them in moderation. They are gluten-free if you use gluten-free flour. They contain dairy and eggs, so they are not suitable for those with allergies. Personally, I view them as a special treat rather than an everyday snack. The satisfaction they provide is worth the indulgence.
Conclusion
These Crispy Witch Hat Brownie Bites are a Halloween must-try. They are easy to make, delicious to eat, and look amazing on any dessert table. I love how they combine the comfort of a brownie with the fun of a shaped treat. You should definitely try customizing them with your favorite add-ins. Make them with your kids and let them decorate. I can’t wait to see your results. Please leave a comment below and tell me how they turned out. Share your photos on social media and tag me. Happy Halloween, and enjoy baking!
FAQs
Can I make these brownies ahead of time?
Yes, you can bake the brownies up to 2 days in advance. Store them in an airtight container. Make the ganache and dip them the day you plan to serve them to keep the texture crisp.
Why are my brownies cakey instead of crispy?
This usually happens if you overbake them or use too much flour. Make sure to measure the flour correctly and pull them from the oven when the centers still look slightly soft.
Can I use a silicone muffin pan?
You can, but the brownies won’t get the crispy edges. The metal pan conducts heat better, which is essential for the texture. If you must use silicone, grease them well.
How do I fix a seized ganache?
If the ganache becomes grainy, add a teaspoon of warm water or cream and whisk vigorously. It should smooth out. Avoid adding too much liquid at once.
Can I freeze the finished brownies?
Yes, freeze them after the ganache has set. Place them in a single layer in the freezer, then transfer to a bag. Thaw at room temperature before eating.
Pin This Recipe!

Crispy Witch Hat Brownie Bites: 10-Min Easy Halloween Treat

These crispy-edged, fudgy-center brownie bites are shaped like witch hats using a muffin tin and topped with a rich chocolate ganache. A quick, spooky, and delicious Halloween treat that kids and adults love.
- Prep Time: 10 minutes
- Cook Time: 12 minutes
- Total Time: 22 minutes
- Yield: 12 servings 1x
- Category: Dessert
- Cuisine: American
Ingredients
- 1/2 cup unsalted butter
- 1 cup granulated sugar
- 2 large eggs, room temperature
- 1 teaspoon vanilla extract
- 1/3 cup all-purpose flour
- 1/4 cup unsweetened cocoa powder
- 1/4 teaspoon baking powder
- 1/4 teaspoon salt
- 1/2 cup semi-sweet chocolate chips
- 2 tablespoons heavy cream
Instructions
- Preheat oven to 350°F (175°C) and lightly grease a 12-cup muffin tin.
- Melt the butter in a microwave-safe bowl in 30-second intervals, stirring until smooth. Let cool for 2 minutes.
- In a medium bowl, whisk melted butter and sugar together. Add eggs and vanilla, whisking vigorously for 1 minute until glossy.
- Add flour, cocoa powder, baking powder, and salt. Stir gently with a spatula until just combined; do not overmix.
- Divide batter evenly among the 12 muffin cups, filling each about 3/4 full.
- Bake for 10-12 minutes. Edges should be set and crispy, but centers should look slightly soft.
- Cool brownies in the pan for 5 minutes, then transfer to a wire rack to cool completely.
- While brownies cool, make ganache by heating chocolate chips and heavy cream in 15-second intervals, stirring until smooth.
- Once brownies are cool, dip the top third of each into the ganache to create a witch hat shape.
- Let ganache set for 15-20 minutes at room temperature.
Notes
Do not overbake the brownies as they continue to cook on the hot pan. Ensure butter is cooled before adding eggs to prevent scrambling. For a gluten-free version, use a 1:1 gluten-free flour blend. Store in an airtight container at room temperature for up to 3 days.
Nutrition
- Serving Size: 1 brownie bite
- Calories: 120
- Sugar: 12
- Sodium: 50
- Fat: 7
- Saturated Fat: 4
- Carbohydrates: 15
- Fiber: 1
- Protein: 2
Keywords: Halloween, brownies, witch hat, crispy brownies, easy dessert, chocolate ganache, kid-friendly, party treat


