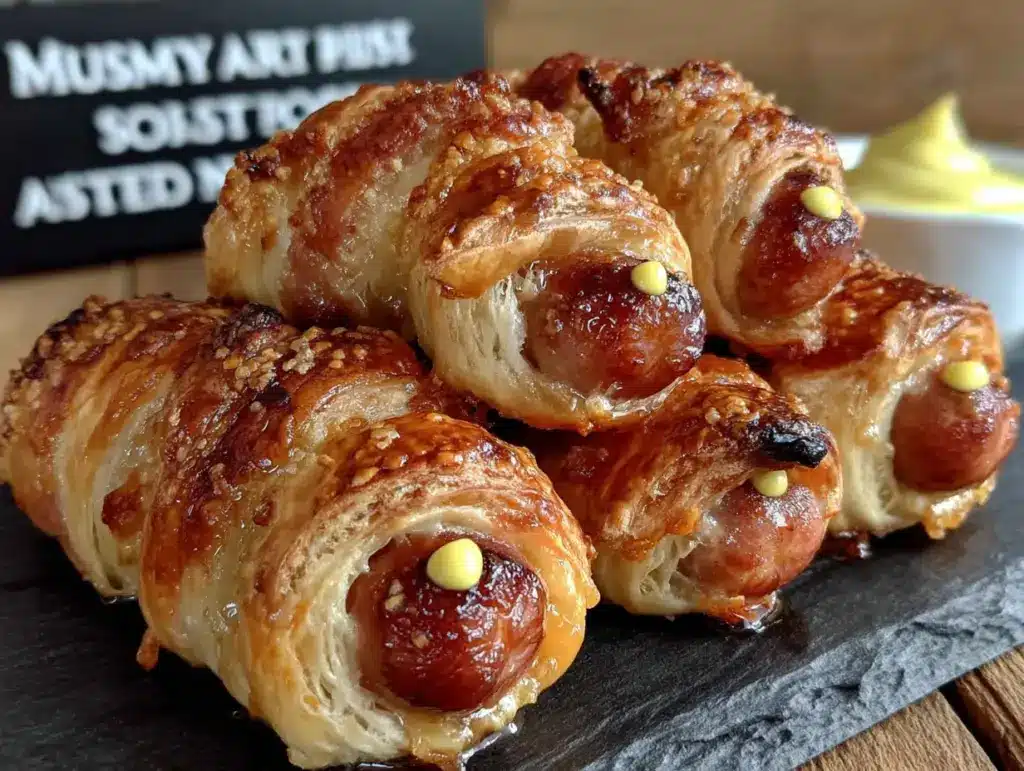
There used to be a tiny, neon-lit diner called “The Crypt” tucked behind a laundromat on the edge of town that made the most incredible Halloween-themed appetizers. When they closed their doors three Octobers ago—the owner finally retired to Florida—I felt a genuine pang of loss. Their mummy pigs in a blanket were legendary: perfectly golden, with little mustard eyes that seemed to follow you around the plate. After six tries—the first batch looked more like sad, deflated caterpillars than spooky mummies—I finally cracked the code. The trick, honestly, was all in the wrapping. Let me tell you, the satisfaction of finally seeing those little bandaged faces come out of the oven was a triumph.
This recipe is my love letter to that diner. It captures the same buttery, flaky pastry wrapped around a juicy, savory cocktail sausage, but with a few tweaks I learned from my failures. You know how it is—sometimes the best recipes come from a place of pure stubbornness. I refused to let that memory fade. Now, every Halloween party I host starts with a platter of these guys. They’re the first thing to disappear, and honestly, that makes me a little proud. It’s like the diner lives on, one crispy little mummy at a time.
The beauty of these spooky cute mummy pigs in a blanket is their deceptive simplicity. They look like you spent hours meticulously wrapping each one, but the process is actually fast and forgiving. I mean, if I can master it after a few lumpy attempts, anyone can. They’re the perfect centerpiece for a Halloween spread—spooky enough to fit the theme but cute enough that even the pickiest eaters at your party will grab a handful. Forget the complicated, multi-step appetizers. This is the recipe that steals the show without stealing your entire afternoon.
Why You’ll Love This Recipe
As someone who has tested this recipe for three different Halloween parties (and a few random Tuesday nights when I needed a pick-me-up), I can tell you with confidence: this is the appetizer that makes you look like a hosting hero. I’ve seen the way guests’ eyes light up when they spot the platter. It’s a genuine crowd reaction, the kind you can’t fake.
- Quick & Easy : From fridge to table in under 30 minutes. Perfect for when you’re juggling costumes, decorations, and a house full of guests. No complicated steps, just simple assembly.
- Simple Ingredients : You only need three main ingredients—cocktail sausages, crescent roll dough, and mustard. Chances are, you already have everything except the wieners in your pantry or fridge.
- Perfect for Halloween Parties : These little guys are the star of any spooky spread. They fit the theme perfectly, are easy to eat standing up, and don’t require any forks or plates.
- Crowd-Pleaser : Kids go wild for the “mummies,” and adults can’t resist the classic pigs in a blanket flavor. They disappear faster than any other appetizer I’ve ever served.
- Unbelievably Delicious : The contrast between the flaky, golden crust and the juicy, salty sausage is a classic for a reason. The little mustard eyes add a tangy pop that cuts through the richness.
What makes this version different from the rest? It’s the wrapping technique. Most recipes just wrap a single strip of dough around the sausage, which looks messy. My method uses a thin, even strip that creates a realistic “mummy” look with distinct bandage lines. It’s not just another pigs in a blanket recipe—it’s your best version for a Halloween party.
This recipe isn’t just good—it is the kind that makes you close your eyes after the first bite. It takes you back to a simpler time, a childhood Halloween, or that awesome party where you ate way too many. It’s comfort food reimagined for a spooky night—faster, cuter, but with the same soul-soothing satisfaction. Perfect for impressing your guests without any stress, or turning a simple snack into a memorable Halloween moment.
What Ingredients You Will Need
This recipe uses simple, pantry-friendly ingredients to deliver maximum flavor and that undeniable “wow” factor. The magic is in how you put them together, not in a long list of exotic items. Here’s what you’ll need to grab:
For the Mummies
- 1 can (8 oz) refrigerated crescent roll dough (I recommend Pillsbury for the most consistent texture and flakiness. The sheets are easier to work with than the perforated triangles.)
- 24 mini cocktail sausages or hot dogs (Look for a brand like Lit’l Smokies or Hillshire Farm. The smaller size is perfect for one-bite appetizers.)
- 1 large egg, beaten (for the egg wash. This gives the mummies that gorgeous golden-brown color. You can also use a splash of milk.)
For the Eyes & Decoration
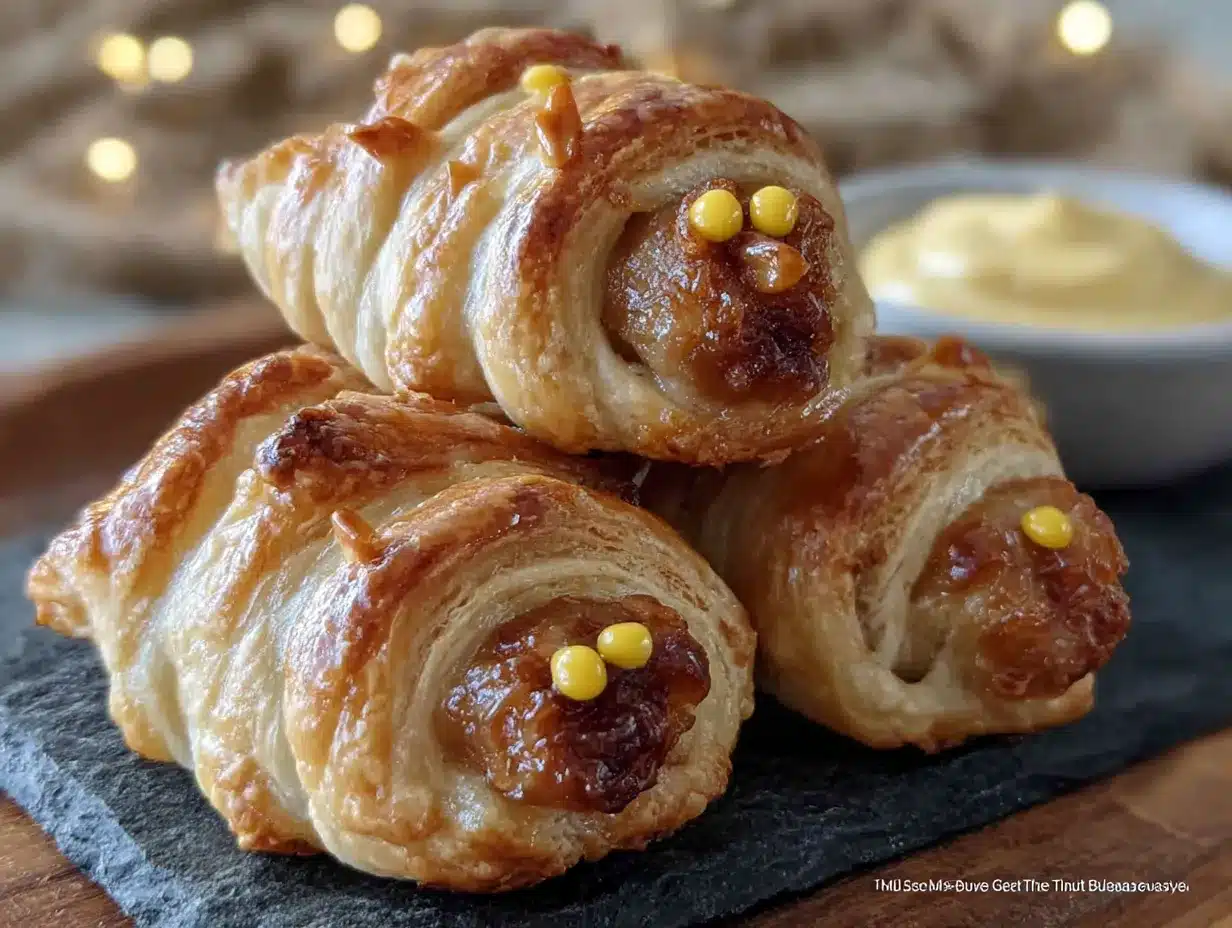
- 2 tablespoons yellow mustard (Classic yellow mustard provides the best color contrast for the “spooky” eyes. Dijon works too, but it’s less vibrant.)
- Optional: ketchup or sriracha (for a red “blood” dip or to add a little heat. Totally optional, but fun for a themed spread.)
Ingredient Tips & Substitutions
- Dough: If you can’t find crescent roll dough, you can use puff pastry sheets. Cut them into thin strips (about 1/2 inch wide). The texture will be a bit more delicate and buttery. For a gluten-free option, use a gluten-free puff pastry or biscuit dough.
- Sausages: Feel free to use your favorite brand of cocktail sausages. You can also use vegetarian or vegan cocktail sausages for a plant-based version. Just make sure they are fully cooked before wrapping.
- Mustard: For the eyes, you can use a dab of sriracha mayo or even a tiny dot of cream cheese mixed with a little paprika for color. The goal is a small, visible dot.
Equipment Needed
You don’t need a professional kitchen to make these spooky treats. A few basic tools will do the trick. I’ve learned through trial and error that the right tools make the process much smoother.
- Baking sheet (A standard half-sheet pan works perfectly. Line it with parchment paper for easy cleanup.)
- Parchment paper (Essential for preventing sticking and making cleanup a breeze. I never bake these directly on a metal pan.)
- Sharp knife or pizza cutter (A pizza cutter is my go-to for slicing the dough into thin strips. It makes clean, even cuts without stretching the dough.)
- Small bowl (For the egg wash. A shallow bowl is easiest for dipping the sausages.)
- Pastry brush (For applying the egg wash. A silicone brush is easy to clean. If you don’t have one, you can use a paper towel.)
- Toothpicks (Optional, but helpful for holding the dough ends in place if they start to unroll. I keep a few on hand just in case.)
Preparation Method
Let’s get these little guys wrapped up! Follow these steps, and you’ll have a platter of spooky-cute mummies in no time. I’ve included all the little tricks I learned the hard way so you can skip the lumpy caterpillar phase.
- Preheat and Prep (5 minutes): Preheat your oven to 375°F (190°C). Line your baking sheet with parchment paper. This is a non-negotiable step for me—it saves so much cleanup time later. While the oven heats, take your crescent roll dough out of the fridge. Unroll it onto a clean cutting board.
- Slice the Dough (5 minutes): If you’re using crescent roll dough, press the perforated seams together gently with your fingers to create a single sheet. Using a sharp knife or pizza cutter, cut the dough into thin strips. I aim for strips about 1/2 inch wide. Don’t worry if they aren’t perfectly uniform—it adds to the “mummy” charm. You should get about 24 strips from one can.
- Wrap the Mummies (10 minutes): Take one cocktail sausage and one strip of dough. Starting at one end of the sausage, wrap the dough strip around it in a spiral, overlapping slightly as you go. Leave a small gap at the top for the “face.” The dough should look like bandages. Don’t wrap it too tightly, or the dough will tear. Gently press the end of the dough strip onto the sausage to seal it. Repeat with all the sausages.
- Arrange and Brush (5 minutes): Place the wrapped mummies on the prepared baking sheet, leaving about 1 inch of space between each one. In a small bowl, beat the egg with 1 tablespoon of water. Using a pastry brush, gently brush the egg wash over the tops of each mummy. This is what gives them that beautiful, golden-brown “baked” look. Don’t skip this step!
- Bake to Perfection (10-12 minutes): Place the baking sheet in the preheated oven. Bake for 10-12 minutes, or until the dough is golden brown and puffed up. The sausages should be hot all the way through. Keep an eye on them after the 10-minute mark—ovens can vary, and you don’t want burnt mummies.
- Add the Eyes (2 minutes): Remove the baking sheet from the oven and let the mummies cool on the pan for 2-3 minutes. They will be very hot! Once they are cool enough to handle, use a toothpick or a small spoon to dab a tiny dot of yellow mustard onto each mummy’s “face” to create two eyes. Be careful, the mustard can be a bit runny if the mummies are too hot.
- Serve Immediately: Transfer the mummy pigs in a blanket to a serving platter. Serve them warm. They are best enjoyed fresh out of the oven. I like to arrange them on a dark platter to make the golden color and mustard eyes pop.
Cooking Tips & Techniques
After making these for a few years, I’ve picked up some tricks that make the process smoother and the results more reliable. I’ve had my share of failures—trust me, a mummy with a torn bandage is a sad sight.
- Keep the Dough Cold: Cold dough is much easier to cut and handle. If your dough gets too warm and sticky, pop it in the fridge for 5 minutes. This prevents the strips from tearing as you wrap them.
- Don’t Overlap Too Much: You want the dough strips to look like bandages, not a solid blanket. Overlapping them too much will result in a thick, doughy center that doesn’t cook through properly. A slight overlap is perfect.
- Use a Pizza Cutter: A pizza cutter makes the cleanest, most even strips. A knife can drag the dough and create jagged edges. I learned this after my second batch looked like they were wrapped in ripped paper.
- Mind the Mustard: Don’t add the mustard eyes before baking! The high heat will cause the mustard to dry out and turn an unappetizing brown. Always add them after the mummies are baked and slightly cooled.
- Make Ahead Strategy: You can assemble the mummies up to a day in advance. Place them on the baking sheet, cover them tightly with plastic wrap, and store them in the fridge. Bake them just before your guests arrive. This is a lifesaver for party hosting.
Variations & Adaptations
One of the best things about this recipe is how easy it is to customize. Don’t be afraid to make it your own. I’ve tried a few different versions myself, and they all have their own charm.
- Spicy Mummies: For a little kick, brush the sausages with sriracha or your favorite hot sauce before wrapping them in the dough. The heat cuts through the richness beautifully.
- Cheesy Mummies: Before wrapping, insert a small strip of cheddar or mozzarella cheese into the center of the sausage. When baked, the cheese melts and creates a “gooey” surprise inside. It’s like a little hidden treasure.
- Veggie Mummies: Swap the cocktail sausages for vegetarian or vegan cocktail sausages. The rest of the recipe remains exactly the same. I’ve used a plant-based brand, and they were a huge hit with my vegetarian friends.
- Bacon-Wrapped Mummies: For the ultimate indulgence, wrap the sausage in a half-strip of thin-cut bacon before wrapping it in the dough. Bake as directed. This adds a smoky, salty layer that is just incredible.
- Sweet Mummies: For a dessert version, use a larger piece of dough and wrap it around a banana or a marshmallow. Bake until golden and drizzle with chocolate sauce. It’s a fun, unexpected twist for a Halloween dessert table.
Serving & Storage Suggestions
These mummy pigs in a blanket are best served warm and fresh, but I have some tips for making them work for your party schedule. Presentation is key for a Halloween spread!
- Serving Temperature: Serve them warm, right after they come out of the oven. This is when the dough is at its flakiest and the sausages are perfectly juicy. I usually time the baking so they come out just as the party starts.
- Presentation Ideas: Arrange them on a large, dark-colored platter (black or dark grey works best) to make the golden color pop. Add a small bowl of ketchup or sriracha in the center for dipping. You can also scatter some “spider” rings or plastic spiders around the platter for extra spooky flair.
- What to Serve Alongside: These pair perfectly with other Halloween finger foods. I love serving them with a bowl of creamy pumpkin dip, some vampire “fang” cheese sticks (mozzarella sticks with black olive slices), and a platter of ghost-shaped fruit slices.
- Storage: Store any leftovers (if there are any!) in an airtight container in the refrigerator for up to 3 days. The dough will soften slightly, but they will still be delicious.
- Reheating: To reheat, place them on a baking sheet in a 350°F (175°C) oven for 5-7 minutes, or until they are warmed through and the dough crisps up again. I do not recommend the microwave—it will make the dough soggy and sad.
Nutritional Information & Benefits
Let’s be honest—this is a treat, not a health food. But knowing a little about what’s in them can help you plan your party spread. I always say, everything in moderation, especially on Halloween!
- Estimated Per Serving (2 mummies): Calories: 220, Fat: 14g, Carbohydrates: 16g, Protein: 7g, Sodium: 480mg. (These are estimates and will vary based on the specific brands you use.)
- Key Ingredients: Cocktail sausages provide a good source of protein and B vitamins. The dough offers quick energy from carbohydrates.
- Dietary Considerations: This recipe is not vegetarian, vegan, or gluten-free by default. However, it is easily adaptable (see variations above). Contains gluten and dairy (from the dough).
- Potential Allergens: Contains wheat (gluten), eggs (from the wash), and milk (in the dough). Always check the labels of your specific ingredients for potential allergens.
- My Perspective: I see these as a fun, celebratory food. They’re perfect for a party where you’re not counting calories. I balance them out with lighter options like veggie platters and fruit skewers on the same table. It’s all about having a good time!
Conclusion
This recipe is more than just a snack—it’s a little piece of Halloween magic. It brings back that nostalgic feeling of a great party, a fun costume, and a plate full of delicious food. I encourage you to make them your own. Play with the variations, add different dips, and have fun with the presentation. They are incredibly forgiving and always a hit.
Personally, I love this recipe because it reminds me of that tiny diner and the joy of finally getting it right. Every time I pull a tray of these golden mummies out of the oven, I feel a little burst of pride. They are the appetizer that makes me feel like a hosting superstar, and I know they will do the same for you.
I’d love to see your creations! Please leave a comment below and tell me how your mummy pigs in a blanket turned out. Did you try a fun variation? What did your guests think? Don’t forget to share this recipe with a friend who loves Halloween as much as you do. Happy haunting, and happy eating!
Frequently Asked Questions
Can I make these mummy pigs in a blanket ahead of time?
Yes, absolutely! You can assemble the mummies up to 24 hours in advance. Place them on the baking sheet, cover them tightly with plastic wrap, and store them in the refrigerator. Bake them just before serving for the best texture.
Why did my dough tear when I was wrapping the sausages?
This usually happens if the dough is too warm. If it gets sticky and tears easily, pop the dough strips in the fridge for 5-10 minutes to firm up. Also, make sure you are not wrapping the sausage too tightly.
Can I use hot dog buns instead of crescent roll dough?
Technically, yes, but it will change the recipe significantly. Crescent roll dough provides the flaky, buttery texture that makes these so special. Using buns would make them more like a traditional mini hot dog, which is fine, but not quite the same “mummy” experience.
What can I use instead of mustard for the eyes?
If you don’t like mustard, you can use a small dab of ketchup, sriracha mayo, or even a tiny dot of cream cheese mixed with a little black food coloring. The goal is a small, visible dot to create the “face.”
How do I prevent the dough from unrolling during baking?
Make sure you press the end of the dough strip firmly onto the sausage to seal it. You can also use a tiny dab of water or egg wash to help it stick. If you are still having trouble, you can secure the end with a toothpick, but remember to remove it before serving!
Easy Spooky Mummy Pigs in a Blanket Recipe

These spooky cute mummy pigs in a blanket are the perfect Halloween appetizer. With flaky crescent roll dough wrapped around juicy cocktail sausages and little mustard eyes, they’re quick, easy, and a guaranteed crowd-pleaser.
- Prep Time: 15 minutes
- Cook Time: 12 minutes
- Total Time: 27 minutes
- Yield: 24 mummies (12 servings of 2 mummies each) 1x
- Category: Appetizer
- Cuisine: American
Ingredients
- 1 can (8 oz) refrigerated crescent roll dough
- 24 mini cocktail sausages or hot dogs
- 1 large egg, beaten
- 2 tablespoons yellow mustard
- Optional: ketchup or sriracha for dipping
Instructions
- Preheat your oven to 375°F (190°C). Line your baking sheet with parchment paper.
- Unroll the crescent roll dough onto a clean cutting board. Press the perforated seams together gently to create a single sheet.
- Using a sharp knife or pizza cutter, cut the dough into thin strips about 1/2 inch wide. You should get about 24 strips.
- Take one cocktail sausage and one strip of dough. Starting at one end, wrap the dough strip around the sausage in a spiral, overlapping slightly. Leave a small gap at the top for the face. Gently press the end to seal. Repeat with all sausages.
- Place the wrapped mummies on the prepared baking sheet, about 1 inch apart. Brush the tops with the beaten egg wash.
- Bake for 10-12 minutes, until the dough is golden brown and puffed up.
- Remove from the oven and let cool for 2-3 minutes. Use a toothpick or small spoon to dab tiny dots of yellow mustard onto each mummy’s face for eyes.
- Serve warm immediately.
Notes
Keep the dough cold for easier handling. Don’t add mustard eyes before baking or they will discolor. You can assemble the mummies up to 24 hours in advance and refrigerate until ready to bake. For best results, serve warm.
Nutrition
- Serving Size: 2 mummies
- Calories: 220
- Sugar: 3
- Sodium: 480
- Fat: 14
- Saturated Fat: 4
- Carbohydrates: 16
- Protein: 7
Keywords: Halloween appetizer, mummy pigs in a blanket, easy Halloween recipe, spooky snacks, party appetizer, pigs in a blanket, crescent roll recipe


