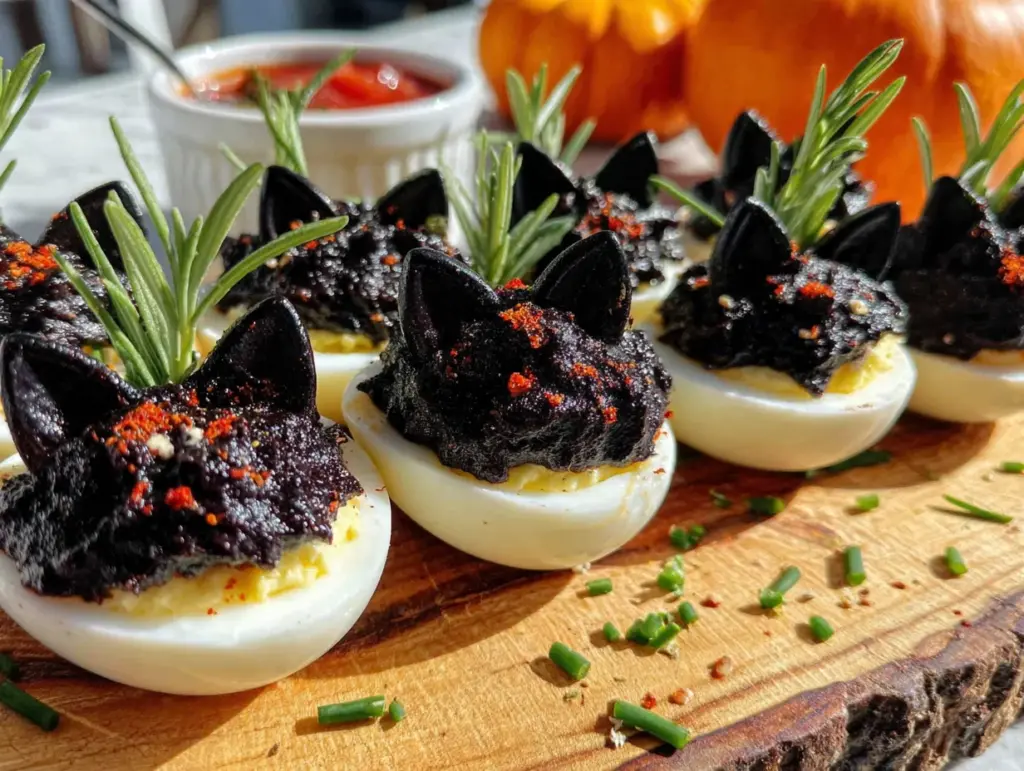
My nephew Leo asked why I couldn’t just use olives instead of piping the filling. I started to explain why that wouldn’t work—then stopped. I mean, he was eight and had just watched me painstakingly pipe deviled egg filling into a star tip for forty-five minutes, only to have the bag explode all over my hand. Honestly, I was tired. The Halloween party was in two hours, and I was this close to just serving store-bought cookies. So I handed him a pitted black olive and said, “Fine. Show me.” He sliced it in half, placed it right on top of the filling, and grinned. I was about to tell him that looked ridiculous when I realized—it didn’t. It looked like a tiny, shiny black eye. And that’s when the Black Cat Deviled Egg was born. Let me tell you, I learned more from that kid in five minutes than I had from a dozen recipe blogs. Sometimes being wrong tastes really, really good. Maybe you’ve been there—stuck in your ways, convinced there’s only one right way to do something, and then a little voice (or a very insistent nephew) proves you dead wrong. That’s this recipe. It’s the one that stole the Halloween table, got photographed by everyone, and disappeared before the punch bowl was even filled. I keep making it because it reminds me that the best ideas don’t always come from expertise. Sometimes they come from a kid with an olive and zero doubt.
Why You’ll Love This Recipe
These Black Cat Deviled Eggs aren’t just cute—they’re the kind of appetizer that makes people stop mid-conversation to grab one. I’ve tested this recipe through three Halloween parties, two family gatherings, and one very skeptical potluck where they vanished in under ten minutes. Here’s why they work so well.
- Quick & Easy: Comes together in about 30 minutes, most of which is just boiling eggs. Perfect for last-minute Halloween prep when you’re already juggling costumes and candy.
- Simple Ingredients: You probably already have eggs, mayo, mustard, and olives in your kitchen right now. No weird specialty items required.
- Perfect for Halloween Parties: These are the star of any spooky spread. Kids love the “cat” look, and adults appreciate the classic deviled egg flavor done right.
- Crowd-Pleaser: I’ve watched people who “don’t like deviled eggs” eat three of these. The olive eyes are surprisingly irresistible.
- Unbelievably Delicious: The creamy, tangy filling paired with the briny olive is a combo I didn’t see coming. It just works.
What makes these different from every other Halloween appetizer? It’s the texture contrast. The smooth, rich yolk mixture against the firm, salty olive creates a bite that’s both familiar and surprising. Plus, the black cat design is genuinely clever—it uses the olive as both the eyes and the nose, so nothing goes to waste. This isn’t just another deviled egg recipe. It’s the one that makes you close your eyes after that first bite, because somehow it tastes even better than it looks. Perfect for impressing guests without stress, or turning a simple Halloween snack into something memorable.
What Ingredients You Will Need
This recipe uses simple, everyday ingredients to create something that looks way more complicated than it actually is. Most of these are pantry staples, which makes last-minute Halloween prep a breeze.
- 12 large eggs (room temperature works best for even peeling)
- 1/3 cup mayonnaise (I prefer Hellmann’s for its creamy texture, but Duke’s adds a nice tang)
- 1 teaspoon yellow mustard (adds that classic deviled egg zing)
- 1/2 teaspoon white vinegar (cuts the richness just enough)
- 1/4 teaspoon salt (fine sea salt dissolves better)
- 1/8 teaspoon black pepper (freshly ground if you have it)
- 1 can (6 ounces) large pitted black olives (look for jumbo or colossal size—they make better cat eyes)
- Optional: 1/4 teaspoon smoked paprika (for a subtle smoky finish, sprinkled on top)
- Optional: Fresh chives or parsley (for garnish, though honestly the cats look great without it)
Let me talk about the olives for a second. I’ve tried this with regular canned black olives, and they work fine, but the jumbo ones really make a difference. They look more like actual cat eyes when you slice them. I buy Lindsay jumbo pitted olives when I can find them. If you only have regular size, just use two slices per egg instead of one—stack them slightly offset to create a wider eye shape.
For the eggs, older eggs actually peel easier than fresh ones. If your eggs are super fresh, add a teaspoon of baking soda to the boiling water. It helps loosen the shells. I learned that trick after ruining a dozen eggs the night before a party. Trust me on this one.
If you’re dairy-free or vegan, you can swap the mayonnaise for a plant-based version. Just know the texture will be slightly less rich. I’ve tried it with Vegenaise and it works well enough, though the flavor is a little milder.
Equipment Needed
You don’t need fancy tools for these Black Cat Deviled Eggs, which is part of why I love making them for parties.
- Large pot (for boiling the eggs—make sure it’s big enough that the eggs aren’t crammed together)
- Medium mixing bowl (for the yolk mixture)
- Fork or potato masher (for mashing the yolks—I prefer a fork because it gives you more control)
- Small piping bag or zip-top bag (for filling the eggs neatly. A zip-top bag with the corner snipped off works perfectly)
- Sharp paring knife (for slicing olives cleanly—dull knives squash them)
- Cutting board (preferably small, just for the olives)
- Egg platter or serving tray (something dark-colored makes the black cats pop visually)
If you don’t have a piping bag, don’t stress. A sturdy sandwich bag works just as well. I’ve even used a clean ketchup bottle in a pinch—not my finest moment, but it got the job done. For the olives, a small, sharp knife is non-negotiable. I ruined my first batch using a dull butter knife, and the olives looked like they’d been through a blender.
Preparation Method
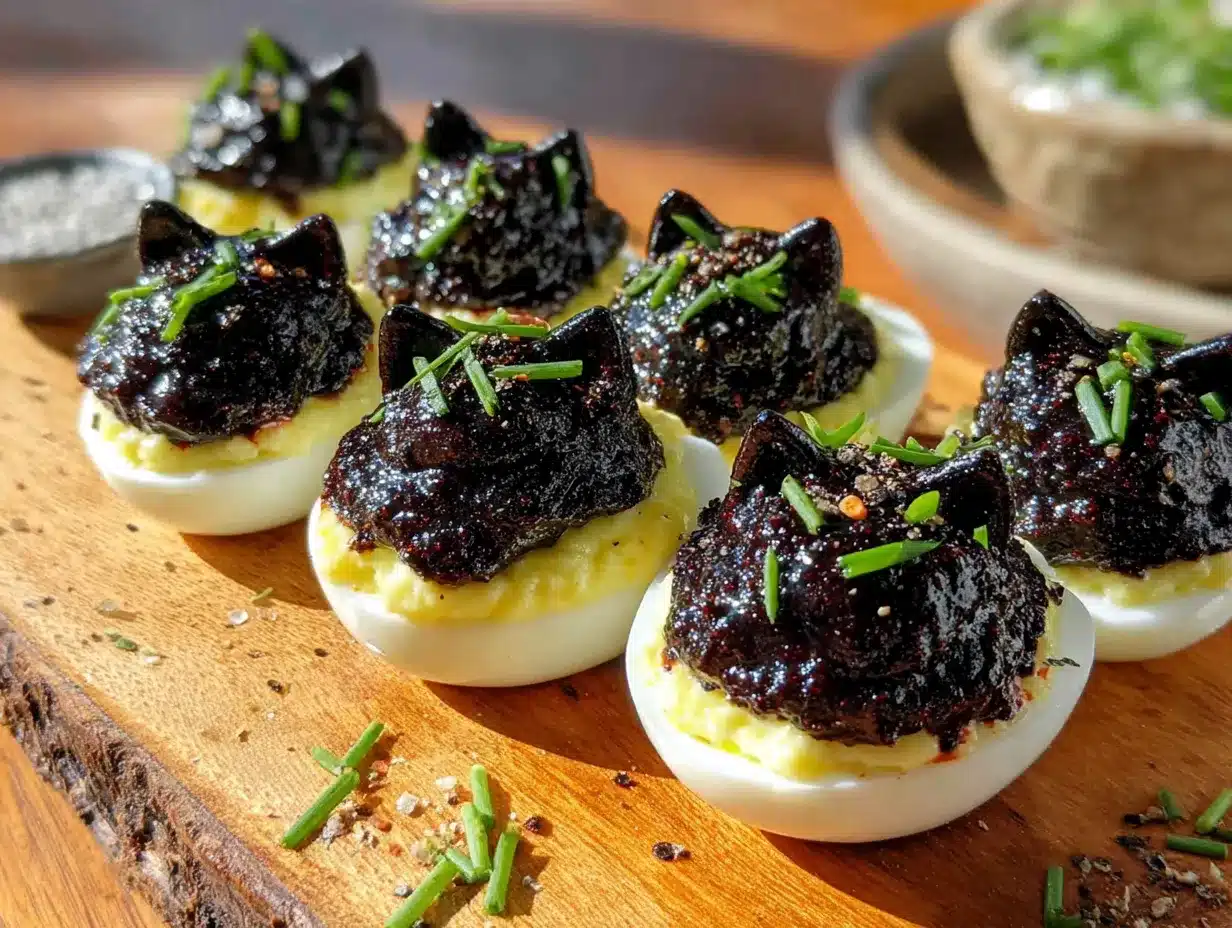
Let’s make these adorable little cats. I’ll walk you through every step so you don’t end up with a kitchen disaster like my first attempt.
- Boil the eggs: Place your 12 eggs in a large pot and cover them with cold water by about an inch. Bring the water to a rolling boil over high heat. Once it’s boiling hard, cover the pot, turn off the heat, and let it sit for exactly 12 minutes. This gives you hard-boiled eggs with fully set yolks but no green ring. While they’re sitting, fill a large bowl with ice water.
- Ice bath: After 12 minutes, transfer the eggs to the ice water bath using a slotted spoon. Let them chill for at least 10 minutes. This stops the cooking process and makes peeling way easier. I once skipped this step and spent twenty minutes picking shell fragments off my eggs. Don’t be me.
- Peel the eggs: Gently tap each egg on the counter to crack the shell all over, then roll it between your palms to loosen the shell. Start peeling from the wider end where the air pocket is. Rinse any stubborn shell bits off under cool running water. Pat the eggs dry with a paper towel.
- Slice and separate: Using a sharp knife, slice each egg in half lengthwise. Gently pop out the yolks into your mixing bowl. Arrange the white halves on your serving platter, cut side up. Try to keep them stable—if they wobble, slice a tiny bit off the bottom to create a flat surface.
- Make the filling: Add the mayonnaise, yellow mustard, white vinegar, salt, and pepper to the bowl with the yolks. Mash everything together with a fork until it’s completely smooth with no lumps. Taste it and adjust the seasoning. I usually add a tiny pinch more salt at this point. The filling should be creamy but not runny—if it seems too thick, add another teaspoon of mayo.
- Fill the eggs: Spoon the yolk mixture into your piping bag or zip-top bag. Snip off a small corner (about 1/4 inch wide). Pipe the filling into each egg white half, mounding it slightly. You want a nice rounded shape that mimics a cat’s face. Don’t overfill—you need room for the olive eyes.
- Prepare the olives: Drain your can of black olives and pat them dry with a paper towel. Using your sharp paring knife, slice each olive crosswise into rounds about 1/4 inch thick. You’ll get about 3-4 slices per olive depending on size. For the cat eyes, you want nice round slices. For the nose, cut a few olives into small triangles or oval shapes.
- Assemble the cats: Place two olive slices on each filled egg half to create the eyes. Position them near the top of the filling mound. Place one smaller olive piece (triangle or oval) just below the eyes for the nose. If you want to get fancy, use a toothpick to draw tiny whiskers on the filling with a little mustard or paprika. I usually skip this because the eyes alone are plenty cute.
- Chill and serve: Refrigerate the finished deviled eggs for at least 15 minutes before serving. This helps the filling firm up and the olives stay put. They’re best served cold or at room temperature.
A quick note: if your filling seems too soft after piping, pop the filled eggs in the fridge for 10 minutes before adding the olives. The olives will sink into soft filling, and you want them sitting on top like little eyeballs.
Cooking Tips & Techniques
I’ve made these Black Cat Deviled Eggs probably a dozen times now, and I’ve learned a few things the hard way. Let me save you some trouble.
Perfect hard-boiled eggs every time: The biggest mistake people make is overcooking. That green ring around the yolk isn’t just ugly—it makes the filling taste sulfurous. The 12-minute off-heat method I described above is foolproof. If you’re at high altitude, add one minute to the off-heat time.
Peeling without the rage: I used to dread peeling eggs until I discovered the shake method. After the ice bath, put the egg in a closed container with a little water and shake it vigorously. The shell basically falls off. It’s messy but effective. Alternatively, peel under running water—the water helps separate the shell from the white.
Olive placement strategy: Here’s something I learned after my third batch: if you press the olive slices into the filling too hard, they sink. If you just place them gently, they might slide off. The sweet spot is a light press—just enough to make them stick without disappearing into the yolk. Also, make sure your olives are dry. Wet olives slide right off.
Timing your prep: You can boil and peel the eggs up to two days ahead. Store them unpeeled in the fridge, then peel right before you make the filling. The filling itself can be made a day ahead and stored in a piping bag in the fridge. Just pipe and decorate right before serving. This is a lifesaver for party prep.
My biggest failure: The first time I made these, I used sliced olives from a jar (the pre-sliced kind). They were too thin and kept breaking when I tried to place them. Plus, they didn’t look like cat eyes at all—they looked like weird, floppy discs. Whole pitted olives, sliced fresh, are non-negotiable.
Variations & Adaptations
These Black Cat Deviled Eggs are surprisingly flexible. Here are some ways I’ve adapted them for different crowds and dietary needs.
Spicy Black Cats: Add 1/2 teaspoon of sriracha or a pinch of cayenne pepper to the yolk mixture. The heat pairs beautifully with the briny olives. I made these for a Halloween party with a “spooky spicy” theme, and they were gone in minutes.
Herb-Infused Filling: Mix in 1 tablespoon of finely chopped fresh dill or chives. It adds a fresh, bright note that cuts through the richness. My mom prefers this version, and she’s not wrong—it’s elegant.
Bacon-Wrapped Cats: Cook 6 strips of bacon until crispy, crumble them, and sprinkle over the finished deviled eggs before adding the olives. The smoky, salty crunch is incredible. Just be aware this makes them less vegetarian-friendly.
Avocado Twist: Replace half the mayonnaise with mashed ripe avocado. The filling turns a pale green color, which contrasts beautifully with the black olives. This version is also dairy-free if you use vegan mayo for the remaining half.
Gluten-Free Note: These are naturally gluten-free, so no adaptations needed. Just double-check your mayonnaise brand if you’re serving someone with celiac—some cheaper brands use wheat starch as a thickener.
Vegan Version: Use a vegan egg substitute like Just Egg for the whites (you’ll need to bake them in an egg-shaped mold) and a vegan mayo-based filling with black salt (kala namak) for that eggy flavor. It’s more work, but I’ve seen it done beautifully.
Serving & Storage Suggestions
These Black Cat Deviled Eggs are at their best when served chilled or at room temperature. I recommend taking them out of the fridge about 15 minutes before serving—they taste better when they’re not ice-cold.
Presentation tips: Arrange the deviled eggs on a dark-colored platter or a black slate board. The contrast makes the black olives pop. I sometimes add a few whole olives scattered around for visual interest. If you want to get really festive, place them on a bed of fresh parsley or arugula—it looks like grass and adds a nice color pop.
What to serve alongside: These pair beautifully with other finger foods. I often serve them alongside a cheese board, veggie platter, or mini sliders. For Halloween specifically, they’re great with mummy hot dogs or pumpkin-shaped cheese balls. A crisp white wine or a light beer complements the creamy, tangy filling perfectly.
Storage instructions: Store leftover deviled eggs in an airtight container in the refrigerator for up to 2 days. The olive eyes may slide around a bit, so handle the container gently. I don’t recommend freezing them—the texture of the egg whites becomes rubbery and unpleasant.
Reheating: Don’t. These are meant to be served cold. If you’ve refrigerated them, just let them sit at room temperature for 10-15 minutes before serving.
Flavor development: Honestly, the filling tastes even better after a day in the fridge. The flavors meld together and mellow out. Just add the olive eyes right before serving to keep them looking fresh. I’ve made the filling a day ahead for parties and it’s always a hit.
Nutritional Information & Benefits
Per deviled egg half (based on 24 servings): approximately 65 calories, 5g fat, 1g saturated fat, 95mg cholesterol, 120mg sodium, 1g carbohydrates, 0g fiber, 0g sugar, 4g protein.
These numbers will vary slightly based on your mayonnaise and olive choices. Light mayonnaise reduces the calorie count by about 15 calories per half.
Eggs are a fantastic source of high-quality protein and contain all nine essential amino acids. They’re also rich in choline, which supports brain health, and lutein, which is good for your eyes. Black olives provide healthy monounsaturated fats and a small amount of iron.
Dietary considerations: This recipe is naturally gluten-free, low-carb, and keto-friendly (about 1g net carbs per serving). It contains eggs and may contain dairy depending on your mayonnaise brand. For a lower-cholesterol version, use only the whites and make the filling with a combination of Greek yogurt and mustard.
I personally love that these deviled eggs feel indulgent but aren’t terrible for you. They’re a great protein-packed appetizer that won’t weigh you down before the main meal.
Conclusion
These Black Cat Deviled Eggs with Olive Eyes are proof that sometimes the best recipes come from letting go of control. I still laugh when I think about my nephew Leo handing me that olive slice, completely sure he was right. And he was. These little cats have become a Halloween tradition in my house, and every time I make them, I remember that cooking isn’t about being perfect—it’s about being open to a good idea, even when it comes from an eight-year-old with mayonnaise on his chin.
I encourage you to make these your own. Add a little spice, try different herbs, or experiment with the olive placement. Maybe you’ll discover your own twist that makes them even better. That’s the beauty of a simple recipe—it leaves room for your personality to shine through.
Have you made these? Did your kids or friends have suggestions that made them even better? I’d love to hear about it in the comments. Share your photos, your variations, your happy accidents. And if you’re looking for more Halloween appetizer ideas, check out my spooky stuffed mushrooms or mummy pizza bites for another crowd-pleasing treat. Happy Halloween, and happy cooking!
Frequently Asked Questions
Can I make these Black Cat Deviled Eggs ahead of time?
Absolutely! You can boil and peel the eggs up to two days ahead. The filling can be made a day in advance and stored in a piping bag in the fridge. Just pipe and add the olive eyes a few hours before serving for the freshest look.
What type of olives work best for the cat eyes?
Jumbo or colossal pitted black olives work best because they give you larger, rounder slices that look more like cat eyes. Regular canned black olives work too, but you’ll get smaller slices.
How do I keep the olive eyes from falling off?
Make sure your olives are patted completely dry before slicing. When placing them on the filling, press down gently—just enough to make them stick without sinking. Chilling the filled eggs for 10-15 minutes before adding the olives also helps.
Can I use a different filling recipe?
Of course! The olive eyes work with any deviled egg filling. Try adding sriracha for heat, fresh herbs for brightness, or even a little curry powder for an unexpected twist.
How long do these keep at a party?
These deviled eggs are safe at room temperature for up to 2 hours. If you’re serving them outdoors or in warm weather, keep the platter on ice to be safe. After that, refrigerate any leftovers promptly.
Pin This Recipe!

Best Easy Black Cat Deviled Eggs for Halloween Fun
These adorable Black Cat Deviled Eggs are a Halloween party hit, featuring a creamy, tangy filling and olive eyes that are surprisingly irresistible. A quick and easy appetizer that’s perfect for last-minute prep.
- Prep Time: 15 minutes
- Cook Time: 12 minutes
- Total Time: 30 minutes
- Yield: 24 servings 1x
- Category: Appetizer
- Cuisine: American
Ingredients
- 12 large eggs (room temperature)
- 1/3 cup mayonnaise
- 1 teaspoon yellow mustard
- 1/2 teaspoon white vinegar
- 1/4 teaspoon salt (fine sea salt)
- 1/8 teaspoon black pepper (freshly ground)
- 1 can (6 ounces) large pitted black olives (jumbo or colossal)
- Optional: 1/4 teaspoon smoked paprika
- Optional: Fresh chives or parsley for garnish
Instructions
- Boil the eggs: Place 12 eggs in a large pot, cover with cold water by 1 inch. Bring to a rolling boil over high heat. Cover, turn off heat, and let sit for exactly 12 minutes. Meanwhile, prepare a large bowl of ice water.
- Ice bath: Transfer eggs to ice water and chill for at least 10 minutes.
- Peel the eggs: Tap each egg to crack the shell, roll between palms, and peel starting from the wider end. Rinse and pat dry.
- Slice and separate: Slice each egg in half lengthwise. Pop out yolks into a mixing bowl. Arrange whites on a serving platter, cut side up.
- Make the filling: Add mayonnaise, yellow mustard, white vinegar, salt, and pepper to the yolks. Mash with a fork until smooth. Adjust seasoning to taste.
- Fill the eggs: Spoon filling into a piping bag or zip-top bag. Snip a small corner and pipe filling into each egg white, mounding slightly.
- Prepare the olives: Drain olives and pat dry. Slice crosswise into 1/4-inch rounds. For noses, cut a few olives into small triangles or ovals.
- Assemble the cats: Place two olive slices on each filled egg for eyes. Add a smaller olive piece below for the nose. Optionally, draw whiskers with mustard or paprika.
- Chill and serve: Refrigerate for at least 15 minutes before serving. Serve cold or at room temperature.
Notes
For easier peeling, use older eggs or add 1 teaspoon baking soda to the boiling water. If filling is too soft, chill filled eggs for 10 minutes before adding olives. Olives must be dry to prevent sliding. Can be made ahead: boil and peel eggs up to 2 days ahead; filling can be made 1 day ahead.
Nutrition
- Serving Size: 1 deviled egg half
- Calories: 65
- Sodium: 120
- Fat: 5
- Saturated Fat: 1
- Carbohydrates: 1
- Protein: 4
Keywords: Halloween deviled eggs, black cat deviled eggs, spooky appetizer, easy Halloween recipe, deviled eggs with olives


