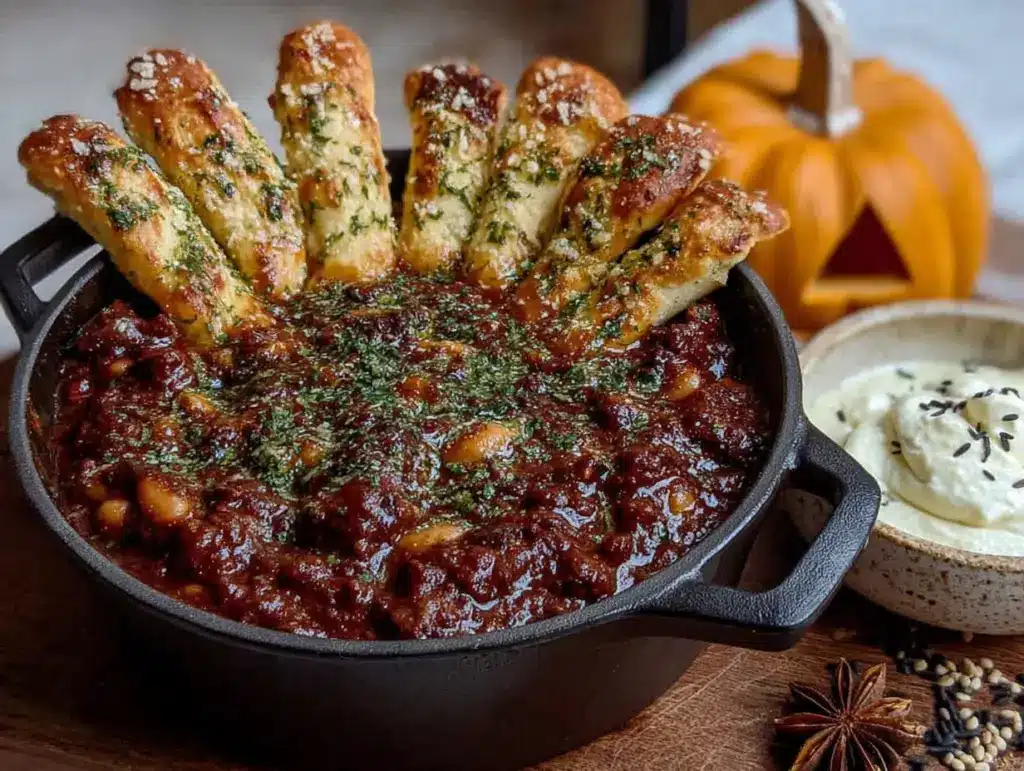
This was supposed to be a simple weeknight chili—the kind you throw together on a Wednesday when you’re too tired to think. I had everything laid out: ground beef, canned tomatoes, my usual spice blend. But then my four-year-old appeared in the kitchen doorway holding a bag of pretzel dough she’d pulled from the freezer, and I was already ten minutes behind schedule because the dog had escaped through the back gate. What came out of that chaotic evening was nothing like the plan—and better.
The pretzel dough sat there on the counter, thawing against my will. I couldn’t just put it back. So I did what any slightly desperate parent might do: I shaped it into long, knobby fingers, threw some almond slivers on for fingernails, and baked them off while the chili simmered. Honestly, I expected my family to laugh at the whole thing. Instead, my daughter grabbed one, dipped it straight into her bowl, and said, “Mom, this is the best dinner ever.”
That’s how this cozy one-pot Halloween chili with breadstick fingers was born—from a distracted moment, a freezer raid, and a kid who refused to eat anything that didn’t look slightly creepy. I’ve since perfected the chili (it’s rich, smoky, and just the right amount of spicy) and the breadsticks (crispy on the outside, soft on the inside, and genuinely unsettling to look at). Maybe you’ve been there—staring at a pot of chili, wondering how to make a Tuesday night feel special without losing your mind. This is that recipe.
Why You’ll Love This Recipe
Let me tell you, I’ve tested this chili six times to get it just right. The first batch was too watery. The second was too spicy for my kids. The third? Perfect, but the breadsticks fell apart. I’ve been a recipe developer for over a decade, and this one taught me that sometimes the best dishes come from stubbornness. Here’s why this one works:
- One-Pot Wonder : Everything comes together in a single Dutch oven or large pot. Less cleanup, more time for decorating the front porch or watching a scary movie.
- Simple Ingredients : No obscure spices or specialty items. You likely have canned tomatoes, beans, chili powder, and ground meat in your pantry right now.
- Perfect for Halloween : The breadstick fingers look genuinely creepy but taste delicious. Kids love them, adults pretend to be grossed out while reaching for seconds.
- Crowd-Pleaser : I brought this to a neighborhood potluck last October, and it was the first dish to disappear. Even the teenager who “doesn’t eat beans” went back for thirds.
- Unbelievably Comforting : The texture is thick and hearty, the flavor deep and smoky. It’s the kind of chili that makes you want to curl up on the couch with a blanket and a good book.
What makes this recipe different from the dozens of other chili recipes out there? It’s the combination of a slow-simmered, deeply flavorful base with those ridiculous, wonderful breadstick fingers. The chili itself is rich enough to stand alone, but the breadsticks add a playful, interactive element that turns dinner into an event. It’s comfort food reimagined—spookier, more fun, but with the same soul-soothing satisfaction. Perfect for impressing guests without stress, or turning a simple Tuesday into something memorable.
What Ingredients You Will Need
This recipe uses simple, wholesome ingredients to deliver bold flavor and satisfying texture without the fuss. Most of these are pantry staples, which means you can whip this up even on a busy weeknight.
For the Chili
- 2 tablespoons olive oil (use avocado oil if preferred—both work well for browning the meat)
- 1 large yellow onion, diced (about 1 ½ cups—adds sweetness and depth)
- 4 cloves garlic, minced (fresh is best, but jarred minced garlic works in a pinch)
- 2 pounds ground beef (80/20 blend is ideal for flavor; drain excess fat if needed)
- 1 medium red bell pepper, diced (adds color and a slight sweetness)
- 2 cans (15 ounces each) fire-roasted diced tomatoes (I prefer Muir Glen for their smoky flavor)
- 1 can (15 ounces) tomato sauce (no-salt-added gives you control over seasoning)
- 2 cans (15 ounces each) kidney beans, drained and rinsed (dark red kidney beans hold their shape best)
- 1 can (15 ounces) black beans, drained and rinsed (adds creaminess and protein)
- 3 tablespoons chili powder (use a good-quality blend like Penzeys or Spice Islands)
- 1 tablespoon ground cumin (toasted cumin seeds ground fresh are amazing if you have them)
- 1 teaspoon smoked paprika (this is non-negotiable—it gives the chili its deep, campfire-like flavor)
- 1 teaspoon dried oregano (Mexican oregano if you can find it)
- ½ teaspoon cayenne pepper (optional—add more for extra heat, skip for milder chili)
- 1 teaspoon salt (adjust to taste)
- ½ teaspoon black pepper
- 2 cups beef broth (low-sodium preferred; chicken broth works if that’s what you have)
- 1 tablespoon brown sugar (balances the acidity of the tomatoes)
- 1 tablespoon Worcestershire sauce (adds umami depth)
- 1 bay leaf (remember to remove before serving!)
For the Breadstick Fingers
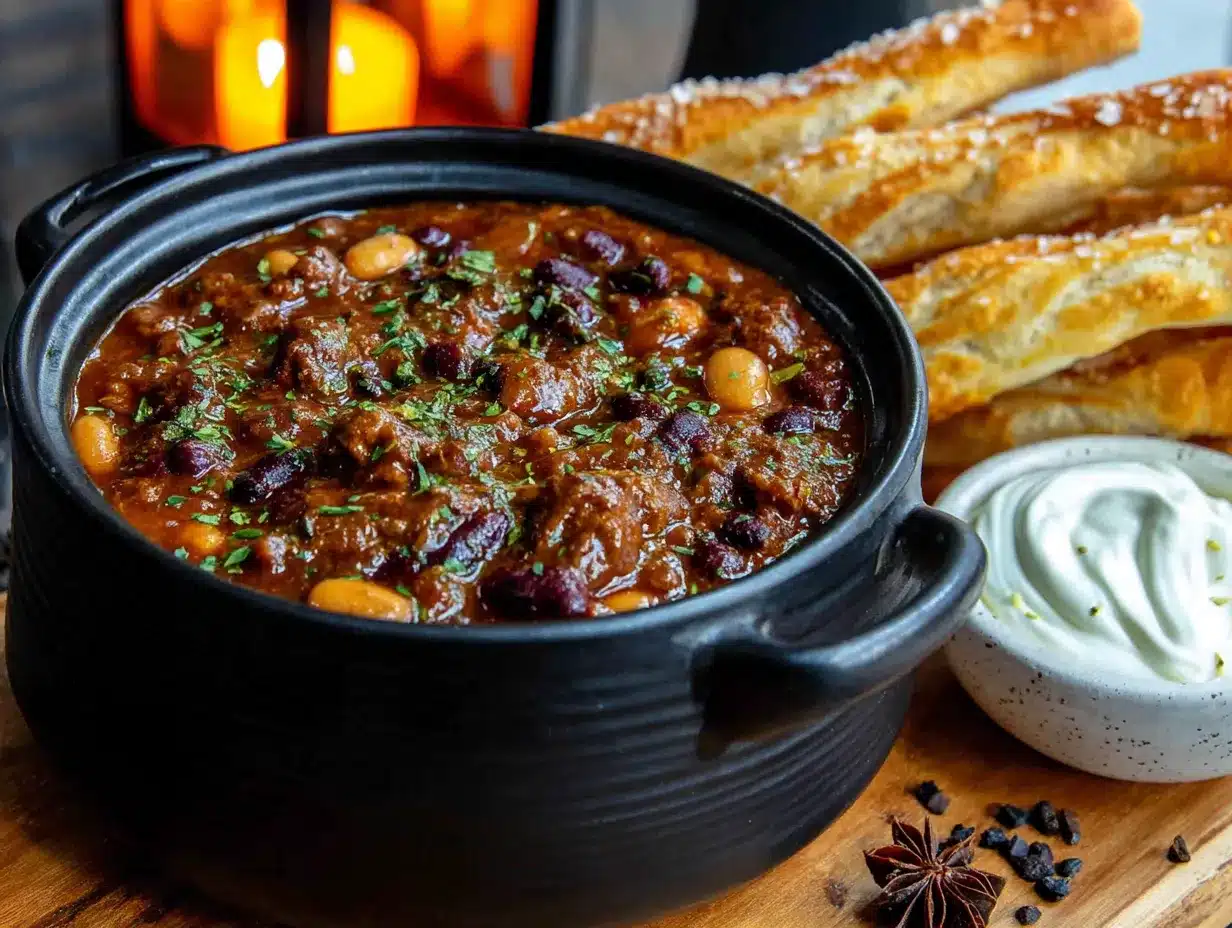
- 1 pound store-bought pizza dough (or homemade if you’re ambitious—I use Trader Joe’s or Pillsbury refrigerated dough for convenience)
- 2 tablespoons butter, melted
- 1 clove garlic, minced (for brushing on top)
- 1 teaspoon flaky sea salt (Maldon is my go-to)
- 24 whole almonds (blanched or raw—these become the fingernails)
- 1 tablespoon sesame seeds (optional, for added texture and creepy knuckle details)
For Topping (Optional but Recommended)
- Shredded cheddar cheese
- Sour cream
- Fresh cilantro, chopped
- Diced red onion
Ingredient Selection Tip : For the best chili, look for fire-roasted tomatoes—they add a smoky complexity that regular diced tomatoes just can’t match. If you’re using dried beans instead of canned, soak them overnight and cook until tender before adding to the chili. And for the breadsticks, any pizza dough works, but avoid the thin-crust variety—you want something that will puff up and stay soft inside.
Equipment Needed
You don’t need a fancy kitchen to make this recipe. Here’s what you’ll need:
- Large Dutch oven or heavy-bottomed pot (5 to 6 quarts—I use my trusty Le Creuset, but any sturdy pot works)
- Baking sheet (for the breadstick fingers—rimmed is best to catch any butter drips)
- Parchment paper (prevents sticking and makes cleanup a breeze)
- Sharp knife (for scoring the knuckle lines on the breadsticks)
- Wooden spoon or spatula (for stirring the chili—a flat-edged wooden spoon is perfect for breaking up the ground beef)
- Measuring cups and spoons
- Garlic press (optional, but saves time)
- Pastry brush (for buttering the breadsticks)
If you don’t have a Dutch oven, a large stockpot works fine—just be aware that the chili might cook slightly faster since the heat distributes differently. For the breadsticks, you could use a silicone baking mat instead of parchment paper if you prefer. And honestly, if you don’t have a pastry brush, just use a spoon to drizzle the butter over the dough—it’s not pretty, but it works.
Preparation Method
This recipe comes together in about an hour, with most of that time being hands-off simmering. Here’s how to do it:
- Start the chili base. Heat the olive oil in your Dutch oven over medium-high heat. Add the diced onion and cook, stirring occasionally, until softened and translucent—about 5 minutes. Add the minced garlic and cook for 30 seconds until fragrant. Don’t let the garlic burn; it turns bitter fast.
- Brown the beef. Add the ground beef to the pot. Break it up with your wooden spoon and cook until no longer pink, about 6 to 8 minutes. If there’s a lot of excess fat (more than 2 tablespoons), drain it off, but leave a little for flavor. I once drained all the fat and ended up with a chili that tasted flat—trust me, a little fat carries the spices.
- Add the vegetables and spices. Stir in the diced red bell pepper, chili powder, cumin, smoked paprika, oregano, cayenne (if using), salt, and black pepper. Cook for 2 minutes, stirring constantly. This toasts the spices and wakes up their flavors. Your kitchen will start smelling incredible at this point.
- Build the liquid base. Pour in the fire-roasted tomatoes (with their juices), tomato sauce, beef broth, brown sugar, Worcestershire sauce, and add the bay leaf. Stir everything together, scraping up any browned bits from the bottom of the pot—that’s pure flavor.
- Simmer the chili. Bring the chili to a boil, then reduce the heat to low. Cover and let it simmer for 30 minutes, stirring occasionally. The longer it simmers, the deeper the flavor becomes. If you have time, let it go for 45 minutes to an hour. Just keep an eye on the liquid level—if it gets too thick, add a splash more broth.
- Add the beans. After 30 minutes, stir in the drained kidney beans and black beans. Simmer uncovered for another 10 to 15 minutes, until the beans are heated through and the chili has thickened to your liking. Remove the bay leaf before serving.
- While the chili simmers, make the breadstick fingers. Preheat your oven to 400°F (200°C). Line a baking sheet with parchment paper. On a lightly floured surface, divide the pizza dough into 8 equal pieces. Roll each piece into a long, thin log about 6 inches long and ½ inch thick—think the shape of a finger, slightly tapered at one end.
- Shape the fingers. Place the dough logs on the prepared baking sheet, leaving about 2 inches between each. Use a sharp knife to score 2 to 3 shallow lines across each “finger” to create knuckle creases. Press one almond firmly into the tapered end of each finger to create a fingernail. If the almond doesn’t stick, dab a little water under it.
- Bake the breadsticks. In a small bowl, mix the melted butter with the minced garlic. Brush this mixture generously over each breadstick finger. Sprinkle with flaky sea salt and sesame seeds (if using). Bake for 12 to 15 minutes, until golden brown and puffed. They should be crispy on the outside but soft inside—like a good breadstick.
- Serve immediately. Ladle the chili into bowls and arrange 2 breadstick fingers on top or alongside each bowl. They’re meant to be dipped, so encourage your guests to grab one and dunk it right in. Add your favorite toppings—cheese, sour cream, cilantro, red onion—and watch everyone dig in.
Sensory Cue : The chili is ready when it’s thick enough to coat the back of a spoon. When you stir it, you should see the bottom of the pot briefly before the chili slides back into place. The breadsticks should be golden with visible knuckle lines and slightly crispy edges.
Cooking Tips & Techniques
I’ve made this chili more times than I can count, and I’ve learned a few things the hard way. Here’s what I wish someone had told me:
Don’t skip the spice-toasting step. The first time I made this, I dumped all the spices in with the liquid and wondered why the chili tasted flat. Toasting the chili powder, cumin, and paprika in the hot oil for a minute transforms them—it releases their essential oils and deepens their flavor. It’s a small step that makes a huge difference.
Let the chili rest. If you can, make the chili a day ahead. The flavors meld and deepen overnight in the fridge, and the texture becomes even better. I’ve made this for Halloween parties two days in advance, and it’s always better on day two. Just reheat gently on the stove, adding a splash of broth if it’s too thick.
Breadstick troubleshooting. My first batch of breadstick fingers looked more like fat worms than fingers. The trick is rolling the dough thin enough—about ½ inch thick—and tapering one end. If the dough springs back when you roll it, let it rest at room temperature for 10 minutes to relax the gluten. And don’t skip the knuckle lines; they’re what makes them look creepy rather than just weird.
Multitasking strategy. While the chili simmers, prep the breadstick dough and shape the fingers. That way, you can pop them in the oven right when the chili is done, and everything arrives at the table hot at the same time. I’ve learned to do this after burning my fingers trying to shape dough while stirring chili with the other hand.
Consistency tip. If your chili turns out too thin, mix 2 tablespoons of cornstarch with 2 tablespoons of cold water to make a slurry, then stir it into the simmering chili. It will thicken in about 2 minutes. If it’s too thick, add more broth or water a quarter cup at a time until it reaches your preferred consistency.
Variations & Adaptations
One of the best things about this recipe is how flexible it is. Here are some ways to make it your own:
Vegetarian Version : Swap the ground beef for 2 cans of pinto beans (drained and rinsed) and 1 cup of finely chopped mushrooms. The mushrooms add that meaty umami texture, and the extra beans make it just as hearty. I tested this version for a vegetarian friend, and she said it was the best chili she’d ever had—even before I told her there was no meat.
Extra Spicy : Add 1 diced jalapeño (seeds included) when you cook the onions, and stir in 1 tablespoon of chipotle peppers in adobo sauce (finely chopped) along with the tomatoes. The chipotle adds a smoky heat that’s incredible. Just warn your guests—this version is not for the faint of heart.
White Chicken Chili Variation : Use shredded cooked chicken instead of ground beef, swap the kidney beans for white beans (cannellini or great northern), and replace the tomato-based ingredients with 2 cups of chicken broth and 1 cup of heavy cream. Omit the chili powder and use 2 teaspoons of cumin and 1 teaspoon of dried oregano instead. Top with the same breadstick fingers, and you’ve got a completely different but equally cozy dish.
Gluten-Free Adaptation : The chili itself is naturally gluten-free (just check your Worcestershire sauce label—some brands contain gluten). For the breadsticks, use a gluten-free pizza dough blend. I’ve tried several, and the ones from King Arthur Baking work best—they’re soft and pliable, easy to shape into fingers.
Slow Cooker Option : Brown the beef and onions in a skillet first, then transfer everything (except the beans) to a slow cooker. Cook on low for 6 to 8 hours or high for 3 to 4 hours. Add the beans in the last 30 minutes. Bake the breadsticks fresh when you’re ready to serve—they don’t hold up well in the slow cooker.
Serving & Storage Suggestions
This chili is best served hot, straight from the pot. Ladle it into deep bowls and arrange 2 breadstick fingers on the rim or alongside each bowl—they’re meant to be dipped, so make sure they’re accessible. The contrast between the warm, hearty chili and the crisp, buttery breadstick is pure magic.
What to serve with it : A simple green salad with a tangy vinaigrette cuts through the richness of the chili. If you want to go all out, serve with a side of roasted cornbread or a platter of cheese and crackers. For drinks, a cold beer (a lager or pale ale works well) or a glass of red wine (Zinfandel or Syrah) complements the smoky flavors. For kids, apple cider is perfect.
Storage : The chili keeps beautifully in the refrigerator for up to 5 days. Store it in an airtight container—the flavors will actually improve over the first couple of days. The breadstick fingers are best eaten fresh, but you can store leftovers in a paper bag at room temperature for up to 2 days. Reheat them in a 350°F oven for 5 minutes to restore their crispness.
Freezing : The chili freezes wonderfully for up to 3 months. Let it cool completely, then transfer to freezer-safe containers or zip-top bags. Thaw overnight in the refrigerator and reheat on the stove or in the microwave. I like to freeze individual portions for quick lunches. Do not freeze the breadstick fingers—they become soggy when thawed.
Reheating : Reheat the chili on the stovetop over medium-low heat, stirring occasionally, until bubbling. Add a splash of broth or water if it’s too thick. In the microwave, heat in 1-minute intervals, stirring between each, until hot. For the breadsticks, reheat in a 350°F oven for 5 to 7 minutes or in an air fryer at 350°F for 3 minutes.
Flavor development note : This chili is one of those rare dishes that tastes even better the next day. The spices meld, the beans absorb the broth, and everything becomes more cohesive. If you can, make it a day ahead—your future self will thank you.
Nutritional Information & Benefits
Per serving (about 1 ½ cups of chili with 2 breadstick fingers):
- Calories: 485
- Protein: 32g
- Fat: 18g
- Carbohydrates: 48g
- Fiber: 12g
- Sugar: 8g
- Sodium: 890mg
This chili is packed with protein from the beef and beans, making it a satisfying meal that keeps you full for hours. The fiber from the beans and vegetables supports digestive health and helps stabilize blood sugar levels. Smoked paprika and chili powder are rich in antioxidants, particularly capsaicin, which has anti-inflammatory properties. The kidney beans are an excellent source of iron and folate, while the bell pepper provides a healthy dose of vitamin C.
Dietary considerations : This recipe is dairy-free (if you skip the cheese and sour cream toppings) and can be made gluten-free with the right Worcestershire sauce and gluten-free pizza dough. It’s naturally nut-free (the almonds on the breadsticks are optional and easily omitted). For a lower-sodium version, use no-salt-added canned tomatoes and beans, and reduce the added salt.
I love that this chili feels indulgent but is actually quite balanced. It’s the kind of meal that nourishes you from the inside out—comforting, hearty, and full of good stuff. Plus, it’s a great way to sneak extra vegetables into a meal without anyone complaining.
Conclusion
This cozy one-pot Halloween chili with breadstick fingers started as a happy accident born from a distracted evening and a freezer full of pretzel dough. But it’s become one of my most-requested recipes, and I think I know why. It’s not just the rich, smoky chili or the delightfully creepy breadsticks—it’s the way it turns an ordinary dinner into something special. It’s the laughter when someone pulls a “finger” out of their bowl, the satisfaction of dipping a warm, buttery breadstick into that deep, flavorful chili, and the way it brings people together around the table.
I hope you’ll make this recipe your own. Add more spice if you like it hot, swap in different beans, or experiment with the breadstick shapes—maybe make them into little ghosts or bats instead. The beauty of this dish is that it’s forgiving and fun. Don’t worry about making it perfect; just enjoy the process and the delicious results.
I’d love to hear how it turns out for you! Drop a comment below and let me know if your kids screamed with delight (or mock horror) at the breadstick fingers. Share your photos on social media and tag me—I can’t wait to see your creepy creations. Until next time, happy cooking, and may your chili always be thick and your breadsticks always be crisp!
Frequently Asked Questions
Can I make this chili in an Instant Pot?
Absolutely! Use the sauté function to brown the beef and onions, then add all remaining ingredients (except the beans). Pressure cook on high for 15 minutes, then quick release. Stir in the beans and let it sit for 5 minutes before serving. Bake the breadsticks separately while the chili cooks.
How do I make the breadstick fingers look more realistic?
Use a sharp knife to score 2 to 3 shallow lines across each finger for knuckles. Press the almonds in firmly at the tapered end, and brush with garlic butter for a shiny, slightly translucent look. For extra creepiness, add a drop of red food coloring mixed with water to the “cuticle” area around the almond.
Can I use ground turkey instead of beef?
Yes, ground turkey works well. Use 93% lean turkey to avoid it drying out. You may need to add an extra tablespoon of olive oil since turkey has less fat than beef. The flavor will be slightly milder, so consider adding an extra teaspoon of chili powder to compensate.
How do I prevent the breadsticks from getting soggy?
Bake the breadsticks until they’re golden brown and slightly crispy on the outside—this creates a barrier that prevents them from absorbing too much moisture. Store them separately from the chili until serving, and don’t let them sit in the chili for more than a few minutes. If you’re serving them as dippers, place them on the side of the bowl rather than in the chili.
Can I double this recipe for a crowd?
Definitely! The chili doubles easily—just use a larger pot (8 to 10 quarts) and increase the simmering time by 10 to 15 minutes. For the breadsticks, you’ll need 2 pounds of pizza dough and 2 baking sheets. Bake them in batches or on two racks, rotating halfway through. This recipe is perfect for Halloween parties or game-day gatherings.
Pin This Recipe!
Cozy One-Pot Halloween Chili with Breadstick Fingers

A rich, smoky one-pot chili served with creepy but delicious breadstick fingers made from pizza dough. Perfect for Halloween or any night you want to turn dinner into a fun, comforting event.
- Prep Time: 20 minutes
- Cook Time: 45 minutes
- Total Time: 1 hour 5 minutes
- Yield: 8 servings 1x
- Category: Main Course
- Cuisine: American
Ingredients
- 2 tablespoons olive oil
- 1 large yellow onion, diced (about 1 ½ cups)
- 4 cloves garlic, minced
- 2 pounds ground beef (80/20 blend)
- 1 medium red bell pepper, diced
- 2 cans (15 ounces each) fire-roasted diced tomatoes
- 1 can (15 ounces) tomato sauce (no-salt-added preferred)
- 2 cans (15 ounces each) kidney beans, drained and rinsed
- 1 can (15 ounces) black beans, drained and rinsed
- 3 tablespoons chili powder
- 1 tablespoon ground cumin
- 1 teaspoon smoked paprika
- 1 teaspoon dried oregano
- ½ teaspoon cayenne pepper (optional)
- 1 teaspoon salt
- ½ teaspoon black pepper
- 2 cups beef broth (low-sodium preferred)
- 1 tablespoon brown sugar
- 1 tablespoon Worcestershire sauce
- 1 bay leaf
- 1 pound store-bought pizza dough
- 2 tablespoons butter, melted
- 1 clove garlic, minced (for breadsticks)
- 1 teaspoon flaky sea salt
- 24 whole almonds (blanched or raw)
- 1 tablespoon sesame seeds (optional)
- Shredded cheddar cheese (for topping, optional)
- Sour cream (for topping, optional)
- Fresh cilantro, chopped (for topping, optional)
- Diced red onion (for topping, optional)
Instructions
- Heat olive oil in a Dutch oven over medium-high heat. Add diced onion and cook until softened, about 5 minutes. Add minced garlic and cook for 30 seconds until fragrant.
- Add ground beef and cook, breaking it up, until no longer pink, about 6 to 8 minutes. Drain excess fat if needed, leaving about 2 tablespoons for flavor.
- Stir in diced red bell pepper, chili powder, cumin, smoked paprika, oregano, cayenne (if using), salt, and black pepper. Cook for 2 minutes, stirring constantly.
- Pour in fire-roasted tomatoes (with juices), tomato sauce, beef broth, brown sugar, Worcestershire sauce, and bay leaf. Stir, scraping up any browned bits from the bottom.
- Bring to a boil, then reduce heat to low. Cover and simmer for 30 minutes, stirring occasionally.
- Stir in drained kidney beans and black beans. Simmer uncovered for 10 to 15 minutes until beans are heated through and chili has thickened. Remove bay leaf.
- While chili simmers, preheat oven to 400°F (200°C). Line a baking sheet with parchment paper.
- On a lightly floured surface, divide pizza dough into 8 equal pieces. Roll each into a long, thin log about 6 inches long and ½ inch thick, tapered at one end.
- Place dough logs on prepared baking sheet, leaving 2 inches between each. Score 2 to 3 shallow lines across each to create knuckle creases. Press one almond firmly into the tapered end for a fingernail.
- Mix melted butter with minced garlic. Brush over each breadstick finger. Sprinkle with flaky sea salt and sesame seeds (if using).
- Bake for 12 to 15 minutes until golden brown and puffed.
- Serve chili in bowls with 2 breadstick fingers on top or alongside. Add desired toppings.
Notes
For best flavor, toast spices in hot oil for a minute before adding liquids. Chili can be made a day ahead for deeper flavor. Breadsticks are best eaten fresh; reheat in a 350°F oven for 5 minutes if needed. If chili is too thin, mix 2 tablespoons cornstarch with 2 tablespoons cold water and stir in; if too thick, add more broth.
Nutrition
- Serving Size: 1 ½ cups chili with
- Calories: 485
- Sugar: 8
- Sodium: 890
- Fat: 18
- Saturated Fat: 6
- Carbohydrates: 48
- Fiber: 12
- Protein: 32
Keywords: Halloween chili, one-pot chili, breadstick fingers, creepy breadsticks, chili recipe, Halloween dinner, comfort food


