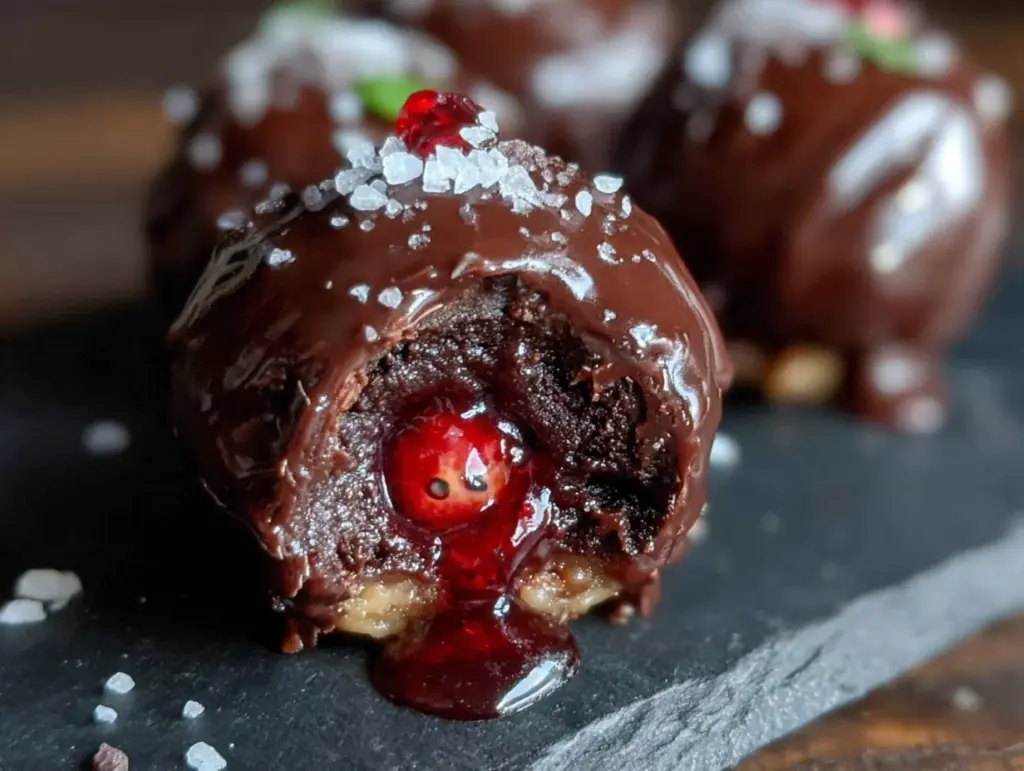
I was standing in the baking aisle of our local grocery store last October, staring at a bag of candy eyeballs like they held the secrets to the universe. My cart was half-full with things I didn’t actually need—a glittery skeleton decoration, a bag of pretzel sticks shaped like bones, and a pumpkin that was honestly too small to carve. But those eyes. Those little white discs with their pupils staring back at me. And suddenly I was seven years old at my Aunt Carol’s kitchen table, her hands covered in powdered sugar, showing me how to roll dough into perfect little spheres.
Aunt Carol wasn’t really my aunt—she was our next-door neighbor, a retired schoolteacher who never had kids of her own but somehow knew exactly how to talk to them. Every Halloween, she’d invite me and my brother over to make “monster treats,” which was her code for anything that could be rolled into a ball and decorated to look slightly horrifying. She never used a recipe. She’d just pull ingredients from her cupboards—things I now recognize as basic pantry staples—and somehow they’d turn into something magical. I remember the way her kitchen smelled that day: vanilla and butter and something slightly toasted, like she’d been baking all morning just for us.
I grabbed the bag of candy eyeballs and put them in my cart. Honestly, I didn’t even know what I was going to make with them yet. But I knew I needed to try. Maybe you’ve been there—that moment when a random grocery store item triggers a memory so strong you can almost taste it. For me, it was those eyes. And the result, after a few messy attempts and one incident involving too much coconut oil, is what I’m sharing with you today: Easy No-Bake Monster Eyeball Truffles.
They’re not exactly what Aunt Carol made—she never used cream cheese or white chocolate—but they capture the same feeling. The joy of making something that looks ridiculous and tastes amazing. The satisfaction of rolling dough between your palms. The way your friends laugh when you hand them a truffle that’s literally staring back at them. That’s why I keep making these. Because some recipes aren’t just about the food—they’re about the moment you get to share it.
Why You’ll Love This Recipe
Let me tell you why these truffles have become my go-to Halloween treat, even over the fancy stuff you see on Pinterest. First off, they’re genuinely no-bake. I mean that in the truest sense—no oven, no stove, no complicated equipment. If you can stir ingredients together and roll them into balls, you can make these. That’s it.
- No Baking Required: Perfect for hot October days when you don’t want to turn on the oven, or for last-minute Halloween party prep when you’re already running late (not that I’ve ever been in that situation… okay, maybe once or twice).
- Simple Ingredients: You probably already have most of these in your kitchen. Cream cheese, vanilla extract, powdered sugar, and some kind of cookie or cracker crumbs. No fancy grocery store trips required.
- Kid-Friendly Fun: This is the kind of recipe where you can actually let kids help without worrying about hot surfaces or sharp knives. My niece, who is notoriously picky about “weird food,” spent an entire afternoon rolling these and didn’t even complain.
- Perfect for Halloween Parties: They look impressive, they’re portable, and they always get a reaction. I brought a batch to my friend’s costume party last year and they were gone within twenty minutes.
- Customizable: You can make them spooky, cute, or somewhere in between. The base recipe is so forgiving that you can really let your creativity run wild.
What makes these truffles different from other Halloween treats I’ve tried? It’s the texture. The inside is creamy and rich—almost like a cheesecake filling—while the outside has that satisfying snap of white chocolate. When you bite into one, you get that contrast between smooth and crunchy, sweet and slightly tangy. It’s not just another sugar bomb. It’s actually balanced, which means you can eat three or four without feeling like you need to lie down afterward.
These truffles are the kind of recipe that makes you close your eyes after the first bite. They’re comfort food disguised as something spooky. Perfect for impressing guests without stress, or turning a simple Halloween gathering into something memorable. And honestly? They’re just fun to make.
What Ingredients You Will Need
This recipe uses simple, wholesome ingredients to deliver that rich, creamy texture and just the right amount of sweetness. Most of these are pantry staples, which makes these truffles perfect for spontaneous Halloween baking sessions.
For the Truffle Base:
- 8 ounces cream cheese, softened (I recommend Philadelphia for the creamiest texture—trust me on this one, the store brands can be a bit grainy)
- 2 cups powdered sugar (also called confectioners’ sugar—sift it if you have the patience, but I’ve skipped this step many times and it still turned out fine)
- 1 teaspoon vanilla extract (pure vanilla extract makes a difference here, but imitation works in a pinch)
- 3 cups crushed vanilla wafer cookies (about 60 wafers—you can also use shortbread cookies or graham crackers if that’s what you have on hand)
- Pinch of salt (just a tiny bit to balance the sweetness)
For the Coating and Decoration:
- 12 ounces white chocolate chips or melting wafers (I like Ghirardelli white chocolate chips for the smoothest melt, but any brand works)
- 1 tablespoon coconut oil or vegetable shortening (this helps thin out the chocolate for a smoother coating)
- 24-30 candy eyeballs (you can find these at most grocery stores or craft stores—they come in different sizes, so pick your favorite)
- Red gel food coloring (optional, for making bloodshot veins—I use Wilton brand because it’s concentrated and doesn’t affect the texture)
Ingredient Tips from My Kitchen:
Let me share a few things I’ve learned through trial and error. First, make sure your cream cheese is truly softened—not cold, not melted, just soft enough that you can easily press your finger into it. Cold cream cheese will leave lumps in your truffle base, and nobody wants a lumpy eyeball.
For the cookie crumbs, I’ve found that vanilla wafers give the best texture, but I’ve also made these with chocolate wafers, which turned the truffles a darker color and made them look even more sinister. If you’re gluten-free, use gluten-free vanilla wafers or crushed gluten-free graham crackers. The texture will be slightly different, but still delicious.
One thing I learned the hard way: don’t skip the salt. I know it seems weird in a sweet recipe, but that tiny pinch makes everything taste more balanced. Without it, the truffles can taste flat and one-dimensional.
Equipment Needed
You don’t need a fancy kitchen to make these truffles. Here’s what I use, along with some alternatives if you’re working with limited tools.
- Mixing bowls: One large bowl for the truffle base, one medium bowl for melting chocolate. Glass or metal works best—plastic bowls can sometimes hold onto grease.
- Electric hand mixer or stand mixer: You can mix by hand with a wooden spoon, but it takes some elbow grease. I’ve done both, and honestly, the hand mixer is worth digging out of the cabinet.
- Baking sheet lined with parchment paper: For chilling the truffles before dipping. If you don’t have parchment, wax paper works too.
- Small cookie scoop or tablespoon: For portioning the truffle mixture evenly. I use a 1-tablespoon scoop and it’s perfect.
- Double boiler or microwave-safe bowl: For melting the white chocolate. I use the microwave method because it’s faster, but a double boiler gives you more control.
- Fork or dipping tool: For coating the truffles in chocolate. A regular dinner fork works great—just tap off the excess.
- Piping bag or small zip-top bag: For adding red veins if you’re going for a bloodshot look. A toothpick also works in a pinch.
My favorite budget-friendly tip: use a styrofoam block or a piece of cardboard covered in foil to hold the truffles while the chocolate sets. It keeps them from getting flat spots on the bottom.
Preparation Method
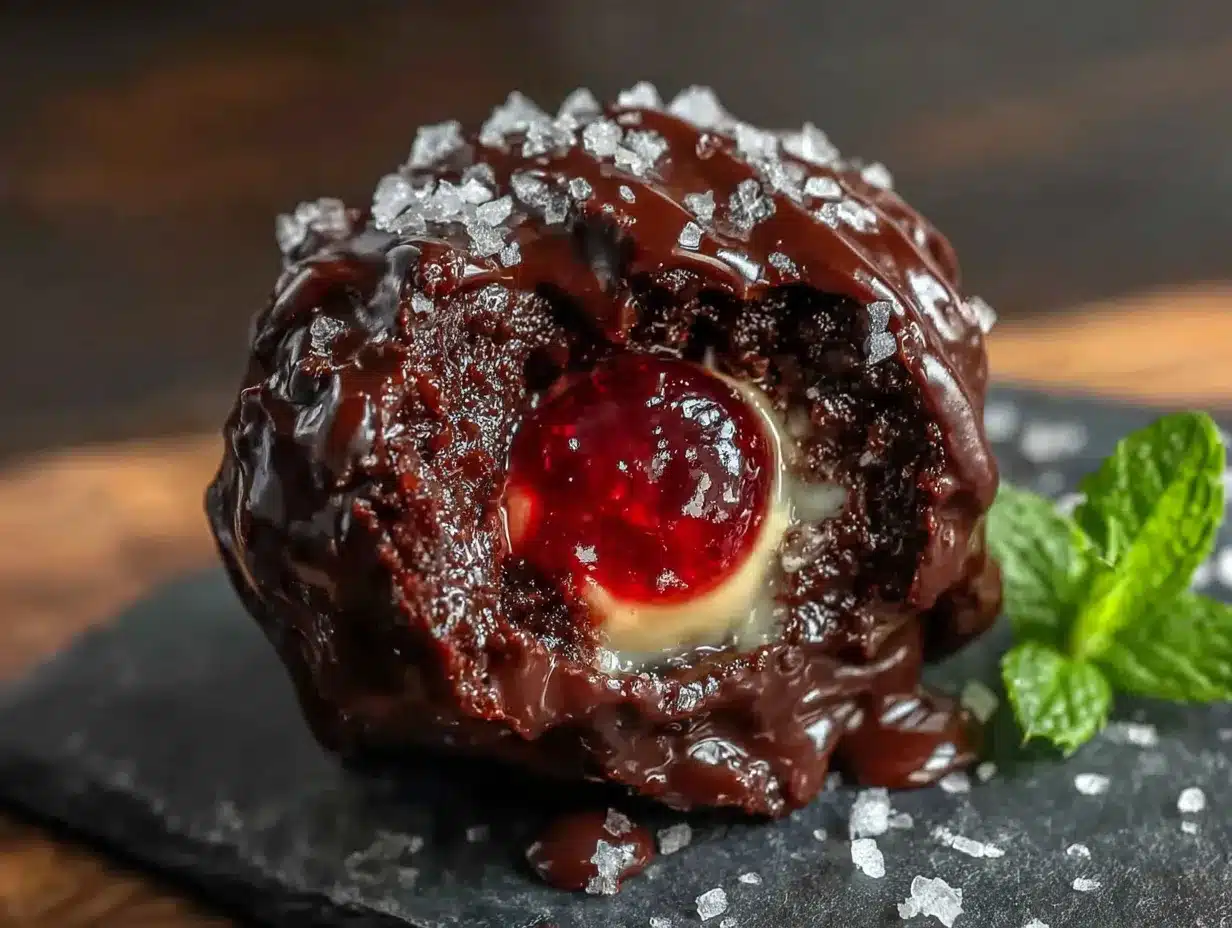
Alright, let’s get into the actual process. I’ve broken this down into clear steps with all the little details I wish someone had told me the first time I made these.
- Make the truffle base. In a large mixing bowl, beat the softened cream cheese with an electric mixer until it’s smooth and creamy—about 1 minute. Add the powdered sugar, one cup at a time, beating on low speed so it doesn’t fly everywhere. Trust me on this one. I learned that lesson the hard way and spent ten minutes wiping powdered sugar off my countertops. Add the vanilla extract and pinch of salt, then beat until everything is combined. The mixture should be thick and smooth, like a soft frosting.
- Add the cookie crumbs. Pour in the crushed vanilla wafers and stir with a spatula or wooden spoon until evenly distributed. The mixture will be thick and slightly stiff. If it seems too soft to roll into balls, pop it in the refrigerator for 15-20 minutes. If it seems too dry, add a tablespoon of milk or cream. I’ve had both happen depending on the brand of cookies I used.
- Roll into balls. Using a small cookie scoop or tablespoon, portion out the mixture and roll between your palms to form smooth balls. Aim for about 1 inch in diameter—slightly smaller than a ping pong ball. Place them on a parchment-lined baking sheet. You should get about 24-30 truffles, depending on how big you roll them.
- Chill the truffles. Pop the baking sheet into the refrigerator for at least 30 minutes, or up to 2 hours. This step is crucial—if the truffles aren’t thoroughly chilled, they’ll fall apart when you dip them in the warm chocolate. I learned this the hard way when my first batch turned into chocolate soup.
- Melt the white chocolate. Place the white chocolate chips and coconut oil in a microwave-safe bowl. Microwave in 30-second intervals, stirring between each, until smooth and fully melted. Be careful not to overheat—white chocolate burns easily and gets grainy. If you’re using a double boiler, keep the water at a gentle simmer and stir constantly.
- Dip the truffles. Remove the chilled truffles from the refrigerator. Working one at a time, drop a truffle into the melted white chocolate. Use a fork to gently turn it and coat completely. Lift it out with the fork, tapping gently on the edge of the bowl to let excess chocolate drip off. Place it back on the parchment-lined baking sheet. Work quickly—the truffles will warm up and start to soften if they sit out too long.
- Add the eyes. While the chocolate is still wet, press two candy eyeballs into each truffle. I like to place them slightly asymmetrical for a more “monster” look. If the chocolate starts to set before you add the eyes, just dip the back of the eyeball in a tiny bit of melted chocolate to help it stick.
- Add bloodshot veins (optional). If you want extra creepy truffles, mix a small amount of red gel food coloring with a drop of water to thin it out. Use a toothpick or the tip of a piping bag to draw thin red lines radiating from the eyeballs. This step is totally optional, but it’s what takes these from “cute Halloween treat” to “genuinely unsettling monster eyeball.”
- Let the chocolate set. Return the baking sheet to the refrigerator for 15-20 minutes, or until the chocolate is completely firm. If you’re in a hurry, you can pop them in the freezer for 5-10 minutes, but watch them carefully so they don’t get too cold and develop condensation.
Sensory Cues: When you’re rolling the truffles, the mixture should feel cool and slightly sticky but hold its shape when pressed. The melted white chocolate should be smooth and glossy, thick enough to coat the truffle but thin enough to drip off easily. When you bite into a finished truffle, you should hear a clean snap from the chocolate coating, followed by the creamy, soft interior.
Cooking Tips & Techniques
After making these truffles more times than I care to count (let’s just say my coworkers have become very familiar with them), I’ve picked up a few tricks that make the process smoother.
The cream cheese temperature is everything. I cannot stress this enough. If your cream cheese is too cold, you’ll end up with lumpy truffles. If it’s too warm, the mixture will be too soft to roll. Let it sit on the counter for at least 30 minutes before you start. If you forget (which I do, constantly), you can microwave it on 50% power for 10-15 seconds, but watch it carefully—you don’t want it to start melting.
Use a light hand when rolling. Don’t squeeze the truffle mixture too tightly—you want them to be smooth, not dense. I roll them just enough to form a ball, then let them chill. The texture is much better this way.
Work in small batches. When you’re dipping the truffles, take only 4-5 out of the refrigerator at a time. Keep the rest chilled until you’re ready for them. Warm truffles = chocolate disaster. I learned this when I tried to rush through the process and ended up with a bowl of chocolate soup with truffle chunks floating in it.
Thin your chocolate properly. White chocolate is notoriously finicky. Adding that tablespoon of coconut oil or shortening makes a huge difference in how smoothly it coats the truffles. If your chocolate starts to thicken while you’re working, pop it back in the microwave for 10 seconds and stir.
Don’t worry about perfection. Honestly, the slightly imperfect ones look more like real monster eyeballs anyway. The ones with a little chocolate drip here, a slightly crooked eye there—those are the ones that get the biggest laughs at parties.
Variations & Adaptations
One of the best things about this recipe is how easy it is to adapt. Here are some variations I’ve tried and loved.
Chocolate Monster Eyeballs: Swap the white chocolate coating for dark or milk chocolate. The dark chocolate gives a more dramatic, gothic look that’s perfect for a spookier vibe. Plus, the bitterness of dark chocolate balances the sweet filling beautifully.
Peanut Butter Monster Eyeballs: Add 1/4 cup creamy peanut butter to the truffle base along with the cream cheese. Reduce the powdered sugar by 1/4 cup to compensate. The peanut butter adds a savory note that makes these dangerously addictive.
Vegan Monster Eyeballs: Use vegan cream cheese and vegan butter (or coconut cream) in the base. Coat with vegan white chocolate. I’ve tested this version and it works surprisingly well—just make sure everything is thoroughly chilled before dipping.
Gluten-Free Monster Eyeballs: Use gluten-free vanilla wafers or crushed gluten-free graham crackers. I like the Kinnikinnick brand for this. The texture is slightly different—a bit more crumbly—but still delicious.
Different Eye Colors: If you can find them, use different colored candy eyeballs—green, blue, or even glow-in-the-dark ones for an extra spooky effect. I found some neon green ones at a craft store last year and they were a huge hit.
Spider Web Design: Instead of bloodshot veins, drizzle a thin line of dark chocolate over the top of the truffle in a spiral pattern, then drag a toothpick through it from the center outward to create a spider web effect. This is easier than it sounds and looks incredibly impressive.
My personal favorite variation? I made a batch with orange-flavored white chocolate (just add a few drops of orange extract and orange food coloring to the melted coating) and called them “Pumpkin Eyeballs.” They were gone before I could even take a picture.
Serving & Storage Suggestions
These truffles are best served chilled, straight from the refrigerator. The cold temperature keeps the chocolate coating firm and the filling creamy. I like to arrange them on a platter lined with black or orange tissue paper for a festive look. If you’re serving them at a party, keep them on a bed of ice or pop them back in the fridge between servings—they can get soft if they sit out for more than 30 minutes.
What to serve with them: These truffles pair beautifully with a glass of cold milk, a hot cup of coffee, or even a glass of red wine (trust me, the sweetness balances the tannins). For a Halloween party spread, I like to serve them alongside other no-bake treats like peanut butter spiders or chocolate pretzel broomsticks.
Storage: Store the truffles in an airtight container in the refrigerator for up to 1 week. Place them in a single layer with parchment paper between layers to prevent sticking. I’ve found that the flavor actually improves after a day or two—the cream cheese and cookie crumbs meld together into something even more delicious.
Freezer instructions: These truffles freeze beautifully. Place them on a baking sheet and freeze until solid (about 1 hour), then transfer to a freezer-safe container or zip-top bag. They’ll keep for up to 3 months. Thaw in the refrigerator overnight before serving. Don’t thaw them at room temperature—they’ll get too soft and the chocolate might develop condensation.
Make-ahead tip: You can prepare the truffle base and roll it into balls up to 2 days in advance. Keep them covered in the refrigerator, then dip and decorate on the day you plan to serve them. This is my go-to strategy for Halloween parties—it makes the day-of prep much less stressful.
Nutritional Information & Benefits
Let’s be real—these are a treat, not a health food. But I do think it’s worth knowing what’s in them, especially if you’re serving them to kids or managing dietary concerns.
Estimated nutrition per truffle (based on 24 servings):
- Calories: 180
- Total Fat: 10g
- Saturated Fat: 6g
- Cholesterol: 15mg
- Sodium: 85mg
- Total Carbohydrates: 22g
- Sugar: 17g
- Protein: 2g
Dietary considerations: These truffles contain dairy, gluten (unless you use gluten-free cookies), and soy (in the white chocolate). They are nut-free if you use standard ingredients, but always check labels if you’re serving someone with allergies.
Health benefits (okay, let’s be creative here): The cream cheese provides a small amount of calcium and protein. The vanilla extract has been shown to have antioxidant properties. And honestly? The joy of eating something that looks like a monster eyeball has to count for something, right?
From a wellness perspective, I think these truffles fit perfectly into a balanced approach to eating. They’re a special occasion treat—not something you’d eat every day—but they’re made with real ingredients that you can recognize. No artificial flavors, no preservatives, no weird chemicals. Just butter, sugar, and a little bit of Halloween magic.
Conclusion
These Easy No-Bake Monster Eyeball Truffles have become my signature Halloween treat, and I think they deserve a spot in your recipe collection too. They’re fun to make, they’re easy enough for kids to help with, and they always get a reaction. Whether you’re hosting a Halloween party, bringing a treat to a potluck, or just looking for a way to make October a little more magical, these truffles deliver.
The best part? You don’t need to be a professional baker to make them look amazing. The slightly imperfect ones are the most charming. The ones where the eyes are a little crooked, the chocolate is a little drippy, the red veins look more like abstract art than blood vessels—those are the ones people remember. Those are the ones that make people laugh.
I’d love to hear how yours turn out. Did you try a different variation? Did your kids come up with their own monster designs? Did you accidentally make them look more adorable than spooky? (That happens more often than you’d think.) Drop a comment below and share your creations. And if you’re looking for more Halloween inspiration, check out my no-bake Halloween treats collection—it’s full of recipes that are just as easy and just as fun.
Happy Halloween, and happy truffle-making. May your eyeballs be creepy, your chocolate be smooth, and your kitchen be filled with laughter.
Frequently Asked Questions
Can I make these truffles ahead of time?
Absolutely! You can prepare the truffle base and roll it into balls up to 2 days in advance. Keep them covered in the refrigerator, then dip and decorate on the day you plan to serve them. Fully assembled truffles will keep in the refrigerator for up to 1 week.
Can I freeze these truffles?
Yes, they freeze beautifully. Freeze them on a baking sheet until solid, then transfer to a freezer-safe container. They’ll keep for up to 3 months. Thaw in the refrigerator overnight before serving.
My white chocolate seized up and got grainy. What went wrong?
White chocolate is sensitive to heat and moisture. If it gets too hot (over 110°F) or if any water gets into the bowl, it can seize up and become grainy. Try melting it at 50% power in the microwave in short bursts, and make sure all your tools are completely dry. Adding a tablespoon of coconut oil or shortening can also help prevent seizing.
Can I use a different type of cookie for the base?
Definitely. Vanilla wafers are my go-to, but shortbread cookies, graham crackers, or even chocolate wafers all work well. If you use a sweeter cookie, you might want to reduce the powdered sugar slightly. If you use a less sweet cookie, you might need to add a bit more sugar.
My truffles are too soft to roll. What should I do?
If the truffle mixture is too soft, pop it in the refrigerator for 15-20 minutes to firm up. If it’s still too soft after chilling, you can add a few more crushed cookies to absorb some of the moisture. The mixture should be firm enough to hold its shape when rolled, but still slightly pliable.
Pin This Recipe!

Easy No-Bake Monster Eyeball Truffles: Best Halloween Treat

These no-bake monster eyeball truffles are creamy, rich, and fun to make. Perfect for Halloween parties, they feature a cheesecake-like filling coated in white chocolate with candy eyeballs.
- Prep Time: 30 minutes
- Cook Time: 0 minutes
- Total Time: 1 hour 30 minutes (includes chilling)
- Yield: 24-30 truffles 1x
- Category: Dessert
- Cuisine: American
Ingredients
- 8 ounces cream cheese, softened
- 2 cups powdered sugar
- 1 teaspoon vanilla extract
- 3 cups crushed vanilla wafer cookies (about 60 wafers)
- Pinch of salt
- 12 ounces white chocolate chips or melting wafers
- 1 tablespoon coconut oil or vegetable shortening
- 24–30 candy eyeballs
- Red gel food coloring (optional)
Instructions
- In a large mixing bowl, beat the softened cream cheese with an electric mixer until smooth and creamy, about 1 minute.
- Add the powdered sugar, one cup at a time, beating on low speed to avoid flying sugar. Add the vanilla extract and pinch of salt, then beat until combined. The mixture should be thick and smooth.
- Pour in the crushed vanilla wafers and stir with a spatula or wooden spoon until evenly distributed. If too soft, refrigerate for 15-20 minutes. If too dry, add a tablespoon of milk or cream.
- Using a small cookie scoop or tablespoon, portion out the mixture and roll between your palms to form smooth balls about 1 inch in diameter. Place on a parchment-lined baking sheet. You should get about 24-30 truffles.
- Chill the truffles in the refrigerator for at least 30 minutes, or up to 2 hours.
- Place the white chocolate chips and coconut oil in a microwave-safe bowl. Microwave in 30-second intervals, stirring between each, until smooth and fully melted. Be careful not to overheat.
- Remove the chilled truffles from the refrigerator. Working one at a time, drop a truffle into the melted white chocolate. Use a fork to gently turn and coat completely. Lift out with the fork, tapping gently to let excess chocolate drip off. Place back on the parchment-lined baking sheet.
- While the chocolate is still wet, press two candy eyeballs into each truffle. If the chocolate starts to set, dip the back of the eyeball in a tiny bit of melted chocolate to help it stick.
- Optional: Mix a small amount of red gel food coloring with a drop of water. Use a toothpick or piping bag to draw thin red lines radiating from the eyeballs for a bloodshot effect.
- Return the baking sheet to the refrigerator for 15-20 minutes, or until the chocolate is completely firm.
Notes
Make sure cream cheese is truly softened for a smooth texture. Chill truffles thoroughly before dipping to prevent them from falling apart. White chocolate burns easily; melt in short bursts. For best results, work in small batches when dipping.
Nutrition
- Serving Size: 1 truffle
- Calories: 180
- Sugar: 17
- Sodium: 85
- Fat: 10
- Saturated Fat: 6
- Carbohydrates: 22
- Protein: 2
Keywords: Halloween, no-bake, truffles, monster eyeballs, white chocolate, cream cheese, easy, kid-friendly


