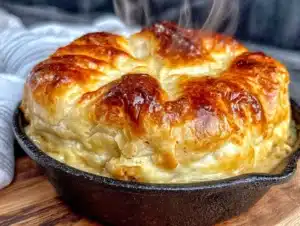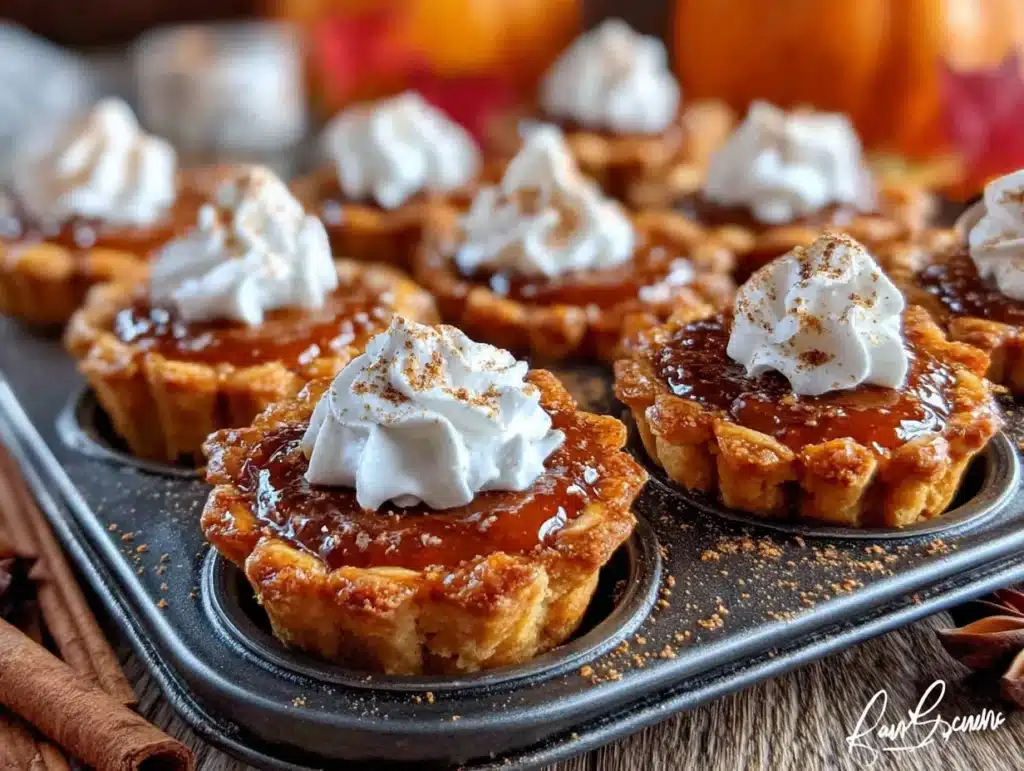
I was standing in the frozen food aisle at the grocery store last Tuesday when the cold air hit my face and that specific freezer-burn smell hit my nose—and suddenly I was seven years old, sitting on a counter stool at my Aunt Jo’s house, watching her pull a perfect, golden pie from the oven. She’d let me press my finger into the crimped edges before they went in. I can still feel the give of the dough. I bought a can of pumpkin puree that day, not because I needed it, but because I couldn’t stop thinking about that moment. The thing is, I don’t have the patience for a full pie crust these days. Honestly, who does on a Tuesday night? So I started messing around with a muffin tin, a roll of store-bought dough, and a lot of hope. The result? These quick mini pumpkin pie bites. They are not a full pie. They are better. They are the part of the pie you actually want—the warm, spiced filling and the buttery crust—without the wait, the mess, or the commitment. Maybe you’ve been there, standing in that aisle, wanting the feeling of homemade pie but not the three-hour project. These little bites are the answer. I’ve made them four times in the last two weeks. My neighbor Karen knocked on my door after she smelled them through the wall. That’s how I know this one is real.
Why You’ll Love This Recipe
Let me tell you, I tested this recipe a ridiculous number of times. I tried different crust-to-filling ratios, different baking times, and even different muffin tin materials. The version I am sharing with you today is the one that finally made me stop tweaking and start eating. Here is why it works:
- Quick & Easy: From start to finish, these mini bites take about 25 minutes. That is faster than driving to the bakery. I mean it.
- Simple Ingredients: You probably have most of this in your pantry right now. No weird extracts or specialty flours. Just real, basic baking staples.
- Perfect for Weeknights: When you want something sweet after dinner but do not want to wash a dozen dishes. These come together while you are still cleaning up from dinner.
- Crowd-Pleaser: I brought these to a potluck and watched three different people ask for the recipe before the appetizers were even gone. Kids love them. Adults pretend they are eating a single serving portion and then eat three.
- Unbelievably Delicious: The texture is what gets me. The crust gets perfectly golden and flaky on the bottom, and the filling stays creamy and rich. It is comfort food in two bites.
What makes this different from every other mini pumpkin pie recipe out there? It is the crust-to-filling ratio. Most recipes give you a thick dough wall and a shallow filling. I reversed that. You get a thin, crispy crust and a generous, heaping spoonful of spiced pumpkin filling. It is the part of the pie you actually crave, just in a more efficient package. This recipe is not just good—it is the kind that makes you close your eyes after the first bite. Trust me on this one.
What Ingredients You Will Need
This recipe uses simple, wholesome ingredients to deliver that classic pumpkin pie flavor without the fuss. Most of these are pantry staples, which is exactly what you want on a busy weeknight.
- For the crust:
- 1 package (14 ounces) refrigerated pie crusts (I prefer Pillsbury, but any brand works; let them sit at room temperature for 15 minutes before rolling so they don’t crack)
- 1 tablespoon all-purpose flour (for dusting your work surface; use more if needed)
- For the filling:
- 1 cup (240 grams) canned pumpkin puree (not pumpkin pie filling—make sure it is 100% pure pumpkin; Libby’s is my go-to for consistent texture)
- 1/2 cup (100 grams) granulated sugar
- 1 large egg, at room temperature (cold egg will make the filling lumpy; set it out 20 minutes ahead)
- 1/4 cup (60 milliliters) heavy cream (adds richness; half-and-half works in a pinch)
- 1 teaspoon vanilla extract (pure vanilla extract makes a difference here; I use Nielsen-Massey)
- 1 teaspoon ground cinnamon
- 1/2 teaspoon ground ginger
- 1/4 teaspoon ground nutmeg (freshly grated if you have it—it really wakes up the flavor)
- 1/4 teaspoon salt (don’t skip this; it balances the sweetness)
- For the topping (optional but recommended):
- 1/4 cup (60 milliliters) heavy cream, whipped to soft peaks (or use store-bought whipped cream in a pinch)
- Ground cinnamon, for dusting
Ingredient selection tips: Look for a pumpkin puree that is thick and not watery. If your puree looks runny, let it drain in a fine-mesh sieve for 10 minutes before using. I have made that mistake before, and the filling turned out soupy. Also, for the spices, I recommend buying fresh ones every six months. Old cinnamon loses its punch, and these mini bites deserve that warm, bold flavor. If you are dairy-free, swap the heavy cream in the filling for full-fat coconut cream. It works beautifully and adds a subtle sweetness.
Equipment Needed
You do not need a lot of fancy gear for this recipe, which is part of why I love it. Here is what you will need:
- Standard 12-cup muffin tin: A non-stick one is ideal, but any metal tin works. I use an old Chicago Metallic one that has seen better days, and it still does the job.
- Rolling pin: For rolling out the pie crust dough. If you do not have one, a clean wine bottle works surprisingly well.
- 3-inch round biscuit cutter or cookie cutter: You need this to cut the dough circles. A drinking glass with a thin rim works as a substitute—just make sure the diameter is about 3 inches.
- Small mixing bowl: For whisking the filling ingredients together.
- Whisk: A fork works if you do not have a whisk, but a whisk gives you a smoother filling.
- Measuring cups and spoons: Standard set for dry and wet ingredients.
- Small cookie scoop or spoon: For portioning the filling into the crusts. A cookie scoop makes it so much faster and less messy.
- Cooling rack: For letting the mini bites cool properly so the bottoms stay crisp.
If you are on a budget, skip the biscuit cutter and use a glass. I have done that more times than I can count. Also, if your muffin tin is not non-stick, give it a light spray of cooking spray before placing the dough circles. Trust me on that one—I learned the hard way.
Preparation Method

Let me walk you through this step by step. I have made these so many times that I have the timing down to a science. Here is exactly how to do it:
- Preheat your oven to 375°F (190°C). Place one oven rack in the middle position. Do not skip preheating—these little bites bake fast, and you want the heat to hit them immediately.
- Prepare the crusts. Let the refrigerated pie crusts sit at room temperature for about 15 minutes. Lightly dust your work surface with flour. Gently unroll one pie crust and use a rolling pin to roll it out slightly thinner—about 1/8 inch thick. Using a 3-inch round cutter, cut out 6 circles from each crust (you should get 12 total). Press each circle gently into a cup of your muffin tin, making sure the dough goes all the way to the edges. Do not stretch the dough—just press it in gently. If it tears, just patch it with a small piece of dough. It will bake together just fine.
- Make the filling. In a small mixing bowl, whisk together the pumpkin puree, granulated sugar, egg, heavy cream, vanilla extract, cinnamon, ginger, nutmeg, and salt. Whisk until the mixture is completely smooth and no streaks of egg remain. This should take about 30 seconds. The filling will look a bit loose—do not worry, it will set as it bakes.
- Fill the crusts. Using a small cookie scoop or a spoon, divide the filling evenly among the 12 crusts. Fill each one almost to the top—leave about 1/8 inch of space. The filling will puff up slightly as it bakes, but it will settle back down as it cools. Do not overfill, or you will have a mess on your hands. I speak from experience.
- Bake. Place the muffin tin in the preheated oven and bake for 18 to 22 minutes. At the 18-minute mark, check them. The crust should be golden brown around the edges, and the filling should be set but still have a slight jiggle in the very center. If the filling looks wet and loose, give them another 2 to 3 minutes.
- Cool. Remove the muffin tin from the oven and let it cool on a wire rack for 10 minutes. Then, carefully run a small knife around the edges of each mini bite to loosen them. Lift them out gently and transfer them to the cooling rack to cool completely. Do not skip this cooling step—the filling needs time to set properly. If you try to eat them too soon, the filling will be too soft.
- Top and serve. Once completely cool, top each mini pumpkin pie bite with a dollop of whipped cream and a light dusting of cinnamon. Serve immediately or refrigerate until ready to serve.
Sensory cues to watch for: When the crust is ready, it will look dry and golden, not pale and doughy. The filling will smell intensely of cinnamon and nutmeg—your whole kitchen will smell like autumn. The edges of the crust should be slightly darker than the center. That is how you know you nailed it.
Cooking Tips & Techniques
I have made these mini pumpkin pie bites probably a dozen times now, and I have made every mistake you can imagine. Let me save you the trouble.
Do not overwork the dough. When you press the dough circles into the muffin tin, handle them as little as possible. Warm hands make the dough tough. If the dough starts sticking to your fingers, dust them with a little flour. I once spent five minutes pressing and repressing the dough, and the crusts came out dense and chewy instead of flaky.
Blind bake for extra crispness. If you want an even crispier bottom crust, you can pre-bake the empty crusts for 5 minutes at 375°F before adding the filling. Just prick the bottoms with a fork first so they do not bubble up. I do not always do this because it adds time, but if you are making these for a special occasion, it is worth the extra step.
Use room temperature ingredients. This is a big one. Cold egg and cold cream will make your filling lumpy and uneven. Set everything out on the counter 20 minutes before you start. I have forgotten this step more times than I want to admit, and the filling never comes out as smooth.
Watch the bake time closely. Every oven runs differently. My old oven runs hot, so I start checking at 16 minutes. Yours might need the full 22 minutes. The key is to look for that golden crust and the slight jiggle in the center of the filling. If the filling is completely firm, it is overbaked and will be dry.
Multitask strategically. While the crusts are baking, make the whipped cream and clean up your workspace. That way, when they come out of the oven, you are ready to go. I have learned that the hard way—standing there with a bowl of unwhipped cream while the mini bites cool is not fun.
Variations & Adaptations
One of the best things about this recipe is how easy it is to change up. Here are some of my favorite variations:
- Gluten-Free Version: Use a gluten-free pie crust mix or a pre-made gluten-free crust. I have tried this with Bob’s Red Mill gluten-free pie crust mix, and it worked beautifully. Just make sure to roll it out a little thicker, as gluten-free dough tends to be more delicate.
- Dairy-Free Version: Swap the heavy cream in the filling with full-fat coconut cream. Use a dairy-free whipped topping for serving. The coconut flavor pairs surprisingly well with the pumpkin and spices—it adds a subtle tropical note that is actually delicious.
- Spice It Up: Add 1/4 teaspoon of ground cloves or allspice to the filling for a deeper, more complex spice profile. I tried this once when I ran out of ginger, and it became my new favorite version. It tastes like a pumpkin chai latte in bite form.
- Maple Pumpkin Bites: Replace the granulated sugar with 1/3 cup of pure maple syrup. Reduce the heavy cream to 2 tablespoons to compensate for the extra liquid. The maple flavor is subtle but adds a lovely warmth.
- Chocolate Drizzle: Once the bites are cool, drizzle them with melted dark chocolate. I did this for a holiday party, and people lost their minds. The chocolate and pumpkin combination is underrated.
- Pecan Topping: Before baking, sprinkle a few chopped pecans on top of each bite. They toast as the bites bake and add a wonderful crunch. I do this when I want to feel fancy.
My personal favorite variation: I made a batch with a tablespoon of bourbon added to the filling. I was testing a recipe for a friend’s party, and honestly, it was the best version I have ever made. The bourbon adds a warmth that complements the spices perfectly. Just be aware that the alcohol does not fully cook out, so this one is for adults only.
Serving & Storage Suggestions
These mini pumpkin pie bites are best served at room temperature or slightly warm. If you are serving them right after baking, let them cool for at least 15 minutes so the filling sets. Top them with a generous dollop of whipped cream and a light dusting of cinnamon. They look beautiful on a simple white platter or a rustic wooden board.
What to serve with them: A hot cup of coffee or a chai latte is the perfect pairing. The spices in the bites echo the flavors in chai, and the bitterness of coffee cuts through the sweetness. For a dessert spread, serve them alongside vanilla ice cream or a warm apple cider. I once served them with a scoop of salted caramel ice cream, and it was divine.
Storage: Store any leftovers (if you have any!) in an airtight container in the refrigerator for up to 4 days. The crusts will soften slightly over time, but they will still taste delicious. I actually think they are even better on day two—the flavors have time to meld together.
Freezing: You can freeze these mini bites for up to 2 months. Place them in a single layer on a baking sheet and freeze until solid, then transfer them to a freezer-safe bag or container. To serve, thaw them in the refrigerator overnight and bring them to room temperature before adding the whipped cream. Do not freeze them with the whipped cream on top—it will turn watery when thawed.
Reheating: If you want to reheat them, pop them in a 300°F (150°C) oven for 5 to 7 minutes. Do not use the microwave—it will make the crust soggy. I learned that lesson the hard way after a sad, limp mini bite incident.
Nutritional Information & Benefits
Here is the estimated nutritional breakdown per mini bite (based on 12 servings, without whipped cream topping):
| Nutrient | Amount per Serving |
|---|---|
| Calories | 145 |
| Total Fat | 7g |
| Saturated Fat | 3g |
| Cholesterol | 28mg |
| Sodium | 195mg |
| Total Carbohydrates | 18g |
| Dietary Fiber | 1g |
| Sugars | 9g |
| Protein | 2g |
Pumpkin is a nutritional powerhouse. It is packed with vitamin A (from beta-carotene), which supports eye health and immune function. It is also a good source of fiber, which helps with digestion and keeps you feeling full. The cinnamon and ginger in this recipe are not just for flavor—they have anti-inflammatory properties and can help with blood sugar regulation. Plus, these mini bites are portion-controlled, so you get the satisfaction of dessert without overdoing it. I love that I can enjoy two of these and feel perfectly satisfied, not stuffed and guilty.
Dietary considerations: This recipe is vegetarian. To make it gluten-free, use a gluten-free pie crust. To make it dairy-free, use coconut cream in the filling and a dairy-free whipped topping. It is not suitable for vegans as written, but you could experiment with a flax egg (1 tablespoon ground flaxseed mixed with 3 tablespoons water) and a vegan pie crust.
Conclusion
These quick mini pumpkin pie bites are the kind of recipe that makes you feel like a hero in the kitchen without actually having to work that hard. They are warm, spiced, and comforting—everything you want from a fall dessert, but in a fraction of the time. Whether you are making them for a weeknight treat, a holiday gathering, or just because you had a long day and deserve something good, they deliver every single time.
I love this recipe because it reminds me of that moment in the grocery store aisle, but it also creates new memories. My neighbor Karen now texts me every time she buys pumpkin puree. My niece asked if she could help make them for Thanksgiving. That is what good food does—it connects us to people and to moments. So go ahead, grab a muffin tin and a can of pumpkin, and make these. And when you do, come back and tell me how they turned out. Did you add the pecans? Did you drizzle them with chocolate? Did you eat three in a row like I did? I want to hear all about it. Leave a comment below or tag me in your photos. Happy baking, friends.
Frequently Asked Questions
Can I use pumpkin pie filling instead of pumpkin puree?
No, do not do that. Pumpkin pie filling is already sweetened and spiced, so it will throw off the entire balance of this recipe. Stick with 100% pure pumpkin puree. If you accidentally buy the wrong one, save it for another recipe and grab the right can next time.
Do I have to use refrigerated pie crust, or can I make my own?
You can absolutely make your own pie crust if you have the time and energy. I use refrigerated crust here because it makes the recipe quick and accessible for busy weeknights. If you make your own, just roll it out to about 1/8 inch thick and cut your circles the same way.
Why did my crust turn out soggy?
Soggy crust usually happens when the filling is too wet or the crust is not baked long enough. Make sure you are using thick pumpkin puree (not watery) and that your oven is fully preheated. If soggy crust is a recurring problem for you, try blind baking the empty crusts for 5 minutes before adding the filling.
Can I make these ahead of time for a party?
Yes, absolutely. You can make the mini bites up to 2 days ahead and store them in the refrigerator. Just wait to add the whipped cream until right before serving. If you want to get even more ahead, freeze them for up to 2 months and thaw them overnight in the fridge.
How do I prevent the crust from shrinking during baking?
Crust shrinkage happens when the dough is stretched too much when you press it into the muffin tin. Instead of pulling and stretching the dough, gently press it into the cup so it fits naturally. Also, letting the dough rest in the refrigerator for 10 minutes before baking can help reduce shrinkage.
Pin This Recipe!
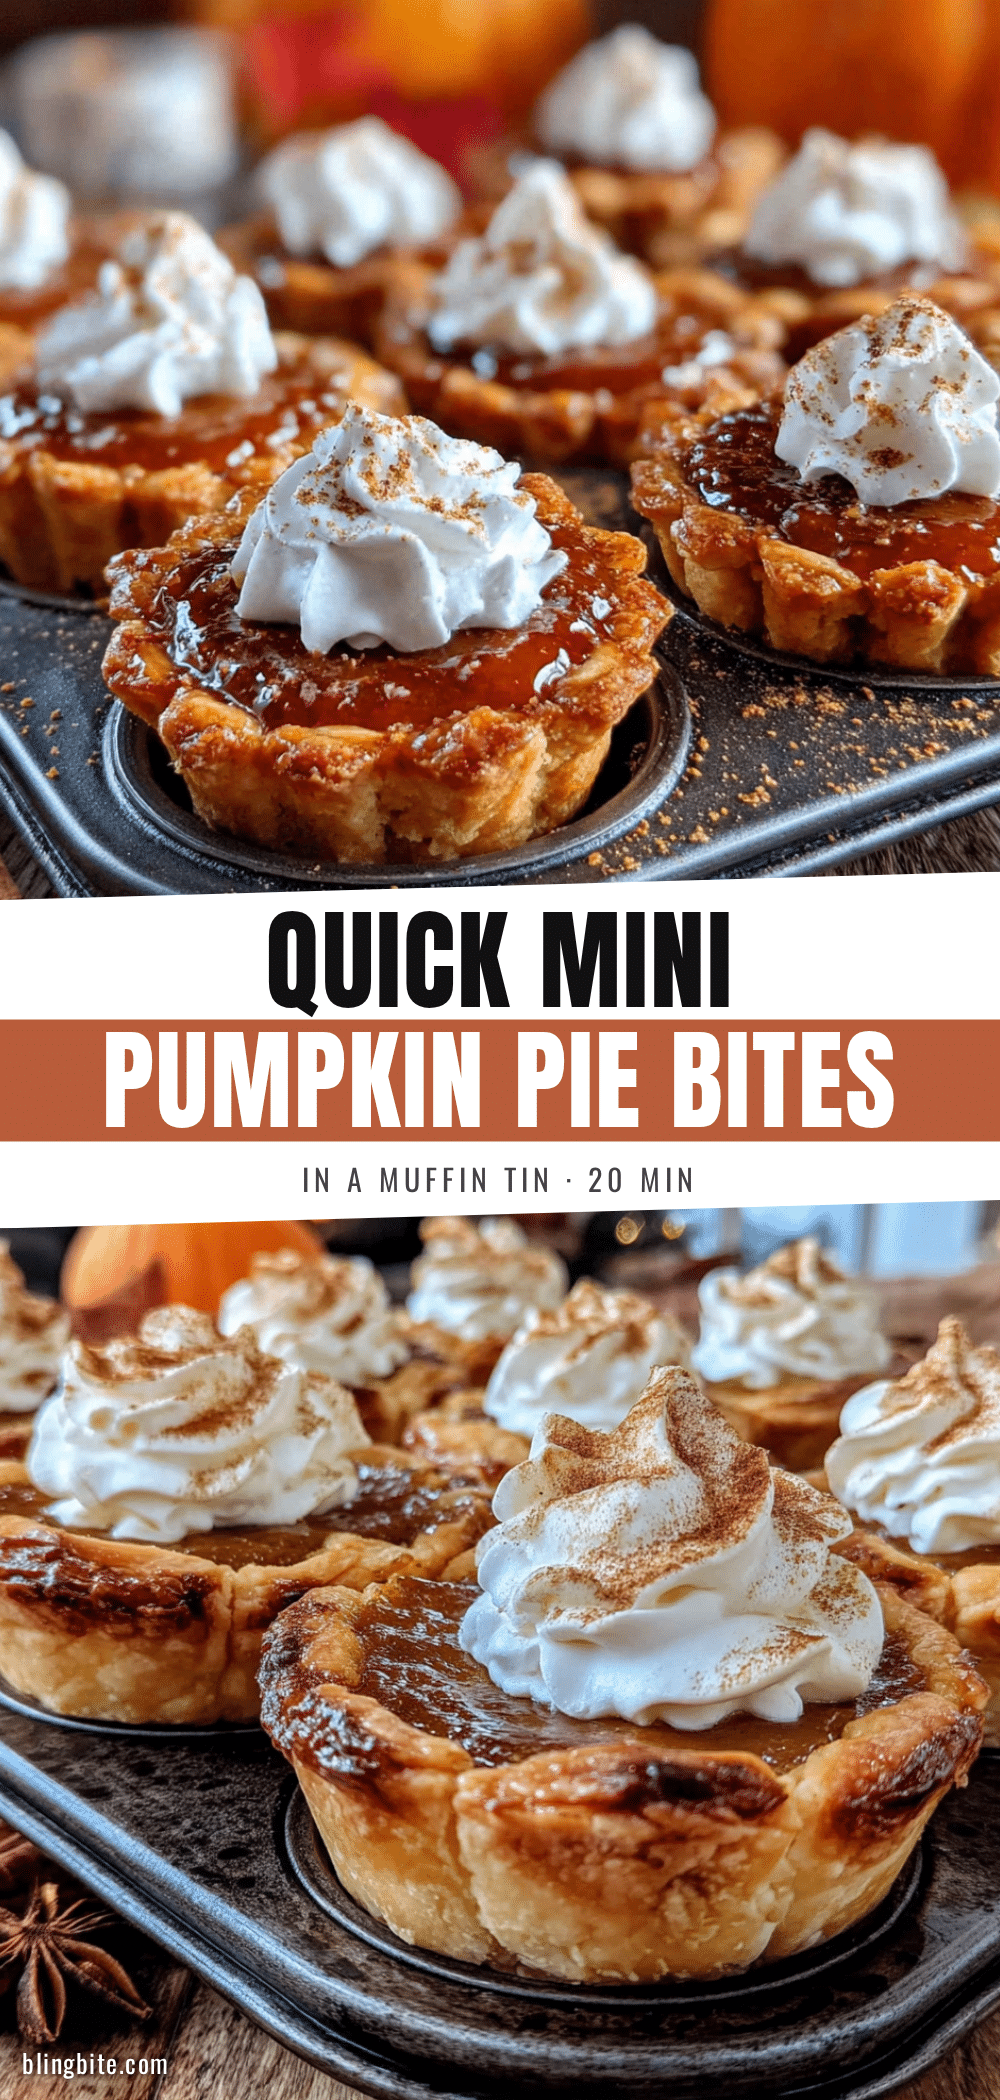
Easy Mini Pumpkin Pie Bites: Perfect Baked in a Muffin Tin

These quick mini pumpkin pie bites deliver all the warm, spiced flavor of classic pumpkin pie in a fraction of the time. Made with a thin, flaky crust and a generous, creamy filling, they are the perfect weeknight dessert or crowd-pleasing treat.
- Prep Time: 15 minutes
- Cook Time: 20 minutes
- Total Time: 35 minutes
- Yield: 12 servings 1x
- Category: Dessert
- Cuisine: American
Ingredients
- 1 package (14 ounces) refrigerated pie crusts (e.g., Pillsbury)
- 1 tablespoon all-purpose flour (for dusting)
- 1 cup (240 grams) canned pumpkin puree (100% pure, not pumpkin pie filling)
- 1/2 cup (100 grams) granulated sugar
- 1 large egg, at room temperature
- 1/4 cup (60 milliliters) heavy cream
- 1 teaspoon vanilla extract
- 1 teaspoon ground cinnamon
- 1/2 teaspoon ground ginger
- 1/4 teaspoon ground nutmeg
- 1/4 teaspoon salt
- 1/4 cup (60 milliliters) heavy cream, whipped to soft peaks (for topping, optional)
- Ground cinnamon, for dusting (for topping, optional)
Instructions
- Preheat your oven to 375°F (190°C). Place one oven rack in the middle position.
- Prepare the crusts: Let the refrigerated pie crusts sit at room temperature for about 15 minutes. Lightly dust your work surface with flour. Gently unroll one pie crust and use a rolling pin to roll it out slightly thinner—about 1/8 inch thick. Using a 3-inch round cutter, cut out 6 circles from each crust (you should get 12 total). Press each circle gently into a cup of your muffin tin, making sure the dough goes all the way to the edges. Do not stretch the dough—just press it in gently. If it …
- Make the filling: In a small mixing bowl, whisk together the pumpkin puree, granulated sugar, egg, heavy cream, vanilla extract, cinnamon, ginger, nutmeg, and salt. Whisk until the mixture is completely smooth and no streaks of egg remain, about 30 seconds.
- Fill the crusts: Using a small cookie scoop or a spoon, divide the filling evenly among the 12 crusts. Fill each one almost to the top—leave about 1/8 inch of space.
- Bake: Place the muffin tin in the preheated oven and bake for 18 to 22 minutes. At the 18-minute mark, check them. The crust should be golden brown around the edges, and the filling should be set but still have a slight jiggle in the very center. If the filling looks wet and loose, give them another 2 to 3 minutes.
- Cool: Remove the muffin tin from the oven and let it cool on a wire rack for 10 minutes. Then, carefully run a small knife around the edges of each mini bite to loosen them. Lift them out gently and transfer them to the cooling rack to cool completely.
- Top and serve: Once completely cool, top each mini pumpkin pie bite with a dollop of whipped cream and a light dusting of cinnamon. Serve immediately or refrigerate until ready to serve.
Notes
For extra crispness, blind bake the empty crusts for 5 minutes at 375°F before adding the filling. Use room temperature ingredients for a smooth filling. Watch the bake time closely; every oven runs differently. Store leftovers in an airtight container in the refrigerator for up to 4 days. Freeze for up to 2 months without whipped cream.
Nutrition
- Serving Size: 1 mini bite
- Calories: 145
- Sugar: 9
- Sodium: 195
- Fat: 7
- Saturated Fat: 3
- Carbohydrates: 18
- Fiber: 1
- Protein: 2
Keywords: mini pumpkin pie bites, easy pumpkin dessert, muffin tin pumpkin pie, quick fall dessert, pumpkin pie bites