My sister had claimed to hate pumpkin desserts for as long as I could remember. Fifteen years, at least. She’d push pumpkin pie around her plate at Thanksgiving, make a show of scraping off the frosting from a pumpkin cupcake, and sigh dramatically whenever I brought up the idea of baking with a can of puree. “It’s just not for me,” she’d say, with the kind of finality that made you feel like you were trying to convert someone to a questionable lifestyle choice.
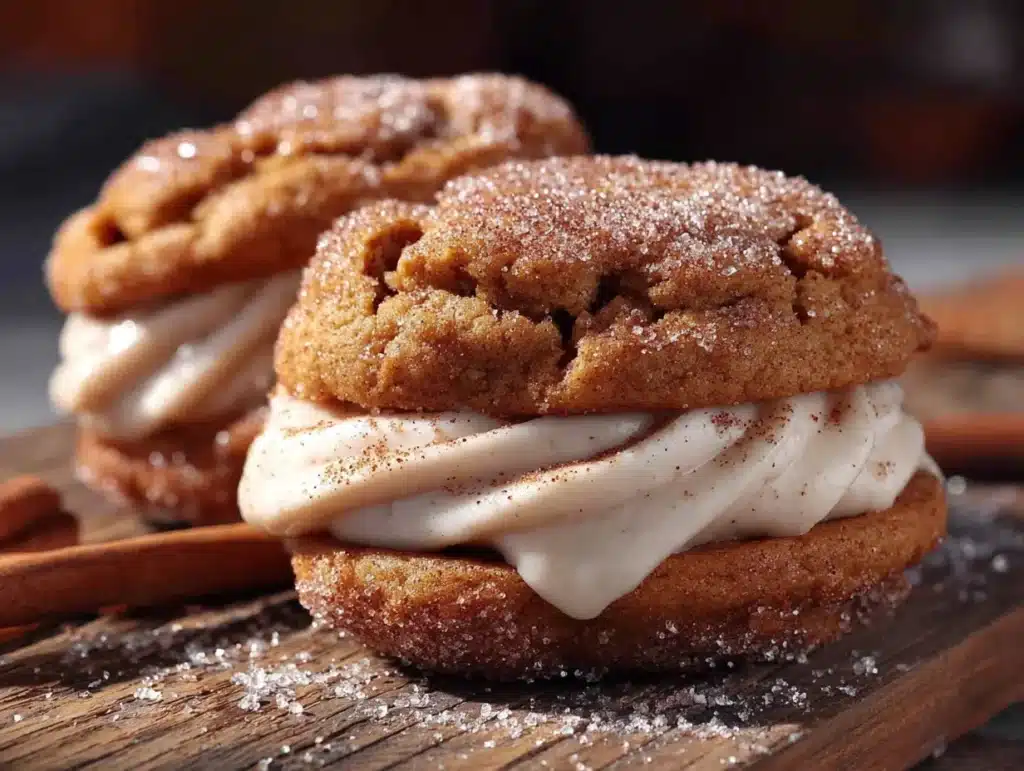
Then last October, I made a batch of these Lightened-Up Pumpkin Snickerdoodle Sandwich Cookies with Maple Cream purely for myself. I’d been testing the recipe for weeks, trying to get the texture just right—soft, pillowy, with that signature cinnamon-sugar crackle on top. I wasn’t thinking about proving anything to anyone. I just wanted a cookie that tasted like fall without feeling like a gut bomb afterward.
I left the kitchen to answer the phone, and when I came back, there she was. Standing at the counter, caught mid-bite, with maple cream smeared on her upper lip and this look on her face like she’d been discovered doing something illegal. “These are different,” she mumbled, reaching for another one. “They’re not… pumpkin-y.” Which is code for “I was wrong about everything and I need more of these immediately.”
Honestly, that moment made my whole month. Not because I love being right—though I do—but because these cookies really are different. They’re light enough that you don’t feel like you need a nap after eating one, but indulgent enough that nobody would ever guess they’re a “lightened-up” version. The pumpkin adds moisture and a subtle earthiness that plays perfectly with the warm cinnamon and nutmeg, and the maple cream filling? Let’s just say my sister didn’t stop at one. Or three.
Maybe you’ve had your own pumpkin skepticism phase, or maybe you’re already a fan looking for a version that won’t weigh you down. Either way, these cookies are the kind that sneak up on you. You take one bite, then another, and before you know it, you’re texting your sister a photo with the caption “told you so.”
Why You’ll Love This Recipe
These Lightened-Up Pumpkin Snickerdoodle Sandwich Cookies with Maple Cream are the result of about eight test batches and a lot of honest feedback from friends who don’t sugarcoat things. Here’s why they keep disappearing at every gathering I bring them to:
- Quick & Easy: From start to finish, you’re looking at about 45 minutes. The dough comes together in one bowl, and there’s no chilling time required. Perfect for those random Tuesday cravings when you need cookies now.
- Simple Ingredients: No weird protein powders or specialty flours here. Everything is stuff you can find at a regular grocery store—canned pumpkin, cream cheese, maple syrup, basic baking staples.
- Perfect for Fall Gatherings: These are made for Halloween parties, Friendsgiving dinners, or just a cozy Sunday afternoon when the leaves are changing and you want something that tastes like the season.
- Crowd-Pleaser: Even the pumpkin skeptics (I know a few now) come back for seconds. The snickerdoodle coating is familiar and comforting, and the maple cream is just sweet enough without being cloying.
- Unbelievably Delicious: The texture is what gets people. The cookies are soft and almost cake-like from the pumpkin, but they still have that slight chewiness of a classic snickerdoodle. Paired with the silky maple cream filling, it’s next-level comfort food.
What makes this recipe different from other pumpkin cookies is the balance. I tested versions that were too dry, too dense, too sweet, and not sweet enough. This one hits the sweet spot—literally. Using reduced-fat cream cheese in the filling and cutting back on butter in the cookies means you save calories without sacrificing flavor. It’s the kind of cookie that makes you close your eyes after the first bite, not because it’s “healthy,” but because it’s genuinely delicious.
This recipe is for those moments when you want something special but don’t want to spend all day in the kitchen. It’s comfort food reimagined—lighter, faster, but with the same soul-soothing satisfaction that a good cookie should bring.
What Ingredients You Will Need
This recipe uses simple, wholesome ingredients to deliver bold flavor and satisfying texture without the fuss. Most of these are pantry staples, and the few that aren’t are easy to find at any grocery store.
For the Cookies
- 1 ½ cups all-purpose flour (spooned and leveled—don’t scoop directly from the bag or you’ll pack it down)
- 1 teaspoon cream of tartar (this is what gives snickerdoodles their signature tangy flavor and soft texture)
- ½ teaspoon baking soda
- ½ teaspoon ground cinnamon
- ¼ teaspoon ground nutmeg (freshly grated if you have it, but pre-ground works fine)
- ¼ teaspoon salt
- ¼ cup unsalted butter, softened (I use Challenge or Kerrygold for the best flavor)
- ¼ cup granulated sugar
- ¼ cup packed light brown sugar
- ⅓ cup pumpkin puree (not pumpkin pie filling—make sure it’s 100% pure pumpkin. I like Libby’s)
- 1 large egg yolk (room temperature is best)
- 1 teaspoon vanilla extract
For the Cinnamon-Sugar Coating
- 3 tablespoons granulated sugar
- 1 teaspoon ground cinnamon
For the Maple Cream Filling
- 4 ounces reduced-fat cream cheese, softened (Neufchâtel works perfectly here)
- 2 tablespoons unsalted butter, softened
- ¼ cup powdered sugar, sifted (sifting prevents lumps)
- 2 tablespoons pure maple syrup (not pancake syrup—use the real stuff for the best flavor. Grade A dark amber is my go-to)
- ¼ teaspoon vanilla extract
- Pinch of salt
The pumpkin puree is the star here, adding moisture and a subtle sweetness that lets you cut back on butter without losing richness. I’ve tried this with homemade pumpkin puree, and while it works, canned is actually more consistent in terms of water content. If you do use homemade, make sure to drain it in a cheesecloth-lined strainer for about an hour first to remove excess liquid.
For the maple cream, real maple syrup is non-negotiable. I learned that the hard way when I tested a batch with the imitation stuff—the filling was thin and had this weird artificial aftertaste. Spend the extra dollar on real maple syrup. Your taste buds will thank you.
As for substitutions, you can use dairy-free cream cheese and butter alternatives if needed, but I haven’t tested those versions extensively, so results may vary. If you’re gluten-free, a 1:1 gluten-free baking flour blend should work, though the texture might be slightly more delicate.
Equipment Needed
You don’t need a lot of fancy equipment to make these cookies, which is part of why I love this recipe. Here’s what you’ll need:
- Large mixing bowl and a medium mixing bowl (I use glass or ceramic, but metal works fine)
- Electric hand mixer or stand mixer with paddle attachment (you can do this by hand with a whisk and some elbow grease, but the mixer makes the cream filling much smoother)
- Baking sheets (I recommend two, so you can rotate them between batches)
- Parchment paper or silicone baking mat (parchment is cheaper and works just as well)
- Cookie scoop (a 1.5-tablespoon scoop is ideal for consistent sizing, but you can use two spoons)
- Small bowl for the cinnamon-sugar coating
- Wire cooling rack
- Spatula for transferring cookies
- Offset spatula or butter knife for spreading the filling
If you don’t have a cookie scoop, just eyeball it—aim for about 1.5 tablespoons of dough per cookie, rolled into a ball. They’ll spread slightly as they bake, so leave about 2 inches of space between each one. I’ve used cheap baking sheets and expensive ones, and honestly, as long as you use parchment paper, the results are pretty similar. Just make sure your pans are cool before putting dough on them, or the cookies will spread too much.
Preparation Method
Preheat your oven to 350°F (175°C) and line two baking sheets with parchment paper. This recipe makes about 14 sandwich cookies, so you’ll get 28 individual cookies total.
Step 1: Make the cookie dough. In a medium bowl, whisk together the flour, cream of tartar, baking soda, cinnamon, nutmeg, and salt. Set this aside. In a large bowl, beat the softened butter, granulated sugar, and brown sugar together with an electric mixer on medium speed until light and fluffy—about 2 minutes. You want it to look pale and almost creamy. Scrape down the sides of the bowl with a spatula halfway through.
Step 2: Add the wet ingredients. Beat in the pumpkin puree, egg yolk, and vanilla extract until everything is well combined. The mixture might look a little curdled at this point—don’t panic, that’s normal. The pumpkin and butter don’t always emulsify perfectly, but the flour will bring it all together.
Step 3: Combine dry and wet. Gradually add the flour mixture to the wet ingredients, mixing on low speed until just combined. You don’t want to overmix here, or the cookies will be tough. Stop as soon as you don’t see any more streaks of flour. The dough will be soft and slightly sticky—that’s exactly what you want.
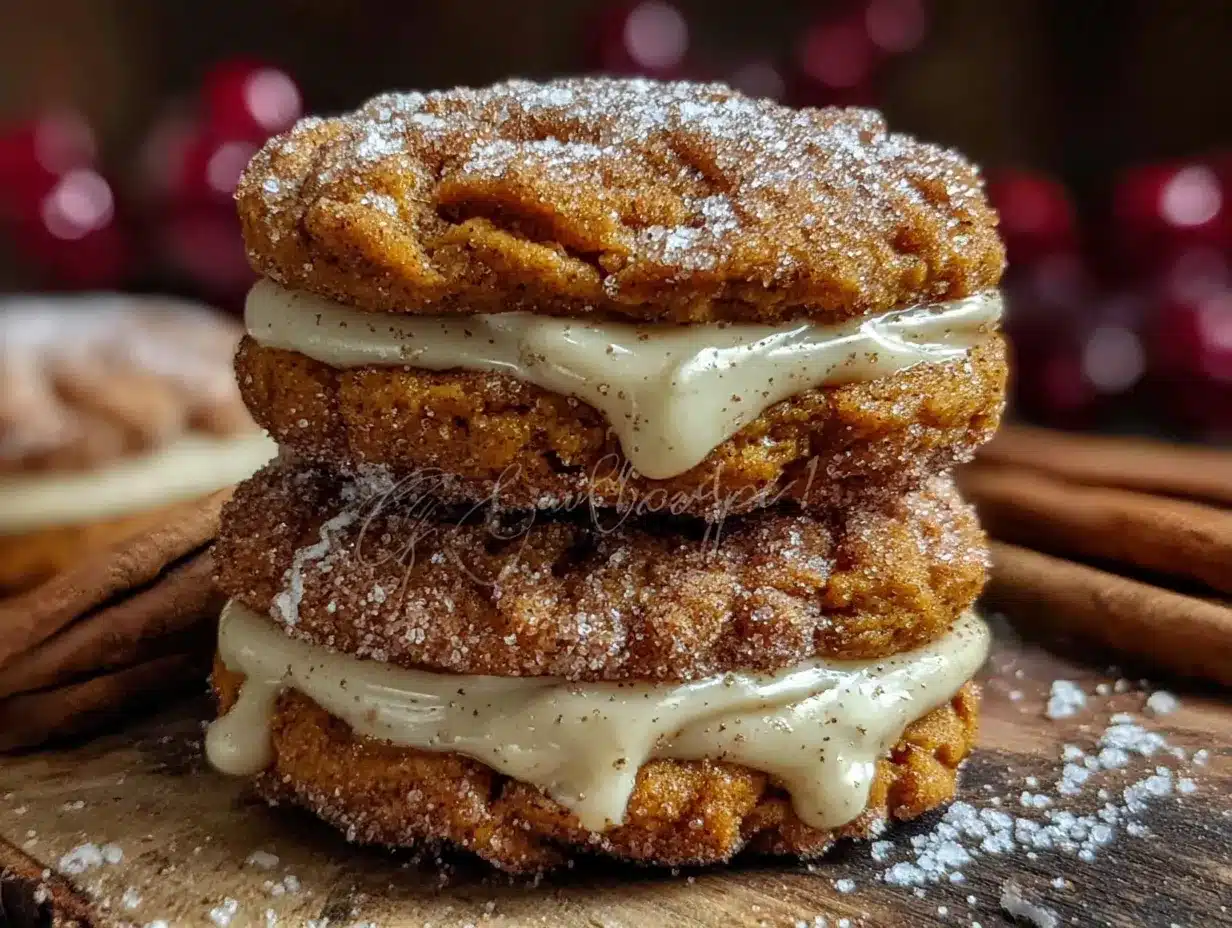
Step 4: Prepare the coating. In a small bowl, stir together the 3 tablespoons of sugar and 1 teaspoon of cinnamon for the coating. Using a cookie scoop or your hands, portion the dough into 28 balls, each about 1.5 tablespoons. Roll each ball between your palms to make it round, then roll it in the cinnamon-sugar mixture until fully coated. Place them on the prepared baking sheets, spacing them about 2 inches apart. I usually fit 12 on one sheet and 16 on the other, then rotate.
Step 5: Bake the cookies. Bake for 10 to 12 minutes, or until the edges are set and the tops look slightly cracked. The centers will still look soft and puffy—that’s good. They’ll continue to set as they cool. Let them cool on the baking sheet for 5 minutes, then transfer to a wire rack to cool completely. Do not skip this cooling time. If you try to move them too soon, they’ll fall apart. I learned this the hard way during batch three, and it was not pretty.
Step 6: Make the maple cream filling. While the cookies are cooling, make the filling. In a medium bowl, beat the softened cream cheese and butter together with an electric mixer on medium speed until smooth and creamy—about 1 minute. Add the sifted powdered sugar, maple syrup, vanilla extract, and salt. Beat on low speed until combined, then increase to medium and beat for another 2 minutes until the filling is light and fluffy. Taste it. If you want more maple flavor, add another teaspoon of maple syrup. If you want it sweeter, add a little more powdered sugar. This is your filling—make it yours.
Step 7: Assemble the sandwich cookies. Once the cookies are completely cool, pair them up by size. Using an offset spatula or a butter knife, spread about 1 tablespoon of the maple cream filling onto the flat side of one cookie. Top with the matching cookie, flat side down, and gently press until the filling spreads to the edges. Repeat with the remaining cookies and filling.
Step 8: Let them rest. Here’s a tip I picked up after a few batches: let the assembled cookies sit at room temperature for about 15 minutes before serving. This gives the filling time to set up slightly, making the cookies easier to handle. If you can wait that long, anyway.
Cooking Tips & Techniques
After testing this recipe eight times, I’ve collected a few lessons the hard way so you don’t have to. Here’s what I learned:
Don’t overbake. This is the number one mistake I made in the early batches. Pumpkin cookies are naturally soft and cake-like, and they’ll look underdone when they come out of the oven. Trust the process. If the edges are set and the tops look dry, they’re done. Overbaked pumpkin cookies turn into hockey pucks, and nobody wants that.
Use room temperature ingredients. I know, I know, everyone says this. But with pumpkin cookies specifically, cold butter or cold cream cheese will make the dough stiff and hard to work with. Leave your butter and cream cheese on the counter for about 30 minutes before you start. If you forget, you can microwave the butter in 5-second bursts, but be careful not to melt it.
Measure your flour correctly. This is a pet peeve of mine, but it matters so much. Spoon the flour into your measuring cup, then level it off with a knife. If you scoop directly from the bag, you’ll pack in way more flour than you need, and your cookies will be dry. I did this in batch two, and the cookies were so dense they barely spread. Learn from my mistakes.
Chill the filling if it’s too soft. If your kitchen is warm or your cream cheese got a little too soft, the maple cream filling might be too runny to spread easily. Just pop it in the fridge for 10 to 15 minutes, and it’ll firm up nicely. Don’t leave it longer than that, or it’ll be too stiff to spread.
Make the cookies uniform in size. I cannot stress this enough. If some cookies are bigger than others, they’ll bake unevenly. Use a cookie scoop if you have one, or weigh the dough balls if you’re feeling fancy. I aim for about 25 grams per cookie, which is roughly 1.5 tablespoons.
Let the cookies cool completely. I mentioned this earlier, but it bears repeating. Warm cookies + cold filling = a melty mess. The filling will slide right off, and you’ll end up with sticky fingers and a sad sandwich. Patience is a virtue, especially when maple cream is involved.
Variations & Adaptations
One of the best things about this recipe is how easy it is to adapt. Here are a few variations I’ve tried and loved:
Vegan Version: Swap the butter for a plant-based butter alternative (I like Miyoko’s), use a flax egg (1 tablespoon ground flaxseed mixed with 3 tablespoons water, let sit for 5 minutes), and use dairy-free cream cheese. The texture will be slightly different—a bit more delicate—but the flavor is still fantastic. I tested this for a friend’s vegan birthday party, and nobody knew the difference.
Gluten-Free Option: Use a 1:1 gluten-free baking flour blend that contains xanthan gum. I’ve had good results with Bob’s Red Mill. The cookies will spread a little more and be slightly more crumbly, so handle them gently when assembling the sandwiches.
Spice It Up: If you like a warmer, more complex spice profile, add ¼ teaspoon of ground ginger and a pinch of cloves to the cookie dough. It gives the cookies a chai-like flavor that pairs beautifully with the maple cream. I did this for a fall potluck, and they were gone in 20 minutes.
No-Filling Version: If you want to skip the sandwich part, these cookies are delicious on their own. Just bake them as directed, skip the filling, and enjoy them as soft, chewy pumpkin snickerdoodles. They’re great for packing in lunchboxes or snacking on the go.
Extra Maple Flavor: For a more intense maple experience, add ½ teaspoon of maple extract to the cookie dough along with the vanilla. It’s subtle, but it gives the whole cookie a warm, woodsy sweetness that ties everything together.
Pumpkin Seed Topping: Before baking, sprinkle a few pepitas (pumpkin seeds) on top of each cookie for a little crunch. It adds a nice texture contrast and makes them look extra pretty for holiday gatherings.
Serving & Storage Suggestions
These cookies are best served at room temperature, which lets the filling soften slightly and meld with the cookie. If you’ve stored them in the fridge, let them sit on the counter for about 15 minutes before serving.
For presentation, I like to arrange them on a rustic wooden board or a white platter, with a few extra cinnamon sticks and star anise scattered around for visual interest. A dusting of powdered sugar over the top never hurts, either.
These pair beautifully with a hot cup of coffee, a chai latte, or a glass of cold milk. For a more grown-up pairing, try them with a warm mug of apple cider or even a bourbon-spiked hot chocolate. The maple cream filling is rich enough to stand up to bold flavors.
Storage: Store the assembled cookies in an airtight container in the refrigerator for up to 5 days. The cookies will soften slightly as they absorb moisture from the filling, which actually makes them even more tender. I kind of prefer them on day two, honestly.
Freezing: You can freeze the unfilled cookies for up to 3 months. Let them cool completely, then place them in a single layer in a freezer-safe bag or container. When you’re ready to serve, thaw them at room temperature, make the filling fresh, and assemble. The filling doesn’t freeze well—it gets grainy—so always make that fresh.
Reheating: If you want to warm up a filled cookie, pop it in the microwave for about 10 seconds. The filling will get slightly melty, and the cookie will be soft and warm. Just don’t overdo it, or the filling will turn into soup.
Nutritional Information & Benefits
Here’s the approximate nutritional breakdown for one sandwich cookie (based on 14 servings):
- Calories: 185
- Fat: 8g
- Saturated Fat: 5g
- Carbohydrates: 26g
- Sugar: 16g
- Fiber: 1g
- Protein: 3g
- Sodium: 120mg
Compared to a traditional snickerdoodle sandwich cookie, which can easily clock in at 300+ calories and 15g of fat, these are a significant improvement. The pumpkin puree adds moisture and natural sweetness, allowing us to cut back on butter and sugar without sacrificing taste.
Pumpkin is also packed with vitamin A, which is great for eye health and immune function. It’s also a good source of fiber, which helps keep you feeling full and satisfied. The cream cheese filling provides a small amount of protein and calcium, making these a slightly more balanced indulgence than your average cookie.
If you’re watching your sugar intake, you can reduce the maple syrup in the filling to 1 tablespoon and add a pinch more salt to balance the sweetness. The cookies themselves are already lower in sugar than traditional snickerdoodles, so every little adjustment helps.
These cookies are vegetarian, and with the substitutions mentioned earlier, they can easily be made vegan or gluten-free. They contain dairy and gluten in their standard form, so keep that in mind if you’re serving someone with allergies.
Conclusion
These Lightened-Up Pumpkin Snickerdoodle Sandwich Cookies with Maple Cream are the kind of recipe that makes you feel like you’ve pulled off something special without actually working that hard. They’re soft, spiced, and filled with a creamy maple goodness that tastes like fall in every bite. Whether you’re a pumpkin lover or a skeptic like my sister, I think you’ll find yourself reaching for a second one before you’ve even finished the first.
What I love most about this recipe is how adaptable it is. You can make it vegan, gluten-free, spice it up, or keep it simple. You can serve it at a Halloween party, a Thanksgiving dessert table, or just a random Tuesday when you need something cozy. It’s forgiving, it’s delicious, and it’s proof that eating lighter doesn’t mean eating boring.
I’d love to hear how these turn out for you. Did you try a variation? Did your family fight over the last one? Drop a comment below and let me know—I read every single one, and your stories honestly make my day. If you loved this recipe, share it with a friend who needs a little fall comfort in their life. Happy baking!
Frequently Asked Questions
Can I use pumpkin pie filling instead of pumpkin puree?
No, please don’t. Pumpkin pie filling is pre-sweetened and spiced, which will throw off the flavor and texture of these cookies. Stick with 100% pure pumpkin puree for the best results.
Why do my cookies look flat and spread out?
This usually happens if the butter was too soft or melted, or if the dough was too warm when it went into the oven. Make sure your butter is softened but not melted, and if your kitchen is hot, chill the dough balls for 15 minutes before baking.
Can I make the dough ahead of time?
Absolutely. You can make the cookie dough, roll it into balls, and store them in the fridge for up to 2 days. Just roll them in the cinnamon-sugar coating right before baking, not before storing, or the coating will dissolve.
How do I prevent the filling from being too runny?
Make sure your cream cheese and butter are softened but not overly warm. If the filling still seems too soft, pop it in the fridge for 10 to 15 minutes to firm up before spreading.
Can I double this recipe?
Yes, it doubles beautifully. Just make sure you have enough baking sheets and space in your oven. You may need to bake in batches, and let the baking sheets cool completely between batches so the dough doesn’t start spreading before it hits the oven.
Pin This Recipe!
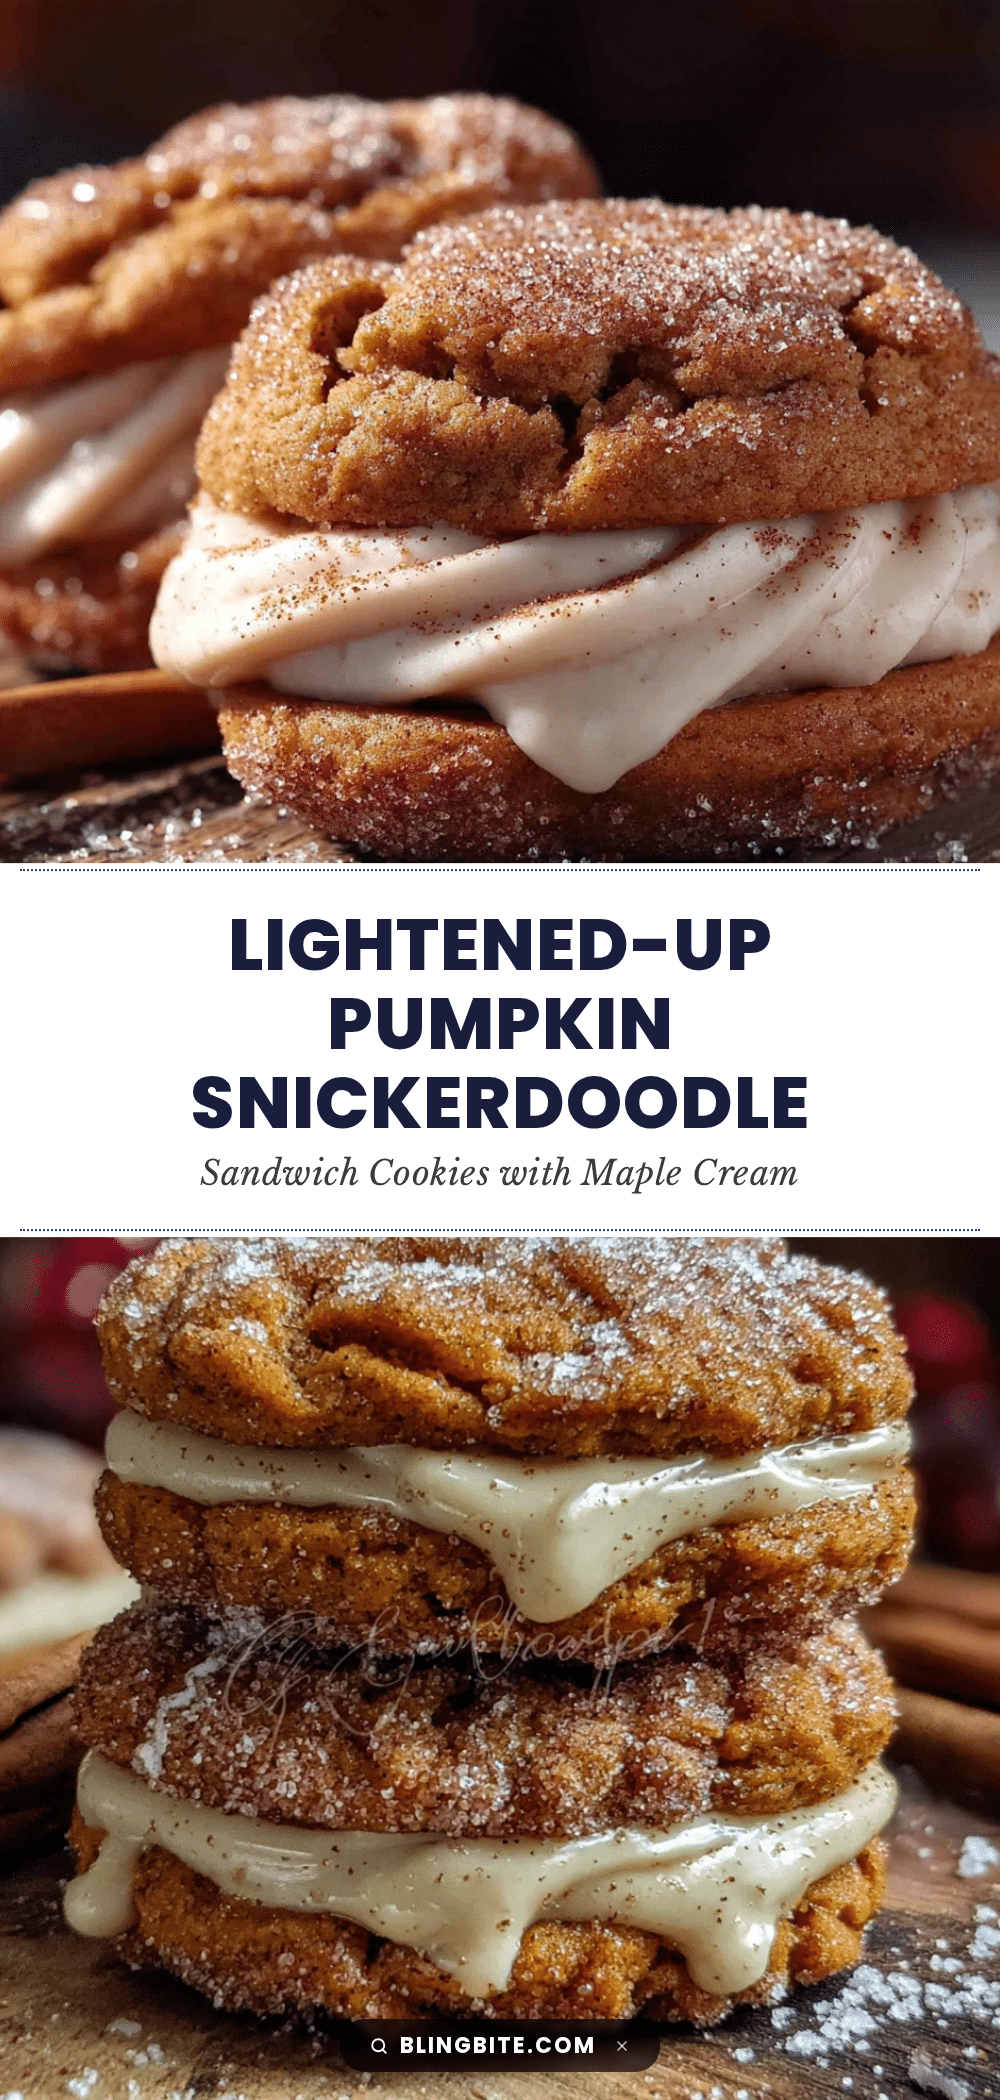
Lightened-Up Pumpkin Snickerdoodle Cookies with Maple Cream

Soft, pillowy pumpkin snickerdoodle cookies with a cinnamon-sugar crackle top, filled with a silky maple cream. A lighter version that doesn’t sacrifice flavor, perfect for fall gatherings.
- Prep Time: 20 minutes
- Cook Time: 12 minutes
- Total Time: 45 minutes
- Yield: 14 sandwich cookies 1x
- Category: Dessert
- Cuisine: American
Ingredients
- 1 ½ cups all-purpose flour (spooned and leveled)
- 1 teaspoon cream of tartar
- ½ teaspoon baking soda
- ½ teaspoon ground cinnamon
- ¼ teaspoon ground nutmeg
- ¼ teaspoon salt
- ¼ cup unsalted butter, softened
- ¼ cup granulated sugar
- ¼ cup packed light brown sugar
- ⅓ cup pumpkin puree (100% pure pumpkin)
- 1 large egg yolk (room temperature)
- 1 teaspoon vanilla extract
- 3 tablespoons granulated sugar (for coating)
- 1 teaspoon ground cinnamon (for coating)
- 4 ounces reduced-fat cream cheese, softened (Neufchâtel)
- 2 tablespoons unsalted butter, softened
- ¼ cup powdered sugar, sifted
- 2 tablespoons pure maple syrup
- ¼ teaspoon vanilla extract
- Pinch of salt
Instructions
- Preheat oven to 350°F (175°C) and line two baking sheets with parchment paper.
- In a medium bowl, whisk together flour, cream of tartar, baking soda, cinnamon, nutmeg, and salt. Set aside.
- In a large bowl, beat softened butter, granulated sugar, and brown sugar with an electric mixer on medium speed until light and fluffy, about 2 minutes. Scrape down sides halfway through.
- Beat in pumpkin puree, egg yolk, and vanilla extract until well combined. Mixture may look curdled; this is normal.
- Gradually add flour mixture to wet ingredients, mixing on low speed until just combined. Do not overmix. Dough will be soft and slightly sticky.
- In a small bowl, stir together 3 tablespoons sugar and 1 teaspoon cinnamon for coating. Portion dough into 28 balls (about 1.5 tablespoons each). Roll each ball in cinnamon-sugar mixture until fully coated. Place on prepared baking sheets, spacing 2 inches apart.
- Bake for 10 to 12 minutes, until edges are set and tops look slightly cracked. Centers will still be soft. Cool on baking sheet for 5 minutes, then transfer to a wire rack to cool completely.
- While cookies cool, make filling: In a medium bowl, beat softened cream cheese and butter with electric mixer on medium speed until smooth and creamy, about 1 minute. Add sifted powdered sugar, maple syrup, vanilla extract, and salt. Beat on low until combined, then increase to medium and beat for 2 minutes until light and fluffy.
- Once cookies are completely cool, pair them by size. Spread about 1 tablespoon of maple cream filling onto flat side of one cookie. Top with matching cookie, flat side down, and gently press until filling spreads to edges. Repeat with remaining cookies and filling.
- Let assembled cookies rest at room temperature for 15 minutes before serving to allow filling to set.
Notes
Do not overbake; cookies will look underdone but continue to set as they cool. Use room temperature ingredients for best results. Measure flour correctly by spooning and leveling. If filling is too soft, chill for 10-15 minutes. Let cookies cool completely before assembling to prevent melting. Store assembled cookies in airtight container in refrigerator for up to 5 days. Unfilled cookies can be frozen for up to 3 months; make filling fresh.
Nutrition
- Serving Size: 1 sandwich cookie
- Calories: 185
- Sugar: 16
- Sodium: 120
- Fat: 8
- Saturated Fat: 5
- Carbohydrates: 26
- Fiber: 1
- Protein: 3
Keywords: pumpkin snickerdoodle, lightened-up cookies, maple cream, fall cookies, sandwich cookies, pumpkin dessert