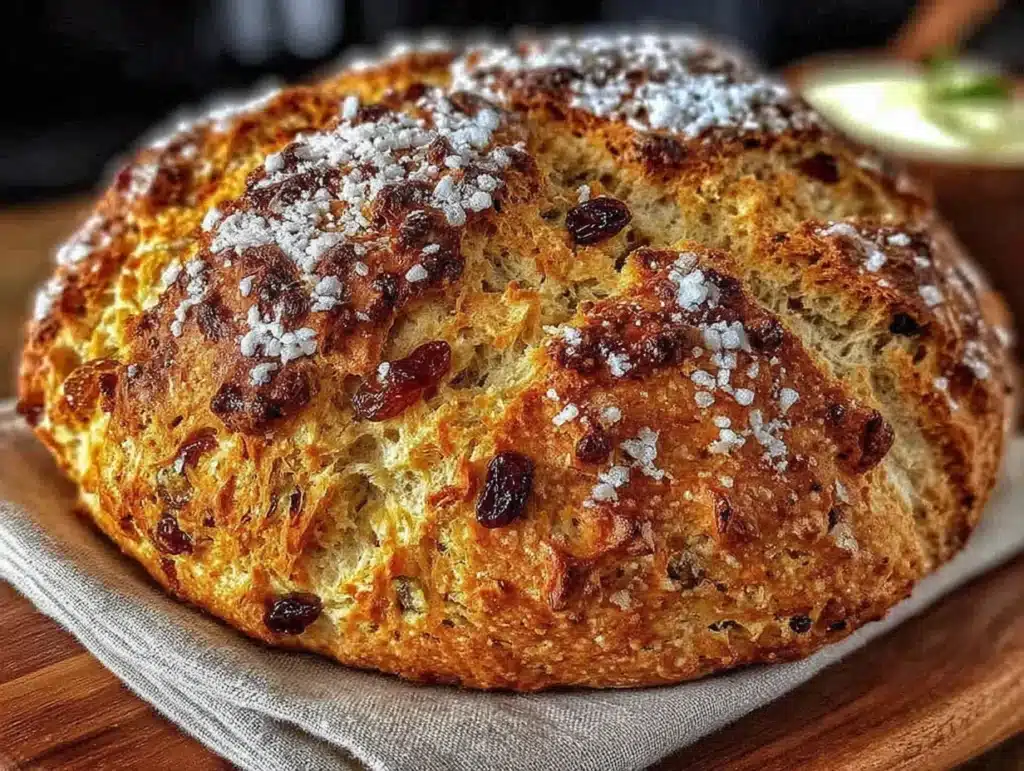
My youngest had claimed to hate raisins for three solid years. Three years of picking them out of oatmeal cookies, pushing them to the side of rice pudding, and giving me that look—the one that says “you know better, Mom.” Then, last Tuesday, I made this Irish soda bread “just for myself” while she was doing homework at the kitchen table. I wasn’t trying to prove anything. I was just craving that dense, slightly sweet bread my grandmother used to make, and golden raisins felt less aggressive than the regular ones. Honestly, I didn’t even think about it.
I pulled the loaf out of the oven, let it cool just enough so the butter wouldn’t immediately turn into a puddle, and cut myself a thick slice. I was standing at the counter, eating it over the sink (you know the move), when I heard her chair scrape back. She walked over, looked at the bread, looked at me, and said, “Can I have a piece?” I almost dropped my plate. I cut her a slice, slathered it with butter, and held my breath. She took a bite. Chewed. Swallowed. Then she reached for the rest of the slice and walked back to her homework without a single word. That was it. No fanfare. No “Mom, this is amazing.” Just a kid who had quietly, completely, changed her own mind.
That’s the thing about this bread. It doesn’t try to convince anyone of anything. It just sits there, humble and golden, with those little bursts of sweetness hiding in every bite. The caraway seeds—which I was also sure she’d hate—add this warm, almost savory note that keeps you coming back for “just one more slice.” And the best part? There’s no yeast. No kneading. No waiting around for dough to rise. You can have this bread on the table in about an hour, and it costs next to nothing to make. For a family on a budget, that’s not just a win—that’s the whole game.
Why You’ll Love This Recipe
I’ve tested this recipe about seven times now, and I can tell you with complete confidence: this is the version that works. It’s not fussy, it’s not fancy, and it doesn’t require a trip to a specialty grocery store. Here’s why it keeps ending up on my table:
- No Yeast, No Waiting: This bread comes together in under an hour, start to finish. No rising, no proofing, no worrying if your water is the right temperature. It’s the kind of recipe you can decide to make at 4:30 and have on the table by 5:15.
- Simple Pantry Ingredients: Flour, buttermilk, baking soda, salt, sugar, butter, caraway seeds, and golden raisins. That’s it. You probably have most of these things right now.
- Kid-Approved (Seriously): I’ve made this for playdates, school bake sales, and quiet afternoons. Kids love the sweet pop of golden raisins, and the caraway is mild enough that even picky eaters don’t bat an eye.
- Budget-Friendly: A loaf of good bakery bread costs what, five or six dollars now? This whole loaf costs maybe two dollars. And it tastes better.
- Perfect for Busy Families: It goes with soup, stew, eggs, or just a thick layer of butter. It’s breakfast, lunch, and snack all in one.
- Freezes Beautifully: Make two loaves. Eat one now, freeze one for later. The frozen loaf reheats like a dream.
What makes this recipe different from all the other Irish soda breads out there? It’s the balance. The golden raisins are plumper and sweeter than regular raisins, so you don’t need as much sugar. The caraway seeds are toasted just slightly in the oven, releasing their oils without being overpowering. And the texture—dense but tender, with a crust that shatters when you bite into it—is exactly what soda bread should be. This isn’t just another recipe. This is the one I make when I want to feel like I’ve got dinner handled before I’ve even started cooking.
What Ingredients You Will Need
This recipe uses simple, honest ingredients to create something that feels special without any fuss. Most of these are pantry staples, and the ones that aren’t are easy to find and worth keeping on hand.
- All-Purpose Flour (4 cups / 480g): No need for bread flour here. All-purpose gives the bread the right crumb—tender but sturdy enough to hold up to a bowl of soup. I use Gold Medal, but any brand works fine.
- Buttermilk (1 ¾ cups / 420ml): This is non-negotiable. The acidity in buttermilk reacts with the baking soda to create the rise. If you don’t have buttermilk, you can make a quick substitute by adding 1 tablespoon of lemon juice or white vinegar to 1 ¾ cups of regular milk and letting it sit for 5 minutes. It works, but real buttermilk gives a better tang.
- Unsalted Butter (4 tablespoons / 56g, cold, cut into small cubes): Cold butter is key. You want it to stay in little pea-sized pieces so it creates those flaky pockets in the bread. Don’t let it soften.
- Golden Raisins (1 cup / 150g): These are sweeter and plumper than regular raisins, and they don’t get as hard during baking. Kids seem to prefer them, too. If you only have regular raisins, soak them in hot water for 10 minutes and drain them well before using.
- Caraway Seeds (1 ½ tablespoons): This is the classic Irish soda bread flavor. It’s earthy and slightly sweet, like a milder version of fennel. If you’re nervous about the caraway, start with 1 tablespoon. My kids didn’t even notice it.
- Granulated Sugar (3 tablespoons / 36g): Just enough to balance the tang of the buttermilk and the bitterness of the caraway. Don’t skip it—it’s not enough to make the bread sweet, but it makes a difference.
- Baking Soda (1 teaspoon): This is your leavening agent. Make sure it’s fresh—if it’s been sitting in your cabinet for a year, it might not work as well. Test it by dropping a little into vinegar; if it fizzes, you’re good.
- Salt (1 teaspoon): Use fine sea salt or table salt. Kosher salt works too, but you might need a little more since the flakes are bigger.
- Egg (1 large, optional but recommended): This isn’t traditional, but I’ve found that adding one egg makes the bread a little richer and gives it a better structure. If you skip it, add an extra 2 tablespoons of buttermilk.
Ingredient Tips: For the best texture, make sure your buttermilk and egg are at room temperature. Cold ingredients can make the butter seize up and result in a denser loaf. Also, I’ve tested this with both salted and unsalted butter, and unsalted gives you more control over the salt level. If you only have salted butter, reduce the added salt to ½ teaspoon.
Equipment Needed
You don’t need much for this recipe, which is part of the beauty of it. Here’s what you’ll need:
- Large Mixing Bowl: Any big bowl will do. I use a glass one so I can see if the butter is evenly distributed.
- Pastry Cutter or Two Forks: You need something to cut the cold butter into the flour. A pastry cutter is ideal, but two forks work in a pinch. You can even use your fingertips if you work quickly so the butter doesn’t warm up.
- Baking Sheet or Cast Iron Skillet: A baking sheet lined with parchment paper works perfectly. If you have a 10-inch cast iron skillet, that’s even better—it gives the bread a gorgeous crust.
- Sharp Knife or Bench Scraper: You’ll need this to score the cross on top of the loaf before baking. A sharp knife works fine.
- Measuring Cups and Spoons: For accuracy, especially with the baking soda and salt.
- Cooling Rack: This is important—if you let the bread cool in the pan, the bottom can get soggy. A wire rack lets air circulate.
I used a cheap baking sheet for years before I finally got a cast iron skillet, and honestly, the bread was still great. Don’t let equipment hold you back. If you have a bowl and an oven, you can make this bread.
Preparation Method
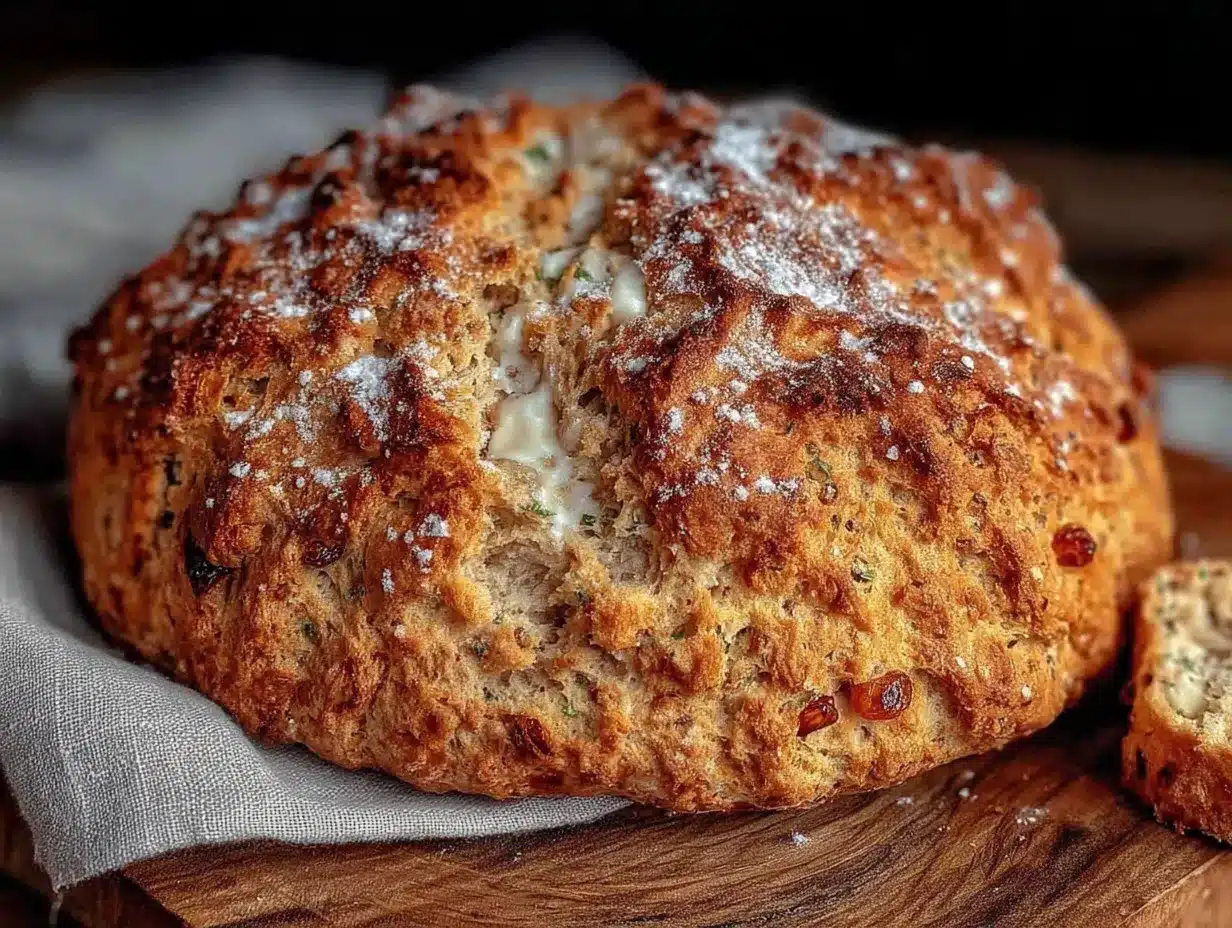
This is the easy part. No yeast, no kneading, no stress. Here’s how to do it:
- Preheat your oven to 425°F (220°C). Place a rack in the middle of the oven. If you’re using a cast iron skillet, put it in the oven now to heat up—this helps create a crispier crust.
- Mix the dry ingredients. In a large bowl, whisk together the 4 cups of all-purpose flour, 1 teaspoon of baking soda, 1 teaspoon of salt, and 3 tablespoons of sugar. Make sure everything is evenly distributed. I usually give it a good stir with a whisk for about 30 seconds.
- Cut in the cold butter. Add the 4 tablespoons of cold, cubed butter to the flour mixture. Use a pastry cutter or two forks to cut the butter into the flour until it looks like coarse meal with pea-sized pieces of butter still visible. Don’t overdo it—you want those little butter pockets. This takes about 2 minutes.
- Stir in the caraway seeds and golden raisins. Add 1 ½ tablespoons of caraway seeds and 1 cup of golden raisins. Toss them gently through the flour mixture so they’re coated. This helps prevent the raisins from sinking to the bottom of the loaf.
- Make a well and add the wet ingredients. If you’re using the egg, whisk it into the 1 ¾ cups of buttermilk first. Pour the buttermilk mixture into the well you’ve created in the center of the flour. Use a wooden spoon or your hands to bring the dough together. Mix just until it forms a shaggy, sticky dough. Don’t overmix—overworking the dough will make the bread tough. It should look rough and a little messy. That’s exactly what you want.
- Shape the dough. Turn the dough out onto a lightly floured surface. With floured hands, gently pat it into a round disc about 1 ½ inches thick. Don’t knead it—just shape it. You want to handle it as little as possible.
- Score the top. Place the dough on your baking sheet (or carefully transfer it to the hot cast iron skillet). Use a sharp knife to cut a deep cross into the top of the dough, about ½ inch deep. This isn’t just for looks—it helps the bread bake evenly and allows the “fairies” to escape, as the Irish saying goes.
- Bake. Bake for 35 to 45 minutes, until the crust is deep golden brown and the loaf sounds hollow when you tap the bottom. If you have an instant-read thermometer, the internal temperature should be around 190°F (88°C).
- Cool. Transfer the bread to a wire rack and let it cool for at least 20 minutes before slicing. I know it’s hard to wait, but if you cut it too soon, the inside will be gummy. Trust me—I’ve made that mistake.
Sensory Cues: When you’re cutting in the butter, the mixture should feel like damp sand with little pebbles. When you add the buttermilk, the dough will come together in a shaggy, sticky mass—it shouldn’t be smooth like bread dough. When it’s done baking, the crust will be a deep golden brown, and if you tap the bottom, it should sound like knocking on a hollow door.
Cooking Tips & Techniques
I’ve made this bread more times than I can count, and I’ve learned a few things the hard way. Here are the tips that actually matter:
Don’t overmix the dough. This is the number one mistake people make with soda bread. The more you handle it, the tougher it gets. You want to mix just until the flour is incorporated and the dough comes together. A few dry spots are fine—they’ll work themselves out in the oven.
Use cold ingredients. The butter needs to stay solid until it hits the oven. If your kitchen is warm, pop the flour and butter in the fridge for 10 minutes before you start. I learned this after making a flat, greasy loaf one hot July afternoon.
Toast the caraway seeds for extra flavor. If you have an extra 2 minutes, toast the caraway seeds in a dry skillet over medium heat until they’re fragrant—about 60 seconds. It brings out their nuttiness without making them bitter. I do this every time now.
Score the cross deep enough. If you only make a shallow cut, the bread won’t open up properly as it bakes. Go at least ½ inch deep. And don’t skip it—the cross helps the bread cook all the way through.
Let it cool. I know the smell is intoxicating. I know you want to slather a slice with butter and eat it immediately. But if you cut into it too soon, the inside will be dense and doughy. Give it at least 20 minutes. Use that time to make a pot of tea or warm up some soup.
Multitasking tip: While the bread is baking, you can prep the rest of your meal. This bread is perfect with a pot of soup or a simple stew. I often start the bread, then chop vegetables for soup while it bakes. Everything finishes around the same time.
Variations & Adaptations
This recipe is forgiving, and I’ve tried several variations over the years. Here are my favorites:
1. Swap the dried fruit. Golden raisins are my go-to, but chopped dried apricots, dried cranberries, or even chopped dates work beautifully. Each one gives the bread a different personality. Apricots make it a little more sophisticated, while cranberries add a tart pop that kids seem to like.
2. Make it savory. Skip the sugar and raisins, and add 1 cup of shredded sharp cheddar cheese and 2 tablespoons of fresh chopped rosemary. The caraway still works here—it pairs surprisingly well with cheese. This version is incredible alongside a bowl of tomato soup.
3. Go gluten-free. I’ve tested this with a 1:1 gluten-free flour blend (the one with xanthan gum), and it works. The texture is a little more crumbly, but the flavor is still there. Add an extra tablespoon of buttermilk if the dough seems too dry.
4. Add a touch of honey. If you want a slightly sweeter bread, drizzle 2 tablespoons of honey into the buttermilk before adding it to the dry ingredients. This is my favorite version for breakfast—toasted with butter and a sprinkle of sea salt.
5. Make mini loaves. Divide the dough into 4 equal pieces, shape them into small rounds, and bake for 20 to 25 minutes. These are perfect for lunchboxes or for giving to neighbors. My kids love having their own “personal” loaf.
Serving & Storage Suggestions
This bread is best served warm, but it’s still wonderful at room temperature. Here’s how I like to serve it:
Serving: Slice it thick—about ¾ inch—and serve it with a generous pat of salted butter. The butter melting into the warm bread is honestly the best part. It’s also fantastic with a bowl of hearty soup, like potato leek or beef stew. For breakfast, toast a slice and top it with a fried egg. For a snack, spread it with apple butter or honey.
Storage: Store the bread wrapped in a clean kitchen towel at room temperature for up to 2 days. Don’t put it in a plastic bag—the crust will get soft and soggy. If you need to keep it longer, wrap it tightly in plastic wrap and then foil, and freeze it for up to 3 months.
Reheating: To bring back that just-baked crust, reheat slices in a 350°F (175°C) oven for 5 to 7 minutes, or pop them in the toaster. For a whole loaf, wrap it in foil and warm it in a 300°F (150°C) oven for 15 minutes.
Flavor development: Honestly, this bread is even better the next day. The flavors meld together, and the caraway becomes less pronounced. If you can resist eating the whole loaf on day one, you’re in for a treat on day two.
Nutritional Information & Benefits
Here’s the estimated nutrition for one slice (based on 12 slices per loaf):
- Calories: 220
- Total Fat: 5g
- Saturated Fat: 3g
- Cholesterol: 25mg
- Sodium: 310mg
- Total Carbohydrates: 40g
- Dietary Fiber: 2g
- Sugars: 12g
- Protein: 5g
Health Benefits: Golden raisins are a good source of iron and potassium, and they provide natural sweetness without refined sugar. Caraway seeds have been used for centuries to aid digestion—they’re known for their soothing properties. And while this bread isn’t exactly health food, it’s made with simple, whole ingredients that you can feel good about feeding your family. It’s also lower in sugar than most store-bought breads, and it contains no preservatives or artificial additives.
Dietary Considerations: This recipe is vegetarian. For a dairy-free version, use a plant-based buttermilk (mix 1 ¾ cups of unsweetened almond milk with 1 tablespoon of lemon juice) and substitute the butter with a vegan butter stick. It’s not quite the same, but it’s close enough to satisfy a craving.
Conclusion
This Irish soda bread has become a staple in my kitchen, and I think it will become one in yours, too. It’s the kind of recipe that doesn’t ask for much—just a few simple ingredients, a little bit of time, and an oven that works. In return, it gives you a warm, crusty loaf that makes your whole house smell like comfort. It makes weeknight dinners feel a little more special. It turns a bowl of soup into a meal. And sometimes, it even convinces a raisin-hating kid to change her mind.
I’d love to hear how this bread turns out for you. Did you stick with the golden raisins, or did you try a different variation? Did your kids eat it? (I’m betting they will.) Leave a comment below and let me know—I read every single one. And if you share a photo on Pinterest or Instagram, tag me so I can see your beautiful loaf. Happy baking, friends. You’ve got this.
Frequently Asked Questions
Can I use regular raisins instead of golden raisins?
Yes, absolutely. Golden raisins are sweeter and plumper, but regular raisins work fine. If you use regular raisins, I recommend soaking them in hot water for 10 minutes and draining them well before adding them to the dough. This keeps them from drying out during baking.
Why did my soda bread turn out dense and heavy?
There are a few possible reasons. You might have overmixed the dough, which develops the gluten and makes it tough. Or your baking soda might be old—it loses its potency over time. Make sure your baking soda is fresh by testing it in a little vinegar. Also, don’t skip the scoring step—the cross helps the bread rise evenly.
Can I make this recipe without buttermilk?
Yes, you can make a quick buttermilk substitute. Add 1 tablespoon of lemon juice or white vinegar to 1 ¾ cups of regular milk and let it sit for 5 minutes. It will curdle slightly, which is exactly what you want. The flavor won’t be quite as tangy, but it works in a pinch.
How do I know when the bread is fully baked?
The easiest way is to tap the bottom of the loaf. If it sounds hollow, it’s done. You can also use an instant-read thermometer—the internal temperature should be around 190°F (88°C). The crust should be deep golden brown, and a toothpick inserted into the center should come out clean or with just a few moist crumbs.
Can I freeze this Irish soda bread?
Yes, it freezes beautifully. Let the loaf cool completely, then wrap it tightly in plastic wrap and then a layer of foil. It will keep in the freezer for up to 3 months. To thaw, leave it at room temperature for a few hours, then reheat in a 300°F (150°C) oven for 10 to 15 minutes to crisp up the crust.
Pin This Recipe!
Easy Kid-Approved Irish Soda Bread (No Yeast)

This no-yeast Irish soda bread is dense, slightly sweet, and studded with golden raisins and caraway seeds. It comes together in under an hour with simple pantry ingredients, making it a perfect budget-friendly bread for busy families.
- Prep Time: 15 minutes
- Cook Time: 40 minutes
- Total Time: 55 minutes
- Yield: 12 servings 1x
- Category: Bread
- Cuisine: Irish
Ingredients
- 4 cups (480g) all-purpose flour
- 1 ¾ cups (420ml) buttermilk
- 4 tablespoons (56g) unsalted butter, cold, cut into small cubes
- 1 cup (150g) golden raisins
- 1 ½ tablespoons caraway seeds
- 3 tablespoons (36g) granulated sugar
- 1 teaspoon baking soda
- 1 teaspoon salt
- 1 large egg (optional but recommended)
Instructions
- Preheat your oven to 425°F (220°C). Place a rack in the middle of the oven. If using a cast iron skillet, put it in the oven now to heat up.
- In a large bowl, whisk together the 4 cups of all-purpose flour, 1 teaspoon of baking soda, 1 teaspoon of salt, and 3 tablespoons of sugar.
- Add the 4 tablespoons of cold, cubed butter to the flour mixture. Use a pastry cutter or two forks to cut the butter into the flour until it looks like coarse meal with pea-sized pieces of butter still visible.
- Stir in 1 ½ tablespoons of caraway seeds and 1 cup of golden raisins. Toss them gently through the flour mixture so they’re coated.
- If using the egg, whisk it into the 1 ¾ cups of buttermilk first. Pour the buttermilk mixture into a well in the center of the flour. Use a wooden spoon or your hands to bring the dough together just until it forms a shaggy, sticky dough. Do not overmix.
- Turn the dough out onto a lightly floured surface. With floured hands, gently pat it into a round disc about 1 ½ inches thick. Do not knead.
- Place the dough on a baking sheet or carefully transfer it to the hot cast iron skillet. Use a sharp knife to cut a deep cross into the top of the dough, about ½ inch deep.
- Bake for 35 to 45 minutes, until the crust is deep golden brown and the loaf sounds hollow when tapped on the bottom. Internal temperature should be around 190°F (88°C).
- Transfer the bread to a wire rack and let it cool for at least 20 minutes before slicing.
Notes
For best texture, use room temperature buttermilk and egg. Do not overmix the dough. Let the bread cool at least 20 minutes before slicing to avoid a gummy interior. The bread freezes well for up to 3 months.
Nutrition
- Serving Size: 1 slice
- Calories: 220
- Sugar: 12
- Sodium: 310
- Fat: 5
- Saturated Fat: 3
- Carbohydrates: 40
- Fiber: 2
- Protein: 5
Keywords: Irish soda bread, no yeast bread, easy bread recipe, kid-friendly bread, golden raisin bread, caraway seed bread, budget-friendly bread