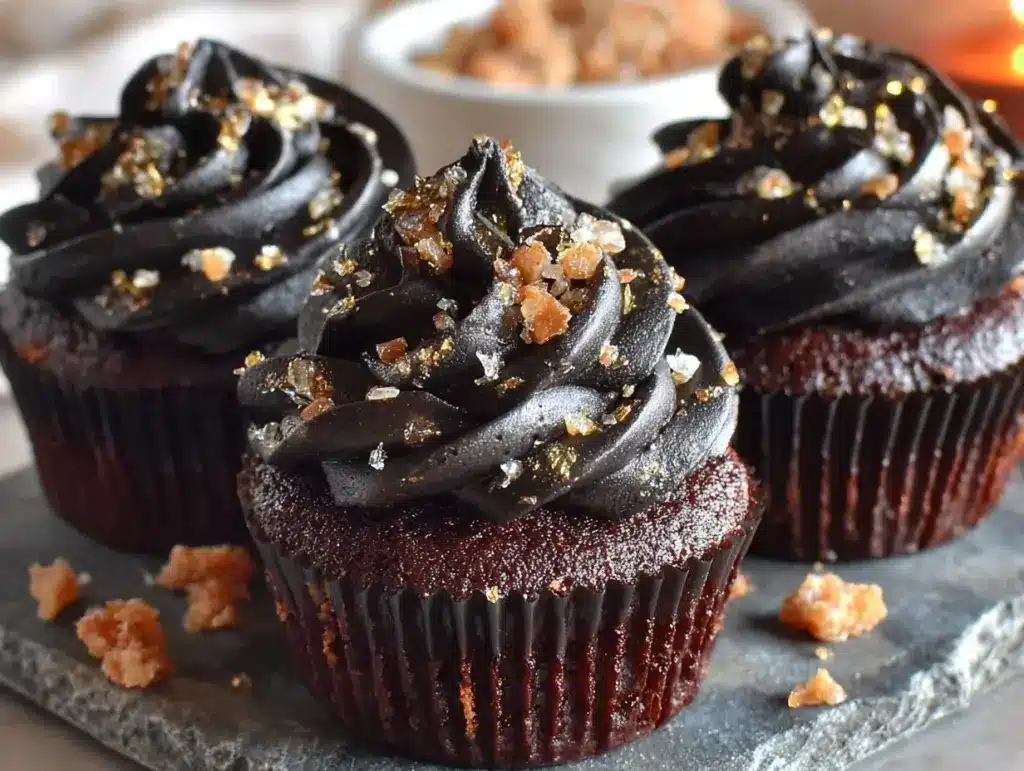
Picture this: You walk into your kitchen late at night and the air is thick with the scent of bittersweet cocoa and vanilla, swirling together. The oven’s light casts a soft glow, and sitting on the counter are a dozen black velvet cupcakes—dark as midnight, impossibly glossy, topped with a swirl of creamy frosting and a glimmer of edible gold. It’s the kind of sight that makes you stop in your tracks and just grin, because you know you’ve landed on something magical.
The first time I made these Black Velvet Cupcakes, it was a rainy Friday, and honestly, I was itching for a baking project that felt a bit dramatic (you know how sometimes you just need a treat that matches your mood). My grandma used to bake classic red velvet cakes for every family birthday, and I thought, “Why not switch things up?”—give those velvety layers a mysterious twist. The moment I bit into that deep, dark crumb, I was instantly hooked. The gold shimmer on top was a last-minute addition, but it transformed the cupcakes into pure, nostalgic comfort with a glamorous edge. That was a pause-and-smile moment, the kind that makes you wish you’d stumbled on this recipe years ago.
Let’s face it, my family couldn’t stop sneaking these off the cooling rack (my teenager claimed three before I could frost them, and my partner kept muttering about ‘witchy bakery vibes’). These cupcakes have become a staple for birthdays, Halloween gatherings, and yes, even for those times when you just want to brighten up your Pinterest board with something bold. They’re dangerously easy—trust me, I’ve tested them a dozen times in the name of research. So if you want a treat that feels like a hug, looks like a show-stopper, and tastes like midnight itself, you’re going to want to bookmark this Black Velvet Cupcakes recipe.
Why You’ll Love This Black Velvet Cupcakes Recipe
Let me share a few reasons why these Black Velvet Cupcakes are honestly worth every minute in the kitchen. After baking countless batches (and eating more than I should probably admit), I’ve landed on a recipe that ticks all the boxes—rich flavor, striking visual appeal, and that perfect, tender crumb.
- Quick & Easy: Ready in under 40 minutes, including cooling and frosting. Perfect for last-minute dessert cravings or when you need something spectacular in a hurry.
- Simple Ingredients: No wild goose chase at the grocery store. Most items are pantry staples—cocoa powder, flour, sugar, buttermilk, and a splash of vanilla.
- Perfect for Special Occasions: These cupcakes are a hit for birthdays, grown-up dinner parties, Halloween, or even midnight snacks. The edible gold makes them truly Pinterest-worthy!
- Crowd-Pleaser: I haven’t met a person who didn’t swoon over these (kids call them “galaxy cupcakes” and adults love the elegant twist).
- Unbelievably Delicious: The texture—moist, soft, and just a hint of tang from the buttermilk—makes each bite feel decadent. The cocoa adds a deep, rich flavor that’s totally different from your average chocolate cupcake.
What sets this recipe apart? For starters, I use black cocoa powder for that true midnight color and flavor (the secret is out!). The frosting isn’t just a sweet afterthought—it’s whipped cream cheese, perfectly balanced and not cloying. The edible gold leaf isn’t just for show, it’s a little moment of luxury you can actually taste. Whether you’re a seasoned home baker or just dipping your toe into cupcake territory, these are forgiving and flexible—no fancy piping required. You’ll get bakery-level results with minimal effort.
So if you want a cupcake that’s dramatic, delicious, and guaranteed to make you pause and savor, this Black Velvet Cupcakes recipe delivers. It’s comfort food meets glamour, and honestly, it’s my go-to for impressing guests without breaking a sweat.
What Ingredients You Will Need
This Black Velvet Cupcakes recipe is all about bold flavor and dramatic presentation, but the ingredients themselves are surprisingly straightforward. Most are pantry staples, with a couple of easy-to-find specialty items to give you that signature color and taste.
- For the Cupcakes:
- 1 cup (120g) all-purpose flour
- 1/2 cup (50g) black cocoa powder (I recommend King Arthur—makes a true midnight hue)
- 1 cup (200g) granulated sugar
- 1/2 tsp baking soda
- 1/4 tsp baking powder
- 1/4 tsp salt
- 2 large eggs, room temperature
- 1/2 cup (120ml) vegetable oil (neutral flavor, keeps the crumb moist)
- 1/2 cup (120ml) buttermilk (for tang and tenderness—use plant-based if needed)
- 1 tsp vanilla extract (pure, if possible)
- 1 tsp apple cider vinegar (helps keep the crumb light)
- Black gel food coloring (optional, but gives that extra depth—Wilton or Americolor are my go-tos)
- For the Frosting:
- 8 oz (225g) cream cheese, softened
- 1/2 cup (115g) unsalted butter, softened
- 2 1/2 cups (300g) powdered sugar
- 1 tsp vanilla extract
- Pinch of salt
- For Decoration:
- Edible gold leaf sheets (available online or at baking supply stores—just a little makes a big impact!)
- Sprinkles or gold dust (optional, for extra shimmer)
If you’re making these gluten-free, swap in your favorite 1:1 gluten-free flour blend. For dairy-free, use plant-based buttermilk and vegan butter—easy peasy. The black cocoa powder is what gives these cupcakes their intense color and Oreo-like flavor; regular cocoa will work, but you’ll get a lighter shade. If you can’t find black cocoa, mix half Dutch-process and half regular cocoa for a similar effect.
Sometimes I’ll toss in a handful of mini chocolate chips for a double-chocolate punch. And, if you want to amp up the drama, a dash of espresso powder deepens the cocoa flavor (just a quarter teaspoon will do).
All in all, these ingredients come together for a cupcake that’s bold, sultry, and totally unforgettable.
Equipment Needed
You don’t need a fancy kitchen setup for these Black Velvet Cupcakes—just a few basics and a couple of optional extras if you want bakery-style results.
- 12-cup muffin pan (non-stick preferred, but any standard pan will do)
- Paper cupcake liners (black or gold look extra cool for presentation)
- Mixing bowls (one large, one medium)
- Electric mixer (hand mixer or stand mixer works—trust me, your arms will thank you when whipping the frosting)
- Whisk and rubber spatula
- Measuring cups and spoons (for accuracy—baking is a science, after all)
- Small offset spatula or butter knife (for frosting—makes it super easy to swirl)
- Fine tweezers (for placing the edible gold leaf—definitely not required, but helps with precision)
If you don’t have an electric mixer, good old elbow grease will work for the batter—just whisk until smooth. For the frosting, though, a mixer makes it fluffier. I’ve tried budget-friendly hand mixers (Black+Decker is sturdy) and they hold up well. If you’re using a heavy-duty stand mixer, remember to scrape down the bowl (learned that the hard way with a lumpy batch once).
For cleaning gold leaf tweezers, just wipe with a damp cloth—don’t use soap, it can dull the finish. And if you don’t have cupcake liners, grease the pan generously and dust with cocoa powder to help release the cakes (my grandma’s old trick).
Preparation Method

Here’s the step-by-step method for making the perfect Black Velvet Cupcakes. I’ll walk you through every detail, so you’re set up for success (and delicious midnight snacking).
- Preheat the Oven & Prep: Preheat your oven to 350°F (175°C). Line a 12-cup muffin pan with cupcake liners—black or gold for dramatic effect.
- Mix the Dry Ingredients: In a large bowl, whisk together 1 cup (120g) all-purpose flour, 1/2 cup (50g) black cocoa powder, 1 cup (200g) sugar, 1/2 tsp baking soda, 1/4 tsp baking powder, and 1/4 tsp salt. Make sure the cocoa is evenly distributed—no streaks (the color should look rich and dark even now).
- Blend the Wet Ingredients: In a separate medium bowl, beat 2 eggs until lightly frothy. Add 1/2 cup (120ml) oil, 1/2 cup (120ml) buttermilk, 1 tsp vanilla, and 1 tsp apple cider vinegar. Whisk until smooth and creamy.
- Combine Wet and Dry: Pour the wet mixture into the dry ingredients. Stir gently with a spatula until just combined—don’t overmix, or you’ll end up with tough cupcakes. If you’re using black gel food coloring, add a few drops now until you get that midnight shade. The batter should be velvety and slightly thick.
- Fill the Cupcake Liners: Divide the batter evenly between the liners, filling each about 2/3 full. A cookie scoop makes this super easy (and less messy). Each cup should get approximately 2 tbsp (30ml) of batter.
- Bake: Slide the pan into the oven and bake for 16-18 minutes. The cupcakes are done when a toothpick comes out clean or with a few moist crumbs (don’t wait for it to be bone dry—overbaking dries them out). The tops should be puffed and deep black.
- Cool: Let the cupcakes cool in the pan for 5 minutes, then transfer to a wire rack. (Don’t skip this step—otherwise, the bottoms can get soggy.) Cool completely before frosting.
- Make the Frosting: Beat 8 oz (225g) cream cheese and 1/2 cup (115g) butter until smooth and fluffy (about 2 minutes on medium speed). Add 2 1/2 cups (300g) powdered sugar, 1 tsp vanilla, and a pinch of salt. Beat for another 2 minutes until light and creamy. If it’s too soft, chill for 10-15 minutes before using.
- Frost & Decorate: Use a spatula or piping bag to swirl generous dollops of frosting onto each cooled cupcake. Carefully place a small piece of edible gold leaf on top (use tweezers—it’s fragile!). Sprinkle with gold dust or sprinkles if you like.
- Final Touches: Serve immediately, or chill for a firmer frosting. The cupcakes will look like little jewels—honestly, you’ll want to snap a photo for Pinterest first!
Troubleshooting: If your cupcakes sink, it’s usually due to overmixing or underbaking. If the frosting feels runny, chill it longer or add more powdered sugar. The batter should look silky, not dry—if it’s too thick, add a splash of buttermilk. And always check the oven temp with an oven thermometer (my old oven runs hot, so learned that by trial and error).
Efficiency tip: While cupcakes bake, whip up the frosting and prep your gold leaf. By the time they’re cooled, everything’s ready to go.
Cooking Tips & Techniques
Let’s talk about how to get these Black Velvet Cupcakes just right—because after a few less-than-perfect batches, I’ve picked up some tricks along the way.
- Use Black Cocoa Powder: It’s seriously the key to that deep, midnight color and Oreo-like flavor. Regular cocoa powder works in a pinch, but you won’t get the same drama.
- Don’t Overmix: Once you combine the wet and dry ingredients, mix just until combined. Overmixing can make the cupcakes dense (I learned this after a particularly chewy batch—lesson learned!).
- Room Temperature Ingredients: Eggs and buttermilk blend better when they’re not cold—your batter will be silkier, trust me.
- Test for Doneness Early: Start checking at 15 minutes—every oven is a little different. The tops should spring back when lightly touched, and a toothpick should come out with moist crumbs.
- Gold Leaf Placement: Use tweezers and handle with care—it’s delicate stuff! If it tears, just patch it up (no one will notice once it’s sparkling).
- Chill the Frosting: Cream cheese frosting can get soft, especially in warm kitchens. If it starts to melt, pop it in the fridge for 10 minutes.
- Multitasking: Prep your frosting while the cupcakes bake, and set up your decorations so you can go straight from cooling to garnishing.
- Consistency: For uniform cupcakes, use a cookie scoop to portion the batter—each cupcake will bake evenly and look professional.
If you ever end up with dry cupcakes, it’s usually because of overbaking or too much flour—spoon and level your flour for accuracy. And if you’re working with kids, let them help with the gold leaf—it’s fun and makes for great memories (even if it gets a bit messy).
Variations & Adaptations
Black Velvet Cupcakes are a fantastic base for all sorts of creative tweaks. Here are a few of my favorite ways to switch things up:
- Gluten-Free: Swap the all-purpose flour for a 1:1 gluten-free blend. I’ve had great results with Bob’s Red Mill—no one could tell the difference.
- Dairy-Free: Use plant-based buttermilk and vegan cream cheese/butter for the frosting. Almond milk with a splash of vinegar works for the cake, and Earth Balance is a solid butter alternative.
- Seasonal Flair: Add 1/2 tsp cinnamon or pumpkin spice to the batter for a fall twist. In spring, top with fresh berries alongside the gold leaf.
- Flavor Boost: A touch of espresso powder in the batter deepens the cocoa flavor (just 1/4 tsp, trust me on this one).
- Alternative Frosting: Try whipped mascarpone or vanilla buttercream instead of cream cheese for a different vibe.
- Cooking Methods: This recipe works for mini cupcakes too—just reduce bake time to 10-12 minutes. Or make a layer cake by doubling the recipe and using two 8-inch pans.
- Personal Twist: I once added a raspberry jam center before baking—wow, the tartness paired with the rich cake was unforgettable!
For allergies, you can use sunflower seed butter in the frosting for nut-free homes. And if you want a less sweet cupcake, reduce the powdered sugar in the frosting by half—the tangy cream cheese will still shine. These cupcakes are flexible, so don’t be afraid to experiment!
Serving & Storage Suggestions
Serve Black Velvet Cupcakes at room temperature for the best flavor and texture—the frosting will be creamy and smooth, and the cake super moist. Stack them on a cake stand or dark platter for that bold, Pinterest-worthy presentation; sprinkle a little extra gold dust for sparkle.
Pair with a glass of cold milk, a cup of coffee, or even a bubbly prosecco for grown-up gatherings. They’re lovely alongside a berry compote or paired with a scoop of vanilla bean ice cream.
For storage, keep frosted cupcakes in an airtight container in the fridge for up to 3 days. The flavor gets even richer by day two (I always sneak one for breakfast, shh!). If you want to freeze them, wrap un-frosted cupcakes tightly in plastic and freeze for up to 2 months. Thaw at room temp, then frost and decorate before serving.
To reheat, zap the cupcake (without frosting) in the microwave for 8-10 seconds—just enough to refresh. The gold leaf holds up well, but add it fresh if you’re storing for longer.
Honestly, these cupcakes only get better with time—the cocoa flavor deepens, and the texture stays soft. Just keep them covered so they don’t dry out.
Nutritional Information & Benefits
Here’s a quick peek at the nutrition for one Black Velvet Cupcake (with frosting and gold leaf):
- Calories: ~260
- Fat: ~13g
- Saturated Fat: ~6g
- Carbohydrates: ~32g
- Protein: ~3g
- Sugar: ~22g
The black cocoa is rich in antioxidants, and buttermilk adds a dose of calcium and protein. Cream cheese offers a bit of protein and healthy fat, and edible gold leaf is purely decorative—no nutritional value, but definitely adds a wow factor!
If you use gluten-free or dairy-free swaps, the nutrition changes slightly, but the treat remains relatively indulgent. These cupcakes are nut-free as written, but always check every packaged ingredient for cross-contamination if allergies are a concern.
I love how these cupcakes satisfy a chocolate craving without being too heavy—plus, they’re a fun way to sneak a little extra joy into everyday life.
Conclusion
So there you have it—the Black Velvet Cupcakes recipe that’s as show-stopping as it is comforting. If you’re after a treat that’s bold, a little mysterious, and absolutely delicious, this one is a winner. The midnight color, creamy frosting, and sparkling gold leaf make them perfect for every occasion, especially those times when you want something special but not complicated.
Honestly, these cupcakes are my favorite for customizing. Swap the frosting, add a filling, or play with toppings—make them your own! Every time I bake a batch, I’m reminded how a simple recipe can bring so much joy (and a little bit of sparkle) to the table.
If you give these a whirl, drop a comment below—share your twists, your family’s reactions, or just a photo of your midnight creations! Pin, share, and make this recipe a staple in your kitchen. Wishing you many happy bites and golden moments ahead!
FAQs About Black Velvet Cupcakes Recipe
What is black cocoa powder, and can I use regular cocoa instead?
Black cocoa powder is a super-dark, Dutch-processed cocoa that gives the cupcakes their signature color and flavor. You can use regular cocoa, but the cupcakes will be lighter and less “midnight” in appearance.
Is edible gold leaf safe to eat?
Yes, edible gold leaf is food-grade and perfectly safe to eat. It has no taste but adds a dramatic, luxurious touch to your cupcakes.
Can I make these cupcakes ahead of time?
Absolutely! The cupcakes stay moist for up to 3 days in the fridge. For best results, add the gold leaf just before serving.
How do I get the frosting to hold its shape?
Chill the frosting for 10-15 minutes before piping or swirling. Using full-fat cream cheese and butter helps keep it sturdy and creamy.
Can I make these cupcakes without eggs?
Yes! Use a flaxseed egg (1 tbsp ground flaxseed + 2.5 tbsp water) or a commercial egg replacer. The texture will be slightly different but still delicious.
Pin This Recipe!
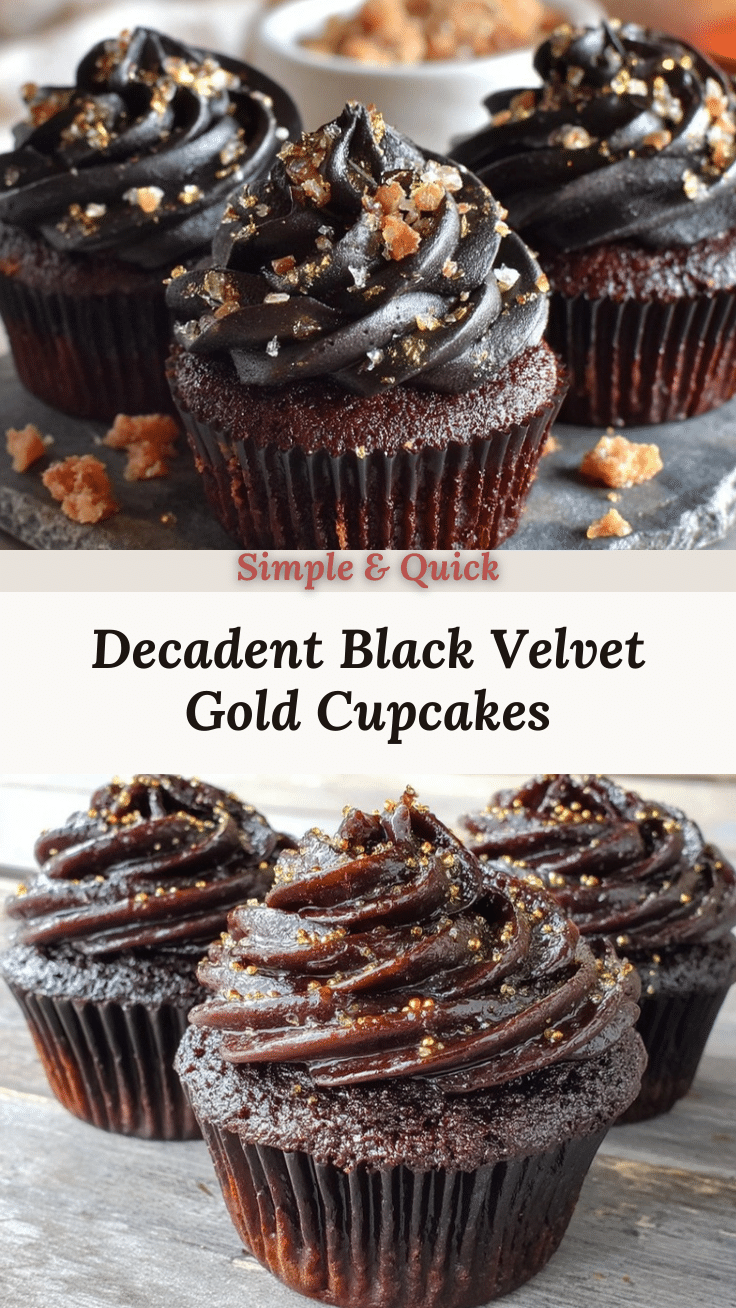
Black Velvet Cupcakes Recipe: Easy Midnight Treat with Edible Gold
These Black Velvet Cupcakes are a dramatic twist on classic red velvet, featuring deep black cocoa, a tender crumb, and a swirl of creamy cream cheese frosting topped with edible gold leaf. Perfect for special occasions or midnight snacking, they’re easy to make and guaranteed to impress.
- Prep Time: 15 minutes
- Cook Time: 18 minutes
- Total Time: 40 minutes
- Yield: 12 cupcakes 1x
- Category: Dessert
- Cuisine: American
Ingredients
- 1 cup (120g) all-purpose flour
- 1/2 cup (50g) black cocoa powder
- 1 cup (200g) granulated sugar
- 1/2 tsp baking soda
- 1/4 tsp baking powder
- 1/4 tsp salt
- 2 large eggs, room temperature
- 1/2 cup (120ml) vegetable oil
- 1/2 cup (120ml) buttermilk (or plant-based alternative)
- 1 tsp vanilla extract
- 1 tsp apple cider vinegar
- Black gel food coloring (optional)
- 8 oz (225g) cream cheese, softened
- 1/2 cup (115g) unsalted butter, softened
- 2 1/2 cups (300g) powdered sugar
- 1 tsp vanilla extract
- Pinch of salt
- Edible gold leaf sheets
- Sprinkles or gold dust (optional)
Instructions
- Preheat oven to 350°F (175°C). Line a 12-cup muffin pan with cupcake liners.
- In a large bowl, whisk together flour, black cocoa powder, sugar, baking soda, baking powder, and salt.
- In a medium bowl, beat eggs until frothy. Add oil, buttermilk, vanilla extract, and apple cider vinegar. Whisk until smooth.
- Pour wet ingredients into dry ingredients. Stir gently until just combined. Add black gel food coloring if using.
- Divide batter evenly among cupcake liners, filling each about 2/3 full.
- Bake for 16-18 minutes, until a toothpick comes out clean or with a few moist crumbs.
- Cool cupcakes in pan for 5 minutes, then transfer to a wire rack to cool completely.
- For frosting: Beat cream cheese and butter until smooth and fluffy (about 2 minutes). Add powdered sugar, vanilla, and salt. Beat for another 2 minutes until light and creamy. Chill if needed.
- Frost cooled cupcakes with cream cheese frosting using a spatula or piping bag.
- Decorate each cupcake with a small piece of edible gold leaf and optional sprinkles or gold dust.
- Serve immediately or chill for firmer frosting.
Notes
For gluten-free, use a 1:1 gluten-free flour blend. For dairy-free, substitute plant-based buttermilk and vegan butter/cream cheese. Use room temperature ingredients for best results. Don’t overmix the batter. Chill frosting before piping for best texture. Add espresso powder for deeper flavor or mini chocolate chips for extra chocolate punch.
Nutrition
- Serving Size: 1 cupcake
- Calories: 260
- Sugar: 22
- Sodium: 180
- Fat: 13
- Saturated Fat: 6
- Carbohydrates: 32
- Fiber: 1
- Protein: 3
Keywords: black velvet cupcakes, edible gold, cream cheese frosting, chocolate cupcakes, Halloween dessert, birthday cupcakes, dramatic cupcakes, easy baking, midnight treat, Pinterest-worthy


