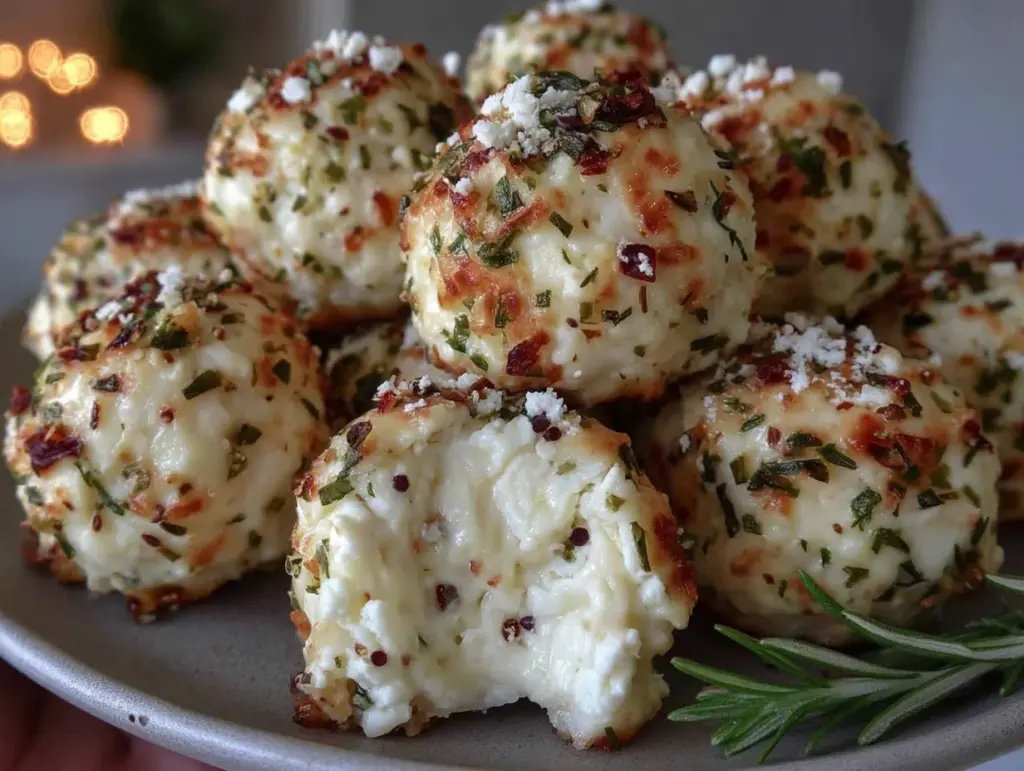
Picture this: you walk into a kitchen, and the air is thick with the rich aroma of fresh herbs mingling with roasted garlic. There’s a creamy tang wafting from a plate piled high with bite-sized cheese ball bites, glistening under a drizzle of olive oil and flecks of green. Honestly, the first time I rolled a batch of these Creamy Marinated Herb and Garlic Cheese Ball Bites, I nearly swooned. The way the creamy cheese melts against the sharpness of garlic and the burst of fresh herbs—it’s downright addictive.
I remember stumbling upon this recipe years ago, back when I was knee-high to a grasshopper, watching my grandma whip up cheese balls for the church potluck. I never understood why people fought over the last one until I popped one in my mouth. It was the kind of moment where you pause, take a deep breath, and just smile because you know you’re onto something truly special.
Since then, these cheese ball bites have become my secret weapon for gatherings. My family can’t stop sneaking them off the tray (and let’s face it, I don’t blame them). Whether it’s a holiday spread or just a Friday night snack board, there’s always room for these little guys. They’re dangerously easy, deliver pure, nostalgic comfort, and fit right in at any occasion—potlucks, birthday parties, or just to brighten up your Pinterest feed.
Honestly, I wish I’d discovered how simple and versatile these Creamy Herb and Garlic Cheese Ball Bites could be years ago. After countless rounds of “testing” (in the name of research, of course), they’ve become a staple for family gatherings, gifting, and those moments when you need a warm hug in edible form. You’re going to want to bookmark this one—trust me on that!
Why You’ll Love These Creamy Marinated Herb and Garlic Cheese Ball Bites
If you’re craving an appetizer that’s equal parts easy and impressive, you’ve hit the jackpot with these Creamy Herb and Garlic Cheese Ball Bites. I’ve made them more times than I can count—at midnight for surprise guests, rushed for a picnic, and even as a last-minute addition to a holiday table. Let me lay out why these bites are a must-make:
- Quick & Easy: Ready in under 30 minutes (plus a little chill time), perfect for busy schedules or spontaneous parties.
- Simple Ingredients: No fancy grocery trips required—you probably have everything in your fridge or pantry right now.
- Perfect for Parties: These cheese balls always steal the show at potlucks, brunches, or casual get-togethers. They’re a Pinterest favorite for good reason!
- Crowd-Pleaser: Kids love their creamy texture, adults crave the bold flavors, and everyone wants seconds (or thirds).
- Unbelievably Delicious: The combo of tangy cream cheese, fresh herbs, and marinated garlic packs a punch—comfort food at its finest.
What sets these Creamy Herb and Garlic Cheese Ball Bites apart? For starters, I blend in a splash of sour cream for extra smoothness and let the cheese balls marinate in olive oil with herbs for a flavor boost that’s honestly next-level. Unlike the dry, bland versions you may have tried, these are velvety, aromatic, and perfectly seasoned.
And let’s not forget the emotional side. There’s something about these bites that just makes you close your eyes after the first taste. They’re the kind of comfort food that’s been reimagined—healthier, faster, but still loaded with all the soul-soothing satisfaction you crave. Whether you’re impressing guests or turning a simple snack into a memorable treat, these cheese ball bites deliver every single time.
What Ingredients You Will Need
This recipe uses simple, wholesome ingredients to deliver bold flavor and a satisfyingly creamy texture—without any fuss. Most are pantry staples, and you can easily swap for whatever’s fresh or on hand.
- For the Cheese Ball Bites:
- 8 oz (225 g) cream cheese, softened (full-fat for extra creaminess, or use light for a lower-fat option)
- 1 cup (100 g) shredded sharp cheddar cheese (adds tang—Cabot or Tillamook are my faves)
- 2 tbsp (30 g) sour cream (makes them extra smooth, can sub Greek yogurt)
- 2 cloves garlic, roasted and mashed (for deep flavor—if you’re in a rush, use minced raw, but roasted is worth it!)
- 1 tbsp (15 g) chopped fresh parsley (flat-leaf preferred for bold flavor)
- 1 tbsp (15 g) chopped fresh chives (or green onion tops)
- 1 tsp (5 g) chopped fresh dill (optional, but it’s a game-changer)
- 1/2 tsp (2 g) kosher salt (Diamond Crystal is my go-to)
- 1/4 tsp (1 g) freshly cracked black pepper
- For the Marinade:
- 1/4 cup (60 ml) extra virgin olive oil (choose fruity, cold-pressed for best results)
- 1 tsp (5 ml) lemon juice (freshly squeezed—adds brightness)
- 1 clove garlic, finely sliced
- 1 tsp (5 g) chopped fresh thyme (or rosemary, if you prefer)
- Pinch red pepper flakes (optional, for a little kick)
- For Rolling:
- 1/3 cup (35 g) finely chopped toasted nuts (pecans, walnuts, or almonds; skip for nut-free)
- 2 tbsp (10 g) extra chopped fresh herbs (parsley, chives, dill—whatever’s handy)
- Cracked black pepper (for garnish)
Substitution Guidance: Swap cheddar for gouda, Monterey Jack, or a blend for a different twist. Use vegan cream cheese and plant-based yogurt for a dairy-free version. Almond flour works for rolling if you need a gluten-free/outside crunch. In summer, add a few chopped sundried tomatoes or swap in fresh basil. The recipe is flexible, so play around!
I recommend sticking with block cream cheese for best texture, as pre-whipped can get too soft. If you’re all about bold flavor, throw in a dash of smoked paprika or even a hint of cayenne. These Creamy Herb and Garlic Cheese Ball Bites are forgiving and absolutely perfect for mixing and matching.
Equipment Needed
You really don’t need much to whip up these Creamy Herb and Garlic Cheese Ball Bites. Here’s what I reach for every time:
- Mixing bowls: One large for the cheese mixture, one small for the marinade.
- Hand mixer or stand mixer: Optional, but makes life easier if you want ultra-creamy cheese balls. A sturdy spoon works, too.
- Rubber spatula: For scraping down the sides and shaping the balls.
- Measuring cups & spoons: Precision matters—don’t eyeball it if you want consistent flavor every time.
- Garlic roaster or small baking dish: If roasting garlic (otherwise, a regular pan works fine).
- Small cookie scoop or tablespoon: For portioning (I use a melon baller, which is fun and kid-friendly).
- Baking sheet or tray: To set out the cheese balls for chilling and marinating.
- Plastic wrap or parchment paper: For easy cleanup and rolling.
If you don’t have a cookie scoop, just use your hands—there’s something satisfying about getting a little messy in the kitchen anyway. For the garlic, I’ve roasted it in a toaster oven and even on a pan over the stove (just don’t burn it—been there, done that). If you’re on a budget, skip the fancy gadgets. A sturdy spoon and a bowl are all you need. Clean up is a breeze if you use parchment paper, which I swear by for sticky cheese mixtures.
Preparation Method
- Roast the Garlic (if using): Preheat your oven to 400°F (200°C). Place unpeeled garlic cloves on a small baking dish, drizzle with a bit of olive oil, and roast for 15-20 minutes until soft and golden. Let cool, then squeeze out the soft garlic and mash with a fork. If you’re short on time, just mince raw garlic and move ahead.
- Mix the Cheese Base: In a large mixing bowl, combine 8 oz (225 g) softened cream cheese, 1 cup (100 g) shredded cheddar, and 2 tbsp (30 g) sour cream. Beat with a hand mixer on medium speed for 2-3 minutes until smooth and fluffy. Scrape down the sides with a rubber spatula to catch every bit. Pro tip: Room temperature cheese mixes better—if you forget, microwave for 10 seconds.
- Add Herbs & Seasonings: Stir in the mashed roasted garlic, 1 tbsp (15 g) chopped parsley, 1 tbsp (15 g) chives, 1 tsp (5 g) dill, 1/2 tsp (2 g) kosher salt, and 1/4 tsp (1 g) black pepper. Mix until everything is evenly distributed. The mixture should smell fresh, creamy, and just a bit tangy at this point.
- Chill the Mixture: Cover the bowl with plastic wrap and refrigerate for at least 30 minutes (up to 2 hours). This helps firm up the cheese and lets the flavors meld. If you’re impatient like me, 20 minutes in the freezer works—but keep an eye on it so it doesn’t freeze solid.
- Shape the Cheese Balls: Use a small cookie scoop or tablespoon to portion the mixture. Roll into 1-inch (2.5 cm) balls using clean hands. You should get 16-20 balls, depending on your scoop size. If the mix sticks, dampen your hands slightly or chill another 10 minutes.
- Prepare the Marinade: In a small bowl, whisk together 1/4 cup (60 ml) olive oil, 1 tsp (5 ml) lemon juice, 1 clove garlic (finely sliced), 1 tsp (5 g) thyme, and a pinch of red pepper flakes. Taste and adjust seasoning. The marinade should be bright, herby, and a little spicy.
- Roll and Marinate: On a plate, mix 1/3 cup (35 g) toasted nuts with 2 tbsp (10 g) fresh herbs and a little cracked pepper. Roll each cheese ball until coated. Place balls on a tray and drizzle with the marinade. Let sit at least 15 minutes before serving (up to 1 hour for deeper flavor).
- Serving: Arrange cheese ball bites on a platter. Spoon any extra marinade over the top. Garnish with a sprinkle of fresh herbs or a dash of black pepper. Serve with crackers, crostini, or fresh veggies.
Troubleshooting: If cheese balls are too soft to roll, chill longer or add a tablespoon of shredded cheese. If they crumble, add a splash more sour cream. If flavors seem muted, increase salt or add another garlic clove. Cheese mixture too sticky? A little extra chilling solves that every time.
Efficiency Tips: Prep the marinade while the cheese chills. Roast garlic ahead of time and store in the fridge. I always double the batch—these go fast, and you’ll want leftovers!
Cooking Tips & Techniques
After making these Creamy Herb and Garlic Cheese Ball Bites for just about every occasion, I’ve picked up some tricks—and learned a few lessons the hard way (like that time I tried to rush without chilling and ended up with a cheesy mess!). Here’s what works:
- Chill is key: Don’t skip the chilling step. It makes rolling easier and helps flavors meld.
- Roast your garlic: Roasted garlic brings a subtle sweetness and depth you just don’t get from raw. But don’t over-roast—it turns bitter fast!
- Mix thoroughly: Use a hand mixer for ultra-smooth texture, but don’t overbeat—just enough to combine everything evenly.
- Size matters: Keep cheese balls bite-sized (about 1-inch/2.5 cm). Too big and they get messy, too small and they disappear on the platter.
- Coating options: Toasted nuts add crunch, but if you need nut-free, use extra herbs, cracked pepper, or even sesame seeds.
- Marinate for flavor: Don’t skip the marinade! It adds a layer of brightness and keeps the cheese balls moist.
Common Mistakes: Not chilling long enough—cheese balls lose shape and get sticky. Using pre-shredded cheese—it’s coated in anti-caking agents and doesn’t blend as smoothly. Skipping the fresh herbs—dried just don’t pop the same way. I learned all this by trial and error, so trust me, these steps make a difference.
Timing tip: Prep everything the night before, roll and marinate day-of. Multitask by roasting garlic while you mix cheese. For consistency, portion with a scoop and roll gently—don’t pack too tight or they’ll get dense. These little bites are forgiving, so if you make a mistake, just adjust and keep going!
Variations & Adaptations
One thing I love about these Creamy Herb and Garlic Cheese Ball Bites is how easily they adapt to just about any taste or dietary need. Here are a few tried-and-true variations:
- Low-Carb/Keto: Use full-fat cream cheese and skip the nuts—roll in crushed pork rinds or extra herbs for crunch.
- Dairy-Free: Swap in vegan cream cheese and plant-based yogurt. Daiya or Kite Hill are solid options. Use nutritional yeast for extra cheesy flavor.
- Seasonal Flavors: In summer, add chopped sun-dried tomatoes and fresh basil. For fall, mix in a pinch of smoked paprika and use roasted pecans.
- Spicy Kick: Add a dash of cayenne or harissa to the cheese mix for heat lovers. Roll in chili flakes or smoked paprika.
- Kid-Friendly: Skip the nuts and roll in crushed pretzels or goldfish crackers. Use mild cheddar or mozzarella for less tang.
- Allergen Substitutions: For nut allergies, coat with toasted seeds (pumpkin, sunflower) or sesame.
Personally, I love a Mediterranean twist: feta cheese, chopped olives, and fresh oregano rolled in sesame seeds. I’ve also tried smoked gouda and rosemary for a wintery flavor—super cozy and perfect for holiday parties. Customize away—these cheese ball bites are as flexible as you need them to be!
Serving & Storage Suggestions
These Creamy Herb and Garlic Cheese Ball Bites are best served slightly chilled, but not ice-cold—just enough to hold their shape. Arrange them on a pretty platter, drizzle with extra marinade, and finish with a sprinkle of fresh herbs for a Pinterest-perfect look.
Pair with crunchy crackers, crostini, or fresh veggie sticks. They’re awesome alongside sparkling wine, herbal iced tea, or even a crisp cider. I love putting a little bowl of extra marinade or olive oil on the side for dipping—trust me, people will ask!
To store, place cheese ball bites in an airtight container and refrigerate for up to 4 days. If you want to freeze them, skip the marinade, freeze balls on a tray, then transfer to a zip-top bag. Thaw overnight in the fridge and marinate before serving. Reheat gently at room temp—don’t microwave, or they’ll melt into a puddle. Flavors deepen after a day or two, so leftovers are never a bad thing!
Nutritional Information & Benefits
Each Creamy Herb and Garlic Cheese Ball Bite contains approximately:
- Calories: 80
- Fat: 7g
- Protein: 3g
- Carbs: 2g
They’re naturally low in carbs and gluten-free if you skip the nuts or use seeds for coating. Cream cheese is a good source of calcium and healthy fats, while fresh herbs bring antioxidants and flavor without extra calories. Garlic is known for its immune-boosting properties (plus, it tastes amazing). If you have nut allergies, swap for seeds or just use extra herbs. As someone who tries to balance flavor and wellness, these bites make snacking feel a little less guilty—especially when you use high-quality dairy and fresh ingredients!
Conclusion
If you’re looking for a party appetizer that’s easy, crowd-pleasing, and endlessly customizable, these Creamy Herb and Garlic Cheese Ball Bites absolutely fit the bill. They’re packed with flavor, a breeze to make, and always disappear fast (even when you make a double batch). Whether you’re hosting, gifting, or snacking, you’ll love how these little bites bring people together—no stress, just pure comfort.
Honestly, these cheese ball bites are one of my favorites because they remind me of family, celebration, and the joy of sharing good food. Try them out, tweak the herbs, add your own flair, and let me know how you make them your own!
If you enjoyed this recipe, leave a comment below, share your favorite adaptations, or pin for later. I’d love to hear your stories—let’s make snack-time special, one cheese ball at a time!
FAQs
Can I make these Creamy Herb and Garlic Cheese Ball Bites ahead of time?
Absolutely! You can prepare them up to two days in advance. Just store in an airtight container and marinate before serving for best flavor.
What herbs work best in these cheese balls?
Fresh parsley, chives, dill, and thyme are my favorites. You can swap in basil, cilantro, or rosemary based on what’s in season or in your fridge.
Can I freeze cheese ball bites?
Yes, but freeze them before marinating. Lay out on a tray, freeze until firm, then transfer to a zip-top bag. Thaw in the fridge and marinate before serving.
How do I make this recipe nut-free?
Skip the nuts and roll in extra herbs, cracked pepper, toasted seeds, or even sesame seeds for crunch and color.
What pairs well with Creamy Herb and Garlic Cheese Ball Bites?
They’re delicious with crackers, crostini, veggie sticks, and a crisp white wine or herbal iced tea. Perfect for snack boards and party spreads!
Pin This Recipe!

Creamy Herb and Garlic Cheese Ball Bites

These creamy, bite-sized cheese balls are packed with tangy cream cheese, roasted garlic, and fresh herbs, then marinated in olive oil for extra flavor. Perfect for parties, potlucks, or snacking, they’re easy to make and always a crowd-pleaser.
- Prep Time: 20 minutes
- Cook Time: 20 minutes
- Total Time: 40 minutes
- Yield: 16-20 cheese ball bites 1x
- Category: Appetizer
- Cuisine: American
Ingredients
- 8 oz cream cheese, softened
- 1 cup shredded sharp cheddar cheese
- 2 tbsp sour cream (or Greek yogurt)
- 2 cloves garlic, roasted and mashed (or minced raw)
- 1 tbsp chopped fresh parsley
- 1 tbsp chopped fresh chives (or green onion tops)
- 1 tsp chopped fresh dill (optional)
- 1/2 tsp kosher salt
- 1/4 tsp freshly cracked black pepper
- 1/4 cup extra virgin olive oil
- 1 tsp lemon juice
- 1 clove garlic, finely sliced
- 1 tsp chopped fresh thyme (or rosemary)
- Pinch red pepper flakes (optional)
- 1/3 cup finely chopped toasted nuts (pecans, walnuts, or almonds; optional for nut-free)
- 2 tbsp extra chopped fresh herbs (parsley, chives, dill)
- Cracked black pepper (for garnish)
Instructions
- Preheat oven to 400°F. Place unpeeled garlic cloves on a small baking dish, drizzle with olive oil, and roast for 15-20 minutes until soft and golden. Let cool, then squeeze out and mash.
- In a large mixing bowl, combine softened cream cheese, shredded cheddar, and sour cream. Beat with a hand mixer on medium speed for 2-3 minutes until smooth and fluffy.
- Stir in mashed roasted garlic, parsley, chives, dill, salt, and black pepper. Mix until evenly distributed.
- Cover bowl with plastic wrap and refrigerate for at least 30 minutes (up to 2 hours) to firm up.
- Use a small cookie scoop or tablespoon to portion mixture and roll into 1-inch balls. You should get 16-20 balls.
- In a small bowl, whisk together olive oil, lemon juice, sliced garlic, thyme, and red pepper flakes for the marinade.
- On a plate, mix toasted nuts with extra fresh herbs and cracked pepper. Roll each cheese ball until coated.
- Place balls on a tray and drizzle with marinade. Let sit at least 15 minutes before serving (up to 1 hour for deeper flavor).
- Arrange cheese ball bites on a platter, spoon extra marinade over the top, and garnish with fresh herbs or black pepper. Serve with crackers, crostini, or fresh veggies.
Notes
Chilling the cheese mixture is key for easy rolling and best flavor. Roasted garlic adds depth, but raw can be used in a pinch. For nut-free, roll in extra herbs or seeds. Prep marinade while cheese chills for efficiency. Cheese balls can be made ahead and stored up to 4 days in the fridge.
Nutrition
- Serving Size: 1 cheese ball bite
- Calories: 80
- Sugar: 1
- Sodium: 120
- Fat: 7
- Saturated Fat: 4
- Carbohydrates: 2
- Protein: 3
Keywords: cheese ball bites, party appetizer, creamy cheese balls, garlic herb cheese balls, easy snack, holiday appetizer, gluten-free, vegetarian


