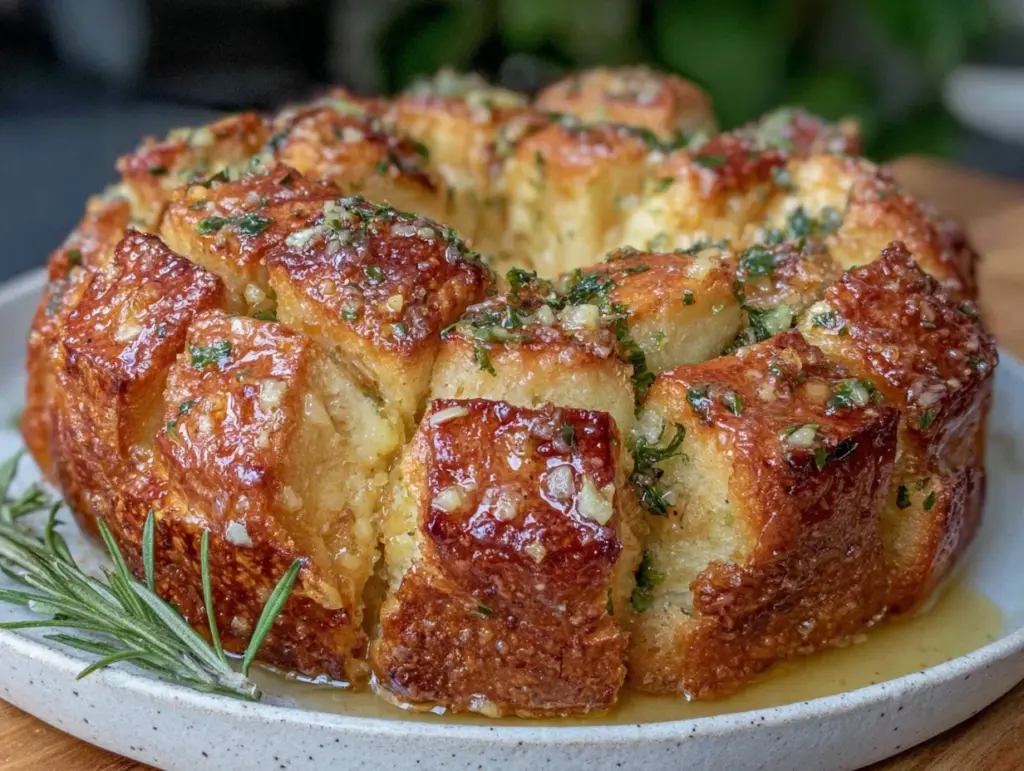
Let me tell you, the aroma of golden, buttery bread mingled with garlic and fresh herbs wafting from my oven is pure magic—like a hug disguised as food. There’s something about tearing into a warm loaf of Garlic Herb Butter Pull-Apart Bread that just makes the whole house feel cozier. I still remember the first time I made this recipe: the dough was soft and pillowy, the kitchen was filled with laughter, and the buttery scent was so inviting that my kids kept sneaking pieces before dinner. Honestly, it’s the kind of moment where you pause, take a deep breath, and just smile because you know you’re onto something truly special.
Years ago, when I was knee-high to a grasshopper, my grandma used to whip up batches of homemade bread for Sunday supper. Her secret? She always slipped in a generous pat of butter and a handful of chopped herbs from her garden. I tried recreating that memory one rainy weekend—just looking for a little nostalgia—and after countless tweaks “in the name of research, of course,” this Garlic Herb Butter Pull-Apart Bread was born. I wish I’d stumbled on this recipe years ago; it’s dangerously easy and tastes like pure, nostalgic comfort.
My family couldn’t stop sneaking bites off the cooling rack (and honestly, I can’t really blame them). Even my picky eater declared it “the best bread ever”—which, coming from her, is no small feat. Now, this pull-apart bread has become the go-to for potlucks, holiday gatherings, and cozy movie nights. It’s perfect for sharing, gifting, or just brightening up your Pinterest board with some serious carb happiness. Trust me, after testing it at least a dozen times, it’s a staple for every special occasion and feels like a warm hug in bread form. You’re going to want to bookmark this one!
Why You’ll Love This Garlic Herb Butter Pull-Apart Bread
If you’re searching for a bread recipe that checks all the boxes—easy, flavorful, and crowd-pleasing—this is it. I’ve baked more loaves than I care to admit, and every time, this Garlic Herb Butter Pull-Apart Bread delivers on taste and texture. Here’s why you’ll absolutely love making (and sharing) it:
- Quick & Easy: Comes together in under two hours, including rising time. No fancy techniques or endless waiting—perfect for busy weeknights or last-minute get-togethers.
- Simple Ingredients: You don’t need a specialty store run. Everything here is straightforward—flour, yeast, butter, garlic, fresh herbs, and a few pantry staples. I bet you’ve got most of these at home right now.
- Perfect for Sharing: Tear-and-share style makes it ideal for potlucks, brunches, or cozy dinners with family and friends. It’s the kind of bread that brings everyone together at the table.
- Crowd-Pleaser: Kids, adults, carb-lovers, and even the “I’m-not-really-into-bread” people rave about it. The buttery herb crust and tender inside are irresistible.
- Unbelievably Delicious: The combination of garlic, herbs, and warm, pillowy bread is comfort food at its best. Honestly, one bite and you’ll understand why it’s become a family favorite.
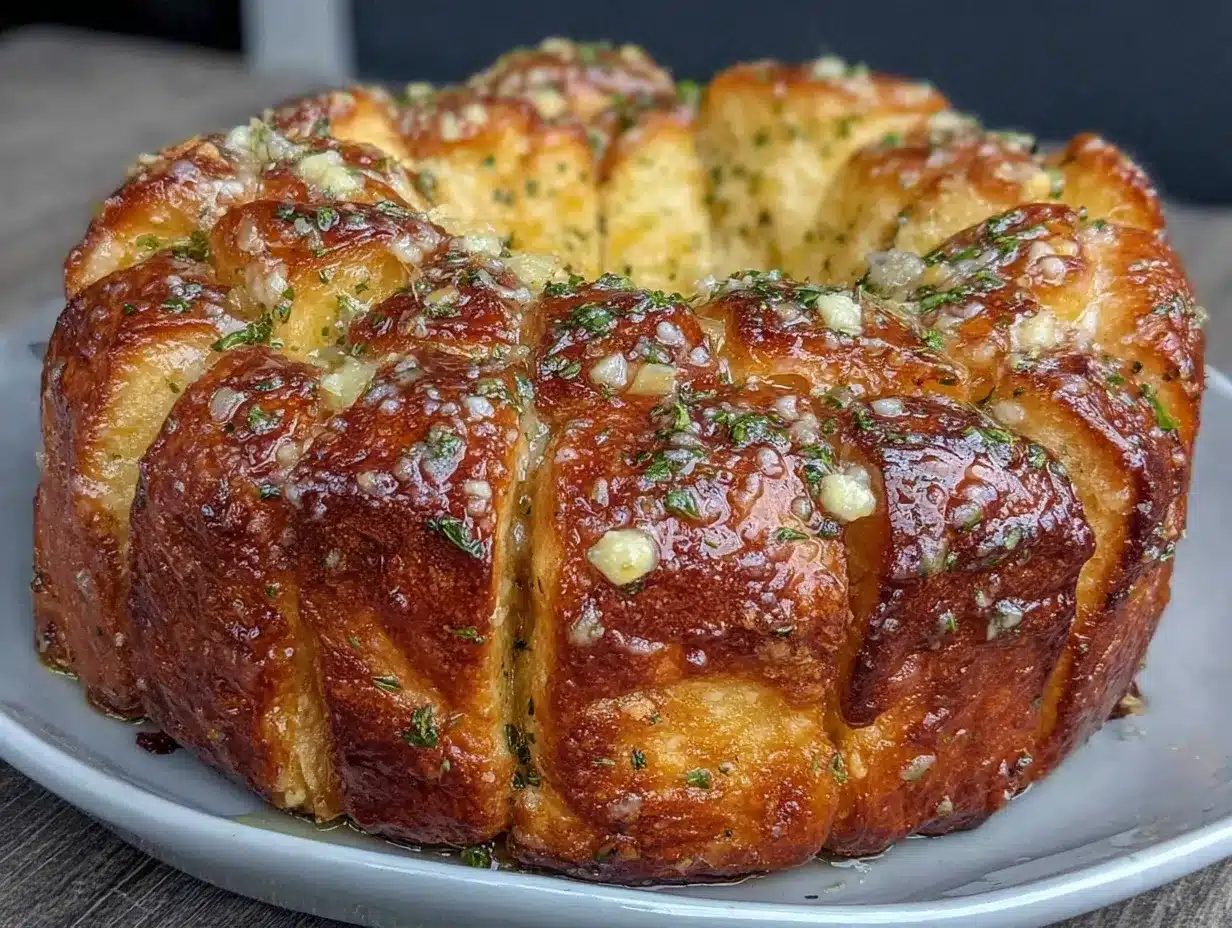
What makes this recipe stand out? For starters, the trick is in brushing the bread with melted garlic herb butter—twice! Once before baking for that signature flavor, and again as soon as it comes out of the oven for extra tenderness and shine (makes all the difference). I’ve played with different herb blends over the years, and landed on a mix that’s balanced but still lets the garlic shine. Plus, the pull-apart shape means you don’t need to fuss with slicing—just grab, tear, and enjoy.
This isn’t just any garlic bread. It’s comfort food reimagined: fast enough for weeknights, special enough for holidays, and always satisfying. The texture is soft, almost like a fluffy dinner roll, but with a crust that’s buttery and rich. It’s stress-free to make, yet impressive to serve. Trust me—this bread is so good, you might just close your eyes after that first, warm bite.
What Ingredients You Will Need
This Garlic Herb Butter Pull-Apart Bread keeps things simple but flavorful. Every ingredient contributes to the bread’s tender crumb and irresistible taste. Most are pantry staples, and a few fresh additions make all the difference. Here’s what you need:
- For the Dough:
- All-purpose flour – 3 1/2 cups (420g) (gives the bread structure)
- Active dry yeast – 2 1/4 tsp (1 packet, 7g)
- Granulated sugar – 2 tbsp (25g) (helps activate the yeast and adds a touch of sweetness)
- Salt – 1 1/2 tsp (8g) (balances flavor)
- Whole milk – 1 cup (240ml), warmed (adds richness and keeps the crumb soft)
- Unsalted butter – 1/4 cup (60g), melted (for extra tenderness)
- Egg – 1 large, room temperature (binds everything together)
- For the Garlic Herb Butter:
- Unsalted butter – 1/2 cup (115g), melted (for brushing and flavor)
- Fresh garlic – 4 cloves, minced (for punchy flavor)
- Fresh parsley – 2 tbsp, finely chopped (adds color and fresh taste)
- Fresh chives – 1 tbsp, finely chopped (mild, oniony flavor)
- Fresh thyme – 1 tbsp, leaves stripped (earthy and aromatic)
- Salt – 1/2 tsp (for seasoning the butter)
- Black pepper – 1/4 tsp (optional, for a little kick)
- Optional Garnish:
- Extra chopped herbs – for topping after baking
- Flaky sea salt – for a finishing touch
Ingredient tips: I usually pick King Arthur or Bob’s Red Mill flour for bread recipes—consistent texture every time. For herbs, fresh is best; dried can work in a pinch, but honestly, the flavor just isn’t the same. If you’re short on milk, swap in unsweetened almond milk or oat milk (I’ve done it and no one noticed). You can use instant yeast, too—just skip the blooming step and mix directly into the flour.
Substitutions: Gluten-free flour blends (like Cup4Cup) work, but you may need a splash more liquid. Vegan? Use plant-based butter and flax egg (1 tbsp flaxseed meal + 2.5 tbsp water). If someone’s not a fan of garlic, reduce it to two cloves or swap with roasted garlic for a milder flavor. Want it spicy? Toss in a pinch of red pepper flakes.
In summer, I swap the parsley for fresh basil—so good with grilled veggies! If you’re in the mood for a cheesy twist, sprinkle shredded mozzarella or parmesan between the layers before baking. Pantry low? Dried herbs work, just halve the amount. (Trust me, I’ve tried every combo on those “must-use-what’s-in-the-fridge” nights.)
Equipment Needed
- Mixing bowls (at least two – one for the dough, one for the butter mixture)
- Measuring cups and spoons (accuracy matters!)
- 9×5-inch loaf pan (standard size; you can use a round cake pan for a different look)
- Pastry brush (for spreading all that delicious garlic herb butter)
- Whisk and wooden spoon (for mixing the dough and butter mixture)
- Kitchen scale (optional, but helps with precise flour measurement)
- Clean kitchen towel or plastic wrap (to cover the dough while rising)
- Bench scraper (really helpful for dividing and shaping the dough, but a sharp knife works too)
Honestly, I’ve made this bread with nothing but a bowl, spoon, and loaf pan—and it still turned out great. If you don’t have a pastry brush, just use the back of a spoon to spread the butter. No loaf pan? A brownie pan or round cake pan works, though the shape will change (and you might get a few extra crispy edges).
Maintenance tip: If you’re using a wooden spoon or bench scraper, give them a good scrub after working with sticky dough—trust me, dried dough is no fun to clean. For budget-friendly options, I’ve picked up mixing bowls and pans at thrift stores, and they work just fine.
Preparation Method
- Activate the yeast: In a large mixing bowl, combine 1 cup (240ml) warmed milk (about 110°F/43°C) with 2 tbsp (25g) sugar. Sprinkle 2 1/4 tsp (7g) active dry yeast over the milk. Let it sit for 5-10 minutes, until foamy and bubbly. If nothing happens, check your yeast—it might be expired!
- Mix the dough: Add 1/4 cup (60g) melted butter and 1 large egg (room temperature) to the yeast mixture. Whisk to combine. Add 3 1/2 cups (420g) all-purpose flour and 1 1/2 tsp (8g) salt. Mix with a wooden spoon until a shaggy dough forms.
- Knead: Turn dough out onto a lightly floured surface. Knead for 6-8 minutes, until it’s smooth and elastic. Dough should feel soft but not sticky. If it’s too dry, add a tablespoon of milk; if too sticky, sprinkle with a bit more flour. (I’ve been heavy-handed with flour before and ended up with dense bread, so go easy.)
- First rise: Place dough in a clean, lightly greased bowl. Cover with a kitchen towel or plastic wrap. Let rise in a warm spot for 1 hour, until doubled in size. If your kitchen is chilly, place the bowl near a preheated oven or on top of the fridge.
- Prepare garlic herb butter: While dough rises, combine 1/2 cup (115g) melted unsalted butter, 4 cloves minced garlic, 2 tbsp chopped parsley, 1 tbsp chopped chives, 1 tbsp thyme leaves, 1/2 tsp salt, and 1/4 tsp black pepper in a small bowl. Stir well. (Your kitchen will already smell amazing.)
- Shape the bread: Once dough is risen, punch it down gently and turn out onto a lightly floured surface. Roll into a 15×10-inch (38x25cm) rectangle. Using a bench scraper or sharp knife, cut the dough into 20 rectangles (about 2×2.5 inches/5x6cm each).
- Layer and butter: Brush each piece generously with garlic herb butter. Stack the pieces loosely and arrange them upright in a greased 9×5-inch loaf pan. Don’t pack them too tight—leave room for expansion.
- Second rise: Cover the pan and let dough rise for 30 minutes, until puffy and almost doubled. Preheat oven to 350°F (175°C) during this time.
- Bake: Bake bread for 30-35 minutes, until deeply golden and cooked through. If the top browns too quickly, tent with foil at the 20-minute mark. The bread should sound hollow when tapped.
- Final butter & serve: As soon as bread comes out, brush with remaining garlic herb butter. Sprinkle with extra herbs and a pinch of flaky sea salt if you like. Let cool in pan for 10 minutes, then transfer to a wire rack.
Bread is best served warm, with all that gooey pull-apart texture. If you end up with leftovers (rare, in my house!), wrap tightly and store as detailed below. For troubleshooting: If your dough isn’t rising, check your yeast and try a warmer spot. If bread is too dense, it’s usually too much flour (been there, done that—go light-handed). For extra efficiency, prep the butter mix while the dough rises and clean up as you go.
Cooking Tips & Techniques
Here are a few tried-and-true tips I’ve picked up after baking more batches of Garlic Herb Butter Pull-Apart Bread than I can count:
- Proofing the yeast: Always start with fresh yeast. If it doesn’t foam up in the milk/sugar mix, toss it and start over—no sense waiting an hour for bread that won’t rise. (Learned that the hard way…)
- Don’t over-flour: It’s tempting to add more flour if the dough feels sticky, but a slightly tacky dough leads to the softest bread. If you go heavy, you’ll get a tough loaf.
- Even butter distribution: Brush each dough piece with garlic herb butter, not just the top—this way, every bite is loaded with flavor, not just the crust.
- Baking for color and texture: Pull-apart breads can brown quickly, especially with all that butter. If the crust is golden but the inside is still doughy, cover loosely with foil and keep baking. (My first loaf looked perfect but was raw in the middle—foil is your friend!)
- Let it rest: Waiting 10 minutes before pulling apart lets the steam settle and keeps the bread from tearing into mush. Trust me, patience pays off.
- Multitasking: Mix the butter blend while the dough rises, and clean up bowls right away to avoid a mountain of dishes later. Efficiency is key!
- Consistency: If you want identical pieces, use a ruler to score the dough before cutting. But honestly, rustic and uneven is part of the charm.
If you’re baking for a crowd, double the recipe and use a larger pan. The bread freezes well, so you can make ahead for stress-free entertaining. Most importantly, don’t worry about perfection—every loaf I’ve made has been a little different, and that’s half the fun!
Variations & Adaptations
One of the best things about Garlic Herb Butter Pull-Apart Bread is how easy it is to customize. Here are some of my favorite ways to switch things up:
- Cheesy Pull-Apart: Sprinkle shredded mozzarella or sharp cheddar between the dough layers before stacking. Parmesan on top is also amazing—think garlic cheese bread, but better.
- Seasonal Herb Swap: Use basil and oregano in summer, rosemary and sage in fall. For a spring twist, add a little lemon zest to the butter mix.
- Gluten-Free & Vegan: Substitute gluten-free flour blend and dairy-free butter. For egg-free, use a flax egg (1 tbsp flaxseed meal + 2.5 tbsp water). I’ve made this for a gluten-sensitive friend, and it was still totally tender.
- Spicy Variation: Stir in a pinch of crushed red pepper flakes or smoked paprika for a little heat.
- Different Shapes: Use a round cake pan and arrange the dough pieces in a circular pattern for a “flower” effect—great for parties.
- Allergen Substitutions: If garlic is a concern, swap for roasted shallots or omit entirely. Nut allergies? This bread is naturally nut-free.
My personal favorite? Adding a layer of caramelized onions with the herb butter—so savory! No matter how you adapt it, this bread is forgiving and still comes out delicious. Tweak it for your family’s tastes, and make it your own.
Serving & Storage Suggestions
For maximum happiness, serve Garlic Herb Butter Pull-Apart Bread warm from the oven. Pull apart pieces and pile onto a rustic board or basket—makes for a beautiful, shareable centerpiece. I love pairing it with hearty soups, fresh salads, or alongside pasta dishes. It’s also fantastic with a glass of chilled white wine (or a steaming mug of tea).
If you have leftovers (rare, but possible), let the bread cool completely. Wrap tightly in foil or plastic wrap and store in the refrigerator for up to 3 days. To freeze, slice and layer with parchment paper in a freezer bag—keeps well for 2 months. For reheating, pop slices in a 350°F (175°C) oven for 7-10 minutes, or microwave briefly (just don’t overdo it, or the bread gets chewy).
Honestly, the flavor deepens by day two—garlic and herbs meld even more. If reheating, brush with a little extra melted butter to revive that “just-baked” taste. This bread travels well for potlucks or picnics; just wrap with a towel to keep warm. If you’re hosting, serve on a wooden board with extra herb butter on the side for dipping.
Nutritional Information & Benefits
| Serving Size | Calories | Carbs | Protein | Fat |
|---|---|---|---|---|
| 1 piece (1/12 loaf) | 160 | 22g | 4g | 6g |
This bread is made with real, whole ingredients—no weird additives or preservatives. Fresh herbs bring antioxidants, and garlic is known for immune-boosting properties. Using whole milk and eggs adds a little protein and healthy fats, making each bite nourishing as well as comforting.
For gluten-free or low-carb diets, use the adaptations above. The bread is nut-free, but does contain dairy and egg (see vegan options for substitutions). Personally, I love that you can control the sodium and fat by adjusting the butter and salt. As always, moderation is key—and sharing means everyone gets a taste!
Conclusion
If you’re craving a recipe that brings people together and tastes like home, Garlic Herb Butter Pull-Apart Bread is your answer. It’s easy, forgiving, and honestly, one of the best ways to fill your kitchen with warmth and happiness. Whether you stick to the classic or put your own spin on it, this bread is sure to become a staple in your rotation.
Don’t be afraid to experiment—swap herbs, add cheese, or try a new shape. That’s half the fun! Personally, I make this bread for every family gathering, and it never fails to get rave reviews (and a few recipe requests).
If you give it a try, let me know how it turned out for you in the comments—share your own tips or favorite variations! Bookmark this recipe, pin it for later, and most importantly, enjoy every buttery, garlicky bite with those you love. Happy baking!
Frequently Asked Questions
Can I make Garlic Herb Butter Pull-Apart Bread ahead of time?
Absolutely! You can assemble the bread up to the final rise, cover, and refrigerate overnight. Bring to room temperature before baking for best results.
What’s the best way to reheat leftovers?
For best texture, reheat in the oven at 350°F (175°C) for 7-10 minutes. Microwave works too, but only for 10-20 seconds to avoid making it chewy.
Can I freeze this pull-apart bread?
Yes! Slice and freeze in a tightly sealed bag for up to 2 months. Thaw at room temperature, then reheat as above.
Can I use dried herbs instead of fresh?
You can, but halve the amount—dried herbs are more concentrated. The flavor will be a bit different, but still tasty!
What if I don’t have a loaf pan?
No problem! Use a round cake pan, brownie pan, or muffin tin. The bread will just have a different shape (and maybe a few extra crispy edges).
Pin This Recipe!
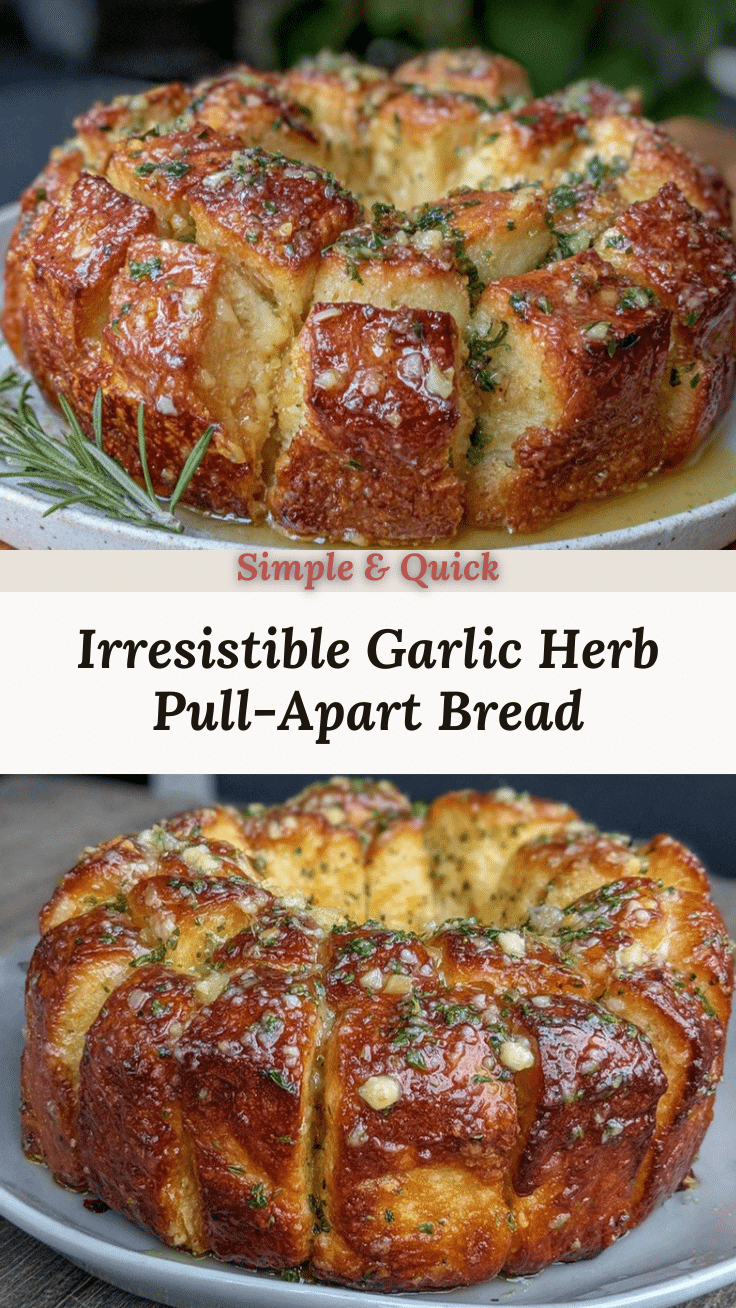
Garlic Herb Butter Pull-Apart Bread
This easy, tender pull-apart bread is infused with garlic and fresh herbs, brushed with buttery goodness, and perfect for sharing at gatherings or cozy dinners. The soft, pillowy texture and aromatic flavor make it a crowd-pleasing comfort food.
- Prep Time: 25 minutes
- Cook Time: 35 minutes
- Total Time: 2 hours
- Yield: 1 loaf (about 12 servings) 1x
- Category: Bread
- Cuisine: American
Ingredients
- 3 1/2 cups all-purpose flour (420g)
- 2 1/4 tsp active dry yeast (1 packet, 7g)
- 2 tbsp granulated sugar (25g)
- 1 1/2 tsp salt (8g)
- 1 cup whole milk (240ml), warmed
- 1/4 cup unsalted butter (60g), melted
- 1 large egg, room temperature
- 1/2 cup unsalted butter (115g), melted (for garlic herb butter)
- 4 cloves fresh garlic, minced
- 2 tbsp fresh parsley, finely chopped
- 1 tbsp fresh chives, finely chopped
- 1 tbsp fresh thyme, leaves stripped
- 1/2 tsp salt (for garlic herb butter)
- 1/4 tsp black pepper (optional)
- Extra chopped herbs, for garnish (optional)
- Flaky sea salt, for garnish (optional)
Instructions
- In a large mixing bowl, combine warmed milk and sugar. Sprinkle yeast over the milk and let sit for 5-10 minutes until foamy.
- Add melted butter and egg to the yeast mixture. Whisk to combine.
- Add flour and salt. Mix with a wooden spoon until a shaggy dough forms.
- Turn dough onto a lightly floured surface and knead for 6-8 minutes until smooth and elastic. Adjust with milk or flour as needed.
- Place dough in a clean, lightly greased bowl. Cover and let rise in a warm spot for 1 hour, until doubled.
- While dough rises, combine melted butter, minced garlic, parsley, chives, thyme, salt, and black pepper in a bowl for the garlic herb butter.
- Punch down risen dough and roll into a 15×10-inch rectangle. Cut into 20 rectangles (about 2×2.5 inches each).
- Brush each piece generously with garlic herb butter. Stack pieces loosely and arrange upright in a greased 9×5-inch loaf pan.
- Cover pan and let dough rise for 30 minutes, until puffy. Preheat oven to 350°F (175°C).
- Bake for 30-35 minutes, until golden and cooked through. Tent with foil if browning too quickly.
- Brush hot bread with remaining garlic herb butter. Sprinkle with extra herbs and flaky sea salt if desired.
- Let cool in pan for 10 minutes, then transfer to a wire rack. Serve warm.
Notes
For best results, use fresh herbs and proof yeast until foamy. Don’t over-flour the dough for a tender crumb. Bread can be customized with cheese, different herbs, or made gluten-free/vegan with substitutions. Leftovers keep well wrapped in the fridge for 3 days or frozen for 2 months. Reheat gently and brush with extra butter to revive flavor.
Nutrition
- Serving Size: 1 piece (1/12 loaf)
- Calories: 160
- Sugar: 2
- Sodium: 220
- Fat: 6
- Saturated Fat: 3
- Carbohydrates: 22
- Fiber: 1
- Protein: 4
Keywords: garlic bread, pull-apart bread, herb bread, easy bread recipe, comfort food, party bread, homemade bread, buttery bread, sharing bread, potluck


