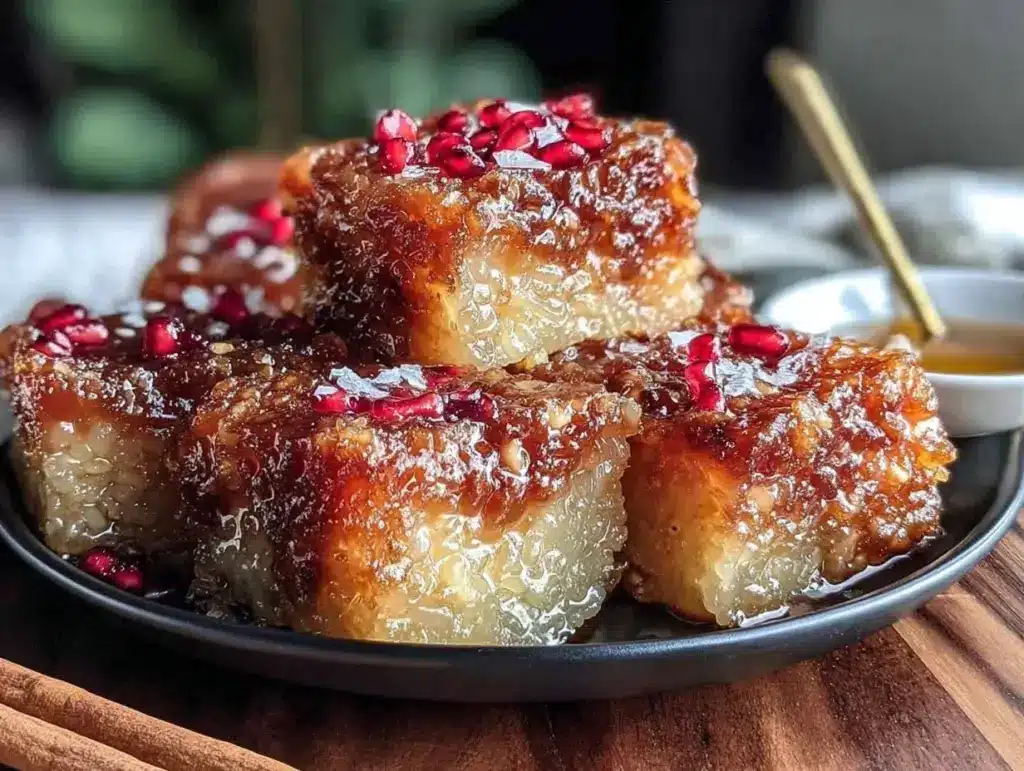
Let me tell you, the first whiff of sweet glutinous rice flour mixing with earthy red bean paste is pure nostalgia. Imagine soft, chewy slices of Nian Gao sticky rice cake, golden on the outside, with a molten red bean filling that oozes warmth at every bite. The aroma floats through the kitchen, mingling with laughter and chatter—honestly, it’s the kind of smell that makes you pause and smile, knowing you’re about to experience something truly comforting.
The first time I made this Nian Gao was during Lunar New Year, years ago when I was knee-high to a grasshopper and helping my grandma steam batches for the family feast. She’d let me spread the red bean paste with a butter knife, always insisting on an extra thick layer. The memory of watching her slice perfect squares, steam rising, and everyone sneaking bites off the cooling rack still makes me grin. There’s something about this recipe that feels like a warm hug—dangerously easy to whip up and guaranteed to charm any crowd.
Back then, I thought Nian Gao was something you’d only get once a year, but let’s face it, it deserves a spot in every dessert rotation. I wish I’d discovered how simple it was to make at home way sooner! My family can’t resist this sticky rice cake, and I’ve had friends ask for the recipe after just one bite. It’s perfect for potlucks, a sweet treat for your kids, or just to brighten up your Pinterest dessert board. I’ve tested this recipe more times than I care to admit (all in the name of research, of course), and it’s become a staple for family gatherings, gifting, and those moments when you need pure, nostalgic comfort. Honestly, you’re going to want to bookmark this one!
Why You’ll Love This Nian Gao Sticky Rice Cake Recipe
If you’ve ever wondered why some sticky rice cakes turn out tough or bland, let me set your mind at ease—this Nian Gao recipe is chef-tested, grandma-approved, and totally foolproof. After countless batches and a few flops (trust me, I’ve had my fair share of dense disasters), I’ve landed on the perfect balance of texture and flavor. Here’s why this version stands out:
- Quick & Easy: Comes together in under 30 minutes of prep (plus steaming), so you don’t need to camp out in the kitchen. Perfect for busy weeknights or holiday mornings.
- Simple Ingredients: No hunting for specialty grocers. Glutinous rice flour, sugar, and canned red bean paste—most of these are pantry staples in my house.
- Perfect for Celebrations: Traditional for Lunar New Year and birthdays, but honestly, I whip these up for weekend treats and tea parties too.
- Crowd-Pleaser: Kids adore the chewy texture, adults love the sweet bean filling, and it’s totally gluten-free (bonus points for allergy-friendly gatherings).
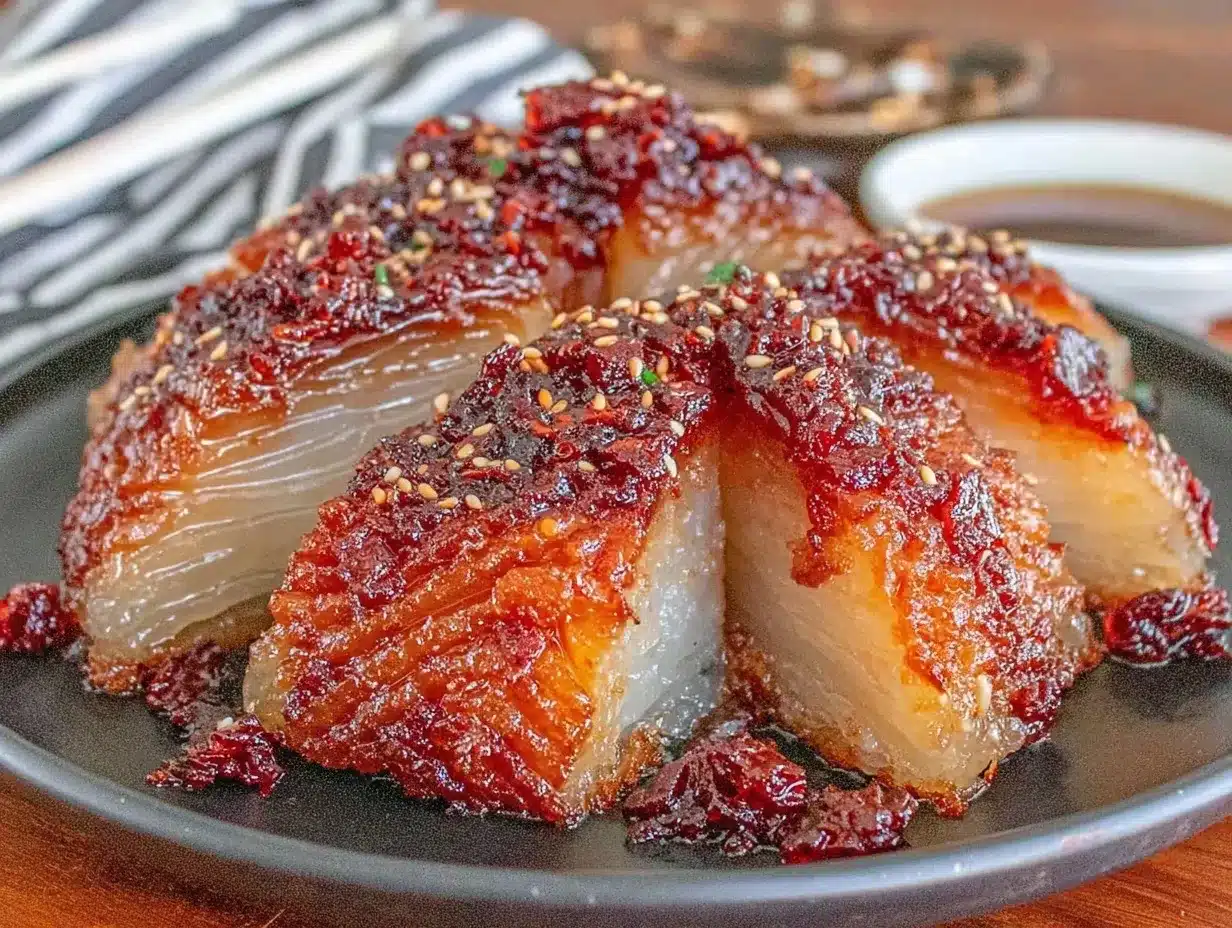
- Unbelievably Delicious: The combo of sticky rice and red bean is next-level comfort food—soft, sweet, and with that irresistible golden crust if you pan-sear the slices.
What makes this Nian Gao sticky rice cake different from the rest? For starters, blending the batter until silky smooth means no grainy texture. I use just enough coconut milk for a hint of richness, and a generous layer of red bean paste so you get filling in every bite. Unlike store-bought versions, this cake stays tender for days—no jaw workout needed!
And let’s be real—this is the kind of dessert that makes you close your eyes after the first bite. It’s comfort food, but a little lighter, a little faster, and with all the soul-soothing satisfaction. You can impress guests without stress, or turn a simple afternoon snack into something memorable. Honestly, if you’re looking to pin a dessert that’ll get people talking, this Nian Gao sticky rice cake recipe is it.
What Ingredients You Will Need
This tender Nian Gao sticky rice cake uses simple, wholesome ingredients to deliver that chewy, sweet texture we all crave—no fancy shopping required. Most of these you’ll probably have on hand, and I’ll toss in a few substitution tips just in case.
- For the Batter:
- Glutinous rice flour (200g / 1⅔ cups) – Essential for that classic chew; I recommend Mochiko or Erawan brands for best texture.
- Granulated sugar (80g / ⅓ cup) – Adds sweetness and helps with browning.
- Coconut milk (240ml / 1 cup) – Gives a subtle richness; you can swap for regular milk or oat milk if you prefer (dairy-free works great here).
- Water (60ml / ¼ cup) – Keeps the batter smooth and pourable.
- Vegetable oil (1 tbsp) – I use sunflower or canola; helps the cake stay moist and prevents sticking.
- Salt (¼ tsp) – Balances out the sweetness and brings out the flavors.
- For the Filling:
- Sweetened red bean paste (150g / ⅔ cup) – You can use canned, homemade, or even swap for black sesame paste if you’re feeling adventurous. I usually go with Yude Azuki brand for consistency.
- Optional Add-ins:
- Sesame seeds (1 tbsp, toasted) – Sprinkle on top for a nutty finish.
- Shredded coconut (2 tbsp) – Adds extra chew and a tropical twist.
- Chopped nuts (walnuts or pecans, ¼ cup) – For crunch, if you’re not nut-free.
If you’re gluten-free, the standard glutinous rice flour is naturally safe—just double-check the label. You can swap out coconut milk for almond or soy if needed. For a lower sugar option, reduce the sugar by half; it’ll still be delicious, just a tad less sweet. In summer, try mixing in fresh berries with the bean paste—trust me, it’s a game-changer. If you want to go all out, add some orange zest or a splash of vanilla to the batter for extra aroma. The best part? This recipe is super flexible, so you can make it work with what’s in your pantry.
Equipment Needed
You don’t need fancy gadgets to whip up this Nian Gao sticky rice cake, but a few trusty tools make things easier. I’ve tried it with both basic and specialty equipment, so here’s what works best:
- Mixing bowls: At least two—one for the batter, one for the filling.
- Whisk or silicone spatula: For blending the batter smooth.
- Measuring cups and spoons: Precision matters for that perfect texture.
- Steamer: I use a bamboo steamer for tradition, but any metal or electric steamer works. If you don’t have one, a large pot with a trivet and plate will do the trick.
- 8-inch round or square cake pan: Lightly greased, glass or metal. I’ve even used a loaf pan in a pinch!
- Parchment paper: For easy removal (trust me—skip this and you’ll be scraping sticky cake for days).
- Cooling rack: Optional, but handy if you want to slice and crisp the pieces later.
If you’re on a budget, skip the steamer and use a deep skillet with a lid, placing a heatproof plate on a rack inside. Clean bamboo steamers right after use—otherwise the sticky residue clings forever. For cake pans, glass dishes heat more evenly but metal helps the edges crisp a bit. You really don’t need anything fancy—just the basics, and you’re good to go.
Preparation Method
- Prepare Your Pan: Lightly grease your 8-inch (20cm) round or square cake pan. Line with parchment paper on the bottom and sides for easy removal. Set aside.
- Mix the Batter: In a large bowl, whisk together 200g (1⅔ cups) glutinous rice flour, 80g (⅓ cup) sugar, and ¼ tsp salt. Pour in 240ml (1 cup) coconut milk, 60ml (¼ cup) water, and 1 tbsp vegetable oil. Whisk until the mixture is smooth and lump-free. Batter should be pourable but thick, almost like pancake batter. If it feels too stiff, add a splash more water.
- Layer the Batter and Filling: Pour half the batter into your prepared pan, spreading evenly. Gently dollop 150g (⅔ cup) red bean paste over the batter, smoothing it into a thick layer with a spatula. Top with the remaining batter, spreading gently to cover the filling. (Try not to mix the layers—just smooth them on top!)
- Optional Toppings: Sprinkle sesame seeds, shredded coconut, or chopped nuts over the surface for extra flavor and texture.
- Steam: Place the pan into your steamer. Cover with a lid and steam over medium-high heat for 40–45 minutes. Check the water level every 15 minutes; refill with hot water as needed so you don’t run dry. The cake is done when the surface looks glossy and a toothpick comes out mostly clean (a little stickiness is normal).
- Cool: Remove the pan from the steamer and let the cake cool in the pan for 15–20 minutes. This helps it firm up for slicing. (Don’t rush—sticky cakes break easily when hot!)
- Slice and Serve: Once cooled, lift the cake out using the parchment paper. Slice into squares or wedges. For a crispy finish, pan-fry slices in a nonstick skillet with a touch of oil until golden on both sides—about 1–2 minutes per side.
Prep Notes: If your batter seems dry, add an extra tablespoon of water. For best results, use room temperature coconut milk; cold milk can cause the batter to clump. If your steamer drips condensation onto the cake, wrap the lid in a clean kitchen towel to absorb excess moisture.
Troubleshooting: If the cake is too dense, you may have overmixed the batter or used cold liquids. If it’s too soft, steam for an extra 5–10 minutes. Don’t worry if some filling peeks through—it’s all part of the homemade charm!
Cooking Tips & Techniques
After making Nian Gao sticky rice cake more times than I can count, I’ve picked up a few tricks (and learned the hard way with a few flops). Here’s what I wish I’d known from the start:
- Consistency is Key: Always sift your glutinous rice flour. Lumps make for uneven texture, and nobody likes a gritty cake.
- Don’t Overmix: Once the wet and dry are combined, mix just until smooth. Overmixing can lead to a tough, rubbery cake (learned this after batch #3).
- Layer Carefully: For clean layers, chill the red bean paste briefly before spreading. It’s less sticky and easier to handle.
- Steam with Care: Keep the steam steady—don’t blast it too high, or the cake can crack. If you notice condensation dripping onto the cake, wrap the steamer lid with a towel as a buffer.
- Pan-Fry for Crunch: Slices of Nian Gao get extra tasty with a quick pan-fry. Use medium heat and don’t crowd the pan for crisp, golden edges.
- Timing Matters: Prep your ingredients before you start. Sticky batter waits for no one, and you don’t want to scramble for that last cup of coconut milk mid-mix.
Honestly, my first few attempts were messy (batter everywhere, filling leaking out), but with practice, you get a feel for how the batter should look and feel. If your cake comes out a little lopsided or the filling isn’t perfectly centered—no worries! It’s homemade, and that’s part of the magic.
Variations & Adaptations
Nian Gao sticky rice cake is super versatile. Whether you have dietary needs or just want to mix things up, here are some tried-and-true tweaks:
- Vegan Version: Use coconut or almond milk and be sure your red bean paste is plant-based. Most store-bought versions are, but check the label.
- Nut-Free: Skip additions like sesame seeds or nuts. You can sprinkle toasted rice instead for crunch.
- Low-Sugar: Reduce sugar to 40g (about 3 tbsp). The cake will be less sweet but still delicious, especially if your red bean paste is sweetened.
- Seasonal Flavor Swaps: Try black sesame paste or mashed sweet potato instead of red bean. In spring, chopped dried fruit (apricots, dates) works beautifully.
- Baked Version: No steamer? Bake at 350°F (175°C) for 40–45 minutes, covered with foil for the first 30 minutes. The surface will be slightly firmer, with a deeper golden hue.
One of my favorite twists is adding a swirl of matcha powder to the batter for a green tea kick. If you want it extra fragrant, a splash of vanilla or orange zest does wonders. For those with allergies, always check that your glutinous rice flour is processed in a gluten-free facility. The beauty of this Nian Gao recipe is that it adapts to whatever you’ve got on hand—so don’t be afraid to get creative!
Serving & Storage Suggestions
This Nian Gao sticky rice cake is best served slightly warm, sliced into squares or wedges. I love presenting it on a pretty platter, garnished with a sprinkle of sesame seeds and a side of fresh fruit—think sliced oranges or strawberries for a pop of color. It pairs perfectly with green tea, oolong, or even a cold glass of soy milk for that classic comfort vibe.
If you’re planning ahead, the cake stores beautifully. Wrap leftovers tightly in plastic wrap or place in an airtight container, then refrigerate for up to five days. For longer storage, freeze slices with parchment between layers; they’ll keep for up to two months. To reheat, steam for 5 minutes or microwave individual pieces for 20 seconds. If you want a crispy snack, pan-fry refrigerated slices in a bit of oil until golden—honestly, the texture gets even better after a day or two.
As the cake sits, the flavors deepen and the texture becomes even chewier (in the best way). It’s the kind of treat that gets better with time, so don’t worry if you have leftovers. You may even find yourself sneaking a piece straight from the fridge late at night (I won’t judge!).
Nutritional Information & Benefits
Each slice (about 50g) of Nian Gao sticky rice cake with red bean filling contains approximately:
- Calories: 120
- Carbohydrates: 22g
- Protein: 2g
- Fat: 2g
- Fiber: 1g
- Gluten-free
Glutinous rice flour is naturally gluten-free, making this cake safe for those with celiac or gluten sensitivities. Red bean paste offers plant-based protein, iron, and fiber. Coconut milk adds healthy fats and a hint of tropical flavor. If you opt for less sugar or skip the sweetened filling, you’ll have a lower calorie treat. Just be aware—sticky rice cakes are dense, so portion control is key if you’re watching carbs.
As someone who tries to balance wellness and comfort food, I love that this dessert is allergy-friendly, easy to digest, and doesn’t rely on artificial ingredients. It’s a feel-good sweet you can share with nearly anyone!
Conclusion
If you’re craving a dessert that’s downright cozy, easy to make, and sure to win over any crowd, this Nian Gao sticky rice cake recipe is your new best friend. The combo of chewy rice and sweet red bean filling is pure joy—classic comfort with a modern twist. Customize the flavors, swap out the fillings, and make it your own. That’s the beauty of homemade treats!
I keep coming back to this recipe because it’s simple, reliable, and always brings smiles (and requests for seconds). Whether you’re making it for a holiday, a family snack, or just a little self-care, I hope it becomes a staple in your kitchen too. Don’t forget to leave a comment below, share your own twists, or tag me with your Pinterest-worthy creations!
Honestly, every time I pull a batch from the steamer, it feels like a little celebration. Enjoy every chewy, sweet bite—and happy baking!
FAQs
What is Nian Gao sticky rice cake?
Nian Gao is a traditional Chinese dessert made from glutinous rice flour, usually enjoyed during Lunar New Year. It’s chewy, sweet, and in this recipe, filled with red bean paste for extra flavor.
Can I use other fillings besides red bean paste?
Absolutely! Try black sesame paste, sweet potato puree, or even mashed dates for different flavors. You can also mix in chopped nuts or dried fruit for more texture.
Do I need a steamer to make this cake?
No steamer? No problem. You can bake the cake at 350°F (175°C) covered with foil for a similar texture. A deep pot with a rack or trivet works as a makeshift steamer too.
How do I keep my Nian Gao from sticking to the pan?
Always line your pan with parchment paper and lightly grease it. This makes removal easy and prevents sticking, especially with sticky rice flour desserts.
Is Nian Gao gluten-free?
Yes! Glutinous rice flour is naturally gluten-free, so this cake is safe for most people with gluten sensitivities. Just double-check your flour brand to avoid cross-contamination.
Pin This Recipe!
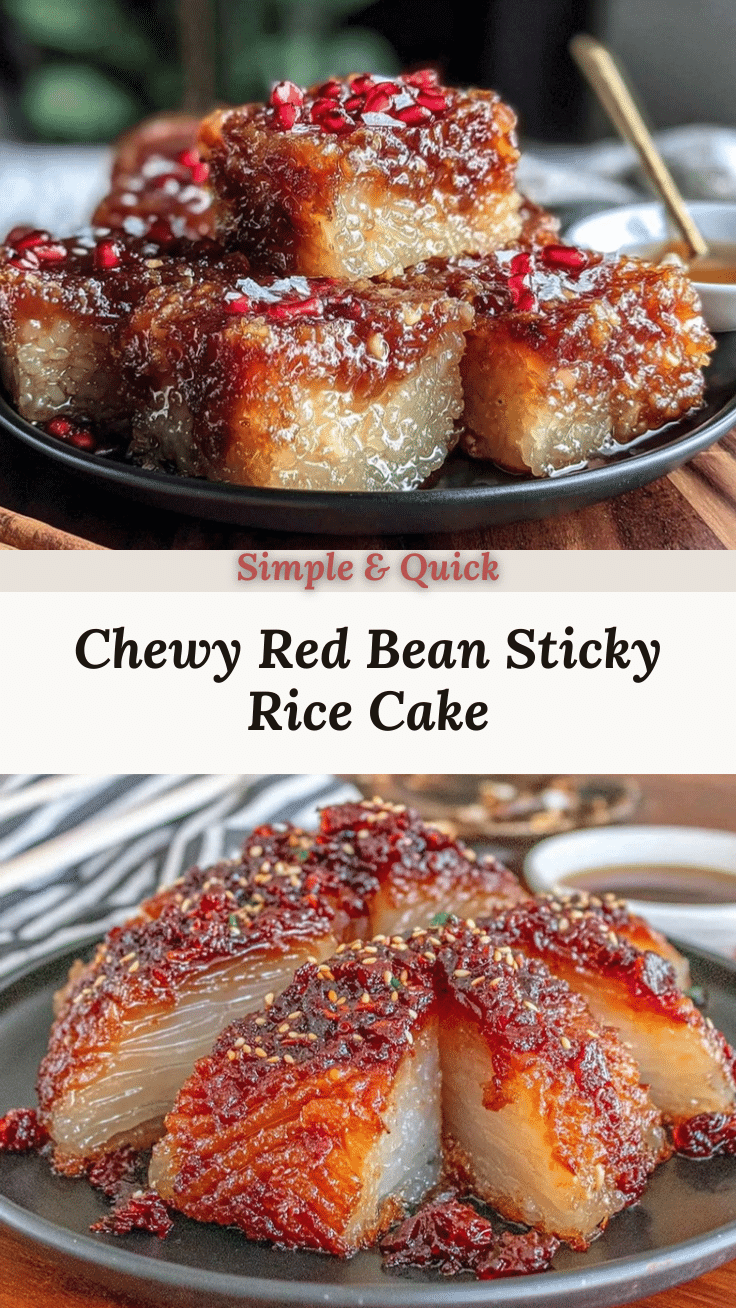
Nian Gao Sticky Rice Cake with Red Bean Filling

This easy, nostalgic Nian Gao sticky rice cake features a chewy, golden exterior and a molten sweet red bean paste filling. Perfect for Lunar New Year or any time you crave a comforting, gluten-free dessert.
- Prep Time: 15 minutes
- Cook Time: 45 minutes
- Total Time: 1 hour
- Yield: 8 servings 1x
- Category: Dessert
- Cuisine: Chinese
Ingredients
- 1 2/3 cups glutinous rice flour (200g)
- 1/3 cup granulated sugar (80g)
- 1 cup coconut milk (240ml)
- 1/4 cup water (60ml)
- 1 tablespoon vegetable oil
- 1/4 teaspoon salt
- 2/3 cup sweetened red bean paste (150g)
- 1 tablespoon toasted sesame seeds (optional)
- 2 tablespoons shredded coconut (optional)
- 1/4 cup chopped walnuts or pecans (optional)
Instructions
- Lightly grease an 8-inch round or square cake pan and line with parchment paper on the bottom and sides.
- In a large bowl, whisk together glutinous rice flour, sugar, and salt. Pour in coconut milk, water, and vegetable oil. Whisk until smooth and lump-free. Batter should be thick but pourable.
- Pour half the batter into the prepared pan and spread evenly. Dollop red bean paste over the batter and smooth into a thick layer. Top with remaining batter, spreading gently to cover the filling.
- Sprinkle optional toppings (sesame seeds, shredded coconut, or chopped nuts) over the surface.
- Place the pan into a steamer. Cover and steam over medium-high heat for 40–45 minutes, checking water level every 15 minutes and refilling as needed.
- Remove the pan from the steamer and let the cake cool in the pan for 15–20 minutes.
- Lift the cake out using parchment paper. Slice into squares or wedges. For a crispy finish, pan-fry slices in a nonstick skillet with a touch of oil until golden on both sides (about 1–2 minutes per side).
Notes
Sift glutinous rice flour for best texture. Do not overmix batter. Chill red bean paste for easier layering. If baking instead of steaming, cover with foil and bake at 350°F for 40–45 minutes. For extra flavor, add orange zest or vanilla to the batter. Cake stores well refrigerated for up to 5 days or frozen for 2 months. Pan-frying slices after refrigeration enhances texture.
Nutrition
- Serving Size: 1 slice (about 50g)
- Calories: 120
- Sugar: 8
- Sodium: 60
- Fat: 2
- Saturated Fat: 1
- Carbohydrates: 22
- Fiber: 1
- Protein: 2
Keywords: Nian Gao, sticky rice cake, red bean, gluten-free dessert, Lunar New Year, Chinese dessert, easy Asian sweets, pan-fried rice cake, vegan option


