Introduction
Let me tell you, the scent of rich chocolate mingling with cool peppermint fills the air and instantly wraps you up like a cozy winter blanket. The first time I made peppermint hot chocolate bombs, I was honestly blown away. It was one of those moments where you pause, take a deep breath, and just smile because you know you’re onto something truly special. I remember being knee-high to a grasshopper, snuggling under a thick quilt with my family, and now years later, I’m recreating that warm, magical feeling with this recipe.
These irresistible peppermint hot chocolate bombs are dangerously easy to make, and they bring pure, nostalgic comfort to any chilly day. My family couldn’t stop sneaking them off the counter, and honestly, I can’t really blame them. Whether you’re looking for the perfect sweet treat to brighten up a holiday party, a fun activity with the kids, or just a way to make your Pinterest cookie board pop, this recipe is your go-to. I’ve tested this recipe more times than I can count (in the name of research, of course), and it’s become a staple for cozy family gatherings and gifting.
Why You’ll Love This Recipe
After countless cups of hot chocolate and many failed attempts at making something both pretty and delicious, this peppermint hot chocolate bombs recipe stands out for so many reasons. It’s been my secret weapon for impressing guests without stress, and the feedback is always the same: “Wow, this is next-level!” Here’s why you’ll fall for it too:
- Quick & Easy: Comes together in under 30 minutes, perfect for busy winter evenings or last-minute holiday treats.
- Simple Ingredients: No need for fancy stores—most are pantry staples you already have, like good-quality chocolate and peppermint extract.
- Perfect for Gifting: These bombs are show-stoppers at parties, holiday gatherings, or as thoughtful homemade gifts.
- Crowd-Pleaser: Both kids and adults rave about the creamy, minty, chocolatey combo.
- Unbelievably Delicious: The texture is silky smooth, and the peppermint adds just the right festive zing.
What makes this recipe different? It’s the little touches—melting the chocolate just right for that glossy finish, using premium dark chocolate for depth, and the peppermint pieces inside that melt perfectly, releasing a burst of flavor. It’s not just a treat; it’s a warm hug in a mug. Honestly, once you try these peppermint hot chocolate bombs, you’ll be closing your eyes after the first sip, savoring every drop.
What Ingredients You Will Need
This recipe uses simple, wholesome ingredients to deliver bold flavor and a satisfying texture without any fuss. Most of these ingredients are easy to find year-round and can be swapped for alternatives if needed.
- For the Chocolate Shell:
- 12 oz (340 g) good-quality dark or semi-sweet chocolate, chopped or chips (I recommend Ghirardelli for best melting)
- 1 tsp coconut oil (optional, for a shiny finish)
- For the Filling:
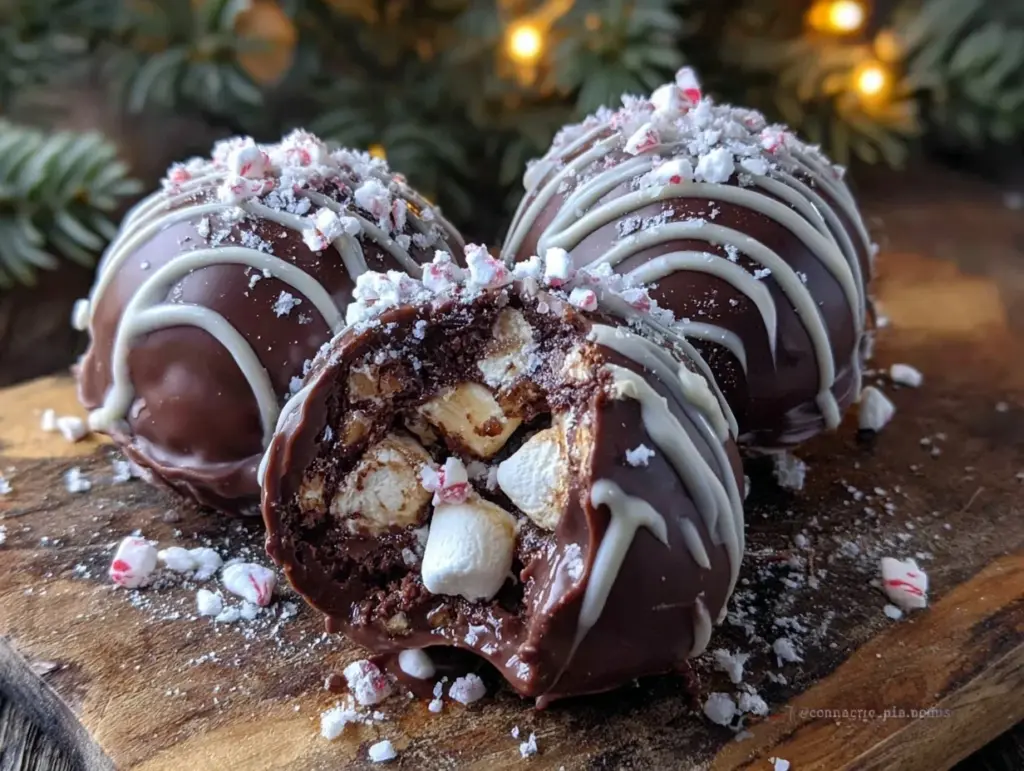
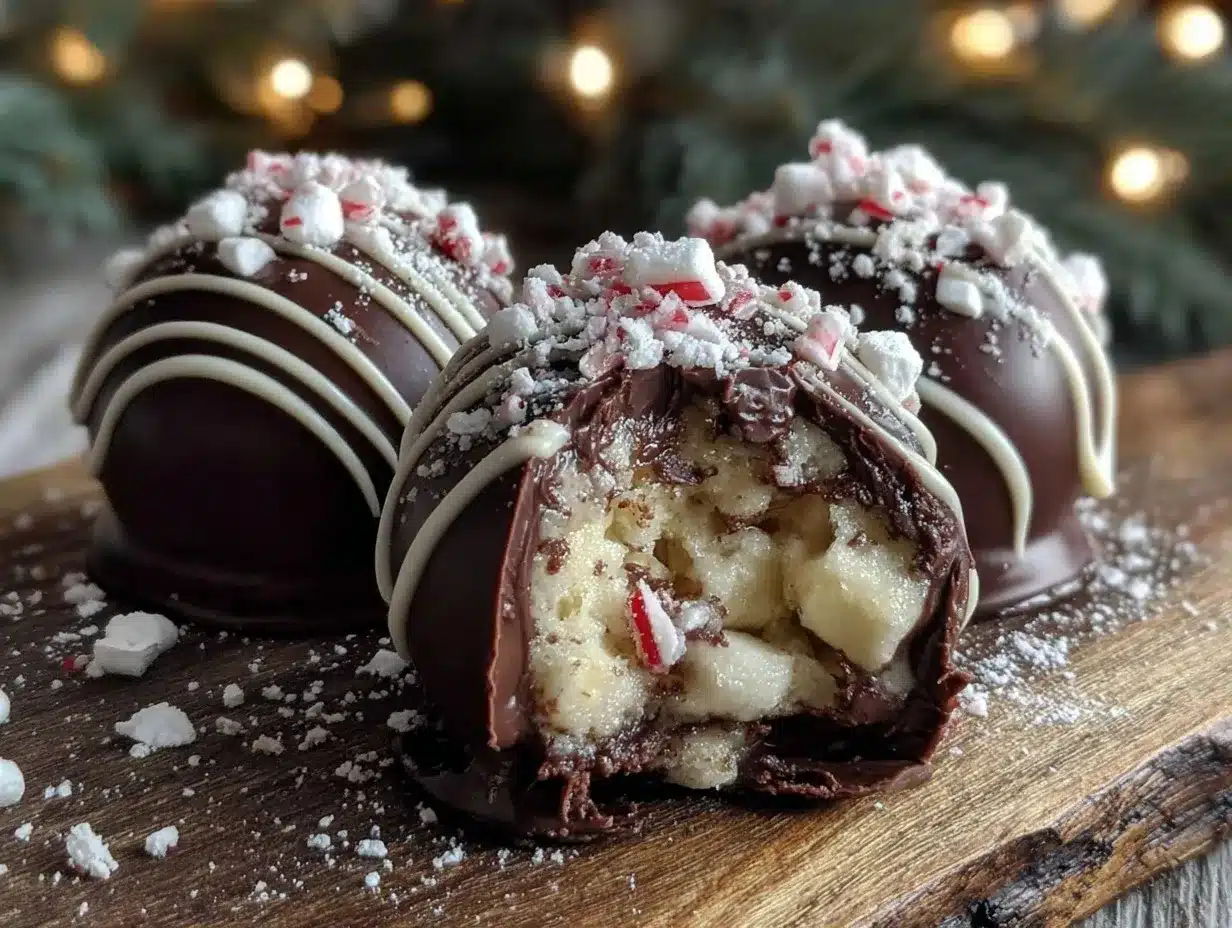
- 1/2 cup (120 ml) mini marshmallows
- 2 tbsp crushed peppermint candies or candy canes (freshly crushed for best texture)
- 2 tbsp high-quality hot cocoa mix (your favorite brand works great)
- For the Garnish (optional):
- Extra crushed peppermint for sprinkling
- White chocolate drizzle (made from 2 oz (57 g) white chocolate chips)
Ingredient Tips: Look for chocolate with at least 60% cocoa for rich flavor, and use mini marshmallows for that perfect melt. If you want a dairy-free version, swap regular chocolate for dairy-free or vegan chocolate, and use coconut marshmallows. Also, you can swap crushed peppermint candies for peppermint extract if you want a less crunchy bite (just 1/2 tsp).
Equipment Needed
- Silicone hot chocolate bomb molds (6-cavity recommended)
- Microwave-safe bowls or double boiler for melting chocolate
- Small spoon or piping bag for filling
- Baking sheet lined with parchment paper
- Spatula or offset spatula for smoothing chocolate
- Kitchen thermometer (optional, but helpful for tempering chocolate)
If you don’t have silicone molds, you can use plastic ornament molds or even carefully shape the chocolate on parchment paper, but silicone makes the process way easier and less messy. Personally, I’ve tried metal molds, and they’re a bit tricky to remove the bombs without cracking. Also, keep your tools dry—water’s the enemy of melted chocolate! Budget-friendly options include silicone muffin molds as a substitute, though the shape won’t be perfect spheres.
Preparation Method
- Temper the Chocolate (10-15 minutes): Chop your chocolate finely or use chips. Melt 2/3 of it in a microwave-safe bowl in 30-second bursts, stirring between each, until smooth and about 110°F (43°C). Stir in the remaining 1/3 until melted and cooled to about 88-90°F (31-32°C). This step ensures a shiny, firm shell that snaps nicely. If you skip tempering, the chocolate might bloom or feel waxy.
- Coat the Molds (10 minutes): Spoon about 2 tablespoons (30 g) of melted chocolate into each mold cavity. Tilt and rotate the mold to cover all sides evenly, about 1/8-inch thick. Scrape off excess chocolate with a spatula. Place the molds upside down on parchment and refrigerate for 5 minutes to set.
- Apply a Second Coating (5-7 minutes): Add a second layer of chocolate for sturdiness, repeat the tilting and scraping process. Chill again until fully firm, around 10-15 minutes. The shells should feel solid and not stick to your fingers.
- Fill the Bombs (5 minutes): Carefully remove half of the chocolate shells from the molds. Fill each with 1 tablespoon (15 ml) of hot cocoa mix, a generous teaspoon of mini marshmallows, and a sprinkle of crushed peppermint. Be gentle—you don’t want to crack the shells.
- Seal the Bombs (5-10 minutes): Warm a plate slightly, and press the empty chocolate halves onto it for a second to melt the edges. Quickly sandwich the filled halves together. Clean up any rough edges with a warm spatula. Place bombs seam-side down on parchment and chill 10 minutes to set.
Pro Tip: If your chocolate seizes or thickens, add a tiny bit of coconut oil and re-melt gently. Also, when melting the chocolate, don’t rush—low and slow is the way to go. The sensory cue is a shiny, smooth coating without streaks or lumps.
Cooking Tips & Techniques
Making peppermint hot chocolate bombs is fun, but a few tricks can make all the difference. First, tempering the chocolate might sound fancy, but it’s just about controlling temperature for that glossy finish and perfect snap. You can skip it, but expect a duller look and softer shells.
Keep your workspace dry—water causes chocolate to seize, turning it grainy and unusable. When filling your bombs, don’t overfill; less is more here to avoid cracking or messy seams. I learned the hard way after a few bombs burst open in the mug (not fun, but hilarious).
Timing is key—chilling between coats prevents frustration and breakage. Multitasking helps; melt chocolate while prepping fillings, and use your fridge/freezer strategically. Also, when sealing, warming the plate just right is your secret weapon—too hot and you’ll melt the whole bomb, too cold and the edges won’t stick.
Variations & Adaptations
- Dairy-Free Version: Use dairy-free chocolate and coconut-based marshmallows. Swap regular hot cocoa mix for a dairy-free brand to keep it allergy-friendly.
- Spicy Twist: Add a pinch of cayenne or cinnamon to the hot cocoa mix for a warming kick that complements the peppermint.
- Seasonal Flavors: Swap peppermint for orange zest and mini chocolate chips for a festive citrus-chocolate combo, perfect for Christmas or winter birthdays.
For a personal twist, I once tried adding crushed ginger snaps inside the bombs—it was a delightful surprise with a spicy crunch that paired beautifully with the peppermint. If you want to switch up the cooking method, you can gently melt the chocolate in a double boiler instead of the microwave for more control.
Serving & Storage Suggestions
Serve your peppermint hot chocolate bombs by dropping one into a mug and pouring 8 oz (240 ml) of hot milk or your favorite dairy-free alternative over it. Watch it melt away, releasing marshmallows and peppermint—pure magic! For presentation, garnish with whipped cream and a candy cane for that extra festive touch.
Store bombs in an airtight container at room temperature in a cool, dry place for up to two weeks. Avoid the fridge, which can cause condensation and dull the chocolate’s shine. For longer storage, freeze them in a sealed container for up to three months; thaw at room temperature before serving.
Reheat gently by placing the mug in a warm spot or microwaving in short bursts if needed. Flavors often deepen after a day, so making them ahead actually gives you a tastier treat.
Nutritional Information & Benefits
Each peppermint hot chocolate bomb has approximately 250-300 calories, depending on the chocolate used. They’re a sweet treat, so enjoy in moderation! Peppermint brings some digestive benefits and a refreshing flavor that cuts sweetness nicely. Using dark chocolate offers antioxidants and a touch of magnesium, which feels like a little health boost in every cup.
This recipe can be adapted for gluten-free and dairy-free diets easily, making it accessible for many. Just keep an eye on ingredient labels for hidden allergens like soy lecithin in some chocolates.
From my wellness perspective, indulging in these bombs occasionally feels like a cozy self-care ritual that warms both the body and soul during chilly months.
Conclusion
Honestly, these peppermint hot chocolate bombs are a wintertime game-changer. They’re fun to make, impressive to gift, and utterly delicious to drink. Whether you stick to the classic recipe or customize with your favorite flavors, you’re going to love how this simple treat brings warmth and smiles to any cold day.
I’ve shared my best tips, but don’t be afraid to get creative and make it your own. If you try this recipe, I’d love to hear how it turned out—drop a comment or share your adaptations! Cozy up, sip slowly, and enjoy that perfect peppermint-chocolate hug in a mug.
FAQs
Can I use milk chocolate instead of dark chocolate?
Absolutely! Milk chocolate will give a sweeter and creamier shell, but keep in mind it’s softer and might melt faster.
How do I prevent my chocolate bombs from cracking?
Make sure to apply two even coats of melted chocolate and chill between each. Avoid overfilling and handle gently when sealing.
Can I prepare these hot chocolate bombs ahead of time?
Yes! They store well at room temperature for up to two weeks or can be frozen for up to three months.
What’s the best way to crush peppermint candies?
Place them in a sealed plastic bag and gently tap with a rolling pin or heavy pan. Avoid pulverizing into powder—it’s nicer to have some texture.
Can I make these without silicone molds?
You can use plastic ornament molds or carefully shape chocolate on parchment, but silicone molds make the process much easier and safer for delicate shells.
Pin This Recipe!
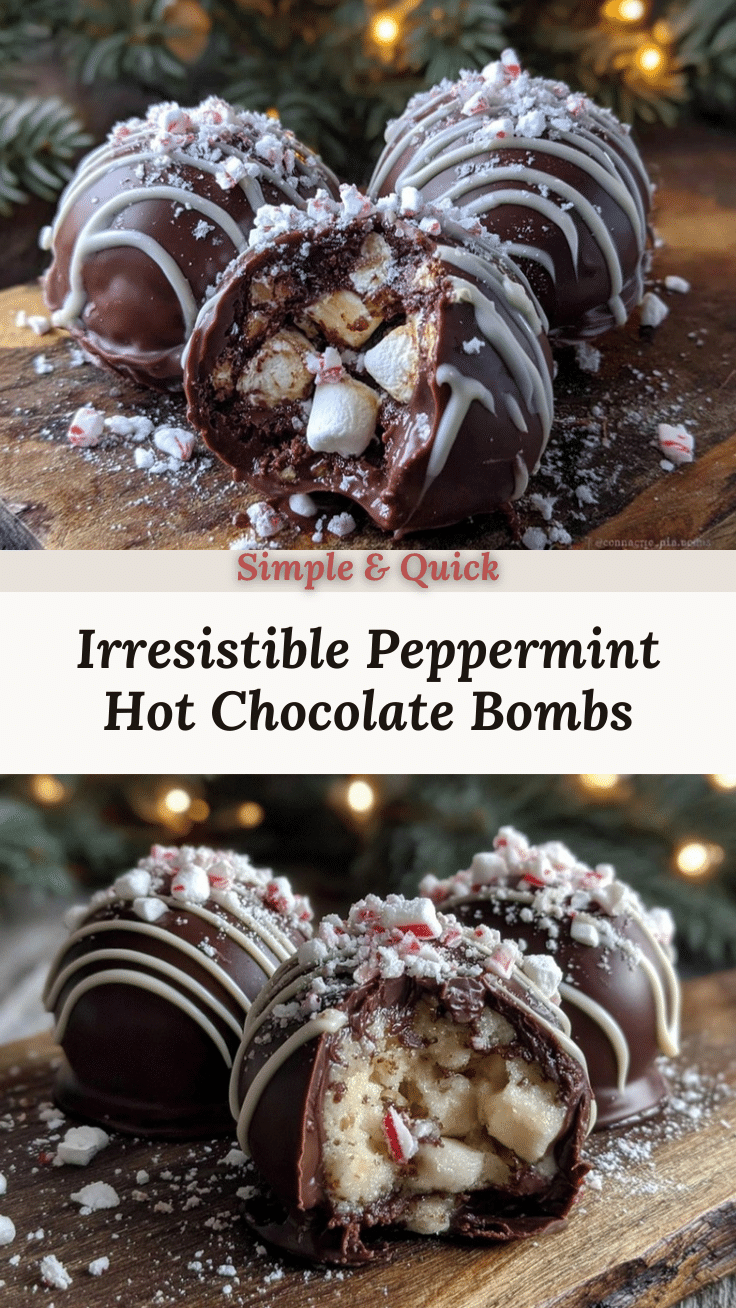
Peppermint Hot Chocolate Bombs

These peppermint hot chocolate bombs are an easy and cozy winter treat that combines rich chocolate with refreshing peppermint for a nostalgic and delicious experience.
- Prep Time: 15 minutes
- Cook Time: 15 minutes
- Total Time: 30 minutes
- Yield: 6 hot chocolate bombs 1x
- Category: Dessert
- Cuisine: American
Ingredients
- 12 oz good-quality dark or semi-sweet chocolate, chopped or chips
- 1 tsp coconut oil (optional, for a shiny finish)
- 1/2 cup mini marshmallows
- 2 tbsp crushed peppermint candies or candy canes
- 2 tbsp high-quality hot cocoa mix
- Extra crushed peppermint for sprinkling (optional)
- 2 oz white chocolate chips (for drizzle, optional)
Instructions
- Temper the chocolate by melting 2/3 of it in a microwave-safe bowl in 30-second bursts, stirring between each, until smooth and about 110°F (43°C). Stir in the remaining 1/3 until melted and cooled to about 88-90°F (31-32°C).
- Spoon about 2 tablespoons (30 g) of melted chocolate into each mold cavity. Tilt and rotate the mold to cover all sides evenly, about 1/8-inch thick. Scrape off excess chocolate with a spatula. Place the molds upside down on parchment and refrigerate for 5 minutes to set.
- Add a second layer of chocolate for sturdiness, repeat the tilting and scraping process. Chill again until fully firm, around 10-15 minutes.
- Carefully remove half of the chocolate shells from the molds. Fill each with 1 tablespoon (15 ml) of hot cocoa mix, a generous teaspoon of mini marshmallows, and a sprinkle of crushed peppermint.
- Warm a plate slightly, and press the empty chocolate halves onto it for a second to melt the edges. Quickly sandwich the filled halves together. Clean up any rough edges with a warm spatula. Place bombs seam-side down on parchment and chill 10 minutes to set.
Notes
Temper the chocolate carefully for a shiny, firm shell. Keep tools dry to avoid chocolate seizing. Chill between coats to prevent cracking. Warm the plate just right when sealing to avoid melting the whole bomb. For dairy-free, use dairy-free chocolate and coconut marshmallows. Crushed peppermint candies can be swapped for peppermint extract (1/2 tsp) for less crunch.
Nutrition
- Serving Size: 1 hot chocolate bomb
- Calories: 275
- Sugar: 25
- Sodium: 50
- Fat: 15
- Saturated Fat: 9
- Carbohydrates: 30
- Fiber: 3
- Protein: 3
Keywords: peppermint hot chocolate bombs, hot chocolate bombs, peppermint chocolate, winter treats, holiday desserts, easy chocolate bombs, cozy drinks


