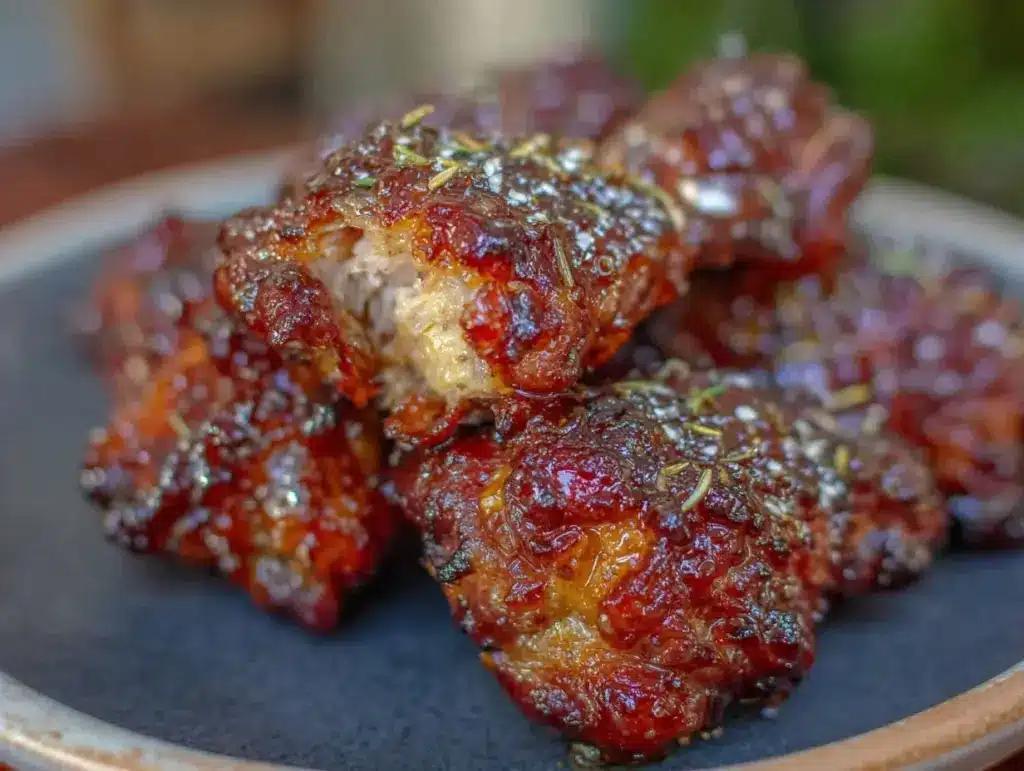
Let me tell you, the scent of sizzling soy sauce chicken wafting through my kitchen is enough to make anyone’s mouth water. The first time I baked this crispy soy sauce chicken with sticky glaze, I was instantly hooked – the kind of moment where you pause, take a deep breath, and just smile because you know you’re onto something truly special. Years ago, when I was knee-high to a grasshopper, my grandma used to make something similar, but honestly, this recipe brings that nostalgic comfort with a fresh, dangerously easy twist.
I stumbled upon this dish on a rainy weekend when I wanted to recreate the magic of her cooking but with a little modern flair. My family couldn’t stop sneaking pieces off the cooling rack (and I can’t really blame them). Let’s face it, this crispy soy sauce chicken is perfect for a cozy dinner, a weekend treat, or even to brighten up your Pinterest dinner board with that irresistible glossy glaze and crunch.
After testing this recipe multiple times in the name of research, of course, it’s become a staple for family gatherings and gifting. Honestly, it feels like a warm hug on a plate, and you’re going to want to bookmark this one for those moments when you crave something both crispy and comforting.
Why You’ll Love This Recipe
This crispy soy sauce chicken recipe is genuinely a keeper. I’ve put it through its paces, and here’s why it stands out:
- Quick & Easy: Comes together in under 45 minutes, perfect for busy weeknights or last-minute cravings.
- Simple Ingredients: No fancy grocery trips needed; you likely already have everything in your kitchen pantry.
- Perfect for Dinner Parties: Impress your guests without stressing over complicated steps.
- Crowd-Pleaser: Always gets rave reviews from kids and adults alike – the crispy skin and sticky glaze combo is irresistible.
- Unbelievably Delicious: That balance of savory soy sauce, a touch of sweetness, and the crispy golden skin? Next-level comfort food.
What makes this recipe different is the perfectly sticky glaze that clings to every crispy bite without turning soggy. Instead of just baking, there’s a little pan-frying step that locks in the crunch, making this soy sauce chicken recipe your best version. It isn’t just good – it’s the kind of dish that makes you close your eyes after the first bite, savoring the layers of flavor. Whether you’re serving it for a casual family dinner or a special occasion, this recipe delivers soul-soothing satisfaction without the fuss.
What Ingredients You Will Need
This recipe uses simple, wholesome ingredients to deliver bold flavor and satisfy that craving for crispy, sticky chicken without the fuss. Most are pantry staples, and the few fresh items add that perfect punch.
- Chicken thighs (bone-in, skin-on): About 4-6 pieces (around 2 pounds or 900 grams) – I find thighs give the best juicy meat and crispy skin combo.
- Soy sauce: ½ cup (120 ml) – I prefer Kikkoman for its balanced flavor.
- Brown sugar: 3 tablespoons – adds the sticky sweetness to the glaze.
- Garlic: 3 cloves, minced – essential for that aromatic depth.
- Ginger: 1 tablespoon, freshly grated – brightens the glaze beautifully.
- Rice vinegar: 2 tablespoons – adds a subtle tang to balance the sweet and salty.
- Sesame oil: 1 teaspoon – for that toasty, nutty note.
- Honey: 2 tablespoons – helps give the glaze a glossy finish.
- Cornstarch: 1 tablespoon – for patting on the chicken skin to help it crisp up.
- Vegetable oil: 2 tablespoons – for pan-frying.
- Green onions: 2 stalks, thinly sliced (optional garnish) – adds fresh color and crunch.
- Sesame seeds: 1 tablespoon (optional garnish) – a little extra nuttiness and visual appeal.
If you want to make this gluten-free, just swap regular soy sauce for tamari or coconut aminos. For a bit of heat, I sometimes add a pinch of red pepper flakes to the glaze – it gives a nice kick without overpowering the flavors.
Equipment Needed
- Large skillet or frying pan: Preferably non-stick or cast iron for even heat distribution and better crisping.
- Baking sheet or oven-safe dish: For finishing the chicken in the oven.
- Tongs: To flip and handle the chicken safely.
- Mixing bowls: For combining glaze ingredients and prepping chicken.
- Measuring cups and spoons: For accuracy.
- Whisk: To blend the glaze smoothly.
If you don’t have a cast iron pan, no worries – a heavy-bottomed stainless steel skillet works well too. I’ve tried this recipe with both, and while cast iron gives that extra crust, the difference isn’t huge. For budget-friendly options, any sturdy pan that holds heat well will do just fine.
Preparation Method

- Prep the chicken: Pat the chicken thighs dry with paper towels (this step is crucial to getting crispy skin). Then, lightly coat each piece with cornstarch – about 1 tablespoon evenly distributed over all pieces. This helps lock in moisture and crisp up the skin nicely. (10 minutes)
- Make the glaze: In a mixing bowl, whisk together ½ cup (120 ml) soy sauce, 3 tablespoons brown sugar, 3 minced garlic cloves, 1 tablespoon grated ginger, 2 tablespoons rice vinegar, 1 teaspoon sesame oil, and 2 tablespoons honey until the sugar dissolves. Set aside. (5 minutes)
- Pan-fry the chicken: Heat 2 tablespoons vegetable oil over medium-high heat in your skillet. Once hot, add the chicken thighs skin side down. Let them cook undisturbed for about 6-8 minutes until the skin turns golden brown and crisp. Flip carefully and cook the other side for 4-5 minutes. (12 minutes)
- Glaze and bake: Pour the prepared glaze over the chicken in the skillet, making sure each piece is coated. Transfer the skillet (or carefully move chicken and glaze to an oven-safe dish) to a preheated oven at 400°F (200°C). Bake for 15-20 minutes, spooning the glaze over the chicken halfway through. The glaze should thicken and get sticky while the chicken finishes cooking through. (20 minutes)
- Finish and garnish: Remove from oven, let it rest for 5 minutes to allow juices to redistribute and the glaze to set. Sprinkle with sliced green onions and sesame seeds if using. (5 minutes)
Pro tip: Keep an eye on the glaze toward the end to avoid burning the sugar. If the glaze thickens too much, a splash of water can loosen it up. The chicken should reach an internal temperature of 165°F (74°C) for safe eating.
Cooking Tips & Techniques
Getting the skin perfectly crispy while keeping the meat tender can be a little tricky, but here’s what I learned from multiple attempts (and a couple of minor burnt disasters):
- Dry the skin well: Moisture is the enemy of crispiness. Pat the chicken dry thoroughly before applying cornstarch.
- Don’t crowd the pan: Give each piece room to breathe when pan-frying. Crowding causes steaming, which ruins crispiness.
- Medium-high heat is key: Too low and the skin won’t brown; too high and the glaze will burn before the chicken cooks through.
- Use cornstarch, not flour: Cornstarch creates a lighter, crisper crust without the heaviness flour sometimes adds.
- Glaze at the right time: Adding the glaze too early in the pan-fry can burn the sugars. Let the chicken brown first, then glaze and bake.
- Multitask smartly: While the chicken bakes, clean up or prep sides to keep the kitchen running smoothly.
Honestly, once you nail the timing and heat, this recipe becomes almost foolproof. Just keep those senses sharp—look for that golden skin, smell the garlic and ginger in the glaze, and listen for the gentle sizzle when you add the glaze to the pan.
Variations & Adaptations
This crispy soy sauce chicken recipe is super flexible and ready for your creative twists:
- Spicy version: Add 1 teaspoon of chili garlic sauce or red pepper flakes to the glaze for some heat that pairs beautifully with the sweetness.
- Gluten-free adaptation: Swap soy sauce with tamari or coconut aminos for a gluten-free, equally tasty glaze.
- Air fryer method: After coating the chicken with cornstarch, air fry at 400°F (200°C) for 20-25 minutes, tossing the glaze halfway through for a crisp result without frying.
- Different protein: Try this glaze on chicken wings or drumsticks for a finger-licking snack or party appetizer.
- Personal touch: I once tossed in a splash of orange juice to the glaze for a citrusy brightness – it was a game changer!
Serving & Storage Suggestions
Serve this crispy soy sauce chicken hot, right off the pan or oven, for maximum crunch. It pairs wonderfully with steamed jasmine rice or fluffy garlic fried rice and a side of stir-fried greens like bok choy or snap peas. For beverages, a chilled light lager or jasmine tea complements the rich, sticky flavors perfectly.
To store leftovers, let the chicken cool completely, then place in an airtight container and refrigerate for up to 3 days. Reheat gently in a skillet over medium heat to keep the skin crispy, or pop it in a 350°F (175°C) oven for about 10 minutes. Avoid microwaving if you want to preserve texture.
Flavors actually deepen the next day as the glaze settles in, so this dish tastes amazing as leftovers — honestly, sometimes even better!
Nutritional Information & Benefits
This crispy soy sauce chicken packs a good balance of protein and flavor with moderate calories. Each serving (1 chicken thigh with glaze) roughly contains:
| Nutrient | Amount |
|---|---|
| Calories | 320 kcal |
| Protein | 28 g |
| Fat | 18 g |
| Carbohydrates | 10 g |
| Sodium | 700 mg |
Chicken thighs are a great source of iron and zinc, while ginger and garlic add antioxidants and anti-inflammatory benefits. Using moderate amounts of soy sauce keeps sodium levels reasonable for a savory dish. For gluten-free or low-sodium diets, adjust the soy sauce accordingly. Overall, this recipe offers a wholesome, satisfying meal that’s both comforting and nourishing.
Conclusion
If you’re after a dinner that’s crispy, sticky, and packed with flavor, this crispy soy sauce chicken recipe is worth every minute you spend making it. It’s flexible enough to fit your taste buds and kitchen style, whether you tweak the spice level or swap cooking methods. Personally, I love how it brings together simple ingredients for a dish that feels special yet is dangerously easy.
Give it a try and let me know how you customize it! Drop a comment below with your favorite glaze twist or serving idea—I’m always eager to hear from fellow home cooks. Trust me, once you make this, it’ll become a go-to for cozy dinners and impressing guests alike. Happy cooking!
FAQs About Crispy Soy Sauce Chicken
Can I use chicken breasts instead of thighs?
You can, but thighs stay juicier and crisp better with the skin on. Breasts might dry out and need careful timing.
How do I keep the chicken skin crispy after baking?
Finish with a quick pan-fry skin side down before glazing and baking. Reheat gently in a skillet to maintain crispiness.
Is this recipe freezer-friendly?
Yes! Freeze cooked chicken in an airtight container up to 2 months. Reheat slowly in the oven for best texture.
Can I make this recipe vegan?
For a vegan twist, try using firm tofu or seitan, pan-fried crisp then glazed with the same sauce (use tamari or coconut aminos).
What sides go well with crispy soy sauce chicken?
Steamed rice, stir-fried veggies, or simple noodle dishes make perfect companions to soak up that sticky glaze.
Pin This Recipe!
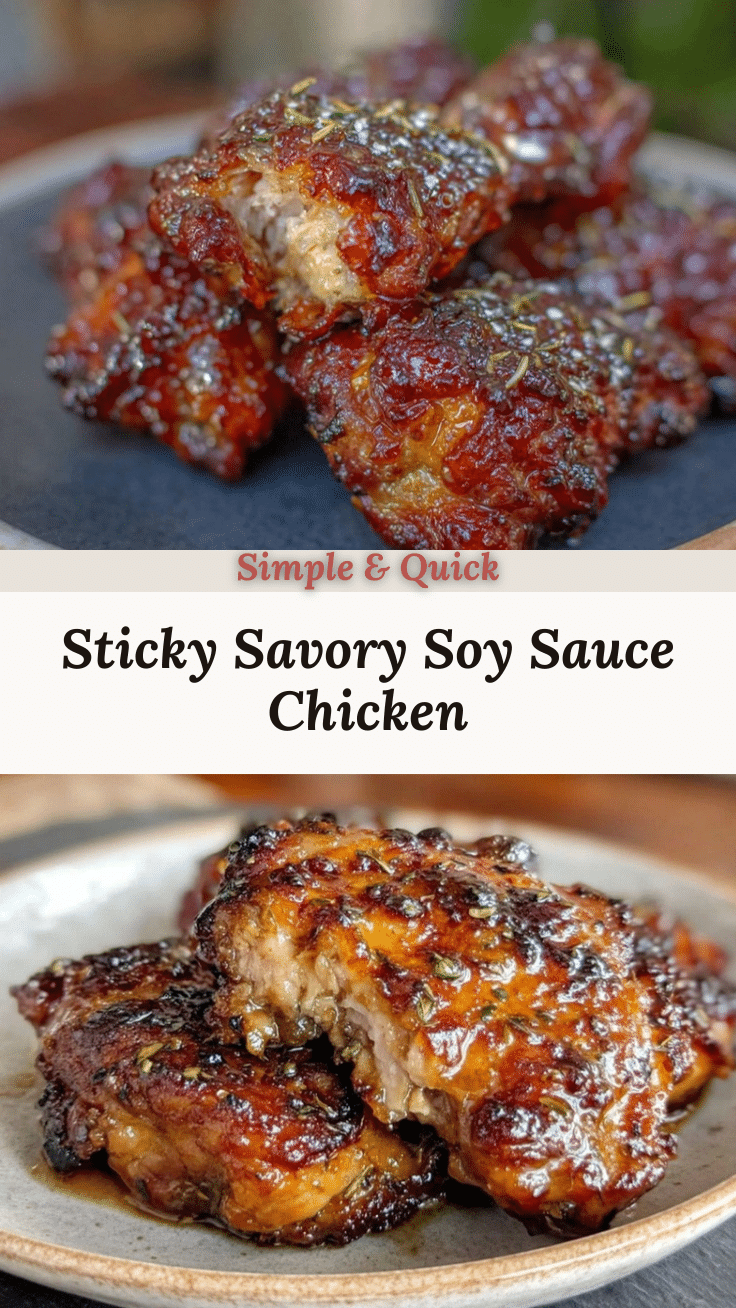
Crispy Soy Sauce Chicken Recipe Easy Sticky Glaze for Perfect Dinner

A quick and easy crispy soy sauce chicken with a sticky, flavorful glaze that delivers juicy meat and perfectly crisp skin. Perfect for cozy dinners or impressing guests with minimal fuss.
- Prep Time: 15 minutes
- Cook Time: 32 minutes
- Total Time: 47 minutes
- Yield: 4-6 servings 1x
- Category: Main Course
- Cuisine: Asian
Ingredients
- 4–6 chicken thighs (bone-in, skin-on), about 2 pounds (900 grams)
- ½ cup soy sauce (120 ml)
- 3 tablespoons brown sugar
- 3 cloves garlic, minced
- 1 tablespoon freshly grated ginger
- 2 tablespoons rice vinegar
- 1 teaspoon sesame oil
- 2 tablespoons honey
- 1 tablespoon cornstarch
- 2 tablespoons vegetable oil
- 2 stalks green onions, thinly sliced (optional garnish)
- 1 tablespoon sesame seeds (optional garnish)
Instructions
- Pat the chicken thighs dry with paper towels. Lightly coat each piece with 1 tablespoon cornstarch evenly distributed over all pieces. (10 minutes)
- In a mixing bowl, whisk together ½ cup soy sauce, 3 tablespoons brown sugar, 3 minced garlic cloves, 1 tablespoon grated ginger, 2 tablespoons rice vinegar, 1 teaspoon sesame oil, and 2 tablespoons honey until the sugar dissolves. Set aside. (5 minutes)
- Heat 2 tablespoons vegetable oil over medium-high heat in a skillet. Add chicken thighs skin side down and cook undisturbed for 6-8 minutes until skin is golden brown and crisp. Flip and cook the other side for 4-5 minutes. (12 minutes)
- Pour the prepared glaze over the chicken in the skillet, coating each piece. Transfer skillet or chicken and glaze to an oven-safe dish and bake at 400°F (200°C) for 15-20 minutes, spooning glaze over chicken halfway through. (20 minutes)
- Remove from oven and let rest for 5 minutes. Garnish with sliced green onions and sesame seeds if desired. (5 minutes)
Notes
Pat chicken dry thoroughly before coating with cornstarch to ensure crispy skin. Avoid crowding the pan during pan-frying to prevent steaming. Watch glaze carefully near the end to avoid burning; add a splash of water if glaze thickens too much. Chicken should reach internal temperature of 165°F (74°C). For gluten-free, substitute soy sauce with tamari or coconut aminos. For heat, add red pepper flakes or chili garlic sauce to glaze.
Nutrition
- Serving Size: 1 chicken thigh with
- Calories: 320
- Sodium: 700
- Fat: 18
- Carbohydrates: 10
- Protein: 28
Keywords: crispy soy sauce chicken, sticky glaze chicken, easy chicken recipe, dinner recipe, pan-fried chicken, baked chicken thighs


