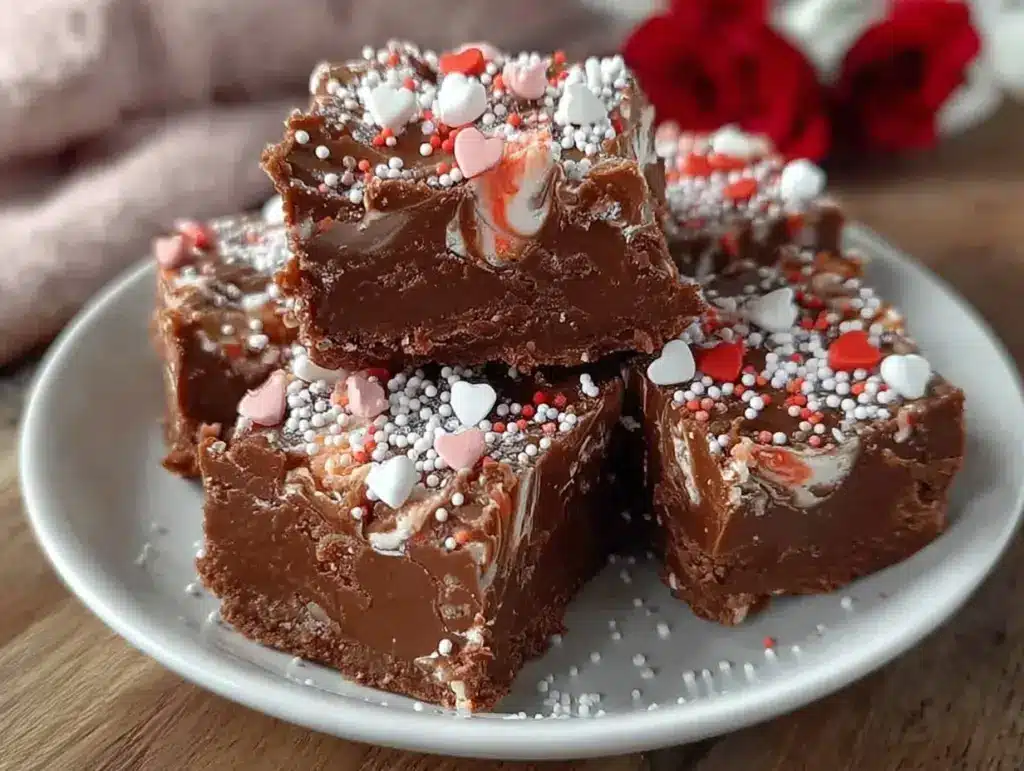
Let me tell you, the rich, velvety aroma of chocolate melting together with a hint of sweet vanilla and a pinch of love is enough to make anyone’s heart skip a beat. That’s exactly what happens when you make this decadent Valentine’s fudge. The first time I whipped up this recipe, I was instantly hooked—the kind of moment where you pause, take a deep breath, and just smile because you know you’re onto something truly special. It’s like a little love letter in every bite.
Years ago, when I was knee-high to a grasshopper, my grandma used to make these luscious fudge squares for special occasions. I stumbled on this recipe during a rainy weekend, trying to recreate that exact magic. Honestly, I wish I’d discovered how dangerously easy it is to make at home a long time ago! My family couldn’t stop sneaking them off the cooling rack (and I can’t really blame them).
This Valentine’s fudge is pure, nostalgic comfort wrapped in a romantic twist. Perfect for gifting, sweetening up a cozy date night, or brightening up your Pinterest cookie board, it’s a recipe you’ll want to bookmark. After testing it multiple times (in the name of research, of course), this fudge became a staple for family gatherings and little romantic surprises. Trust me, you’re going to want to keep this one close.
Why You’ll Love This Recipe
Honestly, this decadent Valentine’s fudge isn’t just another chocolate treat. It’s a heartfelt creation that brings together simple ingredients and expert technique to deliver a melt-in-your-mouth experience. Here’s why it stands out:
- Quick & Easy: Comes together in under 30 minutes, perfect for last-minute romantic plans or spontaneous sweet cravings.
- Simple Ingredients: You probably already have everything in your pantry—no fancy trips required.
- Perfect for Valentine’s Day: Makes a lovely homemade gift or a sweet treat to share with your special someone.
- Crowd-Pleaser: Family, friends, or your sweetheart—everyone raves about the creamy texture and rich flavor.
- Unbelievably Delicious: The balance of smooth chocolate and a subtle hint of vanilla makes every bite feel like a warm hug.
What sets this recipe apart? The little touches—like using a blend of high-quality dark and milk chocolate and folding in just a whisper of vanilla extract for depth. Plus, a sprinkle of sea salt on top adds that perfect sweet-salty dance on your tongue. It’s not just fudge; it’s an experience you close your eyes for, savoring every moment. Whether you’re impressing guests or indulging solo, this fudge brings soul-soothing satisfaction without any fuss.
What Ingredients You Will Need
This recipe uses simple, wholesome ingredients to deliver bold flavor and satisfying texture without the fuss. Most of these are pantry staples or easy-to-find items, and you can swap a few things out if needed.
- Chocolate: 12 ounces (340g) high-quality semi-sweet chocolate chips or chopped bars (I recommend Ghirardelli for best melt and flavor).
- Sweetened Condensed Milk: One 14-ounce (396g) can (adds richness and creaminess).
- Unsalted Butter: 2 tablespoons (about 28g), softened (helps with smooth texture).
- Vanilla Extract: 1 teaspoon (use pure vanilla for the best aroma).
- Salt: A pinch of fine sea salt plus a sprinkle on top (balances sweetness and enhances flavor).
- Optional Add-Ins:
- Chopped nuts (like walnuts or pecans), about ½ cup (50g) for crunch.
- Mini marshmallows, ½ cup (optional for a fun twist).
- Dried raspberries or cherries, ¼ cup (for a tart pop).
Substitution tips: Use dairy-free condensed milk and vegan chocolate for a dairy-free version. Almond butter can replace unsalted butter for a nuttier note. And in summer, toss in fresh chopped strawberries instead of dried fruit for a juicy surprise.
Equipment Needed
- Medium Saucepan: For gently melting chocolate and mixing ingredients without scorching.
- Heatproof Mixing Bowl: To melt chocolate over simmering water (double boiler method) or microwave safely.
- Spatula: A silicone spatula works best for folding and scraping every bit of fudge goodness.
- 8×8-inch Baking Pan: For setting the fudge into a perfect block (line it with parchment paper for easy removal).
- Measuring Cups & Spoons: For precise ingredient amounts.
If you don’t have a double boiler, no worries—microwaving in short bursts while stirring works just fine. For a budget-friendly option, any sturdy saucepan and heatproof bowl combo will do. Keeping your tools clean and dry is key to smooth fudge every time; bits of water or crumbs can cause the chocolate to seize.
Preparation Method
- Prepare Your Pan: Line an 8×8-inch (20×20 cm) baking pan with parchment paper, leaving some overhang on the sides. This helps lift out the fudge easily once set. Set aside.
- Melt the Chocolate: Chop the chocolate into small, even pieces if using bars. In a heatproof bowl over simmering water (double boiler), gently melt the chocolate along with the softened butter. Stir constantly to prevent burning. Alternately, microwave in 30-second bursts, stirring between each, until fully melted and smooth.
- Add Condensed Milk: Once the chocolate and butter mixture is silky, remove from heat and stir in the sweetened condensed milk. Mix thoroughly until fully combined—this adds that luscious creaminess that makes the fudge so irresistible.
- Flavor It Up: Stir in the vanilla extract and a pinch of fine sea salt. This little salt pinch really brings out the chocolate’s depth.
- Add Optional Mix-Ins: If you’re including nuts, dried fruit, or marshmallows, fold them in gently now. Don’t overmix—you want them evenly distributed but not crushed.
- Pour & Smooth: Pour the fudge mixture into your prepared pan. Use a spatula to smooth the top evenly. For a pretty touch, sprinkle a tiny bit of sea salt over the surface.
- Chill: Refrigerate for at least 2 hours, or until firm. You’ll know it’s ready when it’s set and you can press gently without it sticking to your finger.
- Cut & Serve: Lift the fudge out using the parchment paper overhang. Use a sharp knife to cut into 1-inch (2.5 cm) squares. Store cooled fudge in an airtight container in the fridge.
Pro tip: If your chocolate seizes or looks grainy, a splash of extra condensed milk can help smooth it out. Also, make sure no water drips into your chocolate—it can ruin the texture.
Cooking Tips & Techniques
Getting fudge just right can feel like a dance, but here are a few tips I’ve picked up along the way that make it a breeze:
- Use Quality Chocolate: The better the chocolate, the richer the fudge. Don’t skimp here—it makes a big difference in flavor and texture.
- Low & Slow: Melt chocolate gently over low heat or use the microwave in short bursts. High heat scorches chocolate fast, and you’ll end up with a bitter mess.
- Condensed Milk is Your Friend: This ingredient adds creaminess and sweetness without fuss. Don’t substitute with regular milk or cream—it won’t set properly.
- Keep It Dry: Any water or steam can cause chocolate to seize. Make sure your tools and workspace are dry.
- Timing Matters: Chill fudge at least 2 hours, but overnight is even better for firm, sliceable squares.
- Multitasking: While fudge chills, clean your mixing bowls and prep your serving dishes so you’re ready to impress when time comes.
I once tried rushing the chilling step and ended up with gooey squares that stuck everywhere—lesson learned! Patience here really pays off.
Variations & Adaptations
This recipe is wonderfully flexible, and you can tweak it to suit your taste or dietary needs. Here are a few ideas:
- White Chocolate Raspberry Fudge: Swap semi-sweet chocolate for white chocolate and fold in freeze-dried raspberries for a pretty pink twist.
- Nut-Free Version: Simply leave out the nuts and add mini marshmallows or dried cranberries instead.
- Spicy Chocolate Fudge: Add a pinch of cayenne pepper or cinnamon for a subtle warm kick that surprises in the best way.
- Dairy-Free Option: Use dairy-free condensed coconut milk and vegan chocolate chips to keep it creamy without dairy.
- Peanut Butter Swirl: Drop dollops of creamy peanut butter on top before chilling and swirl gently with a toothpick.
One time, I tried adding espresso powder for a mocha fudge and it was a hit at a Valentine’s brunch. Don’t be afraid to experiment—you might find a new favorite!
Serving & Storage Suggestions
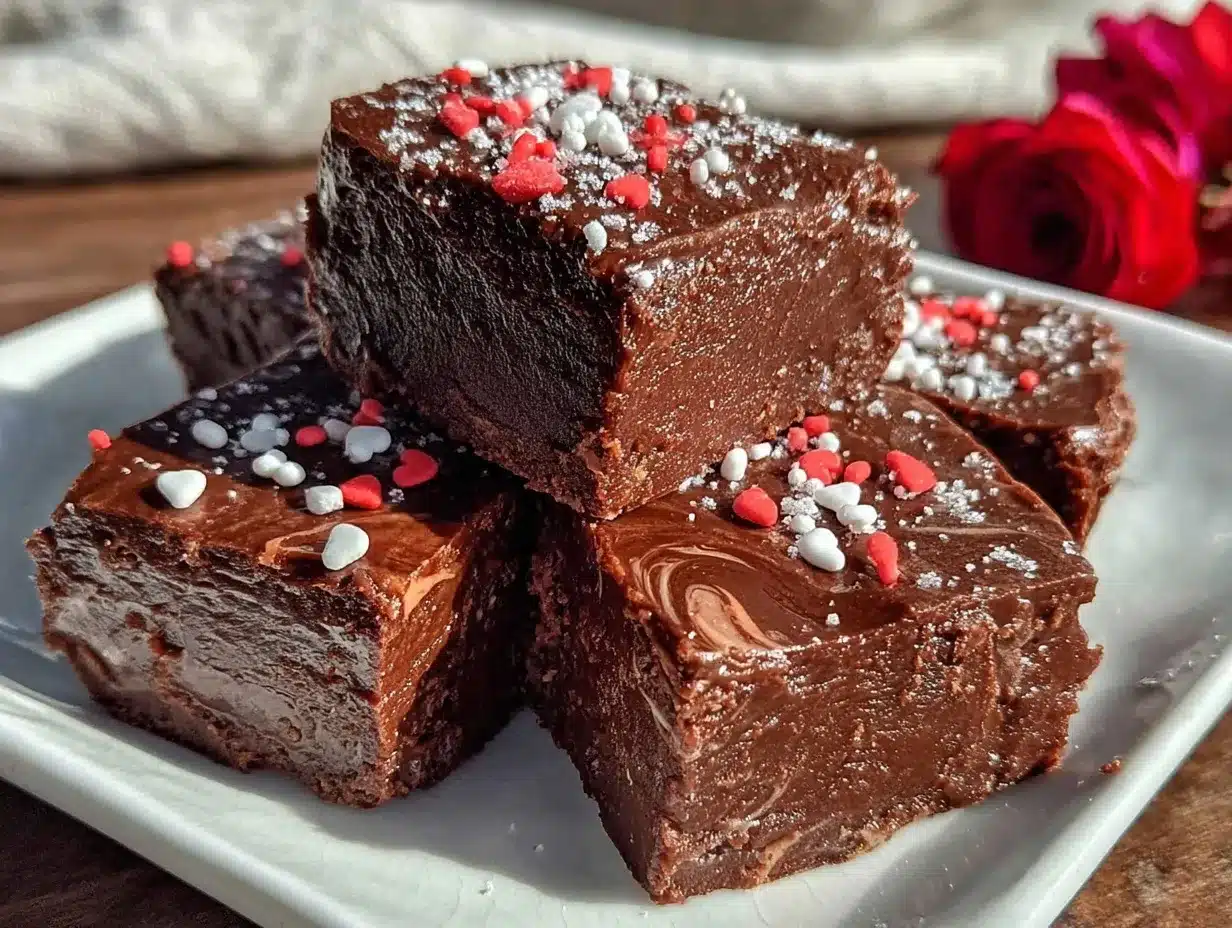
Serve this decadent Valentine’s fudge chilled or at room temperature for the best texture and flavor. Presentation-wise, arranging the squares on a pretty plate with some fresh berries or edible rose petals adds a lovely romantic touch.
It pairs beautifully with a cup of rich coffee, a glass of red wine, or even a cozy mug of hot cocoa. For a party, serve alongside fresh fruit or whipped cream to round out the indulgence.
Store leftover fudge in an airtight container in the refrigerator for up to two weeks. For longer storage, fudge freezes beautifully—just wrap tightly in plastic wrap and place in a freezer-safe container for up to 3 months. Thaw in the fridge overnight before serving.
Flavors actually deepen and marry more after a day, so making fudge a day ahead is a smart move if you want those rich notes to shine.
Nutritional Information & Benefits
Here’s a rough estimate per 1-inch (2.5 cm) square (based on 24 pieces):
| Calories | Fat | Carbohydrates | Protein |
|---|---|---|---|
| 110 | 6g | 14g | 1g |
While fudge isn’t exactly health food, the use of high-quality chocolate can provide antioxidants and a mood boost thanks to compounds like flavonoids. The recipe includes no artificial additives or preservatives, making it a wholesome homemade treat when enjoyed in moderation.
For those mindful of allergens, this recipe contains dairy and possibly nuts if added. Gluten-free by nature, it’s a nice option for many with dietary restrictions. Personally, I find this fudge a lovely way to indulge without the guilt of mystery ingredients or excessive processing.
Conclusion
So, why give this decadent Valentine’s fudge a try? Because it’s more than just a sweet—it’s a little celebration in your mouth, a reminder that homemade treats carry a special kind of love. You can customize it to suit your taste buds or dietary needs, and it’s always a hit whether you’re gifting it or keeping it all to yourself (no judgment, really!).
This fudge recipe holds a special place in my heart, bringing back warm family memories and making new ones every time I make it. I hope you enjoy it just as much as my family and I do.
Give it a go, and don’t forget to share how it turned out in the comments below! Your tweaks, stories, or questions are always welcome. Here’s to sweet moments and even sweeter fudge—happy cooking!
FAQs
Can I use milk chocolate instead of semi-sweet chocolate?
Yes! Milk chocolate will make the fudge sweeter and creamier but may be less rich. Adjust sweetness by reducing any added sugar if you experiment.
How long does homemade fudge last?
Stored in an airtight container in the fridge, fudge lasts about two weeks. For longer storage, freeze it for up to 3 months.
Why is my fudge grainy or crumbly?
Grainy fudge usually means the chocolate was overheated or water got into the mixture. Melt chocolate slowly, and keep everything dry to avoid this.
Can I make this fudge without sweetened condensed milk?
This recipe relies on condensed milk for texture and sweetness, so skipping it isn’t recommended. You could try a specialized fudge recipe designed for other bases.
What’s the best way to cut fudge cleanly?
Use a sharp knife warmed under hot water and wiped dry before slicing. Cutting chilled fudge and wiping the knife between cuts helps keep edges neat.
Pin This Recipe!
Decadent Valentines Fudge Recipe Easy Homemade Romantic Treat Ideas

A rich, velvety chocolate fudge with a hint of vanilla and a pinch of sea salt, perfect for Valentine’s Day gifting or cozy date nights. This easy homemade treat combines simple ingredients for a melt-in-your-mouth experience.
- Prep Time: 10 minutes
- Cook Time: 15 minutes
- Total Time: 2 hours 25 minutes
- Yield: 24 servings 1x
- Category: Dessert
- Cuisine: American
Ingredients
- 12 ounces high-quality semi-sweet chocolate chips or chopped bars
- 1 (14-ounce) can sweetened condensed milk
- 2 tablespoons unsalted butter, softened
- 1 teaspoon pure vanilla extract
- Pinch of fine sea salt plus a sprinkle for topping
- Optional add-ins: ½ cup chopped nuts (walnuts or pecans), ½ cup mini marshmallows, ¼ cup dried raspberries or cherries
Instructions
- Line an 8×8-inch baking pan with parchment paper, leaving some overhang for easy removal.
- Chop chocolate into small pieces if using bars. Melt chocolate and softened butter gently in a heatproof bowl over simmering water (double boiler) or microwave in 30-second bursts, stirring until smooth.
- Remove from heat and stir in sweetened condensed milk until fully combined.
- Add vanilla extract and a pinch of fine sea salt, stirring to combine.
- Fold in any optional mix-ins gently, being careful not to overmix.
- Pour fudge mixture into prepared pan and smooth the top with a spatula. Sprinkle a little sea salt on top.
- Refrigerate for at least 2 hours or until firm.
- Lift fudge out using parchment overhang and cut into 1-inch squares. Store in an airtight container in the fridge.
Notes
Use high-quality chocolate for best flavor. Melt chocolate gently to avoid burning or seizing. Keep all tools dry to prevent grainy texture. Chill fudge at least 2 hours or overnight for firmer squares. Use a sharp knife warmed under hot water for clean cuts.
Nutrition
- Serving Size: 1-inch square (2.5 c
- Calories: 110
- Fat: 6
- Carbohydrates: 14
- Protein: 1
Keywords: Valentine's fudge, homemade fudge, chocolate fudge, easy fudge recipe, romantic treat, chocolate dessert


