
Let me tell you, the smell of melted marshmallows mingling with buttery cereal is one of those scents that grabs you right by the heartstrings. The first time I made these Easy Chewy Lucky Charms Bars, the kitchen was filled with that nostalgic, sugary aroma that instantly transported me back to childhood mornings. I was instantly hooked—the kind of moment where you pause, take a deep breath, and just smile because you know you’re onto something truly special. Years ago, when I was knee-high to a grasshopper, my grandma used to whip up similar treats, but nothing quite like these bars. I stumbled upon this recipe on a rainy weekend, craving something sweet but simple, and honestly, I wish I’d found it sooner.
My family couldn’t stop sneaking them off the cooling rack (and I can’t really blame them). These Easy Chewy Lucky Charms Bars quickly became a staple for family gatherings and an easy go-to for gifting. You know what’s great? They’re dangerously easy to make but taste like pure, nostalgic comfort. Perfect for potlucks, sweet treats for your kids after school, or just brightening up your Pinterest cookie board with a pop of colorful marshmallows. I’ve tested this recipe a handful of times—in the name of research, of course—and trust me, you’re going to want to bookmark this one.
Why You’ll Love This Recipe
Honestly, this Easy Chewy Lucky Charms Bars recipe hits all the right notes for a homemade treat that feels effortless but tastes like you spent hours on it. From my experience, here’s why it’s such a winner:
- Quick & Easy: Comes together in under 15 minutes (plus chilling time), perfect for busy weeknights or last-minute snack cravings.
- Simple Ingredients: No fancy grocery trips needed—you likely already have everything in your pantry, plus a box of Lucky Charms!
- Perfect for Any Occasion: Great for birthday parties, school bake sales, or cozy movie nights.
- Crowd-Pleaser: Kids and adults alike rave about the chewy texture combined with those colorful marshmallows.
- Unbelievably Delicious: The buttery, sweet base with chewy marshmallows makes this treat next-level comfort food.
What sets this recipe apart is its perfectly balanced chewiness—not too sticky, not too crumbly. The secret? Gently melting the butter and marshmallows together without scorching them, then folding in the cereal quickly but carefully. Plus, you don’t just get the sweetness of the marshmallows but the satisfying crunch of the cereal too. It’s comfort food, reimagined for busy folks who crave that homemade touch. This isn’t just another cereal bar recipe—it’s the best version I’ve found, tried, and tweaked for ultimate yumminess.
What Ingredients You Will Need
This recipe uses simple, wholesome ingredients to deliver bold flavor and a satisfying chewy texture without any fuss. Most of these are pantry staples, and the star of the show, of course, is a box of classic Lucky Charms cereal.
- Unsalted Butter, 3 tablespoons (adds richness and helps bind everything)
- Mini Marshmallows, 4 cups (I prefer regular mini marshmallows for that perfect melt, but you can try “jet puffed” brand for fluffier results)
- Lucky Charms Cereal, 6 cups (the magical mix of crunchy oats and colorful marshmallows is what makes these bars irresistible)
- Vanilla Extract, 1 teaspoon (optional, but it adds a subtle depth of flavor)
- Non-stick Cooking Spray or Butter, for greasing the pan
If you want to switch things up, you can swap out the Lucky Charms for another marshmallow cereal, but honestly, this recipe really shines with the original. For a gluten-free option, look for gluten-free Lucky Charms or a similar cereal. Also, if you’re dairy-free, you can use vegan butter and a marshmallow alternative (though the texture may vary slightly).
Equipment Needed
- Large Saucepan: For melting butter and marshmallows gently—nonstick is best to avoid burning.
- Wooden Spoon or Heat-Resistant Spatula: For stirring the marshmallow mixture smoothly.
- 9×13 Inch Baking Pan: Standard size for pressing the bars; glass or metal works fine.
- Parchment Paper or Silicone Baking Mat: To line the pan—makes removing bars a breeze and cleanup easier.
- Measuring Cups and Spoons: For accuracy in your ingredients.
If you don’t have a silicone spatula, a wooden spoon works just as well, but be gentle to avoid breaking cereal pieces. For budget-friendly options, you can find affordable nonstick pans and silicone liners online or at your local kitchen store. Keeping your equipment clean and dry is key to easy mixing and pressing.
Preparation Method
- Prepare your pan: Lightly grease a 9×13 inch baking pan with butter or non-stick spray. Then, line it with parchment paper, leaving a bit hanging over the edges to help lift the bars out later. Set aside.
- Melt butter and marshmallows: In a large saucepan over low heat, melt 3 tablespoons of unsalted butter. Once melted, add 4 cups of mini marshmallows. Stir continuously with a wooden spoon or heat-resistant spatula until completely melted and smooth (about 4-6 minutes). Avoid high heat to prevent scorching—if you see browning, lower the heat immediately.
- Add vanilla extract: Remove the pan from heat and stir in 1 teaspoon of vanilla extract for extra flavor. This step is optional but highly recommended for that subtle sweet aroma.
- Mix in cereal: Quickly add 6 cups of Lucky Charms cereal to the melted marshmallow mixture. Fold gently but thoroughly, making sure every piece is coated without crushing the cereal. Timing is key here—you want to work fast before the marshmallows start to set.
- Press into pan and cool: Transfer the mixture into the prepared pan. Using a buttered spatula or clean hands (lightly greased), press the mixture evenly and firmly into the pan to about 1-inch thickness. Let it cool at room temperature for at least 1 hour before slicing into bars. For quicker results, you can chill in the fridge for 30 minutes, but room temp yields a chewier texture.
Troubleshooting tip: If your bars feel too sticky or soft after cooling, give them extra time in the fridge. If they’re too crumbly, it usually means the marshmallows weren’t melted enough or the cereal wasn’t coated well—next time, stir a bit longer and press firmly.
Cooking Tips & Techniques
From my kitchen mishaps, here are some tips that make this Easy Chewy Lucky Charms Bars recipe foolproof:
- Low and slow melting: Melting butter and marshmallows on low heat prevents burning and keeps the mixture smooth. Patience here is your friend.
- Work quickly: Once marshmallows are melted, add cereal fast to prevent setting. But don’t rush stirring—fold gently to avoid crumbling the cereal.
- Press firmly: Use a buttered spatula or your hands to press down evenly. This compacts the bars and helps them hold together better.
- Use parchment paper: This is a game-changer for removing bars cleanly and saving your fingers (and sanity).
- Don’t skip the vanilla: It might seem minor, but it adds a cozy warmth that balances the sweetness.
One mistake I made early on was overheating the marshmallows, which made the mixture tough and less chewy. Another time, I pressed too lightly, and the bars fell apart when cutting. After a few tries, I realized that the perfect bar is all about gentle heat, quick mixing, and firm pressing. Multitasking during the cooling phase—like cleaning up or prepping another snack—makes the process feel less tedious.
Variations & Adaptations
Want to switch things up? Here are some fun ways to personalize your Easy Chewy Lucky Charms Bars:
- Chocolate Drizzle: Melt some semi-sweet chocolate chips and drizzle over cooled bars for a sweet contrast.
- Peanut Butter Twist: Stir 1/2 cup of creamy peanut butter into the melted marshmallow mixture before adding cereal for a rich, nutty flavor.
- Gluten-Free Option: Use certified gluten-free Lucky Charms or swap for a gluten-free marshmallow cereal.
- Dairy-Free Version: Use dairy-free butter and vegan marshmallows (note: texture may be slightly different).
- Seasonal Flair: Swap Lucky Charms for a festive marshmallow cereal around holidays, or add a handful of mini chocolate chips or dried cranberries.
I once made a batch with almond butter stirred in and sprinkled a pinch of flaky sea salt on top before cooling—trust me, that sweet-salty combo is a winner you might want to try!
Serving & Storage Suggestions
These bars are best served at room temperature when they’re chewy and soft. Cut them into squares or rectangles and stack them on a colorful plate for a fun presentation. They pair wonderfully with a cold glass of milk or a warm cup of cocoa—perfect for a cozy afternoon treat.
To store, wrap bars tightly in plastic wrap or place in an airtight container. They keep fresh at room temperature for up to 3 days. For longer storage, pop them in the refrigerator for up to a week, but let them come to room temp before eating to restore chewiness. You can also freeze the bars individually wrapped for up to 2 months; just thaw overnight in the fridge.
Flavors actually deepen a bit after resting, so if you can wait a few hours before digging in, they taste even better (if you can resist!).
Nutritional Information & Benefits
Each Easy Chewy Lucky Charms Bar (assuming 12 bars per batch) roughly contains:
| Calories | Fat | Carbs | Protein | Sugar |
|---|---|---|---|---|
| ~150 kcal | 5 g | 25 g | 1 g | 15 g |
While these bars are definitely a treat, they do offer a bit of whole grain from the oats in Lucky Charms cereal. Plus, the marshmallows provide a fun nostalgic sweetness without being overly dense. The recipe is naturally gluten-free if you pick the right cereal, dairy-free substitutions are easy, and it’s nut-free unless you add peanut butter variations.
Personally, I think it’s all about balance—enjoying these occasionally while knowing you’re making a homemade snack full of smiles and fewer preservatives than store-bought options.
Conclusion
If you’re after a sweet, chewy treat that’s quick, fun, and full of colorful charm, this Easy Chewy Lucky Charms Bars recipe is where it’s at. Honestly, it feels like a warm hug from your childhood, but with a grown-up twist for today’s busy kitchens. Customize it to your taste, get creative with mix-ins, or keep it classic—either way, you’ll love how simple and satisfying these bars are.
Give it a whirl, share your tweaks in the comments, and don’t be shy to pass this recipe along to friends. Trust me, everyone appreciates a homemade treat that’s as playful as it is delicious. You’re going to love having this one in your recipe box!
FAQs About Easy Chewy Lucky Charms Bars
Can I use regular-sized marshmallows instead of mini?
You can, but you’ll need to chop them into smaller pieces so they melt evenly and distribute well throughout the bars.
How do I make these bars less sticky?
Make sure to melt marshmallows gently over low heat and press the mixture firmly into the pan. Chilling the bars for a bit helps too.
Can I store these bars in the freezer?
Yes! Wrap them individually and freeze for up to 2 months. Thaw overnight in the fridge before serving.
Is there a vegan version of this recipe?
Absolutely—use vegan butter and vegan marshmallows, but note the texture might be slightly different.
What’s the best way to cut the bars?
Use a sharp knife and cut after the bars have fully cooled. Greasing the knife helps prevent sticking and crumbling.
Pin This Recipe!
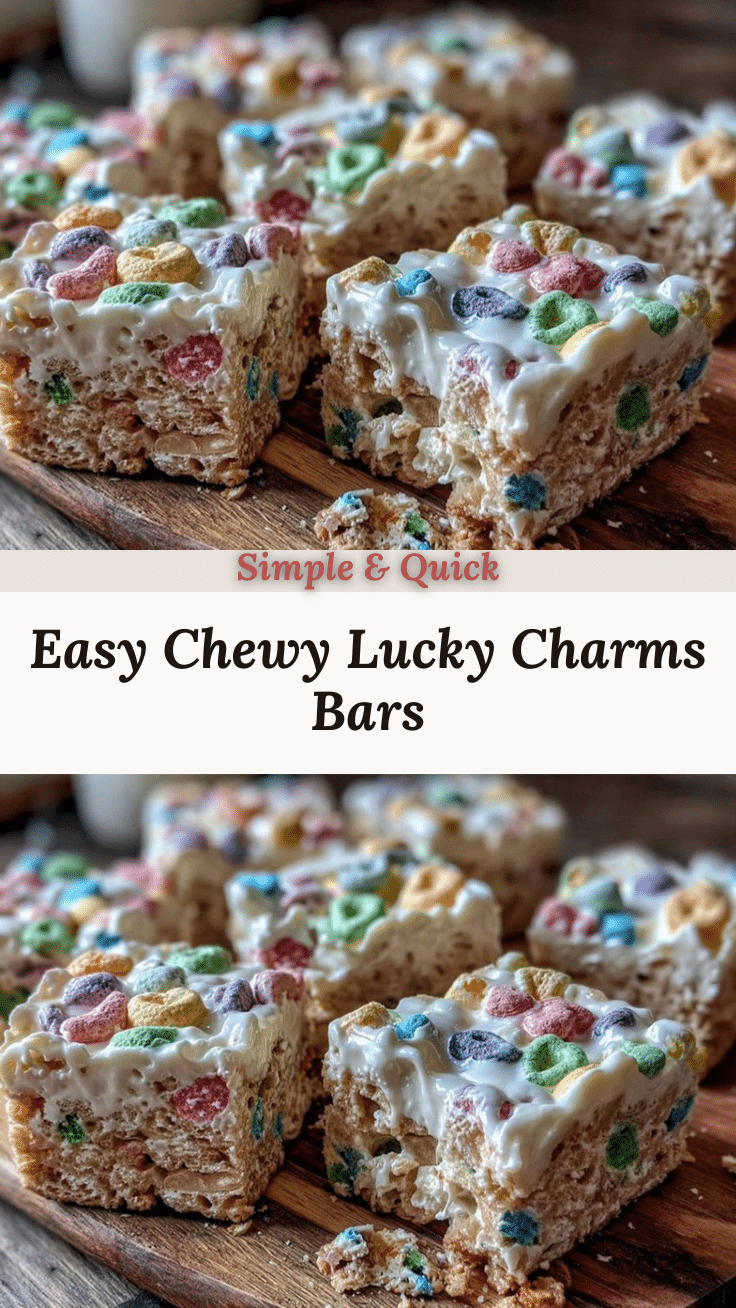
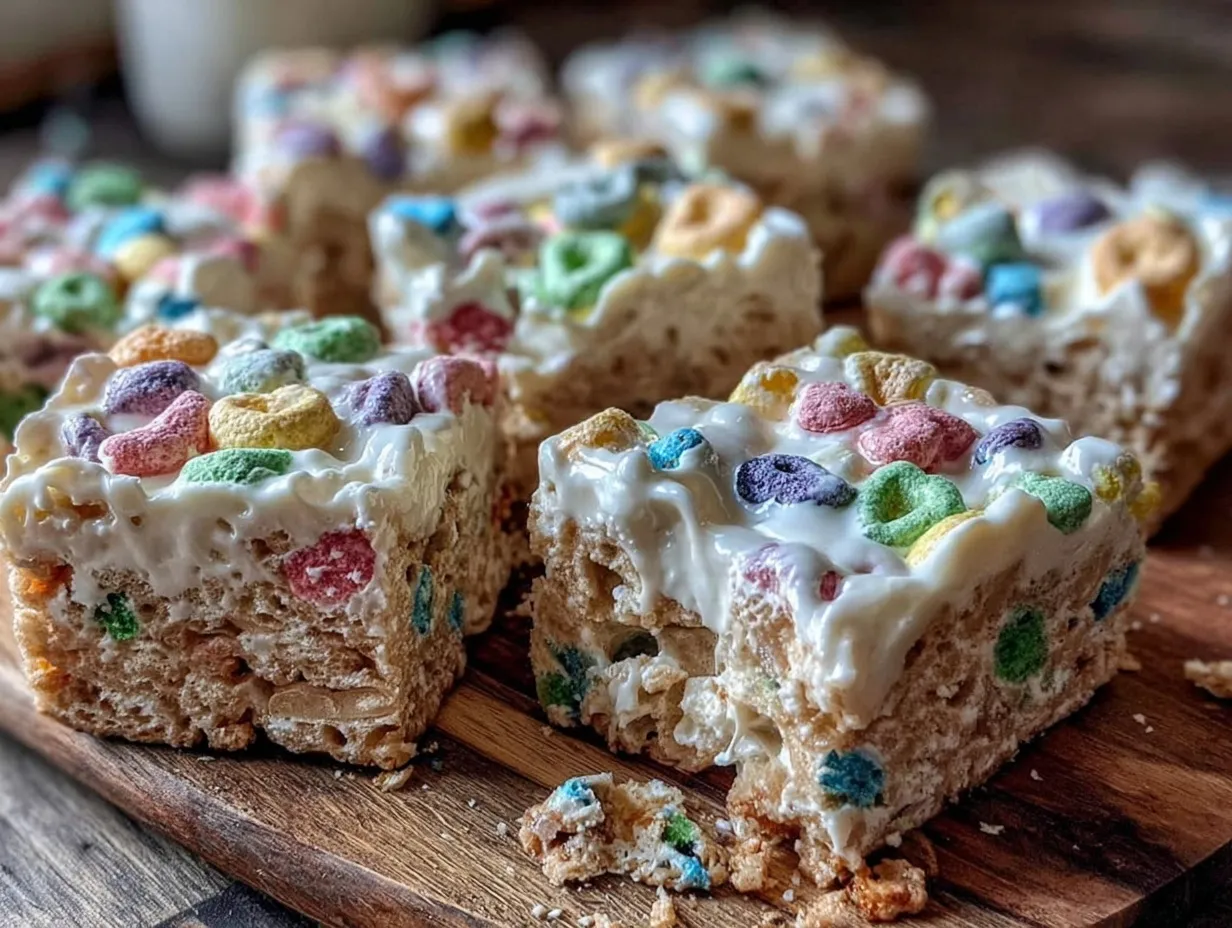
Easy Chewy Lucky Charms Bars
These Easy Chewy Lucky Charms Bars are a nostalgic, buttery, and sweet homemade treat featuring melted marshmallows and crunchy Lucky Charms cereal. Perfect for quick snacks, family gatherings, and gifting.
- Prep Time: 10 minutes
- Cook Time: 6 minutes
- Total Time: 1 hour 16 minutes
- Yield: 12 bars 1x
- Category: Dessert
- Cuisine: American
Ingredients
- 3 tablespoons unsalted butter
- 4 cups mini marshmallows
- 6 cups Lucky Charms cereal
- 1 teaspoon vanilla extract (optional)
- Non-stick cooking spray or butter for greasing the pan
Instructions
- Lightly grease a 9×13 inch baking pan with butter or non-stick spray. Line it with parchment paper, leaving some overhang to lift bars out later. Set aside.
- In a large saucepan over low heat, melt 3 tablespoons of unsalted butter. Add 4 cups of mini marshmallows and stir continuously with a wooden spoon or heat-resistant spatula until completely melted and smooth, about 4-6 minutes. Avoid high heat to prevent scorching.
- Remove the pan from heat and stir in 1 teaspoon of vanilla extract, if using.
- Quickly add 6 cups of Lucky Charms cereal to the melted marshmallow mixture. Fold gently but thoroughly to coat every piece without crushing the cereal.
- Transfer the mixture into the prepared pan. Using a buttered spatula or lightly greased hands, press the mixture evenly and firmly into the pan to about 1-inch thickness.
- Let the bars cool at room temperature for at least 1 hour before slicing. For quicker results, chill in the refrigerator for 30 minutes, but room temperature yields a chewier texture.
Notes
Melt butter and marshmallows on low heat to avoid burning. Work quickly when adding cereal to prevent marshmallows from setting. Press bars firmly to help them hold together. Use parchment paper for easy removal. Vanilla extract is optional but recommended for added flavor. For less sticky bars, chill longer in the fridge. Vegan and gluten-free substitutions are possible but may alter texture.
Nutrition
- Serving Size: 1 bar (assuming 12 b
- Calories: 150
- Sugar: 15
- Fat: 5
- Carbohydrates: 25
- Protein: 1
Keywords: Lucky Charms bars, chewy cereal bars, marshmallow bars, easy dessert, homemade treats, kid-friendly snacks, quick dessert


