Let me tell you, the smell of melted cheese mingling with seasoned beans sizzling on a hot skillet is enough to make anyone’s mouth water. The first time I whipped up these Easy Cheesy Bean and Cheese Quesadillas for Meal Prep, I was instantly hooked. It was one of those rare kitchen moments where you pause, take a deep breath, and just smile because you know you’ve stumbled onto something truly satisfying and simple. Years ago, when I was knee-high to a grasshopper, quesadillas were a rare treat in our house, but now, this recipe feels like pure, nostalgic comfort that I wish I’d discovered much sooner.
Honestly, my family couldn’t stop sneaking these off the pan while I was trying to pack them for the week ahead (and I can’t really blame them). These quesadillas are dangerously easy, packed with gooey cheese and hearty beans, perfect for a quick lunch, a sweet treat for your kids after school, or to brighten up your Pinterest recipe board with a meal prep idea that actually works. You know what? After testing this recipe multiple times—in the name of research, of course—it’s become a staple for family gatherings and quick weekday meals. Trust me, this recipe feels like a warm hug, and you’re going to want to bookmark this one for all your meal prep needs.
Why You’ll Love This Recipe
This Easy Cheesy Bean and Cheese Quesadillas recipe has been put through its paces in my kitchen, earning the family-approved stamp of deliciousness and simplicity. Here’s why it stands out:
- Quick & Easy: Ready in under 20 minutes, perfect for busy weeknights or last-minute cravings.
- Simple Ingredients: No fancy grocery trips needed; you probably already have most of these in your pantry and fridge.
- Perfect for Meal Prep: Great for packing lunches or prepping ahead for hassle-free meals throughout the week.
- Crowd-Pleaser: Kids and adults alike rave about the gooey cheese and hearty beans combo.
- Unbelievably Delicious: The crispy tortilla exterior paired with a melty, flavorful filling hits all the right cozy food notes.
What makes this recipe different? Well, it’s all about the balance between creamy, seasoned beans and the ooey-gooey cheese that melts just right. I like to blend in spices that bring a little kick without overpowering the comforting vibe. Plus, the quesadillas get perfectly crispy without turning into a greasy mess—a trick I learned after a few kitchen slip-ups. This isn’t just another bean and cheese quesadilla; it’s the version that you’ll find yourself craving again and again. Whether you’re prepping for a week of lunches or need a quick bite that feels like a treat, this recipe delivers every time.
What Ingredients You Will Need
This recipe uses simple, wholesome ingredients to deliver bold flavor and satisfying texture without the fuss. Most are pantry staples, and substitutions are easy if you’re aiming for dietary tweaks.
- Flour tortillas (8-inch size works best for folding and packing; choose whole wheat for a fiber boost)
- Refried beans (I prefer canned for convenience—look for low-sodium versions; black beans mashed work well too)
- Shredded cheddar cheese (sharp or mild, depending on your taste; I like Tillamook for great meltability)
- Mexican blend cheese (adds a nice mix of flavors; optional but recommended)
- Ground cumin (just a pinch, adds earthy warmth)
- Chili powder (optional, for a subtle smoky kick)
- Garlic powder (a sprinkle to round out the flavors)
- Salt and pepper (to taste)
- Olive oil or butter (for crisping the quesadillas on the skillet)
- Sour cream or Greek yogurt (for serving; use dairy-free yogurt if needed)
- Fresh cilantro (optional, chopped for garnish)
- Fresh lime wedges (to squeeze on top for a bright finish)
If you want to switch things up, you can use gluten-free tortillas or swap out the cheese for dairy-free alternatives. For a protein boost, adding cooked chicken or sautéed veggies works beautifully, too. In summer, I love adding fresh diced tomatoes or roasted corn kernels to the filling for a seasonal twist.
Equipment Needed
- Non-stick skillet or cast-iron pan (cast iron gives a nice crispy crust, but any good skillet will do)
- Spatula (preferably silicone to avoid scratching your pan)
- Mixing bowl (for combining beans and spices)
- Measuring spoons and cups (to keep things precise, especially with seasonings)
- Knife and cutting board (for any optional garnishes like cilantro or lime wedges)
If you don’t have a cast-iron skillet, don’t worry—nonstick pans heat evenly and make flipping the quesadillas easier. For those on a budget, a basic non-stick pan works just fine. I keep my skillet well-seasoned and clean it gently to maintain that perfect non-stick surface over time.
Preparation Method

- Prep your filling: In a mixing bowl, combine 1 cup (about 260g) of refried beans with ½ teaspoon ground cumin, ¼ teaspoon chili powder (optional), ¼ teaspoon garlic powder, and salt and pepper to taste. Mix well until the spices are evenly distributed. This should take about 3 minutes.
- Heat your skillet: Place your skillet over medium heat and add about 1 teaspoon of olive oil or butter. Let it warm up for 1-2 minutes until shimmering but not smoking.
- Assemble the quesadilla: Lay one flour tortilla flat. Spread about ¼ cup (60g) of the seasoned bean mixture evenly over half the tortilla—don’t overload it or it’ll be tricky to fold. Sprinkle ½ cup (60g) shredded cheddar cheese and ¼ cup (30g) Mexican blend cheese on top of the beans. Fold the tortilla in half to create a half-moon shape.
- Cook the quesadilla: Carefully place the folded quesadilla onto the hot skillet. Cook for about 3-4 minutes on one side until golden brown and crispy. Use your spatula to gently flip it over and cook another 3-4 minutes on the other side. The cheese should be melted and the tortilla crisp.
- Repeat: Remove the cooked quesadilla and place it on a cutting board. Repeat the assembly and cooking process with remaining tortillas and filling until all are done. This should take about 15-20 minutes total.
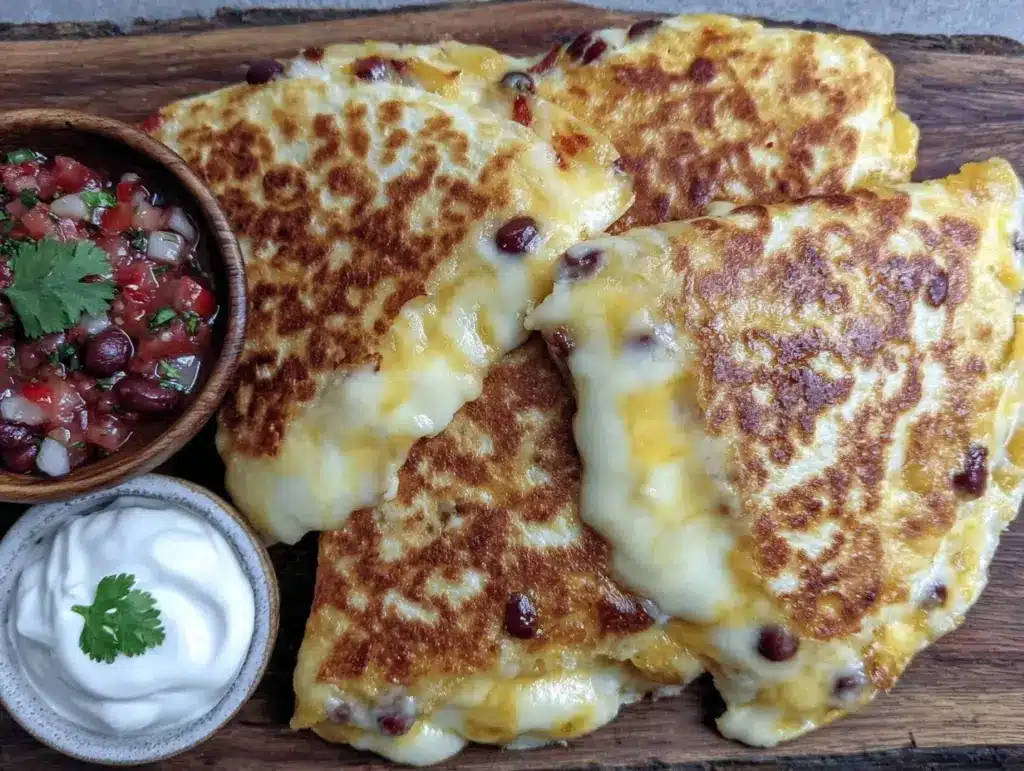
- Slice and serve: Let the quesadillas rest for a minute, then cut each into 3-4 wedges. Serve warm with sour cream or Greek yogurt, a sprinkle of chopped cilantro, and lime wedges on the side.
Pro tip: If your quesadilla is browning too fast but cheese isn’t melting, turn the heat down slightly to avoid burning while allowing the filling to warm through. Also, don’t press down too hard with the spatula—let the quesadilla cook naturally for the best texture.
Cooking Tips & Techniques
Here’s what I’ve learned from many batches of cheesy bean quesadillas: the key is balance. You want enough filling to be satisfying but not so much that the tortilla becomes soggy or difficult to handle. I usually give the beans a quick mash to smooth out any lumps so the cheese melts evenly.
Use medium heat to get that perfect golden crisp without burning your tortilla. Patience here pays off—rushing the flip can cause filling to spill out. I also like to use a thin layer of oil or butter in the pan to encourage browning but avoid greasiness.
A common mistake is overfilling, which makes flipping a nightmare. If you’re new to quesadilla flipping, try using two spatulas for extra support. Multitasking tip: prep your filling while your skillet heats up to save time. And if you want to keep quesadillas warm while finishing the batch, pop them into a low oven (around 200°F or 95°C) wrapped in foil.
Variations & Adaptations
Want to switch things up? Here are some tasty twists you can try:
- Veggie Boost: Add sautéed bell peppers, onions, or spinach into the bean mixture for extra color and nutrients.
- Spicy Kick: Mix in diced jalapeños or a splash of hot sauce to the beans before filling for a bold flavor.
- Protein Upgrade: Toss in some cooked shredded chicken, ground beef, or tofu crumbles for a heartier meal prep option.
- Gluten-Free: Use gluten-free tortillas to cater to dietary needs without sacrificing taste.
- Dairy-Free: Swap shredded cheese for vegan cheese alternatives and serve with dairy-free yogurt or guacamole.
One favorite personal variation I tried was adding roasted sweet corn kernels and a squeeze of fresh lime inside the quesadilla—it brings a sweet, smoky vibe that’s irresistible. You can also bake these quesadillas in the oven at 375°F (190°C) for about 12-15 minutes if you prefer hands-off cooking or want to make a larger batch at once.
Serving & Storage Suggestions
Serve these quesadillas warm—fresh off the skillet is best for that crispy crunch and melty cheese. Pair them with a side of fresh salsa, guacamole, or a simple green salad to balance the richness. For beverages, a cold glass of horchata or iced tea complements the flavors beautifully.
For meal prep, let quesadillas cool completely before wrapping them tightly in foil or placing in airtight containers. They keep well in the refrigerator for up to 4 days. To reheat, pop them in a skillet over medium heat for 2-3 minutes per side or use a toaster oven to retain crispiness. Avoid microwaving if you want to keep the tortilla from getting rubbery.
Flavors tend to meld even better after a day or two, so these quesadillas make great make-ahead lunches that taste like you just cooked them fresh. Just remember to add any fresh garnishes after reheating to keep things bright and fresh.
Nutritional Information & Benefits
Each serving of these Easy Cheesy Bean and Cheese Quesadillas offers a balanced mix of protein, fiber, and calcium. Beans provide plant-based protein and are rich in fiber, which is great for digestion and keeping you full longer. Cheese contributes calcium and adds a comforting creamy texture.
This recipe is naturally vegetarian and can be adapted for gluten-free or dairy-free diets with simple swaps. It’s a wholesome choice for meal prep that fuels your day without feeling heavy or overly processed. Just watch the salt content if you’re using canned beans—rinse them well or go for low-sodium options to keep it heart-friendly.
From a wellness perspective, this quesadilla gives you a satisfying meal that doesn’t skimp on flavor or convenience, helping you stick to healthy eating goals even on busy days.
Conclusion
In a world full of complicated recipes, these Easy Cheesy Bean and Cheese Quesadillas for Meal Prep stand out because they’re simple, tasty, and practical. Whether you’re feeding a hungry family or prepping lunches for the week, this recipe hits the spot every time. You can easily customize it to suit your tastes or dietary needs, making it a versatile kitchen staple.
Personally, I love how this recipe brings people together—whether it’s a quick lunch or a casual snack, it always sparks smiles and second servings. I’d love to hear how you make it your own, so please leave a comment below or share your favorite tweaks. Give these quesadillas a try—you won’t regret it!
Happy cooking and meal prepping, friends!
FAQs
Can I freeze these quesadillas for later?
Yes! Wrap them tightly in foil or plastic wrap and freeze for up to 2 months. Reheat in a skillet or oven straight from frozen for best results.
What’s the best cheese to use for melting?
Sharp cheddar melts nicely, but a Mexican cheese blend or Monterey Jack also works great for that creamy texture.
Can I make these vegan?
Absolutely! Use vegan cheese and substitute refried beans without lard, and serve with dairy-free yogurt or guacamole.
How do I keep quesadillas from getting soggy when meal prepping?
Cool them completely before storing. Reheat in a skillet or toaster oven to bring back crispiness instead of microwaving.
Can I add other fillings besides beans and cheese?
Definitely! Cooked veggies, shredded chicken, or even mashed sweet potatoes make delicious additions or swaps.
Pin This Recipe!
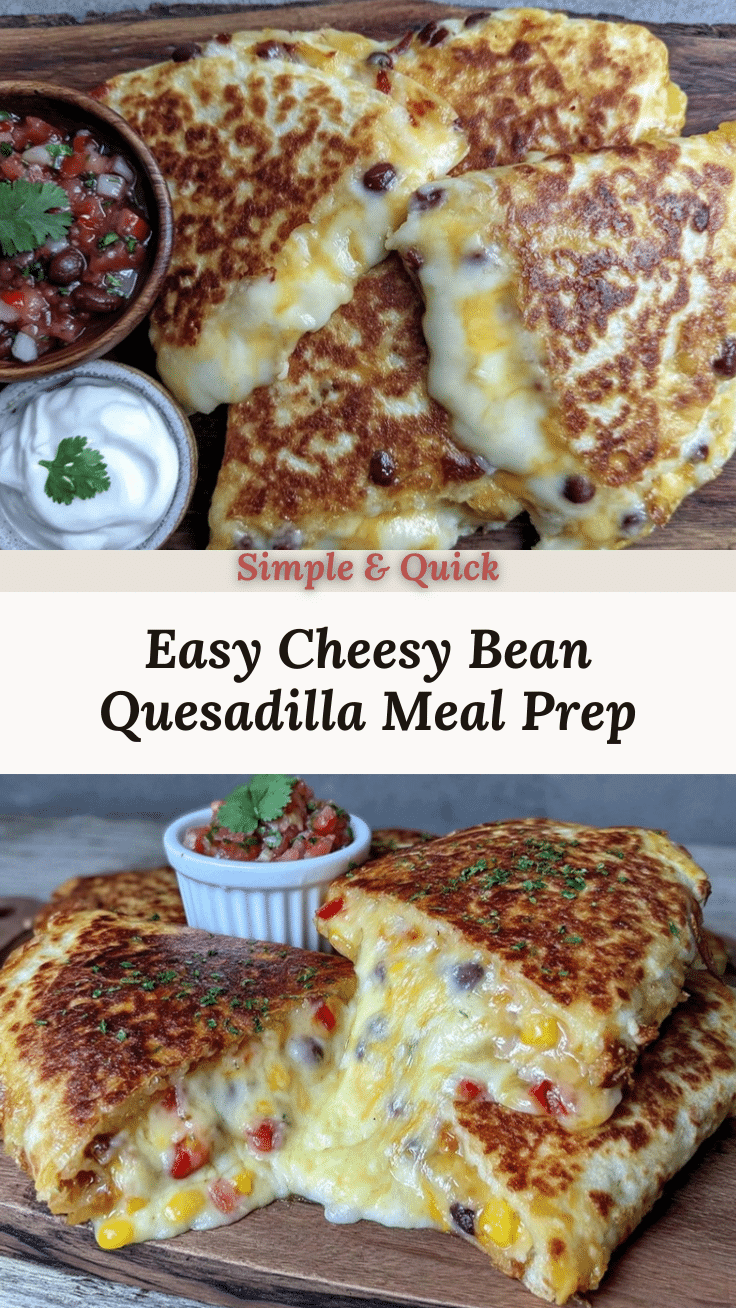
Easy Cheesy Bean and Cheese Quesadillas

A quick and easy recipe for cheesy bean quesadillas perfect for meal prep, featuring a crispy tortilla exterior and a melty, flavorful filling.
- Prep Time: 5 minutes
- Cook Time: 15 minutes
- Total Time: 20 minutes
- Yield: 4 servings 1x
- Category: Main Course
- Cuisine: Mexican
Ingredients
- Flour tortillas (8-inch size, whole wheat optional)
- 1 cup refried beans (low-sodium canned or mashed black beans)
- ½ teaspoon ground cumin
- ¼ teaspoon chili powder (optional)
- ¼ teaspoon garlic powder
- Salt and pepper to taste
- ½ cup shredded cheddar cheese
- ¼ cup Mexican blend cheese (optional)
- 1 teaspoon olive oil or butter
- Sour cream or Greek yogurt (for serving)
- Fresh cilantro, chopped (optional, for garnish)
- Fresh lime wedges (optional, for serving)
Instructions
- In a mixing bowl, combine 1 cup (about 260g) of refried beans with ½ teaspoon ground cumin, ¼ teaspoon chili powder (optional), ¼ teaspoon garlic powder, and salt and pepper to taste. Mix well until spices are evenly distributed.
- Heat a skillet over medium heat and add about 1 teaspoon of olive oil or butter. Warm for 1-2 minutes until shimmering but not smoking.
- Lay one flour tortilla flat. Spread about ¼ cup (60g) of the seasoned bean mixture evenly over half the tortilla.
- Sprinkle ½ cup (60g) shredded cheddar cheese and ¼ cup (30g) Mexican blend cheese on top of the beans.
- Fold the tortilla in half to create a half-moon shape.
- Place the folded quesadilla onto the hot skillet. Cook for 3-4 minutes on one side until golden brown and crispy.
- Flip carefully and cook another 3-4 minutes on the other side until cheese is melted and tortilla is crisp.
- Remove the cooked quesadilla and place on a cutting board. Repeat assembly and cooking with remaining tortillas and filling.
- Let quesadillas rest for a minute, then cut each into 3-4 wedges.
- Serve warm with sour cream or Greek yogurt, chopped cilantro, and lime wedges.
Notes
If quesadilla browns too fast but cheese isn’t melting, reduce heat. Avoid pressing down hard with spatula. Cool completely before storing for meal prep. Reheat in skillet or toaster oven to keep crispiness. Can freeze wrapped tightly for up to 2 months.
Nutrition
- Serving Size: 1 quesadilla (cut in
- Calories: 320
- Sugar: 2
- Sodium: 450
- Fat: 15
- Saturated Fat: 7
- Carbohydrates: 30
- Fiber: 6
- Protein: 14
Keywords: quesadilla, bean quesadilla, cheesy quesadilla, meal prep, easy recipe, vegetarian, quick lunch


