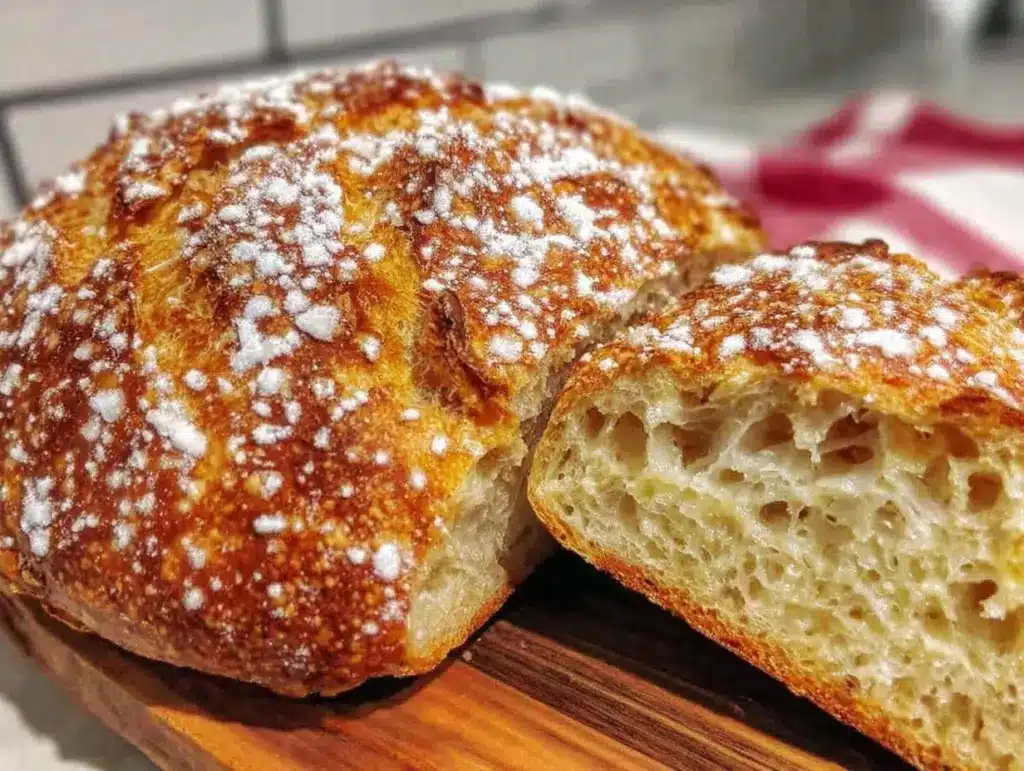
“I wasn’t planning to bake bread that evening,” my neighbor chuckled as he recounted how a simple mix-up in his kitchen led to one of the best loaves he’d ever tasted. It started with a forgotten yeast packet and a late-night impulse to try something new. Honestly, I’ve had similar moments—when a recipe goes sideways but ends up better than expected. This Easy No-Knead Crusty Artisan Bread Recipe is just like that: effortless, forgiving, and packed with flavor. It’s the kind of bread that fills your kitchen with that warm, yeasty aroma, reminding you of simple joys without the fuss of traditional kneading.
One Saturday afternoon, I found myself rummaging through my pantry, short on time but craving fresh bread. I stumbled upon a scribbled note from my old college roommate—a recipe she’d jotted down years ago after a late-night bakery adventure. I tried it right away, even with my usual kitchen distractions (yes, I accidentally spilled flour on the floor). The result? A loaf with an irresistible crust, chewy crumb, and a rustic appearance that fooled all my house guests into thinking I’d spent hours perfecting it.
Maybe you’ve been there too—wanting homemade bread but daunted by the kneading and rising. This recipe is your new best friend. It’s simple, requires just a handful of ingredients, and fits perfectly into busy days. Whether you’re a beginner or just short on time, this no-knead bread is sure to become a staple in your baking routine.
Why You’ll Love This Recipe
After countless trials in my own kitchen, this Easy No-Knead Crusty Artisan Bread Recipe stood out for several reasons. It’s not just beginner-friendly; it’s practically foolproof. The magic lies in letting time do the work instead of your muscles.
- Quick & Easy: No kneading required, and it comes together in about 5 minutes of prep time, perfect for those busy weekdays or unexpected guests.
- Simple Ingredients: Uses just flour, water, salt, and yeast—pantry staples you probably already have on hand, no fancy add-ins necessary.
- Great for Any Occasion: Whether it’s a cozy Sunday brunch or a last-minute dinner side, this bread fits right in.
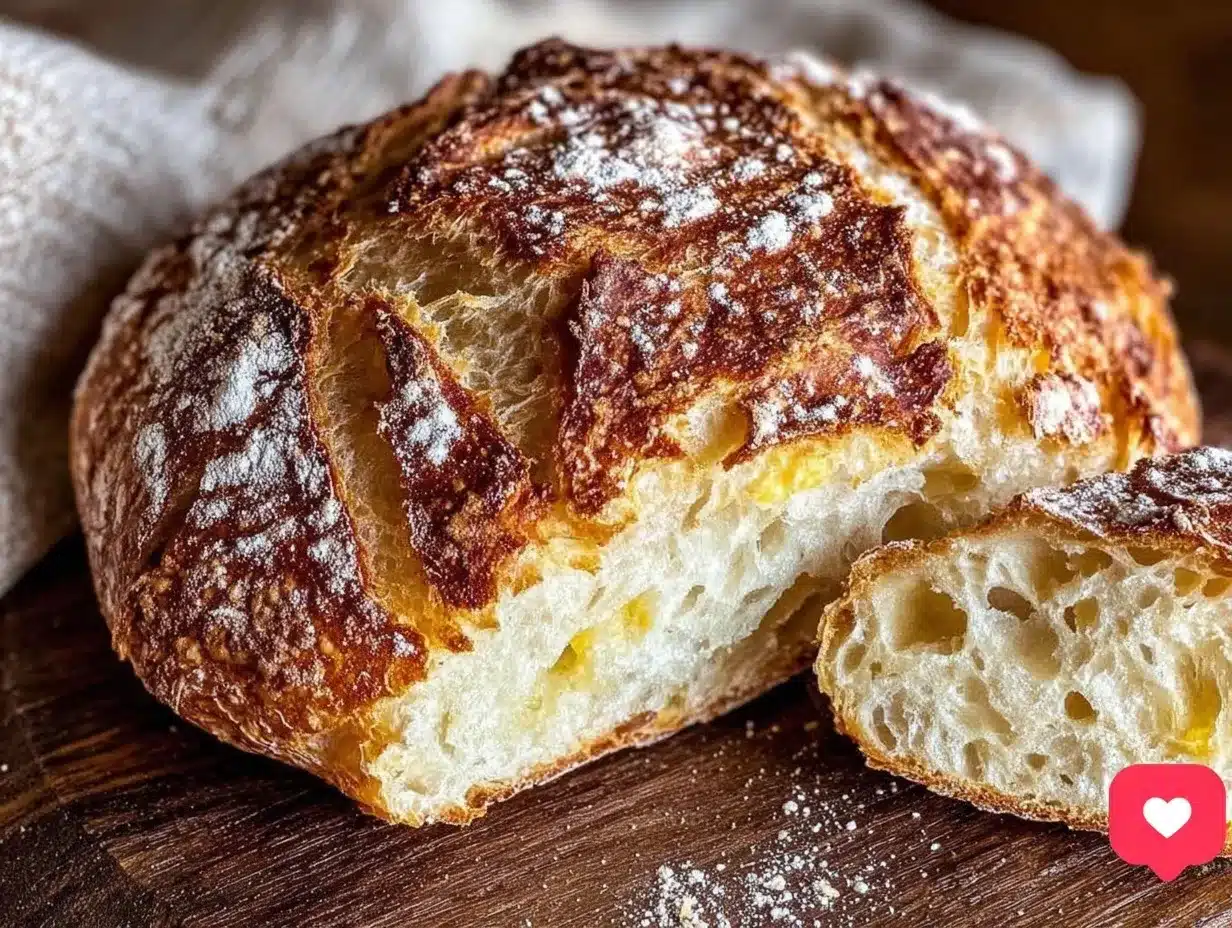
- Crowd-Pleaser: The crunchy crust and tender inside always get compliments from family and friends alike.
- Unbelievably Delicious: The long fermentation develops deep flavor, making you savor every bite.
What really makes this recipe different? It’s all about the slow fermentation and the baking method that creates that perfect crust without any complicated steps. I recommend using King Arthur flour for the best texture, but honestly, most all-purpose flours will do just fine. Letting the dough rest overnight gives it this incredible depth of flavor that’s worth the wait. You don’t have to be a pro baker to get these results—just a bit of patience and a good Dutch oven or heavy pot.
This bread isn’t just food; it’s a comforting ritual. I find myself closing my eyes after the first bite because it reminds me of those quiet mornings when everything feels just right. You might feel the same once you try it!
What Ingredients You Will Need
This recipe uses simple, wholesome ingredients to deliver bold flavor and satisfying texture without the fuss. Most are pantry staples, easy to find, and straightforward to work with.
- All-Purpose Flour – 3 cups (360 grams), unbleached preferred for better flavor and texture.
- Warm Water – 1 ⅓ cups (315 ml), about 105°F to 110°F (40°C to 43°C) to activate the yeast gently.
- Active Dry Yeast – ¼ teaspoon (about 1 gram), just a pinch for a slow rise and flavor development.
- Salt – 1 ½ teaspoons (9 grams), enhances flavor and controls fermentation.
Optional (but recommended):
- Olive Oil – 1 tablespoon (15 ml), for brushing the crust if you want a softer finish.
- Flour for Dusting – as needed, to prevent sticking and create that rustic look.
Ingredient tips: For best results, I like using King Arthur’s unbleached flour—its protein content gives a nice chewiness. If you want a gluten-free option, experimenting with a gluten-free all-purpose blend can work, but the texture will differ. Also, if you don’t have active dry yeast, instant yeast can substitute, but skip proofing it in water first.
Equipment Needed
- Large Mixing Bowl: For mixing your dough comfortably. Glass or stainless steel work well.
- Wooden Spoon or Spatula: To combine ingredients without overworking the dough.
- Plastic Wrap or Kitchen Towel: For covering the bowl during the long rise.
- Dutch Oven or Heavy Oven-Safe Pot with Lid: Crucial for baking the bread to get that crusty artisan finish. If you don’t have a Dutch oven, a heavy casserole dish with a lid or even a cast-iron skillet with a metal bowl on top can substitute.
- Kitchen Scale (Optional): For measuring ingredients precisely, especially helpful if you want consistent results.
- Bread Lame or Sharp Knife: For scoring the dough before baking to help it expand beautifully.
Personally, I started baking with just a mixing bowl and a large pot I found at a thrift store. The Dutch oven is a game-changer but not mandatory if you’re creative. Just be sure whatever you use can tolerate high heat (around 450°F/230°C). And a quick tip—season your Dutch oven occasionally to prevent sticking and rust.
Preparation Method
- Mix the Ingredients (10 minutes): In your large bowl, combine 3 cups (360g) of all-purpose flour, ¼ teaspoon (1g) active dry yeast, and 1 ½ teaspoons (9g) salt. Pour in 1 ⅓ cups (315 ml) of warm water. Stir gently with a wooden spoon until a shaggy, sticky dough forms. It won’t look smooth or perfect—that’s totally normal.
- First Rise (12-18 hours): Cover the bowl tightly with plastic wrap or a clean kitchen towel. Let it rest at room temperature (ideally around 70°F/21°C) for 12 to 18 hours. You’ll know it’s ready when the dough has doubled in size and is bubbly and puffy. This slow fermentation is key for flavor.
- Shape the Dough (15 minutes): Lightly flour a work surface and your hands. Gently scrape the dough out of the bowl onto it—it will be sticky, so don’t stress about perfect shape. Fold the dough over itself a few times to form a rough ball. Let it rest on the floured surface, covered with a towel, for 30 to 45 minutes. It should puff up a bit again.
- Preheat the Oven and Dutch Oven (30 minutes): About 30 minutes before baking, place your Dutch oven (with lid) into the oven and heat to 450°F (230°C). This step traps steam and creates that signature crisp crust.
- Score and Bake (45 minutes): Carefully remove the hot Dutch oven. Transfer the dough ball onto a piece of parchment paper. Using a sharp knife or bread lame, score a shallow ‘X’ or a few slashes on top. Using the parchment as a sling, lift and place the dough into the Dutch oven. Cover with the lid and bake for 30 minutes.
- Finish Baking Uncovered (15 minutes): Remove the lid and bake for another 15 minutes. This helps develop a deep golden, crackly crust. The bread should sound hollow when tapped on the bottom.
- Cool Completely: Transfer the loaf to a wire rack and let cool for at least 1 hour before slicing. I know, patience is tough here—but cutting too soon makes the crumb gummy.
Pro tip: If your dough feels too sticky to handle, lightly dust your hands and surface but avoid adding too much flour—it can make the bread dense. Also, watch for oven hot spots; rotate the Dutch oven halfway through if needed.
Cooking Tips & Techniques
Getting that perfect crusty artisan bread at home is easier than you think, but a few tricks make all the difference.
- Don’t Skip the Long Rise: The slow fermentation is what gives this bread its complex flavor and airy crumb. I used to rush it and ended up with bland, dense loaves.
- Heat Your Dutch Oven Properly: Preheating traps steam, mimicking a professional bakery oven. I once forgot this step and ended up with a pale crust that lacked crunch.
- Scoring Matters: Cutting the dough allows it to expand without cracking randomly. Use a sharp blade and quick, confident slashes.
- Watch Your Oven Temperature: Too low and the bread won’t crisp up; too high and it might burn. I recommend an oven thermometer for accuracy.
- Multitasking Tip: While the dough rests overnight, you can prep other meals or relax. This hands-off approach is a lifesaver on busy schedules.
Once, I tried shaping the dough with wet hands instead of flouring—big mistake! The dough stuck everywhere, making a mess. Lesson learned: a light dusting goes a long way. Lastly, cooling the bread fully before slicing is crucial to avoid gummy texture—trust me on this one.
Variations & Adaptations
This no-knead bread is flexible and can be adapted to fit your tastes or dietary needs.
- Herb-Infused Version: Add 1-2 tablespoons of fresh chopped rosemary or thyme to the dry ingredients for a fragrant twist.
- Whole Wheat Variation: Substitute half of the all-purpose flour with whole wheat flour for a nuttier flavor and more fiber. You might need to add a tablespoon or two of water to adjust the dough consistency.
- Gluten-Free Option: Use a gluten-free all-purpose flour blend designed for baking. Note that rising times and texture will vary, so keep an eye on the dough.
- Cheese-Stuffed: Before shaping, fold in small cubes of your favorite cheese (cheddar or mozzarella). The melty pockets are a real treat.
For baking, if you don’t have a Dutch oven, try using a baking stone with a metal pan of water underneath to create steam. I tried this once during a camping trip and it worked surprisingly well! Also, feel free to experiment with different scoring patterns—you might discover your signature look.
Serving & Storage Suggestions
This Easy No-Knead Crusty Artisan Bread is best served fresh, slightly warm, with butter or your favorite spread. The crust is at its peak the day it’s baked—crispy and crackly—while the crumb remains soft and chewy.
Pair it with soups, stews, or use it for sandwiches. Honestly, it’s versatile enough to be the star of a simple breakfast or a fancy dinner side.
To store, wrap the cooled bread loosely in a clean kitchen towel and keep at room temperature for up to 2 days. For longer storage, slice and freeze in a zip-top bag for up to 3 months. When reheating, toast slices or warm in a 350°F (175°C) oven for 10 minutes to revive the crust.
Interestingly, the flavor continues to develop even after baking, so leftovers make excellent toast the next day. Just remember, avoid storing bread in plastic at room temperature as it softens the crust and can encourage mold.
Nutritional Information & Benefits
Each slice (about 1/12th of the loaf) contains approximately:
| Calories | 130 |
|---|---|
| Carbohydrates | 27 grams |
| Protein | 4 grams |
| Fat | 0.5 grams |
| Fiber | 1.5 grams |
This bread is free from added sugars and uses minimal ingredients, making it a wholesome choice. The slow fermentation not only intensifies flavor but can also make the bread easier to digest for some people due to partial breakdown of gluten.
For those watching gluten intake, this recipe contains gluten unless using a certified gluten-free flour blend. It’s naturally dairy-free and low in fat, making it suitable for many dietary preferences.
From my wellness perspective, baking your own bread is a rewarding way to avoid preservatives and artificial ingredients found in store-bought loaves. Plus, it’s a comforting ritual that nourishes both body and soul.
Conclusion
Honestly, this Easy No-Knead Crusty Artisan Bread Recipe is one of those rare finds that makes baking approachable and enjoyable. It’s simple enough for beginners yet yields impressive results that taste like you put in hours. You can tweak it, personalize it, and make it your own.
I love this recipe because it turns baking bread from a chore into a pleasure, even on busy days. It’s become my go-to for gifting neighbors or just treating myself on a quiet Sunday morning.
Give it a try, and don’t hesitate to share your variations or questions in the comments. Baking bread at home is a joy that’s meant to be shared, and I can’t wait to hear about your crusty, delicious loaves!
FAQs
Can I use instant yeast instead of active dry yeast?
Yes! If using instant yeast, you can mix it directly with the flour without proofing in water first. The rise time stays about the same.
What if my dough is too sticky to handle?
Lightly flour your hands and work surface, but avoid adding too much extra flour, which can make the bread dense. Sticky dough is normal for this recipe.
How do I know when the bread is fully baked?
The crust should be deep golden-brown, and when you tap the bottom of the loaf, it should sound hollow. Internal temperature should reach about 200°F (93°C) if you use a thermometer.
Can I make this bread without a Dutch oven?
Yes! Use a heavy oven-safe pot with a lid or a baking stone with a pan of water in the oven to create steam. The Dutch oven just makes it easier to trap moisture.
How long can I store this bread?
Keep it wrapped in a clean towel at room temperature for up to 2 days. For longer storage, slice and freeze for up to 3 months. Reheat to refresh the crust.
Pin This Recipe!

Easy No-Knead Crusty Artisan Bread Recipe Perfect for Beginners at Home
This no-knead artisan bread recipe is simple, beginner-friendly, and yields a crusty loaf with a chewy crumb using minimal ingredients and effortless preparation.
- Prep Time: 10 minutes
- Cook Time: 45 minutes
- Total Time: 13 hours 55 minutes
- Yield: 1 loaf (about 12 slices) 1x
- Category: Bread
- Cuisine: American
Ingredients
- 3 cups (360 grams) all-purpose flour, unbleached preferred
- 1 1/3 cups (315 ml) warm water (105°F to 110°F)
- 1/4 teaspoon (about 1 gram) active dry yeast
- 1 1/2 teaspoons (9 grams) salt
- Optional: 1 tablespoon (15 ml) olive oil for brushing crust
- Optional: flour for dusting
Instructions
- Mix the Ingredients (10 minutes): In a large bowl, combine 3 cups (360g) all-purpose flour, 1/4 teaspoon (1g) active dry yeast, and 1 1/2 teaspoons (9g) salt. Pour in 1 1/3 cups (315 ml) warm water. Stir gently with a wooden spoon until a shaggy, sticky dough forms.
- First Rise (12-18 hours): Cover the bowl tightly with plastic wrap or a clean kitchen towel. Let it rest at room temperature (around 70°F/21°C) for 12 to 18 hours until doubled in size and bubbly.
- Shape the Dough (15 minutes): Lightly flour a work surface and hands. Scrape dough onto surface, fold over itself a few times to form a rough ball. Let rest covered with a towel for 30 to 45 minutes until puffed.
- Preheat Oven and Dutch Oven (30 minutes): Place Dutch oven with lid in oven and preheat to 450°F (230°C).
- Score and Bake (45 minutes): Remove hot Dutch oven. Transfer dough ball on parchment paper. Score top with a sharp knife or bread lame. Using parchment as sling, place dough into Dutch oven. Cover and bake 30 minutes.
- Finish Baking Uncovered (15 minutes): Remove lid and bake another 15 minutes until deep golden crust forms and bread sounds hollow when tapped.
- Cool Completely: Transfer loaf to wire rack and cool at least 1 hour before slicing.
Notes
Use King Arthur unbleached flour for best texture. If dough is too sticky, lightly dust hands and surface with flour but avoid adding too much. Preheat Dutch oven properly to trap steam for crust. Cool bread completely before slicing to avoid gummy crumb. Oven thermometer recommended for accuracy. Variations include adding herbs, whole wheat flour, cheese, or gluten-free flour blends.
Nutrition
- Serving Size: 1 slice (1/12th of l
- Calories: 130
- Fat: 0.5
- Carbohydrates: 27
- Fiber: 1.5
- Protein: 4
Keywords: no-knead bread, artisan bread, easy bread recipe, crusty bread, beginner bread, homemade bread, no kneading, Dutch oven bread


