
Let me tell you, the scent of warm garlic butter mingling with fresh rosemary, wafting from my oven, is enough to make anyone’s mouth water instantly. The first time I baked these crispy garlic butter breadsticks with rosemary and sea salt, I was instantly hooked—honestly, the kind of moment where you pause, take a deep breath, and just smile because you know you’re onto something truly special. Years ago, when I was knee-high to a grasshopper, my grandma used to make the fluffiest breadsticks, but these crispy beauties bring a whole new level of crunch and flavor that I wish I’d discovered years ago.
My family couldn’t stop sneaking them off the cooling rack (and I can’t really blame them). You know what? These breadsticks are dangerously easy to whip up, perfect for those cozy nights when you want a little something to nibble on without the fuss. Let’s face it, they bring pure, nostalgic comfort but with a crispy twist that brightens up any snack table or dinner spread. Whether you’re looking to impress at your next potluck, need a sweet (well, savory!) treat for the kids, or simply want to brighten up your Pinterest cookie board with something savory, these garlic butter breadsticks are your new go-to.
I’ve tested this recipe more times than I can count—in the name of research, of course—and it’s become a staple for family gatherings, gifting, or even just a solo snack that feels like a warm hug. You’re going to want to bookmark this one, trust me.
Why You’ll Love This Recipe
From my experience, this crispy garlic butter breadsticks recipe stands out for several reasons. It’s not just another breadstick recipe; it’s a crowd-pleaser that hits all the right notes. Here’s why it’s quickly become a favorite:
- Quick & Easy: Comes together in under 30 minutes, perfect for busy weeknights or last-minute cravings.
- Simple Ingredients: No fancy grocery trips needed; you likely already have everything in your pantry.
- Perfect for Any Occasion: Great for potlucks, game nights, cozy dinners, or even brunch.
- Crowd-Pleaser: Always gets rave reviews from kids and adults alike—hard to resist that crispy, buttery crust!
- Unbelievably Delicious: The texture combo of crisp outside and tender inside, with the punch of garlic and fresh rosemary, is next-level comfort food.
What makes this recipe different? It’s the way the garlic butter is generously brushed on before baking, then sprinkled with fragrant rosemary and a touch of flaky sea salt. This layering gives an irresistible flavor that’s both fresh and robust. Plus, the breadsticks crisp up just right without drying out—no more soggy disappointments! The rosemary adds that lovely herbal aroma that makes you want to keep coming back for more. Honestly, this isn’t just food; it’s a little moment of joy in breadstick form.
What Ingredients You Will Need
This recipe uses simple, wholesome ingredients to deliver bold flavor and satisfying texture without the fuss. Most are pantry staples, and a few fresh touches make all the difference.
- For the dough:
- All-purpose flour – 2 ½ cups (about 300g), for that perfect chew
- Active dry yeast – 2 ¼ teaspoons (1 packet), the magic behind the rise
- Warm water – 1 cup (240ml), about 110°F (43°C), to activate the yeast
- Sugar – 1 tablespoon, to feed the yeast and add a touch of sweetness
- Salt – 1 teaspoon, balances flavor
- Olive oil – 2 tablespoons, adds tenderness to the dough
- For the garlic butter topping:
- Unsalted butter – 4 tablespoons (about 56g), melted and warm (I recommend Kerrygold for best flavor)
- Fresh garlic – 3 cloves, finely minced or pressed (use fresh for punchy garlic flavor)
- Fresh rosemary – 1 tablespoon, finely chopped (dried rosemary works too but fresh is best!)
- Flaky sea salt – 1 teaspoon, for that satisfying crunch and saltiness
- Freshly ground black pepper – a pinch, optional but recommended
Substitution tips: Use gluten-free all-purpose flour mix if you need a gluten-free option. Swap butter with dairy-free margarine or coconut oil for a dairy-free version, though the flavor will shift slightly. Don’t skimp on fresh garlic and rosemary—these give the breadsticks their soul.
Equipment Needed
- Baking sheet or tray – a rimmed one works best to catch any drips.
- Mixing bowls – one large for dough mixing, one small for the garlic butter.
- Measuring cups and spoons – precise measurements are key here.
- Pastry brush – to generously spread the garlic butter over the breadsticks.
- Kitchen towel or plastic wrap – to cover the dough as it rises.
- Stand mixer with dough hook (optional) – helpful if you want to save your arms, but hand mixing works fine.
Personally, I find a silicone baking mat makes cleanup a breeze and helps prevent sticking, but parchment paper is an excellent budget-friendly alternative. If you don’t have a pastry brush, a clean spoon or your fingers work just fine for spreading the butter—no fancy tools required.
Preparation Method
- Activate the yeast (5 minutes): In a small bowl, combine warm water (110°F/43°C), sugar, and active dry yeast. Stir gently and let it sit until foamy and bubbly—about 5 minutes. This shows the yeast is alive and ready.
- Mix the dough (10 minutes): In a large bowl, whisk together the flour and salt. Add the yeast mixture and olive oil. Stir until it starts to come together, then knead by hand on a floured surface or with a stand mixer fitted with a dough hook for about 8 minutes, until the dough is smooth and elastic. If it’s sticky, add a little flour, but don’t overdo it—too much flour makes the breadsticks tough.
- First rise (60 minutes): Place the dough in a lightly oiled bowl, cover with a damp kitchen towel or plastic wrap, and let it rise in a warm spot until doubled in size, about 1 hour. You’ll know it’s ready when you poke it gently and the indentation stays.
- Shape the breadsticks (15 minutes): Punch down the dough to release air. Divide it into 12 equal pieces (about 2 oz / 56g each). Roll each piece into a 6-inch (15 cm) long rope. Place them spaced apart on a baking sheet lined with parchment paper or a silicone mat.
- Second rise (20 minutes): Cover the shaped breadsticks loosely with a towel and let them rest for 20 minutes. They’ll puff up slightly—this step is crucial for that soft interior.
- Prepare the garlic butter topping: While the breadsticks rise, whisk together melted butter, minced garlic, chopped rosemary, and a pinch of black pepper.
- Brush and season (5 minutes): Preheat your oven to 400°F (205°C). Brush each breadstick generously with the garlic butter mixture. Sprinkle flaky sea salt on top for that perfect crunch.
- Bake (15-18 minutes): Bake in the preheated oven until golden brown and crispy on the outside. You’ll notice the aroma intensify—that’s the rosemary and garlic working their magic! If you want extra crispiness, you can broil for 1-2 minutes at the end, but watch carefully to avoid burning.
- Final butter brush (optional): For an irresistibly glossy finish, brush with a bit more garlic butter right after baking.
- Cool and serve: Let the breadsticks cool slightly on a rack. Serve warm or at room temperature with your favorite marinara or cheese dip.
Tip: If your dough feels too sticky after mixing, add flour gradually—one tablespoon at a time. Over-kneading can make the sticks tough, so feel the dough; it should be soft and springy.
Cooking Tips & Techniques
One of the keys to these crispy garlic butter breadsticks is balancing the texture—crispy outside and tender inside. Here’s what I’ve learned after many batches:
- Don’t skip the second rise: It might seem like an extra step, but it makes a huge difference in texture and fluffiness.
- Use fresh garlic: Pre-minced garlic or powder just won’t give you that punchy, aromatic flavor. Freshly minced garlic butter is worth the extra minute.
- Brush generously but don’t drown: Too much butter can make the breadsticks soggy. Brush enough to coat but not pool.
- Watch your oven temperature: Ovens vary, so keep an eye during baking. If your breadsticks brown too fast, lower the temp by 25°F (about 15°C) and bake a little longer.
- For extra crispiness: Try a quick broil at the end, but stay close and watch for burning.
- Multitasking tip: Prepare the garlic butter while the breadsticks do their second rise—that saves time and keeps the process smooth.
I once skipped the second rise in a rush and ended up with dense breadsticks—lesson learned! Also, using room temperature butter for melting helps it mix better with garlic and rosemary.
Variations & Adaptations
These crispy garlic butter breadsticks are super versatile. Here are some ways to switch things up:
- Herb swap: Use fresh thyme or oregano instead of rosemary for a different herbaceous twist.
- Cheesy delight: Sprinkle grated Parmesan or shredded mozzarella on top before baking for a melty, golden crust.
- Spicy kick: Add a pinch of red pepper flakes to the garlic butter for a subtle heat that pairs beautifully with the buttery richness.
- Gluten-free option: Use a gluten-free all-purpose flour blend and add a binding agent like xanthan gum if needed.
- Dairy-free version: Swap the butter for coconut oil or a dairy-free margarine; fresh garlic and rosemary still shine through.
- Whole wheat twist: Substitute half the all-purpose flour with whole wheat flour for a nuttier flavor and more fiber.
I personally love adding a sprinkle of Parmesan and a little extra rosemary on top—makes for a seriously addictive snack.
Serving & Storage Suggestions
Serve these crispy garlic butter breadsticks warm or at room temperature with your favorite dipping sauces like marinara, ranch, or garlic aioli. They’re fantastic alongside soups, salads, or pasta dishes, adding a crunchy contrast to soft meals.
To store, place cooled breadsticks in an airtight container at room temperature for up to 2 days. For longer storage, freeze them wrapped tightly in foil or plastic wrap for up to 2 months.
When reheating, pop them in a preheated oven at 350°F (175°C) for 5-7 minutes to restore their crispiness. Avoid microwaving if possible, as it tends to make them chewy and less pleasant.
Flavors actually deepen after a day, so if you can wait, make them ahead and enjoy even more garlicky goodness the next day.
Nutritional Information & Benefits
| Serving Size | 1 breadstick (approx. 56g) |
|---|---|
| Calories | 160 kcal |
| Fat | 7g (Saturated Fat 4g) |
| Carbohydrates | 20g |
| Protein | 4g |
| Fiber | 1g |
These breadsticks offer a satisfying dose of carbohydrates for energy, with a moderate amount of fat from the butter and olive oil. Garlic and rosemary are known for their antioxidant properties and potential digestive benefits. Using fresh herbs adds flavor without extra calories, and opting for whole wheat flour can boost fiber content.
This recipe is naturally free from nuts and soy but contains gluten and dairy, so be mindful if you have allergies. You can easily adapt it for gluten-free or dairy-free diets using the swaps mentioned earlier.
Conclusion
In a nutshell, these crispy garlic butter breadsticks with rosemary and sea salt are worth every minute of your time. They bring together crunchy, buttery, and herby flavors in a way that feels both comforting and special. I love how versatile they are—you can tweak the herbs, add cheese, or spice them up to fit your mood.
Give this recipe a try and see how it becomes one of those “go-to” snacks or side dishes you can’t live without. Don’t forget to share your tweaks and experiences—I’m always curious to hear your spin on this classic. So grab your mixing bowl, some fresh rosemary, and get ready to make your kitchen smell like a bakery (and your family think you’re a total pro!).
FAQs About Crispy Garlic Butter Breadsticks
How long do these breadsticks stay fresh?
Stored in an airtight container at room temperature, they stay fresh for up to 2 days. For longer storage, freeze them and reheat in the oven.
Can I use dried rosemary instead of fresh?
Yes, you can use dried rosemary, but use about half the amount since dried herbs are more concentrated. Fresh rosemary does provide a brighter flavor, though.
What if I don’t have active dry yeast?
You can substitute instant yeast in the same amount. Just mix it directly into the flour without proofing it in water first.
Can I make the dough ahead of time?
Absolutely! After the first rise, you can refrigerate the dough overnight. Just let it come to room temperature before shaping and baking.
How do I make these breadsticks extra crispy?
Brush them with garlic butter right before baking and again immediately after. You can also broil for 1-2 minutes at the end but watch closely to avoid burning.
Pin This Recipe!

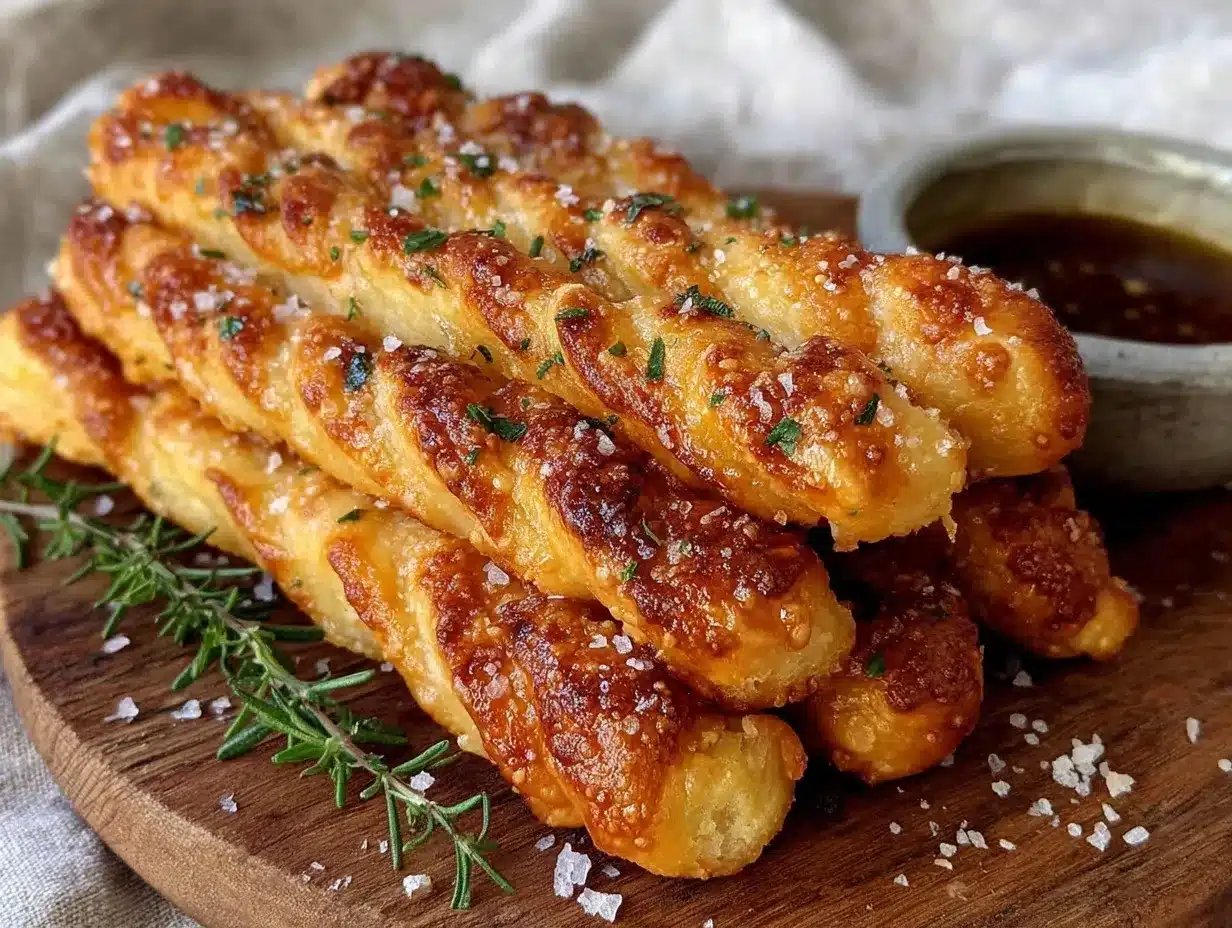
Crispy Garlic Butter Breadsticks

These crispy garlic butter breadsticks with rosemary and sea salt offer a perfect crunchy outside and tender inside, making them an easy and delicious homemade snack.
- Prep Time: 20 minutes
- Cook Time: 15-18 minutes
- Total Time: 1 hour 35-38 minutes
- Yield: 12 breadsticks 1x
- Category: Snack
- Cuisine: American
Ingredients
- 2 ½ cups all-purpose flour (about 300g)
- 2 ¼ teaspoons active dry yeast (1 packet)
- 1 cup warm water (110°F / 43°C)
- 1 tablespoon sugar
- 1 teaspoon salt
- 2 tablespoons olive oil
- 4 tablespoons unsalted butter (about 56g), melted and warm
- 3 cloves fresh garlic, finely minced or pressed
- 1 tablespoon fresh rosemary, finely chopped
- 1 teaspoon flaky sea salt
- Pinch of freshly ground black pepper (optional)
Instructions
- Activate the yeast: In a small bowl, combine warm water (110°F/43°C), sugar, and active dry yeast. Stir gently and let it sit until foamy and bubbly, about 5 minutes.
- Mix the dough: In a large bowl, whisk together the flour and salt. Add the yeast mixture and olive oil. Stir until it starts to come together, then knead by hand on a floured surface or with a stand mixer fitted with a dough hook for about 8 minutes, until the dough is smooth and elastic. Add flour gradually if sticky, but avoid overdoing it.
- First rise: Place the dough in a lightly oiled bowl, cover with a damp kitchen towel or plastic wrap, and let it rise in a warm spot until doubled in size, about 1 hour.
- Shape the breadsticks: Punch down the dough to release air. Divide into 12 equal pieces (about 2 oz / 56g each). Roll each piece into a 6-inch (15 cm) long rope. Place spaced apart on a baking sheet lined with parchment paper or silicone mat.
- Second rise: Cover the shaped breadsticks loosely with a towel and let them rest for 20 minutes until slightly puffed.
- Prepare garlic butter topping: Whisk together melted butter, minced garlic, chopped rosemary, and a pinch of black pepper.
- Brush and season: Preheat oven to 400°F (205°C). Brush each breadstick generously with garlic butter mixture. Sprinkle flaky sea salt on top.
- Bake: Bake in preheated oven for 15-18 minutes until golden brown and crispy. Optionally broil for 1-2 minutes for extra crispiness, watching carefully to avoid burning.
- Final butter brush (optional): Brush with a bit more garlic butter right after baking for a glossy finish.
- Cool and serve: Let breadsticks cool slightly on a rack. Serve warm or at room temperature with marinara or cheese dip.
Notes
Do not skip the second rise for best texture. Use fresh garlic and rosemary for best flavor. Brush garlic butter generously but avoid pooling to prevent sogginess. Watch oven temperature closely and adjust if breadsticks brown too fast. For extra crispiness, broil 1-2 minutes at the end but watch carefully. Dough can be refrigerated overnight after first rise; bring to room temperature before shaping.
Nutrition
- Serving Size: 1 breadstick (approx
- Calories: 160
- Sugar: 1
- Sodium: 230
- Fat: 7
- Saturated Fat: 4
- Carbohydrates: 20
- Fiber: 1
- Protein: 4
Keywords: garlic breadsticks, crispy breadsticks, garlic butter breadsticks, homemade snacks, rosemary breadsticks, easy breadsticks