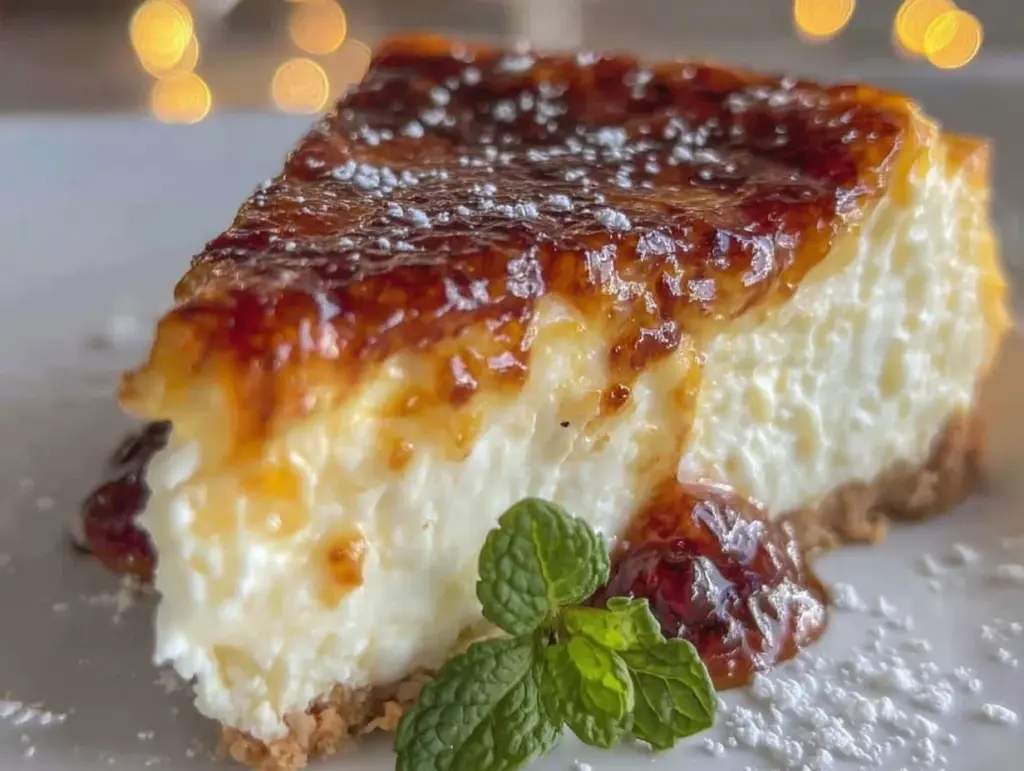
“I wasn’t expecting to find this recipe scribbled on a crumpled napkin at the back of a dusty cookbook in a little antique shop on a Tuesday afternoon,” I confessed to myself as I carefully unfolded it. The notes were messy, the handwriting barely legible, but the promise of a Decadent Crème Brûlée Cheesecake with Caramelized Sugar Topping was too tempting to ignore. Honestly, it felt like a secret treasure had fallen right into my hands, and I simply had to bring it to life.
That day, as the oven warmed and the kitchen filled with the sweet, creamy scent of baking cheesecake, I couldn’t help but smile at the unexpected joy that came from trying something new. Maybe you’ve been there—standing in your kitchen, a little overwhelmed but excited, with a recipe that feels both familiar and intriguingly different. This cheesecake isn’t just any dessert. It’s that perfect blend of two beloved classics: the rich, smooth texture of cheesecake and the crisp, caramelized topping of crème brûlée that snaps delightfully under your spoon.
There was a moment during my first attempt when I forgot to set the timer properly, and the caramelized sugar bubbled a tad too long, creating a slightly smoky aroma. Instead of ruining the batch, that tiny imperfection somehow added an extra depth of flavor. It’s that kind of recipe that stays with you—comfort food with a touch of surprise, a dessert that feels fancy but is honestly doable on a weeknight. So, if you’ve ever wondered how to nail that perfect golden sugar crust atop a creamy, luscious cheesecake, you’re in the right place.
Why You’ll Love This Recipe
After testing this Decadent Crème Brûlée Cheesecake multiple times, I can say with confidence that it’s a real crowd-pleaser and a showstopper dessert for any occasion. Here’s why it might just become your new favorite:
- Quick & Easy: While it looks impressive, it comes together in under 1 hour prep time (plus baking and cooling), making it perfect for those last-minute dessert cravings.
- Simple Ingredients: No need for exotic items—you likely have most of these in your pantry or fridge already. Cream cheese, eggs, sugar, cream—classic staples!
- Perfect for Entertaining: Whether it’s a cozy dinner party or a holiday treat, this cheesecake adds a touch of elegance without the fuss.
- Crowd-Pleaser: Kids and adults alike rave about the creamy texture paired with the satisfying crunch of caramelized sugar on top.
- Unbelievably Delicious: The marriage of cheesecake creaminess and brûlée’s burnt sugar crunch creates a texture and flavor combo that’s pure comfort food.
What sets this recipe apart is the delicate balance of flavors and textures. I blend the cream cheese with a hint of vanilla and a touch of heavy cream to achieve an ultra-smooth filling. The caramelized sugar topping isn’t just sprinkled on; it’s carefully torched for that perfect, glass-like finish. Honestly, it’s the kind of dessert that makes you close your eyes after the first bite and whisper, “That’s it.”
What Ingredients You Will Need
This recipe uses simple, wholesome ingredients to deliver bold flavor and a satisfying texture without any fuss. Most are pantry staples, and you can easily swap a few items to suit your preferences.
- For the Crust:
- 1 ½ cups (150g) graham cracker crumbs (or digestive biscuits, finely crushed)
- 5 tablespoons (70g) unsalted butter, melted (adds richness and helps bind crust)
- 2 tablespoons (25g) granulated sugar (for subtle sweetness)
- For the Cheesecake Filling:
- 24 ounces (680g) cream cheese, softened (I prefer Philadelphia brand for smoothness)
- ½ cup (100g) granulated sugar
- 3 large eggs, room temperature (helps with creamy texture)
- 1 teaspoon pure vanilla extract (use Nielsen-Massey if you want top-notch flavor)
- ½ cup (120ml) heavy cream (for extra creaminess)
- ¼ cup (60ml) sour cream (optional, adds slight tang)
- For the Caramelized Sugar Topping:
- ½ cup (100g) granulated sugar (for torching on top)
Substitution tips: If you want a gluten-free crust, swap graham crackers for almond flour or gluten-free cookies. For dairy-free, try vegan cream cheese and coconut cream instead of heavy cream. If sour cream isn’t your thing, just leave it out—it won’t affect the outcome drastically.
Equipment Needed
- 9-inch (23 cm) springform pan – I find springform pans make cheesecake removal a breeze. If you don’t have one, a regular cake pan lined with parchment works.
- Mixing bowls – for beating cream cheese and combining ingredients.
- Electric mixer or stand mixer – makes blending cream cheese super smooth and lump-free.
- Measuring cups and spoons – precise measurements matter here!
- Rubber spatula – to scrape down bowl sides and fold ingredients gently.
- Cream whipper or hand-held kitchen torch – the torch is essential for caramelizing the sugar topping. If you don’t have one, a broiler can work, but watch closely.
- Oven-safe water bath container or large roasting pan – to create a water bath for even baking and prevent cracks.
If you’re budget-conscious, a hand mixer works just fine instead of a stand mixer. For the torch, inexpensive culinary torches are available online and last for years. Just keep the nozzle clean and refill the butane safely.
Preparation Method
- Prepare the crust (10 minutes): Preheat your oven to 325°F (163°C). In a medium bowl, mix graham cracker crumbs, melted butter, and sugar until the mixture looks like wet sand. Press firmly and evenly into the bottom of your springform pan. I like to use the bottom of a glass to pack it down tight. Bake for 10 minutes, then remove and let cool while you prepare the filling.
- Make the filling (15 minutes): Using an electric mixer, beat the softened cream cheese on medium speed until smooth and creamy—no lumps! Gradually add sugar, mixing well. Add eggs one at a time, blending after each addition, but don’t overmix; just enough to combine. Stir in vanilla extract, heavy cream, and sour cream until silky. I usually stop and scrape the bowl with a spatula halfway to ensure everything is evenly mixed.
- Assemble and bake (50-60 minutes): Pour the cheesecake filling over the crust in the pan. Place the springform pan inside a larger roasting pan. Carefully pour hot water into the roasting pan until it reaches halfway up the sides of the springform pan—this water bath prevents cracks. Bake in the preheated oven for about 50-60 minutes. The edges should be set, but the center will still jiggle slightly when you gently shake the pan. Don’t worry; this is perfect.
- Cool and chill (4+ hours): Remove the cheesecake from the water bath and let cool completely on a wire rack. Then refrigerate for at least 4 hours, preferably overnight. Patience is key here; the texture improves with time.
- Caramelize the sugar topping (5-10 minutes): Just before serving, evenly sprinkle the granulated sugar over the chilled cheesecake surface. Using a kitchen torch, carefully caramelize the sugar by moving the flame in small circles until it melts and forms a crisp, golden crust. If you don’t have a torch, place the cheesecake under a hot broiler for 2-3 minutes, watching it like a hawk to prevent burning.
- Serve immediately: The caramelized sugar hardens quickly, so serve right away for that satisfying crack when you break the crust with your spoon.
Pro Tip: If your sugar doesn’t caramelize evenly, wait a minute and gently tap the top with the back of a spoon to break up any clumps. Also, keep a damp cloth handy—torching can get a little messy if you’re not careful.
Cooking Tips & Techniques
To get that perfectly smooth cheesecake filling, make sure your cream cheese is fully softened—no cold lumps allowed! I’ve learned the hard way that mixing cold ingredients leads to a grainy texture, which nobody wants. Beat the cream cheese alone first before adding anything else to avoid overworking the batter.
Using a water bath is non-negotiable for this recipe. It keeps the oven moisture high and the temperature steady, preventing cracks and dry edges. I usually wrap the bottom of my springform pan with foil to stop any water from sneaking in.
When caramelizing the sugar, patience is your best friend. Move the torch slowly and keep it a few inches away to avoid burning. You want a golden amber color, not blackened sugar. If you’re feeling adventurous, try sprinkling a pinch of sea salt on top right after torching—it creates a lovely sweet-salty contrast.
Don’t rush the chilling process. Cheesecake needs time to fully set and develop that creamy yet firm texture. While it’s tempting to dig in after an hour, waiting overnight really pays off. Plus, the caramelized sugar topping tastes best freshly torched just before serving.
Variations & Adaptations
- Flavor twists: Add a tablespoon of espresso powder to the filling for a mocha kick, or swirl in raspberry puree before baking for a fruity surprise.
- Crust options: Swap the graham cracker crust with crushed gingersnaps or chocolate cookies for a different flavor profile. Almond flour crust works well for gluten-free needs.
- Dairy-free version: Use vegan cream cheese and coconut cream. Replace butter in the crust with coconut oil. The texture will be slightly different but still delightful.
- Cooking method: You can bake this cheesecake in a water bath inside the oven or try a slow cooker method on low for a more hands-off approach (expect longer cooking times).
One of my favorite personal variations is adding a layer of salted caramel sauce between the crust and filling. It’s indulgent but adds a lovely depth that pairs perfectly with the brûlée sugar crust.
Serving & Storage Suggestions
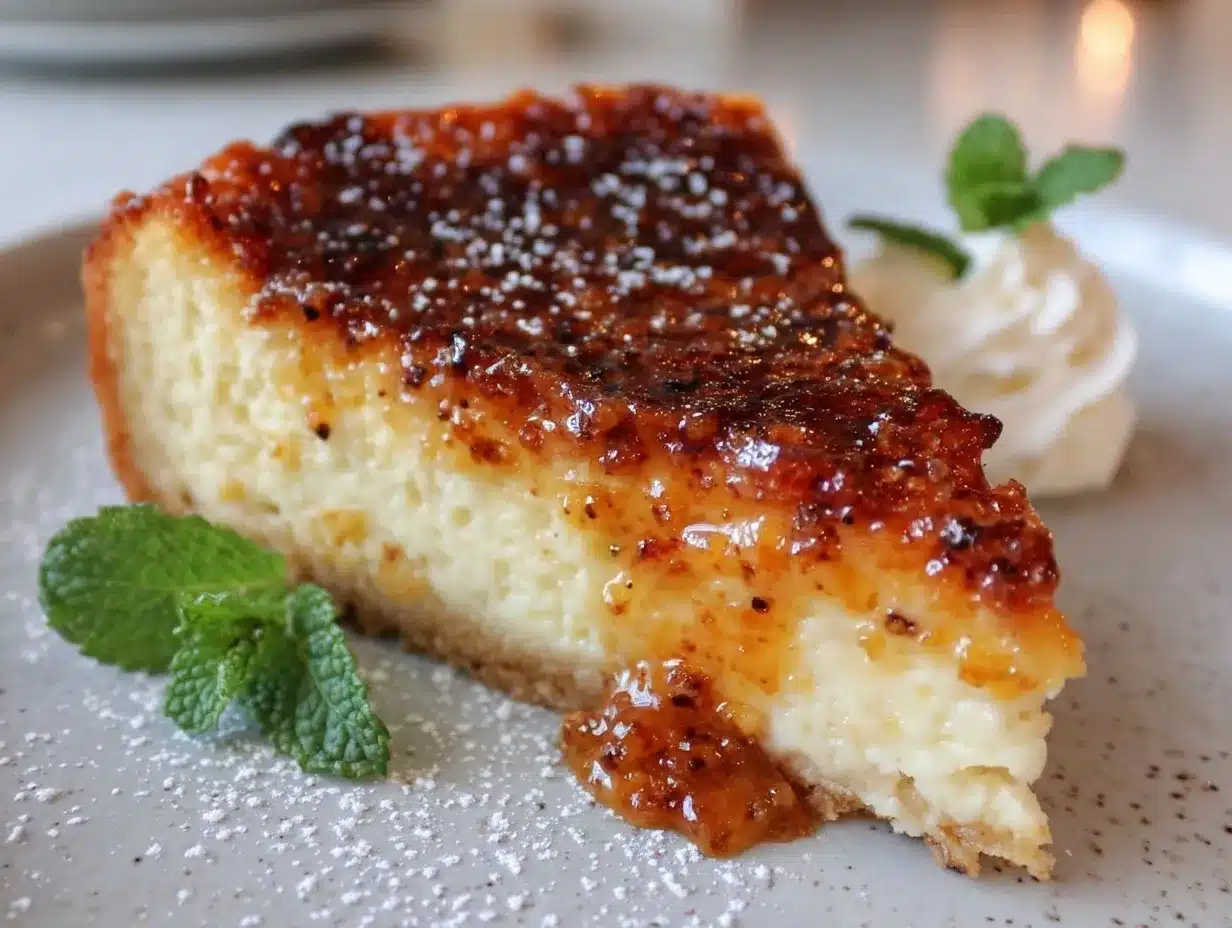
Serve the Decadent Crème Brûlée Cheesecake chilled, right after torching the sugar topping for that signature crackle. A dollop of fresh whipped cream or a handful of fresh berries on the side brightens the richness beautifully. A cup of strong coffee or black tea complements the flavors nicely.
If you have leftovers (and you might not!), store them covered in the refrigerator for up to 4 days. The caramelized sugar topping will soften over time, so for best texture, re-torch the surface briefly just before serving again.
For longer storage, you can freeze the cheesecake (without the sugar topping) wrapped tightly in plastic wrap and foil for up to 2 months. Thaw it overnight in the fridge, then sprinkle and torch the sugar topping fresh before serving.
Interestingly, the flavors mellow and deepen after chilling, so some say it tastes even better the next day. Just remember the caramel topping is best fresh!
Nutritional Information & Benefits
This cheesecake is rich and satisfying, with an estimated serving containing approximately 450 calories, 35 grams of fat, 30 grams of carbohydrates, and 7 grams of protein. The cream cheese and heavy cream provide a good dose of calcium and vitamin A.
While this isn’t your everyday health food, it’s perfect as an occasional indulgence. Using quality ingredients like real butter and cream cheese ensures a better nutritional profile compared to processed alternatives. For those watching carbs, swapping the crust for almond flour reduces the carbs significantly.
Allergy note: contains dairy, eggs, and gluten (unless substituted). If you have sensitivities, consider the dairy-free and gluten-free variations mentioned earlier.
Conclusion
This Decadent Crème Brûlée Cheesecake with Caramelized Sugar Topping isn’t just a dessert; it’s a little celebration in every bite. The creamy, velvety cheesecake paired with that crisp, sugary crown makes each spoonful memorable. I love how approachable it feels despite its fancy appearance—perfect for impressing guests or treating yourself after a long day.
Feel free to tweak the flavors and crust to your liking. Maybe you’ll add a personal touch like I did with salted caramel or espresso. I’d love to hear how you make it your own! So don’t hesitate to leave a comment or share your variations.
Go ahead, make this cheesecake your next homemade dessert adventure. Trust me, the crack of that caramelized sugar topping is worth every bit of effort!
FAQs
Can I make this cheesecake without a water bath?
Technically yes, but the water bath helps prevent cracks and uneven baking. If you skip it, try baking at a lower temperature and watch closely.
What can I use if I don’t have a kitchen torch?
You can use your oven’s broiler setting. Place the cheesecake under the broiler for 2-3 minutes, watching carefully to avoid burning the sugar.
How long should I chill the cheesecake before serving?
At least 4 hours, but overnight chilling is best for the ideal texture and flavor development.
Can I prepare the caramelized sugar topping ahead of time?
It’s best to caramelize the sugar just before serving to enjoy the crisp texture and crackling sound.
Is it possible to freeze this cheesecake?
Yes, freeze without the sugar topping wrapped tightly for up to 2 months. Thaw in the fridge overnight and caramelize the sugar fresh before serving.
Pin This Recipe!
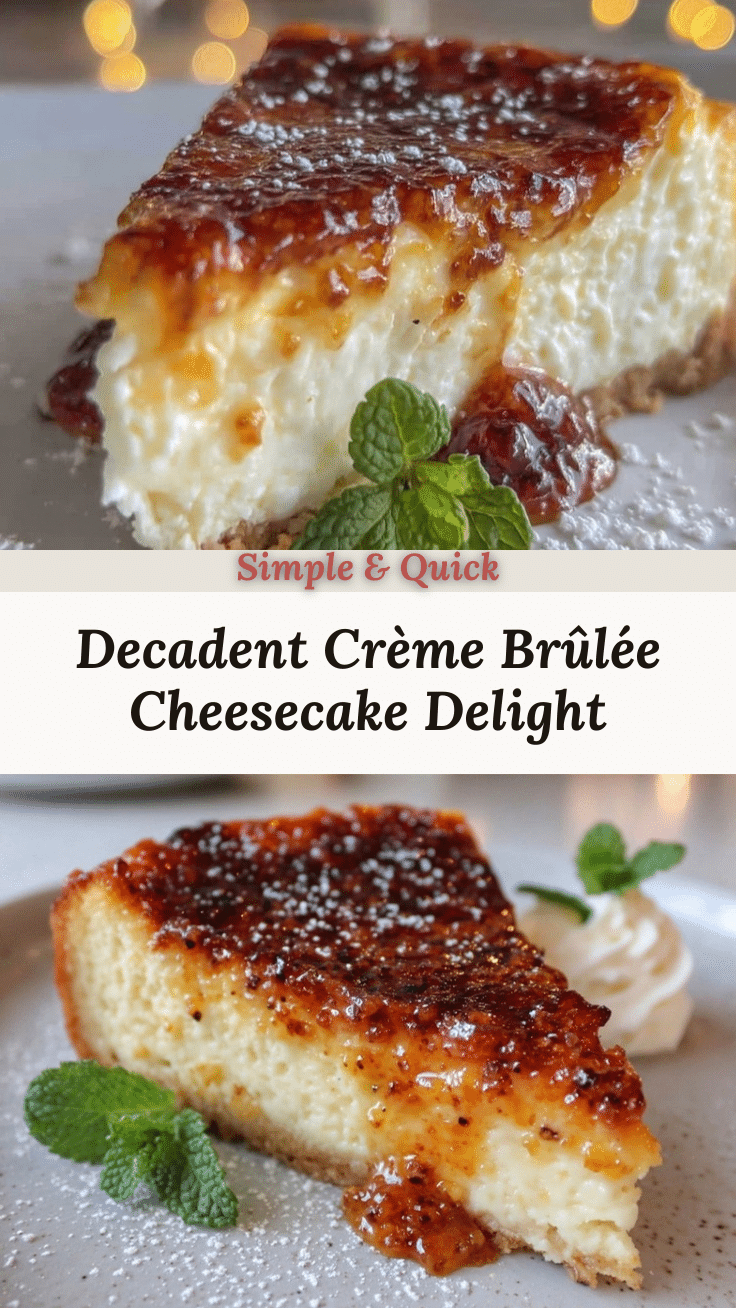
Decadent Crème Brûlée Cheesecake with Caramelized Sugar Topping
A rich and creamy cheesecake topped with a crisp, caramelized sugar crust that combines the best of cheesecake and crème brûlée in one elegant dessert.
- Prep Time: 25 minutes
- Cook Time: 60 minutes
- Total Time: 5 hours 25 minutes
- Yield: 12 servings 1x
- Category: Dessert
- Cuisine: American
Ingredients
- 1 ½ cups (150g) graham cracker crumbs or digestive biscuits, finely crushed
- 5 tablespoons (70g) unsalted butter, melted
- 2 tablespoons (25g) granulated sugar (for crust)
- 24 ounces (680g) cream cheese, softened
- ½ cup (100g) granulated sugar (for filling)
- 3 large eggs, room temperature
- 1 teaspoon pure vanilla extract
- ½ cup (120ml) heavy cream
- ¼ cup (60ml) sour cream (optional)
- ½ cup (100g) granulated sugar (for caramelized topping)
Instructions
- Preheat oven to 325°F (163°C). In a medium bowl, mix graham cracker crumbs, melted butter, and 2 tablespoons sugar until mixture resembles wet sand. Press firmly and evenly into bottom of a 9-inch springform pan. Bake for 10 minutes, then remove and let cool.
- Using an electric mixer, beat softened cream cheese on medium speed until smooth and creamy. Gradually add ½ cup sugar, mixing well. Add eggs one at a time, blending after each addition without overmixing. Stir in vanilla extract, heavy cream, and sour cream until silky. Scrape bowl sides as needed.
- Pour cheesecake filling over cooled crust in springform pan. Place pan inside a larger roasting pan. Pour hot water into roasting pan until it reaches halfway up the sides of the springform pan to create a water bath.
- Bake for 50-60 minutes until edges are set but center jiggles slightly when shaken. Remove from oven and water bath. Cool completely on a wire rack, then refrigerate for at least 4 hours or overnight.
- Before serving, evenly sprinkle ½ cup granulated sugar over chilled cheesecake surface. Using a kitchen torch, caramelize sugar by moving flame in small circles until sugar melts and forms a crisp, golden crust. Alternatively, place under broiler for 2-3 minutes, watching carefully.
- Serve immediately to enjoy the crisp caramelized sugar topping.
Notes
Use a water bath to prevent cracks and ensure even baking. Soften cream cheese fully before mixing to avoid grainy texture. Caramelize sugar topping just before serving for best crispness. If no torch is available, use broiler carefully. For gluten-free crust, substitute graham crackers with almond flour or gluten-free cookies. For dairy-free, use vegan cream cheese and coconut cream.
Nutrition
- Serving Size: 1 slice (1/12 of che
- Calories: 450
- Fat: 35
- Carbohydrates: 30
- Protein: 7
Keywords: cheesecake, crème brûlée, caramelized sugar, dessert, easy cheesecake, homemade dessert, creamy cheesecake, torch sugar topping