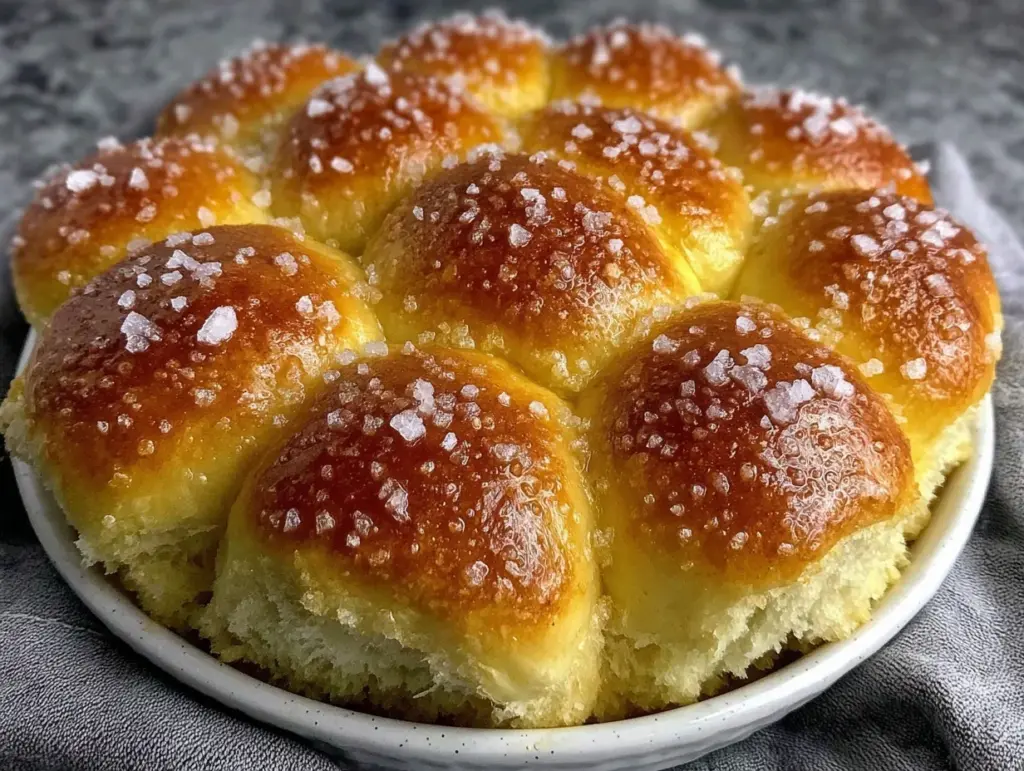
Let me tell you, the aroma of freshly baked fluffy dinner rolls drifting through my kitchen is pure magic—like a warm, buttery hug that wraps itself around you. Picture this: a tray of soft, pillowy rolls, golden brown on top, still warm from the oven, steam curling into the air as you pull one apart. The first time I sank my teeth into one of these dinner rolls, it was the kind of moment you pause, take a deep breath, and just smile because you know you’ve stumbled upon something truly special. That buttery softness, the gentle sweetness, the way it melts on your tongue—honestly, it’s the kind of bread that makes you wonder why you ever settled for anything less.
Years ago, when I was knee-high to a grasshopper, I remember watching my grandma shape dough with hands that had baked a thousand loaves before. She’d let me help roll the dough into imperfect little balls (some were more lopsided than round!) and I’d always sneak a taste of the raw dough—don’t tell her. The tradition stuck, and now, whether it’s a cozy holiday dinner or just a rainy weekend, these fluffy dinner rolls have become the centerpiece on our table. I wish I’d discovered this exact recipe sooner—it’s dangerously easy, and the comfort it brings is pure nostalgia.
My family can’t resist snatching them off the cooling rack, and honestly, I can’t blame them. There’s just something about the way these rolls rise up, tender and airy, that makes every meal feel special. Perfect for potlucks, a sweet treat for your kids’ lunchbox, or to brighten up your Pinterest bread board, these ultimate soft rolls have proven themselves over and over. I’ve tweaked and tested this recipe more times than I can count (in the name of research, of course!) and now it’s our go-to for family gatherings, gifting, or just when we need a little pick-me-up. If you’re looking for a recipe that feels like a warm hug and delivers every time, you’re going to want to bookmark this one.
Why You’ll Love This Fluffy Dinner Rolls Recipe
- Quick & Easy: Comes together in under 2 hours, perfect for busy weeknights or last-minute cravings. No fuss—just honest, straightforward steps.
- Simple Ingredients: You don’t need anything fancy—almost everything is probably already in your pantry. Flour, yeast, milk, butter—no wild goose chase at the grocery store.
- Perfect for Any Occasion: Great for brunch spreads, family dinners, holiday feasts, or just as a cozy side to soup. These rolls fit in everywhere.
- Crowd-Pleaser: Kids love them, adults rave about them, and even picky eaters can’t say no. I’ve brought these rolls to potlucks and watched them disappear in minutes.
- Unbelievably Delicious: The combination of soft texture and buttery flavor is next-level comfort food. It’s the kind of bread that makes you close your eyes after the first bite.
Here’s what sets this recipe apart: the careful balance of ingredients and technique. By using warm milk and letting the dough rise just right, you get a pillowy crumb every time. I’ve tested adding an extra egg for richness, brushing with melted butter for that irresistible sheen, and letting the rolls proof in a warm spot (sometimes I even use the top of my dryer—don’t judge!). This isn’t just another dinner roll recipe; it’s the one I reach for when I want to impress my guests without breaking a sweat. Comfort food reimagined—faster, easier, but with all the soul-soothing satisfaction you remember from childhood. If you’re looking to turn a simple meal into something memorable, these fluffy dinner rolls are your ticket.
What Ingredients You Will Need
This recipe uses simple, wholesome ingredients to deliver bold flavor and a satisfying, pillowy texture—no complicated steps or hard-to-find items. Most of these are pantry staples, and I love how easy it is to swap things out if needed. Here’s everything you’ll need for these ultimate fluffy dinner rolls:
- For the dough:
- All-purpose flour (3 ½ cups / 420g) – The backbone for structure and softness. I’ve also used King Arthur and Bob’s Red Mill brands for consistent results.
- Instant yeast (2 ¼ tsp / 7g) – Fast-acting, helps the dough rise quickly. If using active dry yeast, let it proof longer.
- Whole milk (1 cup / 240ml, warmed) – Adds richness and a tender crumb. You can swap in unsweetened almond milk for dairy-free rolls.
- Granulated sugar (¼ cup / 50g) – A touch of sweetness that helps activate the yeast and gives the rolls a lovely flavor.
- Large egg (1, room temperature) – Binds the dough and adds richness. If you’re out of eggs, you can use ¼ cup plain Greek yogurt as a substitute.
- Unsalted butter (¼ cup / 60g, melted) – Infuses the rolls with buttery flavor. For a dairy-free option, use vegan margarine.
- Salt (1 ½ tsp / 8g) – Balances the sweetness and brings out flavor. I use sea salt for a little extra punch.
- For finishing:
- Additional unsalted butter (2 Tbsp / 28g, melted) – For brushing the tops right after baking. This gives that irresistible glossy finish and extra flavor.
- Optional: flaky sea salt – Sprinkle on top for a savory touch (my kids love this for “fancy bread night”).
If you’re baking in summer, try swapping in buttermilk for a tangier flavor. For gluten-free rolls, use a 1:1 gluten-free flour blend (I’ve had success with Cup4Cup). You can even toss in a handful of fresh herbs—rosemary, thyme, or chives—to make these dinner rolls extra special. Don’t be afraid to experiment with what you have on hand; this recipe is forgiving and welcoming to tweaks.
Equipment Needed
You don’t need a fancy kitchen to whip up these fluffy dinner rolls. Here’s what I use:
- Stand mixer with dough hook – Makes kneading a breeze (but you can use your hands and a big bowl if you prefer old-school style).
- Large mixing bowl – Perfect for proofing the dough. I’ve used glass and stainless steel; both work well.
- Baking pan (9×13-inch / 23x33cm) – Ensures even baking and lets the rolls snuggle up for extra fluffiness.
- Measuring cups & spoons – Precision matters, especially with flour and yeast.
- Kitchen scale (optional) – For bakers who want spot-on accuracy.
- Pastry brush – For that glossy butter finish.
- Plastic wrap or clean kitchen towel – Covers the dough while it rises.
Don’t stress if you don’t have a stand mixer; I’ve made these rolls by hand many times. Just expect a little arm workout on kneading! If your baking pan is a bit smaller, make slightly smaller rolls—works just fine. I always hand-wash my mixer attachments to keep them in good shape, and my trusty metal baking pan has survived years of family dinners (a budget-friendly pick from the local store!).
Preparation Method

- Warm the milk: In a small saucepan, gently heat 1 cup (240ml) whole milk until it’s just warm to the touch (about 100-110°F / 38-43°C). Don’t let it boil—just cozy and warm. If it gets too hot, let it cool down a bit before moving on.
- Mix the dough: In the bowl of your stand mixer (or a large mixing bowl), combine 3 ½ cups (420g) all-purpose flour, 2 ¼ tsp (7g) instant yeast, and ¼ cup (50g) granulated sugar. Give it a quick stir with the paddle or dough hook.
- Add wet ingredients: Pour in the warm milk, ¼ cup (60g) melted unsalted butter, 1 large egg (room temperature), and 1 ½ tsp (8g) salt. Start mixing on low speed for 1 minute until just combined. (If mixing by hand, use a sturdy wooden spoon.)
- Knead the dough: Increase to medium speed and let the mixer knead for 5-6 minutes, until the dough is smooth and elastic. It should be slightly tacky but not super sticky. If it sticks too much, sprinkle in 1-2 Tbsp extra flour. By hand, knead on a lightly floured surface for 8-10 minutes. The dough should feel soft and supple—like a baby’s cheek!
- First rise: Shape the dough into a ball, place in a lightly greased bowl, and cover with plastic wrap or a clean towel. Let it rise in a warm spot for 1 hour, or until doubled in size. (Sometimes I stick it in the oven with just the light on for extra warmth.)
- Shape the rolls: Punch down the risen dough gently (don’t get too aggressive), then turn it out onto a lightly floured surface. Divide into 12-15 equal pieces (about 2 oz / 55g each). Roll each piece into a smooth ball—if they’re lopsided, no worries, they’ll puff up beautifully!
- Second rise: Arrange the dough balls in a greased 9×13-inch (23x33cm) baking pan. Cover and let them rise for another 30-40 minutes, until puffy and touching each other. The rolls should look soft and pillow-like.
- Bake: Preheat the oven to 375°F (190°C). Bake the rolls for 20-22 minutes, until golden brown on top and cooked through. The smell at this stage is heavenly—like a bakery in your own home!
- Finish: Remove from the oven and immediately brush with 2 Tbsp (28g) melted butter. (This step is non-negotiable for that glossy, flavorful finish.) Sprinkle with flaky sea salt if desired.
- Cool & enjoy: Let the rolls cool for 10-15 minutes before serving, if you can resist. They’re best eaten warm, but still dreamy at room temp.
Troubleshooting tips: If your rolls turn out dense, your yeast might have been old or the milk too hot. If the rolls spread too much, try letting them rise in a slightly cooler spot next time. Trust your senses—they should look puffy and feel soft, not sticky or stiff.
Personal tip: I always set a timer for each rise—life gets busy, and it’s easy to forget! And if you want that bakery-style look, roll the dough balls tightly before placing in the pan.
Cooking Tips & Techniques
Here’s where years of baking fluffy dinner rolls really pay off. I’ve had my fair share of dough disasters (once left the yeast out entirely—oops!), so let me share what actually works:
- Use fresh yeast: Old yeast means sad, flat rolls. I always check the expiration before starting.
- Warm but not hot milk: Yeast likes it cozy, not scalding. Too hot, and your dough won’t rise. I use the “baby bottle test”—if you’d feed it to a baby, it’s good for yeast.
- Knead until elastic: Under-kneading leads to tough rolls. The dough should be stretchy and bounce back when poked. If kneading by hand, don’t rush—enjoy the rhythm!
- Let dough rise fully: Don’t rush the rising time. If it’s cold in your kitchen, find a warmer spot (I’ve used my microwave with the door just cracked open). Fully risen dough equals fluffier rolls.
- Don’t overbake: Rolls can dry out quickly—watch the color, not just the clock. Golden brown is what you’re after, not deep brown.
- Butter brush: Brushing with melted butter right after baking is key. It locks in moisture, adds flavor, and gives that bakery-style shine.
Common mistake? Adding too much flour. The dough should be a little sticky—trust me, it leads to the softest rolls. And if you’re multitasking (kids running around, dinner bubbling on the stove), set timers and prep ingredients ahead. That way, nothing gets missed. My rolls turned out best when I paid attention to the rise and didn’t skimp on kneading. Consistency comes from practice, and honestly, even imperfect rolls taste amazing!
Variations & Adaptations
One of my favorite things about this fluffy dinner rolls recipe is how flexible it is. Here are some easy ways to switch things up:
- Gluten-Free: Substitute all-purpose flour with a 1:1 gluten-free flour blend (I’ve had success with Cup4Cup). The rolls won’t rise quite as much, but the texture is still wonderful.
- Dairy-Free: Use unsweetened almond milk and vegan margarine instead of milk and butter. They turn out just as soft—great for those avoiding dairy.
- Herb & Garlic: Add 1 Tbsp chopped fresh herbs (like rosemary or chives) and 1 tsp minced garlic to the dough for a savory twist. My kids call these “pizza bread rolls.”
- Sweet Rolls: For a breakfast treat, mix in ¼ cup (40g) raisins and a dash of cinnamon. Brush with honey instead of butter after baking.
- Different Baking Methods: These rolls bake up beautifully in a cast iron skillet for extra crispy bottoms, or as pull-apart rolls in a round cake pan for a fun presentation.
- Allergen Substitutions: Egg-free option: Substitute ¼ cup (60g) plain Greek yogurt or applesauce for the egg. For nut-free homes, stick with regular dairy.
My personal favorite? Adding a handful of shredded cheddar cheese to the dough—cheesy dinner rolls are always a hit in our house! Don’t be afraid to play around with flavors and shapes; this recipe welcomes your creativity.
Serving & Storage Suggestions
These fluffy dinner rolls are best served warm, right out of the oven. I love presenting them in a bread basket lined with a checked towel—makes any meal feel homey. For special occasions, I’ll sprinkle them with fresh herbs or flaky salt for a little extra flair.
They pair perfectly with hearty soups (think chicken noodle or tomato), cozy casseroles, or classic roast chicken. For breakfast, try them with a smear of jam or honey butter—trust me, that combo is addictive. If you’re planning ahead, these rolls can be made a day in advance.
- Storage: Store leftovers in an airtight container at room temperature for up to 2 days. For longer storage, freeze in a zip-top bag for up to 2 months—wrap in foil first to protect from freezer burn.
- Reheating: Warm in a low oven (300°F / 150°C) for 5-10 minutes, or microwave for 10-15 seconds with a damp paper towel. They’ll taste almost fresh-baked!
- Flavor development: Rolls actually taste even better the next day—the flavors mellow and the texture stays soft. Perfect for making ahead for holiday gatherings.
These rolls are so versatile—they fit right in at brunch, lunch, or dinner, and never last long!
Nutritional Information & Benefits
Here’s a quick look at the nutrition for one fluffy dinner roll (based on a batch of 15):
- Calories: ~140
- Protein: 3g
- Carbohydrates: 22g
- Fat: 4g
- Fiber: 1g
Key ingredients like whole milk and eggs add protein and vitamins, while butter brings healthy fats and that classic flavor. Using quality flour means you get a soft crumb without a lot of additives. For those watching gluten, try the gluten-free variation. These rolls are nut-free as written, and can easily be made dairy-free or egg-free. From a wellness perspective, I love that you can control the ingredients—no preservatives, just honest food. Just remember, these are a treat—moderation is key. Allergens: Contains wheat, dairy, and egg (unless you use the substitutions above).
Conclusion
If you’re searching for the ultimate soft, pillowy bread to complete any meal, these fluffy dinner rolls are worth every minute. They’re easy enough for beginners, yet special enough to steal the spotlight at family gatherings or holiday feasts. Customize them with herbs, cheese, or swap out ingredients to suit your needs—it’s your kitchen, your rules.
Personally, these rolls bring back memories of baking with my grandma and fill my house with happiness. I hope they do the same for you! If you try this recipe, let me know how it turns out—drop a comment below, share your photos, or tell me about your favorite variation. Don’t forget to save this recipe for next time (your future self will thank you).
Warm wishes and happy baking—may your kitchen always smell like fresh bread!
Frequently Asked Questions – Fluffy Dinner Rolls Recipe
Can I make these fluffy dinner rolls ahead of time?
Absolutely! You can shape the rolls, cover tightly, and refrigerate overnight. Let them come to room temperature and rise for 30-40 minutes before baking.
Can I freeze the dough or baked rolls?
Yes, both work well. Freeze shaped dough balls on a tray, then store in a bag for up to 2 months. Or, freeze baked rolls, wrapped in foil, and reheat as needed.
Do I have to use a stand mixer?
Nope! You can knead the dough by hand—just expect a little workout. The results are just as soft and fluffy.
Why are my rolls dense and heavy?
Most likely, the yeast was old, milk too hot, or the dough didn’t rise long enough. Make sure to follow the warmth and timing tips for the fluffiest rolls.
How do I make dinner rolls dairy-free or egg-free?
Swap in almond milk and vegan margarine for dairy-free rolls. Substitute ¼ cup Greek yogurt or applesauce for the egg to make them egg-free.
Pin This Recipe!

Fluffy Dinner Rolls

These soft, pillowy dinner rolls are easy to make and deliver a warm, buttery flavor that makes any meal feel special. Perfect for holidays, family gatherings, or cozy weeknights, they come together in under two hours and are a true crowd-pleaser.
- Prep Time: 20 minutes
- Cook Time: 22 minutes
- Total Time: 1 hour 45 minutes
- Yield: 12-15 rolls 1x
- Category: Bread
- Cuisine: American
Ingredients
- 3 1/2 cups all-purpose flour (420g)
- 2 1/4 teaspoons instant yeast (7g)
- 1 cup whole milk, warmed (240ml)
- 1/4 cup granulated sugar (50g)
- 1 large egg, room temperature
- 1/4 cup unsalted butter, melted (60g)
- 1 1/2 teaspoons salt (8g)
- 2 tablespoons unsalted butter, melted (for brushing tops, 28g)
- Optional: flaky sea salt for sprinkling
Instructions
- Warm the milk in a small saucepan until just warm to the touch (about 100-110°F). Do not boil.
- In a stand mixer bowl (or large mixing bowl), combine flour, instant yeast, and sugar. Stir briefly.
- Add the warm milk, melted butter, egg, and salt. Mix on low speed for 1 minute until just combined (or use a sturdy spoon if mixing by hand).
- Knead the dough on medium speed for 5-6 minutes until smooth and elastic. If kneading by hand, knead on a lightly floured surface for 8-10 minutes. Dough should be soft and slightly tacky.
- Shape dough into a ball, place in a lightly greased bowl, and cover with plastic wrap or a clean towel. Let rise in a warm spot for 1 hour, or until doubled in size.
- Punch down the risen dough gently, then turn onto a lightly floured surface. Divide into 12-15 equal pieces (about 2 oz each). Roll each piece into a smooth ball.
- Arrange dough balls in a greased 9×13-inch baking pan. Cover and let rise for another 30-40 minutes, until puffy and touching.
- Preheat oven to 375°F (190°C). Bake rolls for 20-22 minutes, until golden brown on top and cooked through.
- Remove from oven and immediately brush tops with melted butter. Sprinkle with flaky sea salt if desired.
- Let rolls cool for 10-15 minutes before serving. Enjoy warm or at room temperature.
Notes
For gluten-free rolls, use a 1:1 gluten-free flour blend. For dairy-free, substitute almond milk and vegan margarine. For egg-free, use 1/4 cup plain Greek yogurt or applesauce. Add fresh herbs or shredded cheese for flavor variations. Rolls can be made ahead and refrigerated overnight before baking. Store leftovers in an airtight container at room temperature for up to 2 days, or freeze for up to 2 months.
Nutrition
- Serving Size: 1 roll (based on 15
- Calories: 140
- Sugar: 3
- Sodium: 180
- Fat: 4
- Saturated Fat: 2
- Carbohydrates: 22
- Fiber: 1
- Protein: 3
Keywords: dinner rolls, fluffy bread, soft rolls, easy bread recipe, homemade rolls, holiday bread, yeast rolls, comfort food