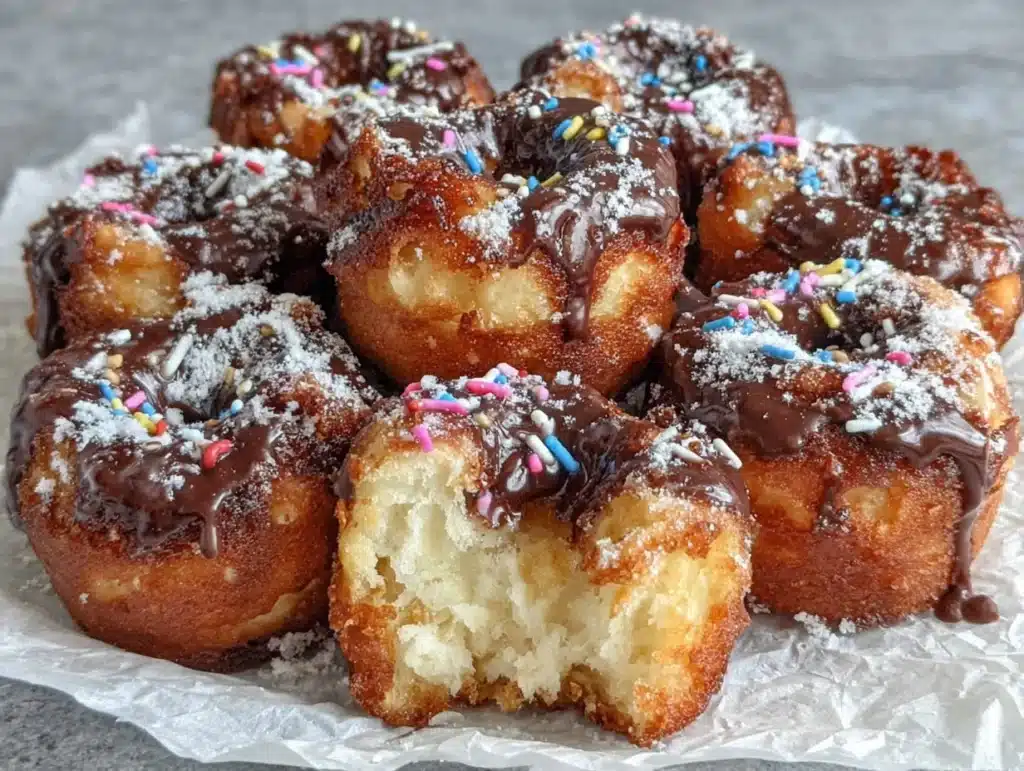
Let me tell you, the smell of freshly baked donuts drifting through the kitchen is pure joy. These fluffy gluten-free donuts are the kind of treat that makes you stop in your tracks, close your eyes, and savor the moment. The first time I made them, I couldn’t believe how soft and airy they turned out—no one even guessed they were gluten-free! Honestly, it felt like magic seeing my family sneak one after another off the cooling rack. These donuts are everything you want in a sweet treat: light, tender, and just the right amount of sweetness. Whether it’s a cozy weekend at home or a dessert table centerpiece, these donuts are sure to be a hit.
Years ago, before I had to go gluten-free, donuts were my go-to indulgence. And after much trial and error, I finally recreated that nostalgic texture and flavor without the gluten. It’s the kind of recipe that makes you wish you’d discovered it sooner. Perfect for birthdays, brunches, or just because—you’re going to want to bookmark this one. Tested, family-approved, and absolutely irresistible, these donuts feel like a warm hug in food form.
Why You’ll Love This Recipe
- Quick & Easy: These donuts come together in under 30 minutes, making them ideal for busy mornings or last-minute cravings.
- Simple Gluten-Free Ingredients: No hard-to-find items here—everything is likely already in your pantry or easily available.
- Perfect for Any Occasion: From birthday breakfasts to cozy Sunday mornings, these donuts fit the bill.
- Crowd-Pleaser: Even the pickiest eaters (and non-gluten-free folks) will rave about these fluffy, melt-in-your-mouth treats.
- Unbelievably Delicious: The soft texture and classic donut flavor make these an absolute favorite.
What sets this recipe apart is the combination of gluten-free flour and a touch of dairy to create a batter that transforms into pillowy perfection. Trust me, once you master this recipe, you’ll never miss traditional donuts again. Plus, you can easily adapt it to suit your taste—add chocolate chips, a sprinkle of cinnamon, or even a tangy glaze.
What Ingredients You Will Need
This recipe uses simple, wholesome ingredients to deliver bold flavor and satisfying texture without the fuss. Here’s what you’ll need:
- Gluten-Free All-Purpose Flour: Make sure to use a blend that includes xanthan gum for structure.
- Baking Powder: Helps give the donuts their fluffy rise.
- Granulated Sugar: Adds just the right amount of sweetness.
- Salt: Balances the flavors.
- Milk: Use any milk you prefer—regular, almond, or oat milk will work beautifully.
- Unsalted Butter: Melted for richness and flavor.
- Vanilla Extract: For that classic donut taste.
- Eggs: Adds structure and helps the donuts hold together.
- Powdered Sugar: For the glaze (optional, but highly recommended).
- Milk (for glaze): A splash to create that perfect drizzle consistency.
- Sprinkles: For decorating and adding fun colors.
While these are the basics, you can always tweak the recipe to suit your preferences. For example, swap butter for coconut oil to make it dairy-free or add a dash of cinnamon for a warm, spicy kick.
Equipment Needed
- Donut Pan: A non-stick donut pan is key for achieving the classic shape. If you don’t have one, you can use a muffin tin and shape the batter into rings.
- Mixing Bowls: One for dry ingredients and one for wet ingredients.
- Whisk: To mix the batter evenly.
- Cooling Rack: Ensures your donuts cool evenly without getting soggy on the bottom.
If you don’t have a donut pan, don’t worry—you can pipe the batter onto a parchment-lined baking sheet in donut shapes. It might not look as perfect, but the taste will still be amazing!
Preparation Method
- Preheat your oven to 375°F (190°C). Grease your donut pan well to prevent sticking.
- In a large mixing bowl, combine the gluten-free flour, baking powder, sugar, and salt. Whisk well to ensure there are no lumps.
- In another bowl, whisk together the milk, melted butter, vanilla extract, and eggs. Make sure the butter has cooled slightly before adding it to avoid cooking the eggs.
- Pour the wet ingredients into the dry ingredients. Stir until just combined—be careful not to overmix, as this can make the donuts dense.
- Transfer the batter into a piping bag or a zip-top bag with the corner snipped off. Pipe the batter into the donut pan, filling each cavity about two-thirds full.
- Bake for 10-12 minutes, or until the donuts are golden and spring back when gently pressed. Avoid overbaking, as this can make them dry.
- Let the donuts cool in the pan for 5 minutes, then transfer them to a wire rack to cool completely.
- For the glaze, whisk together powdered sugar and a splash of milk until smooth. If it’s too thick, add a tiny bit more milk; if it’s too thin, add more powdered sugar.
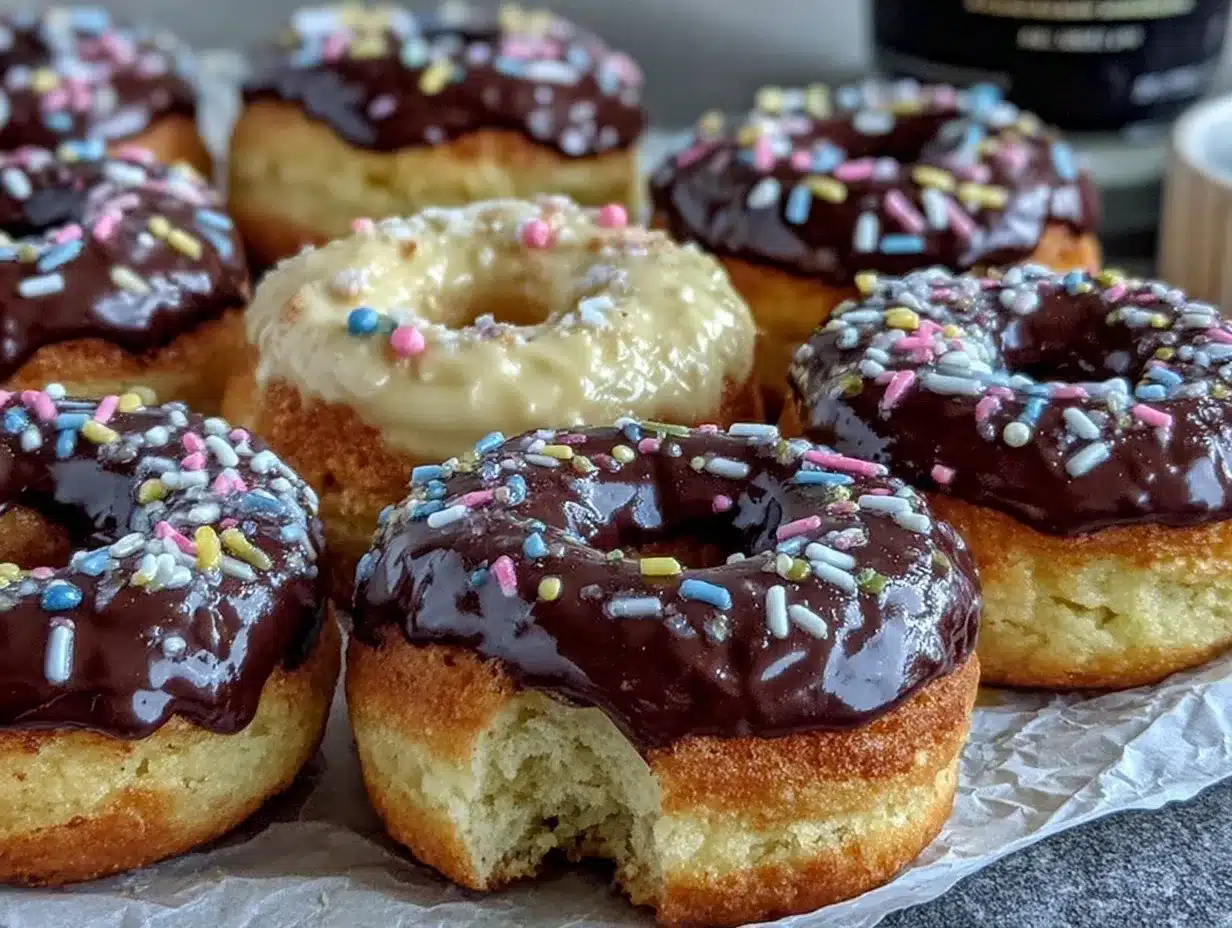
- Dip the tops of the cooled donuts into the glaze and place them back onto the wire rack. Decorate with sprinkles if desired.
And voilà—your fluffy gluten-free donuts are ready! Serve them fresh for the best texture and flavor.
Cooking Tips & Techniques
- Don’t Overmix: Overmixing the batter can lead to dense donuts. Stop mixing once the ingredients are just combined.
- Grease the Pan Thoroughly: Gluten-free batter can stick more than regular batter, so make sure to grease your pan well.
- Test for Doneness: Lightly press the surface of a donut—if it springs back, it’s ready. If not, give it another minute in the oven.
- Cool Completely: Allow the donuts to cool on a wire rack to prevent a soggy bottom and ensure the glaze sets properly.
- Use Room Temperature Ingredients: This helps the batter come together smoothly and ensures even baking.
Pro tip: If you’re feeling adventurous, try adding a pinch of nutmeg or cinnamon to the batter for a hint of spice.
Variations & Adaptations
- Dairy-Free Option: Replace milk with almond, soy, or coconut milk, and use coconut oil instead of butter.
- Chocolate Lovers: Add cocoa powder to the batter and top with a chocolate glaze for a decadent twist.
- Seasonal Flavors: In the fall, add pumpkin puree and a sprinkle of cinnamon and nutmeg. In summer, mix in fresh lemon zest for a citrusy punch.
- Low-Sugar Option: Swap granulated sugar for a sugar substitute like stevia or monk fruit sweetener.
- Nut-Free Version: Ensure there are no nut-based ingredients in your milk or flour blend for allergen safety.
Personally, I love adding a bit of orange zest to the glaze for a refreshing pop of flavor—it’s a game-changer!
Serving & Storage Suggestions
These donuts are best served slightly warm or at room temperature. Pair them with a cup of coffee, tea, or even a glass of cold milk for a classic touch.
- Refrigerator Storage: Store leftover donuts in an airtight container for up to 3 days. Let them come to room temperature before serving.
- Freezer Storage: Freeze unglazed donuts for up to 2 months. Thaw at room temperature and glaze just before serving.
- Reheating: Warm donuts in a 300°F (150°C) oven for 5-7 minutes for that fresh-baked taste.
One of my favorite things about these donuts is that their flavor gets even better after a few hours, as the glaze seeps into the fluffy texture. You might find yourself sneaking into the kitchen for seconds!
Nutritional Information & Benefits
Estimated values per donut:
- Calories: About 120
- Protein: 2g
- Carbohydrates: 18g
- Fat: 4g
Key ingredients like gluten-free flour and milk make these donuts suitable for those with gluten intolerance. With lower fat content compared to fried donuts, they’re a slightly lighter option without sacrificing flavor. Just be mindful of the sugar if you’re watching your intake.
Conclusion
These fluffy gluten-free donuts are worth every bite—and then some. Whether you stick to the classic recipe or experiment with fun variations, they’re guaranteed to win over everyone at your table. I love how versatile this recipe is, and it’s become a go-to in my kitchen for all kinds of occasions. So grab your donut pan, whip up a batch, and let the compliments roll in!
If you give this recipe a try, I’d love to hear how it turned out for you! Share your thoughts in the comments below or tag me in your donut creations on social media. Happy baking!
FAQs
Can I use a different type of flour for this recipe?
Yes, but make sure it’s a gluten-free all-purpose flour blend with xanthan gum for the best results.
Can I make these donuts without a donut pan?
Absolutely! You can pipe the batter onto a parchment-lined baking sheet in donut shapes or use a muffin tin as an alternative.
Can I fry these donuts instead of baking them?
This recipe is specifically designed for baking, so frying may affect the texture. For fried donuts, a different recipe may be better.
How can I make these donuts sugar-free?
You can replace the granulated sugar with a natural sugar substitute like stevia or erythritol.
Can I make these donuts ahead of time?
Yes! Store unglazed donuts in an airtight container for up to 3 days or freeze them for longer storage. Glaze them right before serving for the best results.
Pin This Recipe!
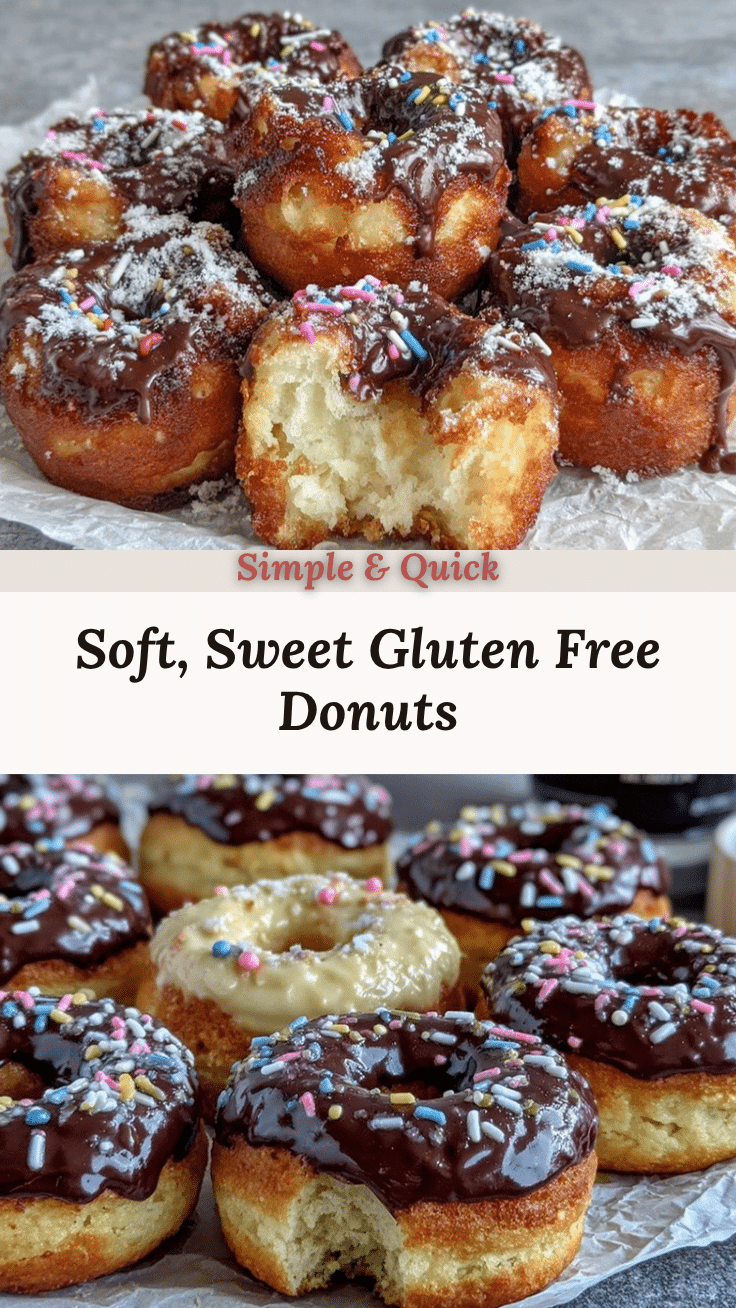
Fluffy Gluten Free Donuts Recipe – Best Homemade Treat
These fluffy gluten-free donuts are light, tender, and perfectly sweet, making them a delightful treat for any occasion.
- Prep Time: 10 minutes
- Cook Time: 12 minutes
- Total Time: 22 minutes
- Yield: 6 donuts 1x
- Category: Dessert
- Cuisine: American
Ingredients
- 1 cup gluten-free all-purpose flour (with xanthan gum)
- 1 teaspoon baking powder
- 1/4 cup granulated sugar
- 1/4 teaspoon salt
- 1/2 cup milk (regular, almond, or oat milk)
- 2 tablespoons unsalted butter, melted
- 1 teaspoon vanilla extract
- 1 large egg
- 1/2 cup powdered sugar (for glaze)
- 1–2 tablespoons milk (for glaze)
- Sprinkles (optional, for decorating)
Instructions
- Preheat your oven to 375°F (190°C). Grease your donut pan well to prevent sticking.
- In a large mixing bowl, combine the gluten-free flour, baking powder, sugar, and salt. Whisk well to ensure there are no lumps.
- In another bowl, whisk together the milk, melted butter, vanilla extract, and eggs. Make sure the butter has cooled slightly before adding it to avoid cooking the eggs.
- Pour the wet ingredients into the dry ingredients. Stir until just combined—be careful not to overmix, as this can make the donuts dense.
- Transfer the batter into a piping bag or a zip-top bag with the corner snipped off. Pipe the batter into the donut pan, filling each cavity about two-thirds full.
- Bake for 10-12 minutes, or until the donuts are golden and spring back when gently pressed. Avoid overbaking, as this can make them dry.
- Let the donuts cool in the pan for 5 minutes, then transfer them to a wire rack to cool completely.
- For the glaze, whisk together powdered sugar and a splash of milk until smooth. If it’s too thick, add a tiny bit more milk; if it’s too thin, add more powdered sugar.
- Dip the tops of the cooled donuts into the glaze and place them back onto the wire rack. Decorate with sprinkles if desired.
Notes
[‘Don’t overmix the batter to avoid dense donuts.’, ‘Grease the pan thoroughly to prevent sticking.’, ‘Test for doneness by lightly pressing the surface of a donut—if it springs back, it’s ready.’, ‘Cool completely on a wire rack to prevent soggy bottoms and ensure the glaze sets properly.’, ‘Use room temperature ingredients for smoother batter and even baking.’]
Nutrition
- Serving Size: 1 donut
- Calories: 120
- Fat: 4
- Carbohydrates: 18
- Protein: 2
Keywords: gluten-free donuts, baked donuts, easy dessert, homemade donuts, gluten-free baking