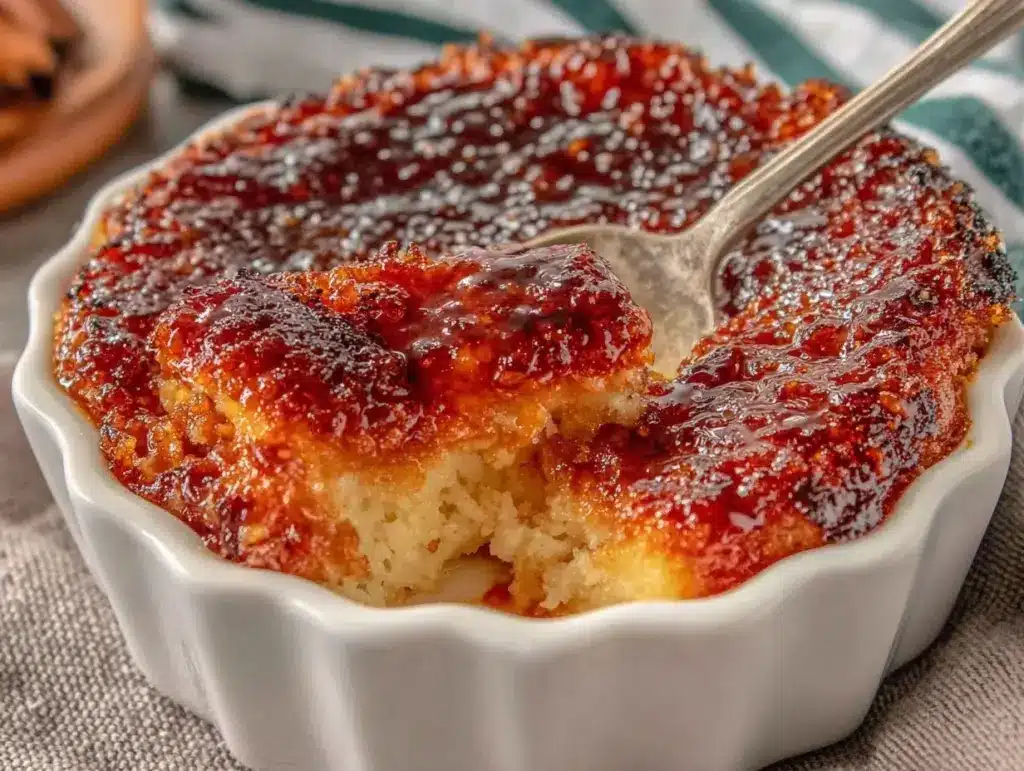
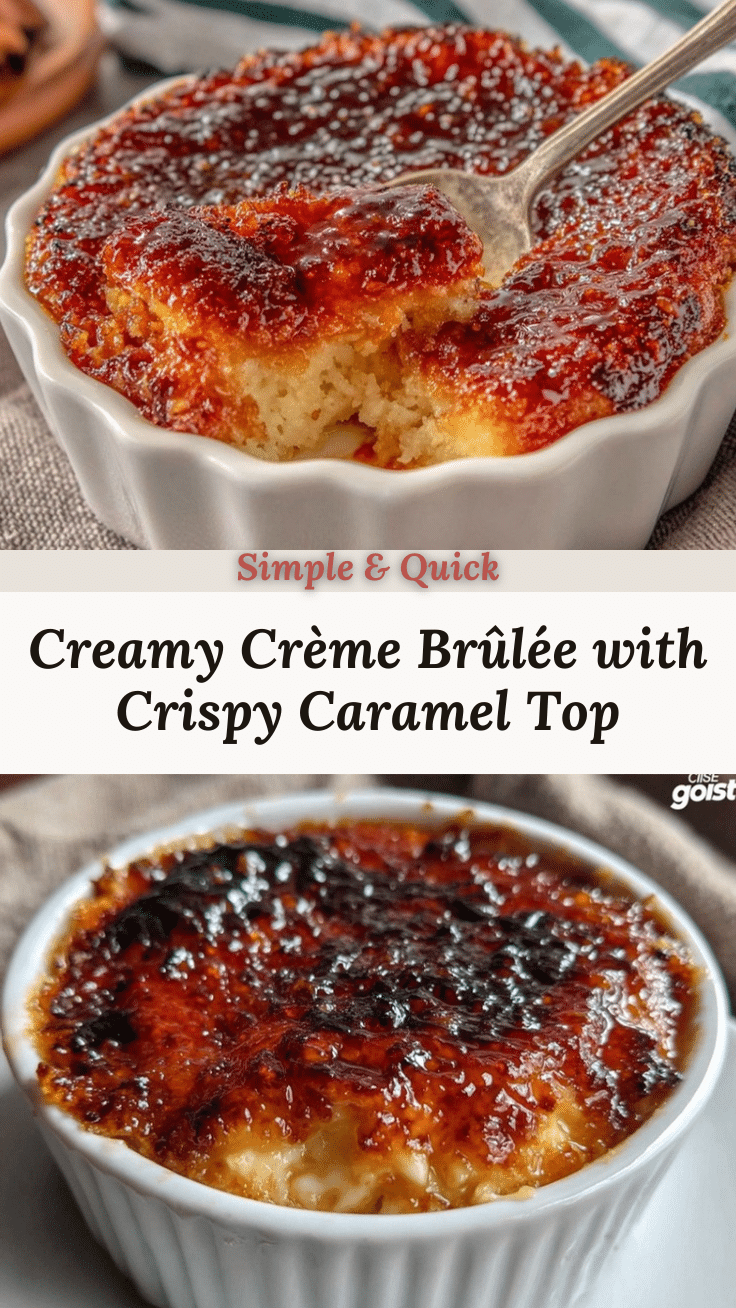
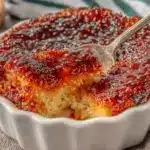
Let me tell you, the scent of rich vanilla and warm caramel wafting from the kitchen is enough to make anyone’s mouth water. The first time I baked this perfect crème brûlée with its iconic crispy caramelized top, I was instantly hooked—honestly, it was the kind of moment where you pause, take a deep breath, and just smile because you know you’re onto something truly special. Years ago, when I was knee-high to a grasshopper, my grandma used to make custards that felt like pure, nostalgic comfort, but this recipe? It’s a little different—dangerously easy, yet with that classic wow factor.
I stumbled upon this recipe on a rainy weekend, trying to recreate that golden crackly top I’d seen in fancy restaurants but never managed to get quite right myself. My family couldn’t stop sneaking spoonfuls off the cooling ramekins (and I can’t really blame them). Let’s face it, you know that satisfying sound when the caramelized sugar cracks under your spoon? That’s the magic of this perfect crème brûlée recipe with crispy caramelized top.
Perfect for impressing guests, brightening up your Pinterest dessert board, or simply treating yourself on a cozy night in, this recipe has become a staple for family gatherings and gifting. I’ve tested it multiple times in the name of research, of course, and trust me—you’re going to want to bookmark this one.
Why You’ll Love This Recipe
This perfect crème brûlée recipe with crispy caramelized top isn’t just any custard—it’s a blend of experience, love, and a few chef-tested tricks that make all the difference. Here’s why it stands out:
- Quick & Easy: Comes together in under an hour, perfect for last-minute dessert cravings or special occasions.
- Simple Ingredients: No fancy grocery trips needed; you likely already have vanilla, eggs, cream, and sugar in your kitchen.
- Perfect for Entertaining: Great for dinner parties, romantic dinners, or holiday celebrations where you want to impress effortlessly.
- Crowd-Pleaser: Always gets rave reviews from kids and adults alike, thanks to its silky custard and that irresistible caramel top.
- Unbelievably Delicious: The texture and flavor combo is next-level comfort food—smooth, creamy custard with a crunchy, caramelized crust that just melts in your mouth.
What makes this recipe the best version? Honestly, it’s the balance of just the right amount of vanilla bean infusion and the careful caramelization of sugar on top that gives it that perfect snap without burning. Instead of fussing with complicated steps, this recipe embraces straightforward techniques that anyone can master. It’s comfort food reimagined—classic, fast, and deeply satisfying.
This isn’t just a dessert; it’s a moment on a plate, the kind that makes you close your eyes after the first bite and smile. Whether you’re impressing guests or just treating yourself, this perfect crème brûlée with its crispy caramelized top ticks all the boxes.
What Ingredients You Will Need
This recipe uses simple, wholesome ingredients to deliver bold flavor and satisfying texture without the fuss. Most of these are pantry staples, but choosing quality items really pays off for that authentic crème brûlée taste.
- Heavy Cream – 2 cups (480 ml), full-fat for the richest, creamiest custard
- Vanilla Bean or Pure Vanilla Extract – 1 vanilla bean split and scraped, or 1 tablespoon high-quality vanilla extract (I personally prefer Nielsen-Massey for its deep vanilla flavor)
- Large Egg Yolks – 5, room temperature (the foundation of the custard’s richness)
- Granulated Sugar – 1/2 cup (100 g) for the custard, plus extra for caramelizing the top (about 2 tablespoons per ramekin)
- Salt – a pinch, to balance sweetness and enhance flavor
Optional:
- Turbinado or Demerara Sugar – can be swapped for granulated sugar on top if you want an extra crunchy, rustic caramel crust
- Citrus Zest – a little lemon or orange zest adds a bright twist if you want to experiment
- Almond Milk or Coconut Cream – for dairy-free adaptation (note: texture will be slightly different)
Look for fresh eggs and real vanilla bean pods if you want to go all out—the vanilla bean seeds really pack that extra punch. If you’re out of vanilla beans, a good-quality vanilla extract will work just fine and save a trip to the specialty store.
Equipment Needed
- Ramekins: 4 to 6 ceramic ramekins, about 6-ounce (180 ml) size – perfect for individual servings.
- Baking Dish or Roasting Pan: To create a water bath for gentle, even cooking. Make sure it’s large enough to hold all ramekins comfortably.
- Kitchen Torch: Essential for that perfect crispy caramelized top. If you don’t have one, the broiler method works but requires close attention.
- Mixing Bowls: For whisking egg yolks and sugar.
- Fine Mesh Sieve: To strain the custard mixture and get that silky smooth texture.
- Whisk: For blending ingredients evenly.
Personally, I started with a basic kitchen torch from a budget-friendly brand and it worked like a charm. Just make sure to clean the nozzle regularly to keep the flame steady. If you don’t have a torch, placing the ramekins under a hot broiler for a minute or two is a decent alternative, but watch carefully to avoid burning.
Preparation Method

- Preheat your oven to 325°F (160°C). Place a kettle of water on to boil for the water bath.
- Warm the cream: In a saucepan, combine the heavy cream and vanilla bean seeds plus the pod (or vanilla extract if using). Heat over medium heat just until it starts to simmer—don’t let it boil. Remove from heat and let it steep for about 15 minutes to infuse that lovely vanilla flavor.
- Whisk egg yolks and sugar: While the cream is steeping, whisk the egg yolks, granulated sugar, and a pinch of salt in a bowl until the mixture is pale and slightly thickened, about 2-3 minutes. This step is crucial to create that smooth custard base.
- Temper the eggs: Slowly pour the warm cream into the egg yolk mixture in a thin stream while whisking constantly. This prevents the eggs from scrambling and keeps the custard silky.
- Strain the mixture: Pour the custard through a fine mesh sieve into a clean bowl or large measuring cup. This removes any cooked egg bits or vanilla pod pieces for a perfectly smooth texture.
- Fill the ramekins: Divide the custard evenly among the ramekins, filling almost to the top but leaving a little space to prevent overflow.
- Prepare the water bath: Place ramekins in the baking dish or roasting pan. Carefully pour the boiling water around the ramekins until it reaches halfway up their sides. This gentle baking method helps prevent cracking and uneven cooking.
- Bake: Bake for 40-45 minutes, or until the custard is just set but still slightly wobbly in the center when gently shaken. Avoid overbaking; you want that creamy consistency.
- Cool and chill: Remove ramekins from the water bath and cool to room temperature. Then cover with plastic wrap and refrigerate for at least 4 hours or overnight. This step lets the custard firm up and flavors meld beautifully.
- Caramelize the top: Before serving, sprinkle about 1 to 2 teaspoons of granulated sugar evenly over each custard. Use a kitchen torch held a few inches away to melt and caramelize the sugar until golden brown and crispy. If you don’t have a torch, place ramekins under a preheated broiler for 1-2 minutes, watching like a hawk to avoid burning.
- Serve immediately: Let the caramelized top cool for a minute to harden, then serve for that satisfying crack when you dig in!
Pro tip: If your custard cracks or bubbles appear during baking, it usually means the oven temperature was too high or you overcooked it. Lower your temperature next time and keep an eye on the wobble test. Also, don’t skip chilling—the cold custard contrasts perfectly with the warm caramelized top.
Cooking Tips & Techniques
Getting that perfect crème brûlée with a crispy caramelized top can feel tricky, but these tips make it foolproof.
- Use room temperature eggs: They blend better with warm cream and reduce the chance of curdling.
- Steep vanilla: Letting the vanilla bean soak in warm cream intensifies the flavor, making it more fragrant than just adding extract.
- Don’t rush tempering: Adding hot cream slowly while whisking keeps the eggs from scrambling—trust me, I learned the hard way!
- Strain custard: It’s tempting to skip, but it makes a silky smooth texture that feels luxurious on your tongue.
- Water bath is key: The gentle, moist heat prevents cracking and ensures even cooking. Make sure your boiling water is hot when pouring.
- Watch your baking time: The custard should jiggle slightly in the center—if it’s too firm, it’ll be dry; too loose, it won’t set properly.
- Chill well: I usually refrigerate mine overnight. It helps flavors meld and makes caramelizing easier.
- Caramelize with care: Keep your torch moving in small circles to avoid burning spots. If using a broiler, watch like a hawk—you want golden, not blackened!
One time, I left the custards in the oven too long and ended up with something more like baked eggs (not a great look). But after a few tries, this method became second nature. Patience is your friend here, and the results are worth every minute.
Variations & Adaptations
Want to mix things up? Here are a few ideas to tweak this perfect crème brûlée recipe with crispy caramelized top:
- Chocolate Crème Brûlée: Add 2 ounces (60 g) of melted dark chocolate to the cream mixture before tempering. It adds a rich, decadent twist.
- Lavender or Earl Grey Infused: Steep dried lavender or Earl Grey tea bags with the cream for 15 minutes for a floral or fragrant note.
- Dairy-Free Version: Substitute heavy cream with full-fat coconut milk or coconut cream. The custard texture changes slightly but remains delightfully creamy.
- Low-Sugar Option: Use a sugar substitute like erythritol for the custard and top, but be mindful the caramelization might differ.
- Seasonal Fruit Toppings: Instead of just caramelized sugar, sprinkle finely chopped fresh berries or stone fruits on top after torching for a fresh contrast.
I tried the lavender version once for a dinner party—it was a hit and felt so fancy without extra effort. Feel free to experiment with your favorite flavors or dietary needs.
Serving & Storage Suggestions
Serve your perfect crème brûlée chilled with that crispy caramelized top freshly torched for the best texture contrast. A small mint leaf or a few fresh berries on the side add color and a pop of freshness.
This dessert pairs wonderfully with a glass of dessert wine like Sauternes, or a cup of strong espresso to balance the sweetness. For a casual twist, serve alongside fresh fruit salad.
Store any leftovers tightly covered in the refrigerator for up to 3 days. The caramelized top will soften over time, so it’s best to torch the sugar right before serving again. Avoid freezing as custard texture suffers.
Interestingly, flavors tend to deepen after a day in the fridge, so if you can resist, letting it rest overnight will reward you with an even better-tasting crème brûlée.
Nutritional Information & Benefits
Each serving of this perfect crème brûlée with crispy caramelized top contains approximately:
| Calories | 350-400 kcal |
|---|---|
| Fat | 30 g (mostly from heavy cream) |
| Carbohydrates | 20 g (mainly sugars) |
| Protein | 6 g |
This dessert is rich and indulgent, thanks largely to the heavy cream and egg yolks, which provide essential fats and protein. Vanilla bean adds antioxidants, while the egg yolks supply vitamin A and choline. If you’re mindful of sugar intake, you can adjust the amount or swap for alternative sweeteners as needed.
While not a low-calorie treat, it fits well into a balanced diet when enjoyed occasionally. Personally, I believe dessert is part of wellness too—joy from a beautifully made dish is good for the soul!
Conclusion
This perfect crème brûlée with crispy caramelized top is worth every step and every minute it takes to prepare. It’s creamy, dreamy, and that crackly caramel is pure satisfaction on a spoon. Customize it with your favorite flavors or keep it classic—either way, it’s a crowd-pleaser that never disappoints.
I love this recipe because it brings a bit of French elegance into my kitchen without complicated fuss. Plus, watching friends and family crack through the caramel top never gets old.
Give it a try, share your adaptations in the comments, and don’t forget to pass it along to your dessert-loving friends. Trust me, once you make this, it’s going to be your go-to for special occasions (or just because!). Happy cooking!
FAQs
Can I make crème brûlée ahead of time?
Absolutely! You can prepare the custard and chill it overnight. Just caramelize the sugar top right before serving for the best texture.
What if I don’t have a kitchen torch?
No worries! Place ramekins under the broiler for 1-2 minutes, watching closely to prevent burning. Move ramekins around for even caramelization.
Why did my custard crack or curdle?
This usually happens if the oven temperature is too high or eggs are added too quickly to hot cream. Temper the eggs slowly and bake gently in a water bath.
Can I use milk instead of heavy cream?
Using milk will result in a thinner custard that might not set as well. Heavy cream is best for that rich, silky texture.
How do I get a crispy top every time?
Use a kitchen torch to evenly caramelize sugar on top. Make sure the sugar layer is thin and even, and keep the torch moving to avoid burning.
Pin This Recipe!
Perfect Crème Brûlée Recipe Easy Steps for Crispy Caramelized Top
A rich and creamy classic French dessert featuring a silky custard base topped with a crispy caramelized sugar crust. This easy recipe delivers perfect results every time with simple ingredients and straightforward techniques.
- Prep Time: 15 minutes
- Cook Time: 45 minutes
- Total Time: 1 hour
- Yield: 4 to 6 servings 1x
- Category: Dessert
- Cuisine: French
Ingredients
- 2 cups (480 ml) heavy cream, full-fat
- 1 vanilla bean, split and scraped, or 1 tablespoon pure vanilla extract
- 5 large egg yolks, room temperature
- 1/2 cup (100 g) granulated sugar for custard
- Extra granulated sugar for caramelizing the top (about 1 to 2 teaspoons per ramekin)
- Pinch of salt
- Optional: Turbinado or Demerara sugar for caramelizing
- Optional: Lemon or orange zest
- Optional: Almond milk or coconut cream for dairy-free adaptation
Instructions
- Preheat your oven to 325°F (160°C). Place a kettle of water on to boil for the water bath.
- In a saucepan, combine the heavy cream and vanilla bean seeds plus the pod (or vanilla extract if using). Heat over medium heat just until it starts to simmer—do not boil. Remove from heat and let steep for about 15 minutes.
- While the cream is steeping, whisk the egg yolks, granulated sugar, and a pinch of salt in a bowl until pale and slightly thickened, about 2-3 minutes.
- Slowly pour the warm cream into the egg yolk mixture in a thin stream while whisking constantly to temper the eggs.
- Strain the custard mixture through a fine mesh sieve into a clean bowl or large measuring cup.
- Divide the custard evenly among 4 to 6 ramekins, filling almost to the top but leaving a little space.
- Place ramekins in a baking dish or roasting pan. Carefully pour boiling water around the ramekins until it reaches halfway up their sides.
- Bake for 40-45 minutes, or until the custard is just set but still slightly wobbly in the center when gently shaken.
- Remove ramekins from the water bath and cool to room temperature. Cover with plastic wrap and refrigerate for at least 4 hours or overnight.
- Before serving, sprinkle about 1 to 2 teaspoons of granulated sugar evenly over each custard.
- Use a kitchen torch held a few inches away to melt and caramelize the sugar until golden brown and crispy. Alternatively, place ramekins under a preheated broiler for 1-2 minutes, watching carefully to avoid burning.
- Let the caramelized top cool for a minute to harden, then serve immediately.
Notes
Use room temperature eggs to blend better with warm cream and reduce curdling. Steep vanilla bean in warm cream for best flavor. Temper eggs slowly to avoid scrambling. Strain custard for silky smooth texture. Use a water bath to prevent cracking and ensure even cooking. Chill custard overnight for best texture and flavor. Caramelize sugar carefully with a torch or broiler to avoid burning.
Nutrition
- Serving Size: 1 ramekin (about 6 o
- Calories: 350400
- Fat: 30
- Carbohydrates: 20
- Protein: 6
Keywords: crème brûlée, custard, caramelized sugar, vanilla, dessert, French dessert, creamy custard, easy dessert