
Introduction
Scrambling around the kitchen while the clock ticks down to bedtime, I realized the ice cream maker was nowhere to be found—probably buried under a mountain of holiday gear in the back of the pantry. Half a can of sweetened condensed milk staring back at me, the caramel sauce simmering gently on the stove, and exactly zero freezer space left for a complicated dessert. That’s when this easy creamy no-churn salted caramel ice cream came together, almost by accident, born from my need for a quick, fuss-free treat that still felt special.
At first, I wasn’t convinced that skipping the ice cream machine would actually work. But honestly, the smooth, luscious texture caught me off guard—and the salted caramel ribbons? Pure magic. It’s the kind of recipe that sneaks up on you, offering a little comfort after a hectic day. I kept thinking about how this no-churn treat became my go-to, especially when I needed something indulgent without the usual hassle.
This recipe stuck around in my rotation because it’s a sweet little escape that doesn’t ask for much time or fancy gadgets. Once you get the hang of folding in that whipped cream just right, you’re rewarded with something that tastes like it took hours but really came together in a flash. If you’re juggling a busy schedule or just want a homemade ice cream without the drama, this salted caramel ice cream might just become your new favorite too.
Why You’ll Love This Recipe
Honestly, making ice cream from scratch can feel intimidating, but this recipe is different—tested over and over in my kitchen, it’s foolproof and friendly for even the most reluctant cooks. Here’s why this easy creamy no-churn salted caramel ice cream wins big:
- Quick & Easy: Ready to freeze in about 15 minutes and perfect for last-minute dessert emergencies or weekend treats.
- Simple Ingredients: You probably have most of them already, including heavy cream, sweetened condensed milk, and a good-quality caramel sauce.
- Perfect for Any Occasion: Whether it’s a backyard BBQ, a cozy movie night, or a quick summer dessert, this ice cream fits right in.
- Crowd-Pleaser: The salted caramel swirl adds that perfect sweet-salty twist that everyone raves about, from kids to adults.
- Unbelievably Delicious: Creamy, smooth, and rich without the fuss of churning—there’s nothing artificial here, just honest flavor.
What makes this no-churn salted caramel ice cream stand out is the balance of textures and flavors. The gentle folding technique keeps the cream fluffy, while the salted caramel drizzle adds pockets of gooey, buttery goodness. It’s not just another ice cream—it’s the kind that reminds you why homemade beats store-bought every time. Plus, I love how easy it is to customize it, whether you want to add a pinch more salt or swirl in some chopped pecans for crunch.
What Ingredients You Will Need
This recipe calls for simple, wholesome ingredients that work together to create a creamy, luscious ice cream without any complicated steps. Most of these are pantry staples or easy to find at any grocery store, making it a perfect last-minute dessert option.
- Heavy Whipping Cream (2 cups / 480 ml): The backbone for that rich, creamy texture. Use cold for best whipping results.
- Sweetened Condensed Milk (1 can, 14 oz / 397 g): Adds sweetness and creaminess without needing to add granulated sugar separately. I prefer Nestlé for consistency.
- Salted Caramel Sauce (¾ cup / 180 ml): You can use store-bought or homemade. I made a quick batch with brown sugar, butter, cream, and a pinch of sea salt—fresh tastes unbeatable.
- Vanilla Extract (1 teaspoon): A splash to round out the flavors and add warmth.
- Sea Salt (¼ teaspoon): Just a pinch for that classic salted caramel punch.
Optional add-ins if you want to get creative:
- Chopped toasted pecans or walnuts (½ cup / 60 g) for crunch
- Dark chocolate chips for a subtle contrast
- Swirls of extra caramel sauce drizzled on top before freezing
If you’re looking to make this dairy-free, swap the heavy cream for coconut cream and use a vegan caramel sauce. For a lower sugar version, try a sugar-free caramel sauce and unsweetened condensed milk alternatives, though the texture might vary slightly.
Equipment Needed
Luckily, this easy creamy no-churn salted caramel ice cream doesn’t require fancy kitchen gadgets, but a few basic tools will make your life easier:
- Mixing Bowls: A large bowl for whipping cream and another for folding ingredients.
- Electric Hand Mixer or Stand Mixer: Essential for whipping the heavy cream to stiff peaks. You can use a whisk, but it’s a serious workout.
- Spatula: For gentle folding to keep that airy texture.
- Loaf Pan or Freezer-Safe Container: For freezing the ice cream. I like a metal loaf pan because it helps the ice cream freeze faster and scoops easier.
- Measuring Cups and Spoons: For accuracy, especially with the caramel and cream.
You don’t need an ice cream maker (thank goodness), but if you have one, it’s fun to experiment with flavors. And if you’re worried about your whipped cream bowl not being cold enough, pop it in the freezer for 10-15 minutes before whipping—it makes a big difference. For budget-friendly options, a sturdy plastic bowl and a good hand mixer work just fine.
Preparation Method
- Chill your mixing bowl and beaters: Place the bowl and mixer attachments in the fridge for about 15 minutes. Cold equipment whips cream better and faster.
- Whip the heavy cream: Pour 2 cups (480 ml) of cold heavy whipping cream into the chilled bowl. Beat on medium-high speed until soft peaks form, about 3–4 minutes. The cream should hold its shape but still be soft enough to fold.
- Combine sweetened condensed milk and vanilla: In a separate bowl, mix 1 can (14 oz / 397 g) of sweetened condensed milk with 1 teaspoon vanilla extract and ¼ teaspoon sea salt. This mixture adds sweetness and a touch of saltiness that complements the caramel.
- Gently fold the sweetened condensed milk into the whipped cream: Use a spatula to fold the condensed milk mixture into the whipped cream. Do this slowly and carefully to keep as much air in the mixture as possible. This step takes about 2 minutes.
- Swirl in the salted caramel sauce: Pour ¾ cup (180 ml) of salted caramel sauce over the mixture. Use the spatula to create soft folds and swirls—don’t overmix; you want visible caramel ribbons.
- Optional add-ins: If using chopped nuts or chocolate chips, gently fold them in now to evenly distribute without deflating the mixture.
- Transfer to freezer-safe container: Spoon the mixture into a loaf pan or a container with a tight-fitting lid. Smooth the top with your spatula, and for an extra touch, drizzle a little more caramel sauce on top for a pretty finish.
- Freeze: Cover the container with plastic wrap or a lid and freeze for at least 6 hours, preferably overnight. The ice cream will firm up nicely but stay creamy and scoopable.
- Serving tip: Let the ice cream sit at room temperature for 5 minutes before scooping for easier serving and creamier texture.
Watch out for overmixing when folding in the caramel; if you stir too much, the ice cream can become dense. Also, if your caramel sauce is too thick, warm it gently before swirling in so it blends beautifully. A quick taste test during preparation helps to adjust the salt level—sometimes I add a tiny bit more sea salt on top just before freezing.
Cooking Tips & Techniques
Making no-churn ice cream sounds simple, but a few tricks can make a big difference in texture and flavor. Here’s what I’ve learned through trial, error, and lots of taste testing:
- Whip cream just right: Aim for stiff peaks but not over-whipped. Over-whipped cream turns grainy and loses that lightness that makes no-churn ice cream so dreamy.
- Fold gently: Folding is key to preserving air. Use a spatula to fold in the condensed milk and caramel sauce with slow, deliberate movements. No vigorous stirring!
- Caramel consistency matters: Too thick, and it won’t swirl well; too thin, and it sinks. If your caramel is store-bought and stiff, heat it for a few seconds in the microwave.
- Salt balance: Salted caramel is all about contrast. Taste as you go, and don’t be shy with the sea salt—just enough to cut through the sweetness.
- Freeze time: Resist the urge to dig in too early. The texture firms up over several hours, so patience pays off here.
- Multitasking suggestion: While the ice cream is freezing, you can prep a quick appetizer like creamy herb and garlic cheese ball bites to serve alongside your dessert for guests.
Variations & Adaptations
Want to switch things up? This no-churn salted caramel ice cream is super adaptable for different tastes and diets:
- Nutty Caramel Crunch: Add toasted pecans or walnuts for a crunchy texture that pairs perfectly with the creamy base.
- Chocolate Swirl: Melt a handful of dark chocolate chips and swirl into the ice cream along with the caramel for a chocolate-caramel duo.
- Dairy-Free Version: Use coconut cream in place of heavy cream and a vegan caramel sauce. It’s a bit lighter but still indulgent.
- Spiced Caramel: Stir in a pinch of cinnamon or cardamom into the caramel sauce for a warm, cozy flavor twist.
- Salted Caramel Coffee: Mix a teaspoon of instant espresso powder into the condensed milk before folding it in for a subtle coffee flavor that wakes up the palate.
Personally, I’ve tried folding in bits of pretzel for a salty crunch that’s addictive. Whatever variation you choose, just keep the folding gentle to maintain that airy texture. And if you’re curious about pairing this with other homemade treats, something like puff pastry baked brie with cranberry chutney balances savory and sweet beautifully alongside this ice cream.
Serving & Storage Suggestions
This salted caramel ice cream is best served straight from the freezer after resting for a few minutes at room temperature. The texture should be creamy and soft enough to scoop easily, not rock-hard.
For a simple presentation, serve scoops in chilled bowls with a drizzle of extra caramel sauce and a sprinkle of flaky sea salt on top. It also pairs wonderfully with warm desserts like apple crisp or alongside rich chocolate brownies for a crowd-pleasing combo.
Store leftovers in an airtight container to prevent ice crystals. It keeps well in the freezer for up to 2 weeks, though the caramel swirl might settle a bit over time. To refresh it, stir gently with a spoon after thawing slightly.
Reheating is a no-go here, but letting the ice cream soften for 5-10 minutes before serving makes scooping effortless and brings out the flavors. Over time, the caramel deepens in richness, so it’s a treat that gets even better the next day.
Nutritional Information & Benefits
This no-churn salted caramel ice cream isn’t exactly a health food, but it’s made with simple, real ingredients—no artificial stabilizers or preservatives like you’d find in store-bought versions. A half-cup serving (about 120 g) roughly contains:
| Calories | 280 |
|---|---|
| Fat | 18 g |
| Saturated Fat | 11 g |
| Sugar | 27 g |
| Protein | 3 g |
Key benefits come from the heavy cream, which provides fat-soluble vitamins like A and D, and the caramel adds a touch of sea salt for electrolyte balance. Use quality ingredients for the best flavor and minimal additives.
If you need gluten-free dessert options, this recipe is naturally gluten-free, making it a safe choice for those with sensitivities. For anyone watching sugar intake, consider reducing the caramel or using a sugar-free alternative, but keep in mind it may affect texture.
Conclusion
This easy creamy no-churn salted caramel ice cream is one of those recipes I keep close, especially for those days when I want a homemade dessert that feels special but is shockingly simple. It’s proof that you don’t need a fancy machine or hours of effort to create something indulgent and comforting.
Feel free to tweak the saltiness, add your favorite mix-ins, or pair it with a warm dessert for a balanced flavor experience. I love how forgiving this recipe is, making it perfect for both beginners and seasoned home cooks. Plus, it’s a sweet way to impress friends without the stress.
If you try it, I’d love to hear about your variations or any twists you put on it. Sharing these little kitchen victories always makes the process more enjoyable. Here’s to sweet moments and creamy treats that make life just a bit sweeter.
Frequently Asked Questions
Can I make this salted caramel ice cream without an electric mixer?
You can whip the cream by hand using a whisk, but it will take longer and require some elbow grease. For best results and fluffiest texture, an electric mixer is recommended.
How long can I store no-churn ice cream in the freezer?
Store it in an airtight container for up to 2 weeks. After that, texture and flavor can start to degrade, especially the caramel swirl.
Can I substitute the salted caramel with another flavor?
Absolutely! You can use chocolate sauce, fruit compote, or peanut butter swirl for different flavor profiles. Just fold gently to maintain the creaminess.
Why is my no-churn ice cream icy or hard?
Overmixing or not folding gently can cause ice crystals. Also, make sure to freeze it in a shallow container and cover tightly to prevent freezer burn.
Is this recipe suitable for vegans?
Not as written, but you can substitute coconut cream for heavy cream and use a vegan caramel sauce to make it vegan-friendly.
Pin This Recipe!
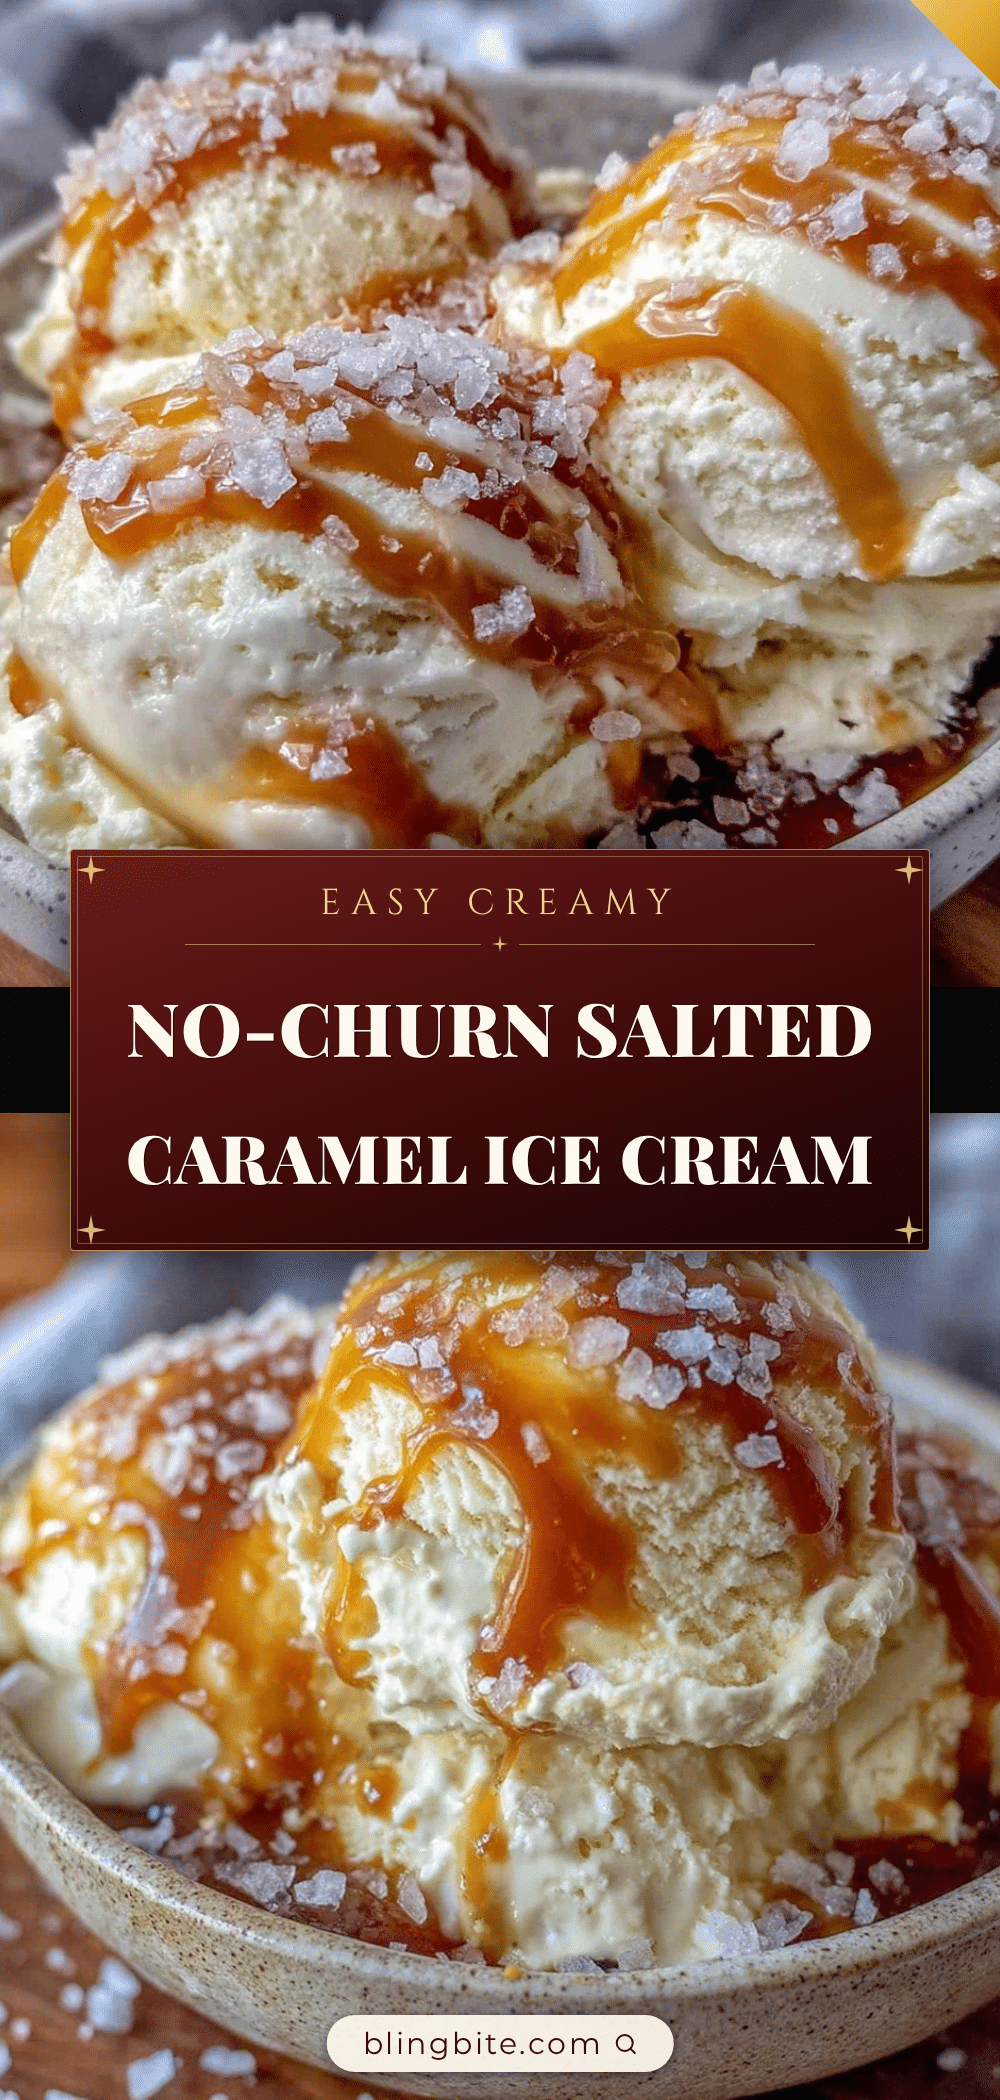
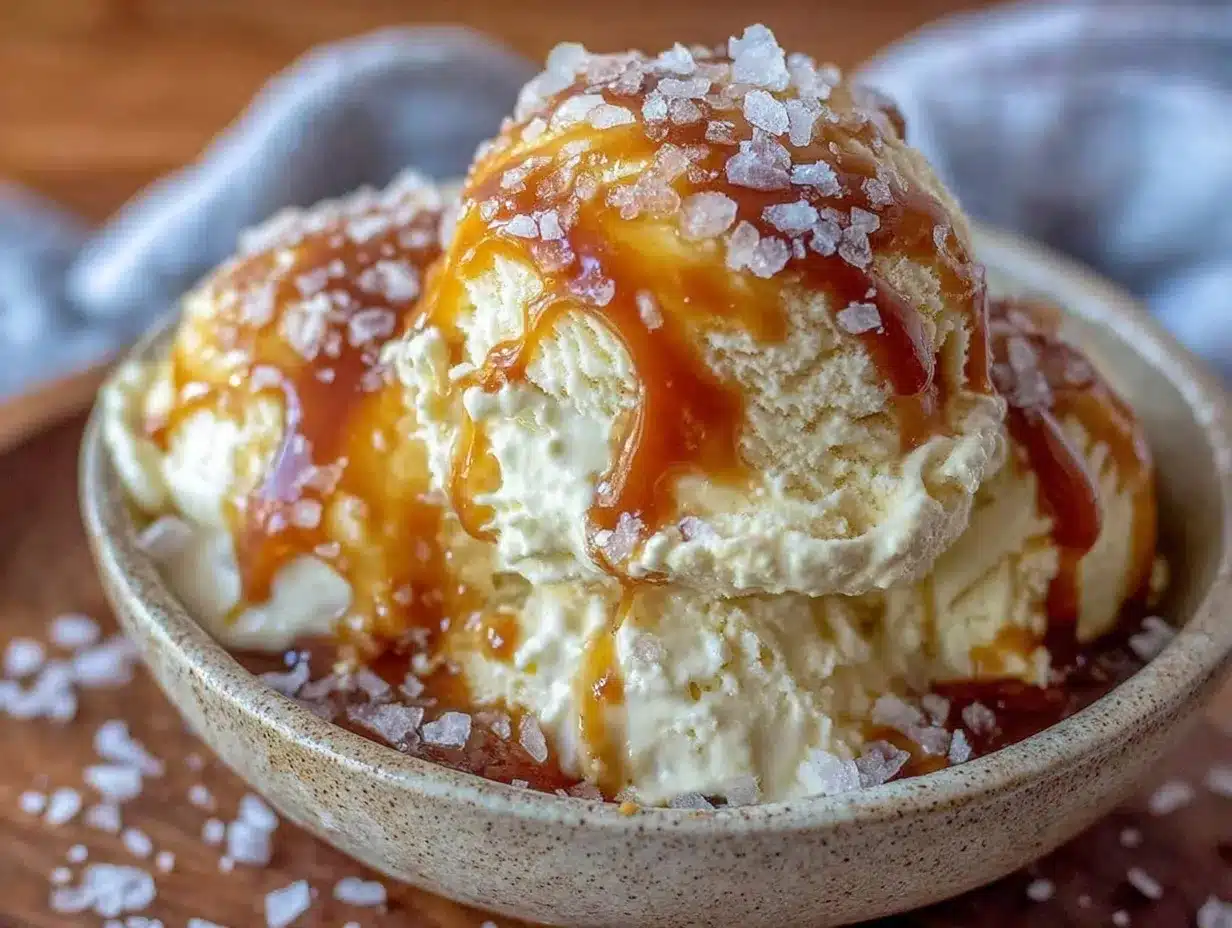
Easy Creamy No-Churn Salted Caramel Ice Cream

A quick and fuss-free no-churn ice cream recipe featuring a smooth, creamy texture with luscious salted caramel ribbons. Perfect for busy schedules and last-minute desserts.
- Prep Time: 15 minutes
- Cook Time: 0 minutes
- Total Time: 6 hours 15 minutes
- Yield: 8 servings 1x
- Category: Dessert
- Cuisine: American
Ingredients
- 2 cups (480 ml) heavy whipping cream, cold
- 1 can (14 oz / 397 g) sweetened condensed milk
- 3/4 cup (180 ml) salted caramel sauce (store-bought or homemade)
- 1 teaspoon vanilla extract
- 1/4 teaspoon sea salt
- Optional: 1/2 cup (60 g) chopped toasted pecans or walnuts
- Optional: dark chocolate chips
- Optional: extra caramel sauce for drizzling
Instructions
- Chill your mixing bowl and beaters in the fridge for about 15 minutes.
- Pour 2 cups (480 ml) of cold heavy whipping cream into the chilled bowl. Beat on medium-high speed until soft peaks form, about 3–4 minutes.
- In a separate bowl, mix 1 can (14 oz / 397 g) sweetened condensed milk with 1 teaspoon vanilla extract and 1/4 teaspoon sea salt.
- Gently fold the sweetened condensed milk mixture into the whipped cream using a spatula, taking about 2 minutes to keep as much air as possible.
- Pour 3/4 cup (180 ml) salted caramel sauce over the mixture and create soft folds and swirls without overmixing to keep visible caramel ribbons.
- If using, gently fold in chopped nuts or chocolate chips now.
- Spoon the mixture into a loaf pan or freezer-safe container. Smooth the top and drizzle extra caramel sauce on top if desired.
- Cover with plastic wrap or a lid and freeze for at least 6 hours, preferably overnight.
- Before serving, let the ice cream sit at room temperature for 5 minutes for easier scooping and creamier texture.
Notes
Use cold equipment for best whipping results. Fold ingredients gently to preserve airiness. Warm caramel sauce slightly if too thick for better swirling. Let ice cream soften 5 minutes before serving for easier scooping. Store in airtight container up to 2 weeks. For dairy-free, substitute heavy cream with coconut cream and use vegan caramel sauce.
Nutrition
- Serving Size: 1/2 cup (about 120 g
- Calories: 280
- Sugar: 27
- Fat: 18
- Saturated Fat: 11
- Carbohydrates: 27
- Protein: 3
Keywords: no-churn ice cream, salted caramel, easy dessert, homemade ice cream, quick ice cream recipe, creamy ice cream, no ice cream maker


