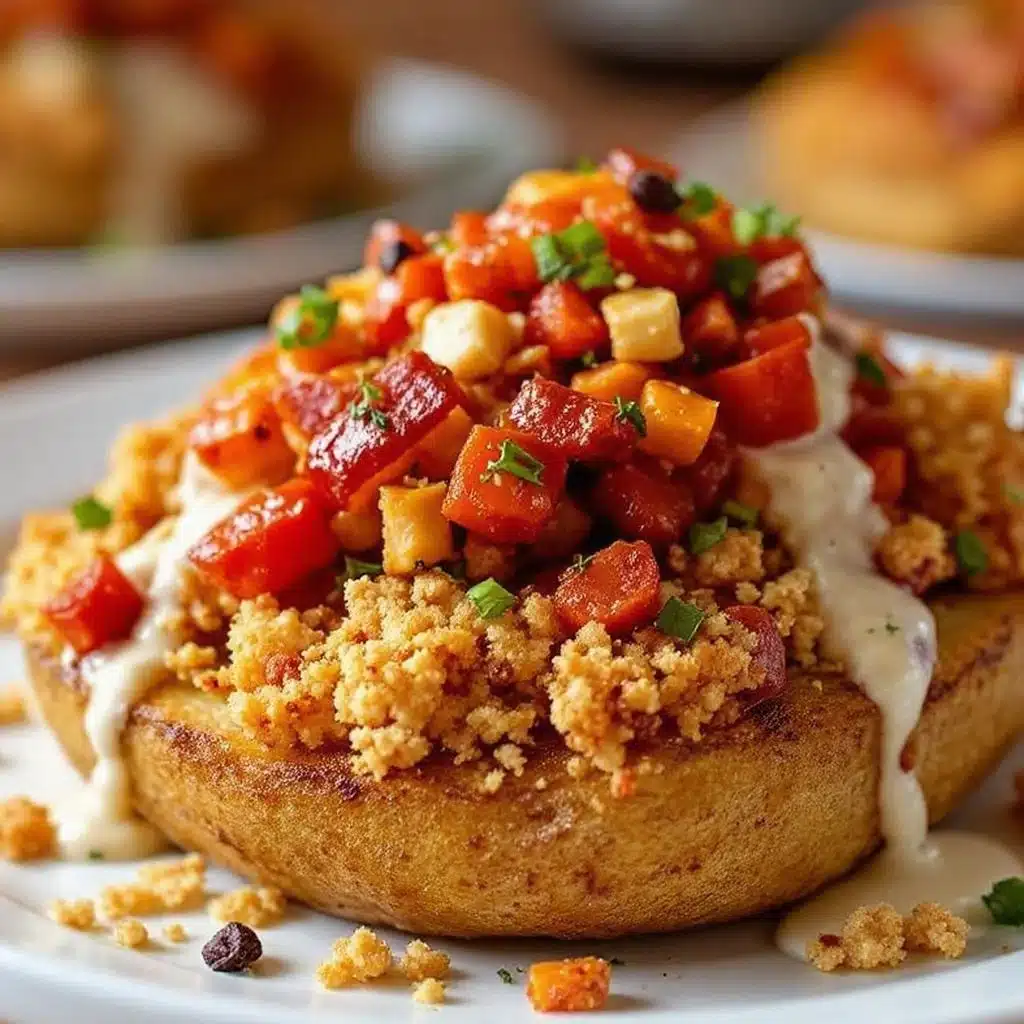
Third time this season I’d set up the full spread — sheet pans lined with foil, a cooler full of toppings, and a bag of russets that I’d scrubbed so clean they practically gleamed. But something was still off. The potatoes came out fine, sure. But fine doesn’t win tailgate season. Fine is what you eat standing over the kitchen sink, not what you bring to a parking lot where everyone’s watching what lands on their paper plate.
What I wanted was a potato bar that felt like an event. Something where people actually stop mid-conversation to go back for seconds. Where the toppings aren’t an afterthought but the whole point. And honestly? It took me three tailgates to figure out what I was doing wrong. I was treating the potatoes like the main event. But in a loaded tailgate baked potato bar, the potato is just the vehicle. The toppings? That’s where the magic lives.
So I started over. I dialed in the baking method — crispy skin, fluffy interior, no foil wrapping nonsense. Then I went all in on the toppings: sharp cheddar, crispy bacon, tangy sour cream, fresh chives, and a few curveballs that made people actually ask for the recipe. By the fourth game, I had a lineup that felt like a full meal, not just a side dish. And honestly? It’s the kind of spread that makes you forget about the score entirely.
Why You’ll Love This Recipe
This loaded tailgate baked potato bar isn’t just another game day snack. It’s a full-on interactive meal that feeds a crowd without making you spend the whole game in the kitchen. Here’s why it works:
- Completely Customizable — Everyone builds their own plate. No fussing over dietary preferences or picky eaters.
- Make-Ahead Friendly — Bake the potatoes ahead, prep the toppings, and assemble on site. Minimal last-minute work.
- Crowd-Pleasing Variety — From classic loaded to spicy buffalo to vegetarian-friendly options, there’s something for everyone.
- Budget-Friendly — Potatoes are cheap. Toppings stretch far. You feed a dozen people for under $30.
- No Fancy Equipment Needed — Just an oven (or grill), a cutting board, and some bowls. Perfect for tailgates, potlucks, or casual parties.
What makes this version different? I spent weeks testing potato varieties, baking temperatures, and topping combinations. The result? Russet potatoes baked at 425°F until the skin crackles and the inside is pillowy soft. A topping lineup that balances creamy, crunchy, salty, and tangy. And a few unexpected additions — like pickled jalapeños and a drizzle of ranch — that take it from basic to unforgettable. This isn’t just another potato bar. It’s the one people text you about the next day.
What Ingredients You Will Need
This recipe uses simple, everyday ingredients that come together to create something genuinely impressive. The beauty of a baked potato bar is that the ingredients are flexible — but the quality of each component matters. Here’s what you need to build the best loaded tailgate baked potato bar:
For the Potatoes
- 8 large russet potatoes (scrubbed clean, dried thoroughly) — Russets are the gold standard for baking. Their high starch content gives you that fluffy, light interior. Look for potatoes that are firm, evenly shaped, and free of green spots or sprouts.
- 2 tablespoons olive oil (or avocado oil) — This helps the skin crisp up beautifully. Don’t skip it.
- 1 teaspoon kosher salt — For seasoning the skins before baking. Use coarse salt for best texture.
- Optional: 1/2 teaspoon garlic powder — Rub this into the skins for extra flavor. Trust me on this one.
Classic Toppings (The Essentials)
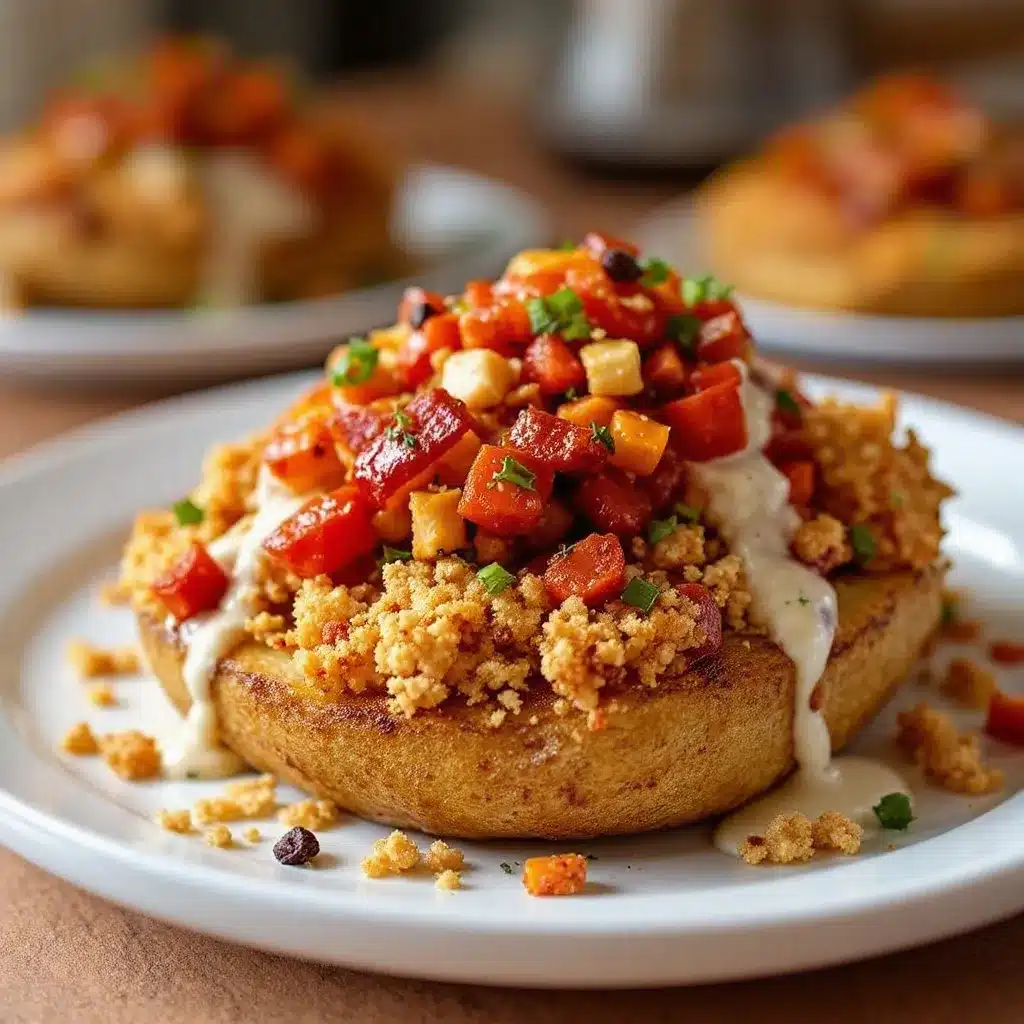
- 1 1/2 cups sharp cheddar cheese (shredded fresh, not pre-shredded) — Pre-shredded cheese has anti-caking agents that prevent it from melting smoothly. Grate your own for that gooey, stretchy texture.
- 1 cup sour cream (full-fat preferred) — Adds tangy richness. Greek yogurt works as a lighter substitute.
- 8 slices bacon (cooked until crispy, crumbled) — Thick-cut bacon gives you more texture. Cook it ahead and crumble just before serving.
- 4 green onions (sliced thin, both white and green parts) — Freshness and color. Don’t skip the green tops.
- 4 tablespoons unsalted butter (softened) — A pat of butter inside each potato before adding toppings is non-negotiable.
Go-Big Toppings (The Game Changers)
- 1/2 cup pickled jalapeños (drained, chopped) — Adds acidity and heat that cuts through the richness. I recommend La Costeña brand for consistent heat and crunch.
- 1/2 cup cooked pulled pork (optional, but incredible) — Leftover pulled pork from a best apple cider pulled pork sliders recipe works perfectly here.
- 1/4 cup ranch dressing (for drizzling) — Homemade or store-bought, it adds a creamy, herby finish.
- 1/4 cup chopped fresh chives — More delicate than green onions, with a mild onion flavor.
- 1 avocado (diced, tossed with lime juice) — For creamy, fresh contrast.
Substitution Guidance
- Dairy-Free: Use vegan butter, dairy-free sour cream, and nutritional yeast in place of cheese.
- Vegetarian: Skip the bacon and pulled pork. Add roasted chickpeas or black beans for protein.
- Gluten-Free: This recipe is naturally gluten-free. Just double-check your bacon and ranch dressing labels.
- Lower Fat: Use Greek yogurt instead of sour cream, turkey bacon instead of pork bacon, and reduce the butter.
Equipment Needed
You don’t need a lot of fancy gear to pull off a great baked potato bar. Here’s what actually matters:
- Baking sheet (rimmed, 18×13-inch) — A heavy-duty sheet pan prevents warping and ensures even heat distribution. I use Nordic Ware brand and they’ve held up for years.
- Parchment paper or foil — For easy cleanup. Foil works, but parchment gives better air circulation around the potatoes.
- Cooling rack (fits inside the baking sheet) — This is the secret to crispy skin. Elevating the potatoes allows hot air to circulate underneath, preventing soggy bottoms.
- Chef’s knife and cutting board — For prepping toppings. A sharp knife makes quick work of green onions and jalapeños.
- Small mixing bowls — For organizing toppings. I use a set of nesting bowls that stack for easy transport.
- Potato masher or fork — For fluffing the insides before adding toppings.
- Aluminum foil — For wrapping potatoes if you’re transporting them to a tailgate. But don’t wrap them during baking — that steams the skin.
Budget-Friendly Tip: If you don’t have a cooling rack that fits your baking sheet, you can flip the potatoes halfway through baking to crisp both sides. Not as perfect, but it works in a pinch.
Preparation Method
Follow these steps carefully, and you’ll have potatoes that are crispy-skinned, fluffy-centered, and ready to be loaded with all your favorite toppings.
Step 1: Preheat and Prep (10 minutes)
Preheat your oven to 425°F (220°C). Position the rack in the center of the oven. Scrub each russet potato thoroughly under cold running water. Dry them completely with a clean kitchen towel — moisture is the enemy of crispy skin. Using a fork, pierce each potato 6-8 times all over. This allows steam to escape during baking and prevents exploding potatoes (yes, it happens).
Step 2: Season the Skins (5 minutes)
Place the dried, pierced potatoes in a large bowl. Drizzle with olive oil and sprinkle with kosher salt. Using your hands, rub the oil and salt into the skins until evenly coated. If using garlic powder, add it now. This step is what gives you that crackling, flavorful exterior that people fight over.
Step 3: Arrange and Bake (60-75 minutes)
Place a cooling rack inside your rimmed baking sheet. Arrange the potatoes on the rack, leaving at least 1 inch of space between each one. Bake for 60-75 minutes, depending on size. At the 30-minute mark, rotate the baking sheet for even cooking. The potatoes are done when a fork slides easily into the center with no resistance, and the skin is tight and crispy. For extra-crispy skin, switch the oven to broil for the last 2-3 minutes — watch closely so they don’t burn.
Step 4: Prep the Toppings (During Baking, 20 minutes)
While the potatoes bake, cook the bacon until crispy. I prefer baking it on a separate sheet pan at 400°F for 15-18 minutes — less mess, more even cooking. Drain on paper towels and crumble once cool. Shred the cheddar cheese (do not buy pre-shredded — it doesn’t melt the same). Slice the green onions and chives. Dice the avocado and toss with a squeeze of lime juice to prevent browning. Drain and chop the pickled jalapeños. If using pulled pork, warm it gently in a skillet or microwave.
Step 5: Assemble the Potato Bar (10 minutes)
Once the potatoes are done, let them rest for 5 minutes — this allows the steam to settle and prevents a gummy texture. Transfer the potatoes to a large platter or keep them on the baking sheet for a more casual presentation. Arrange all toppings in separate bowls. Provide small plates, forks, and napkins. Let everyone build their own creation.
Step 6: Build the Perfect Loaded Potato (Per Person)
Using a sharp knife, slice the potato open lengthwise. Use a fork to fluff the interior, breaking up the flesh. Add a pat of butter and let it melt into the steam. Sprinkle with salt and pepper. Layer on cheese, bacon, sour cream, green onions, and any other toppings you desire. Finish with a drizzle of ranch and a sprinkle of fresh chives. Serve immediately while the cheese is still melty.
Cooking Tips & Techniques
After making this recipe more times than I care to count, I’ve learned a few things the hard way. Here are the tips that actually make a difference:
- Don’t wrap potatoes in foil. I know your grandmother did it. But foil traps steam, which makes the skin soft and soggy. You want crispy skin? Bake them naked on a rack.
- Size matters. Choose potatoes that are roughly the same size so they cook evenly. If one is significantly larger, it will be undercooked when the others are done.
- Salt the skins generously. The salt doesn’t just season the skin — it draws out moisture, which helps the skin crisp up. Don’t be shy.
- Let them rest. Five minutes of rest after baking allows the starches to settle. Cutting into a piping-hot potato immediately releases steam that makes the interior gummy.
- Warm your toppings. Cold sour cream and cold cheese on a hot potato equals lukewarm disappointment. Let toppings sit at room temperature for 15 minutes before serving, or warm the cheese slightly.
- Double up on bacon. Honestly, I always cook more bacon than I think I need. It disappears fast, and leftover bacon crumbles are never a problem (they’re great on loaded baked potato soup).
- Use the broiler for melty cheese. If you want that Instagram-worthy cheese pull, after adding the cheese to the open potato, pop it under the broiler for 30 seconds. Watch it like a hawk.
Variations & Adaptations
A great baked potato bar is endlessly adaptable. Here are some of my favorite variations:
Buffalo Chicken Baked Potato
Swap the bacon for shredded rotisserie chicken tossed in buffalo sauce. Top with blue cheese crumbles, celery slices, and a drizzle of ranch. It’s like buffalo chicken dip in potato form — and it’s incredible alongside crispy buffalo cauliflower bites for a full game day spread.
Loaded Vegetarian Potato
Skip the bacon and pulled pork. Add black beans, roasted corn, diced tomatoes, and a generous scoop of guacamole. Top with shredded pepper jack cheese for a southwestern twist. This version is hearty enough to satisfy even the most dedicated carnivores.
Tex-Mex Loaded Potato
Top with seasoned ground beef (or chorizo), pico de gallo, shredded Mexican blend cheese, pickled jalapeños, and a dollop of sour cream mixed with lime juice. This pairs perfectly with crispy loaded nachos for a full fiesta.
Breakfast Baked Potato
Top with crumbled breakfast sausage, a fried egg, shredded cheddar, and a drizzle of hot sauce. It’s a breakfast-for-dinner win that works for brunch tailgates too.
Low-Carb Option
Swap the russet potato for a sweet potato (lower glycemic index) or a cauliflower base. The toppings work exactly the same way — just adjust baking time for sweet potatoes (45-55 minutes at 400°F).
Serving & Storage Suggestions
This recipe is designed for flexibility. Here’s how to serve it and store leftovers:
Serving Temperature & Presentation
Serve the potatoes hot from the oven, arranged on a large platter or wooden board. Keep toppings in separate bowls labeled with small tags — it looks polished and helps guests navigate. For tailgates, transport the baked potatoes wrapped in a clean kitchen towel inside a cooler to retain heat. Reheat in a 350°F oven for 5-10 minutes if needed.
Complementary Dishes
This potato bar pairs beautifully with other finger foods. Set it up alongside crispy bacon-wrapped jalapeno popper football bites for a game day spread that covers all bases. A simple green salad or coleslaw adds freshness. For drinks, cold beer, lemonade, or a spicy Bloody Mary works perfectly.
Storage Instructions
Store leftover baked potatoes (without toppings) in an airtight container in the refrigerator for up to 4 days. Store toppings separately — the cheese and sour cream will keep for 5-7 days, and bacon crumbles stay crispy for up to a week in a sealed container. Do not freeze assembled potatoes; the texture suffers significantly.
Reheating Methods
The best way to reheat a baked potato is in the oven or air fryer. Microwave reheating makes the skin rubbery. For oven reheating, place the potato on a baking sheet and warm at 350°F for 10-15 minutes. For air fryer, cook at 350°F for 5-7 minutes. Add fresh toppings after reheating — not before.
Flavor Development
Here’s a fun fact: leftover baked potatoes (without toppings) actually develop a better texture after a day in the fridge. The starches retrograde, making the interior even fluffier when reheated. So if you’re planning ahead, bake the potatoes a day early and reheat just before serving.
Nutritional Information & Benefits
Per serving (one loaded potato with classic toppings):
- Calories: 520
- Protein: 18g
- Carbohydrates: 52g
- Fat: 28g
- Fiber: 6g
- Sodium: 680mg
Potatoes often get a bad reputation, but they’re actually quite nutritious. A medium russet potato with the skin on provides more potassium than a banana, along with vitamin C, vitamin B6, and fiber. The skin alone contains about half of the potato’s total fiber. When you load it with protein-rich cheese, bacon, and sour cream, you get a balanced meal that keeps you full for hours.
Dietary Considerations: This recipe is naturally gluten-free. For a lower-calorie version, use Greek yogurt instead of sour cream, turkey bacon instead of pork bacon, and reduce the butter. For a dairy-free version, use vegan cheese and sour cream alternatives. The potato itself is vegan-friendly — it’s the toppings that add the dairy and meat.
Potential Allergens: Dairy (cheese, sour cream, butter), eggs (if using ranch dressing with eggs). Always check labels on store-bought toppings.
Conclusion
This loaded tailgate baked potato bar is the kind of recipe that turns a casual gathering into something people actually remember. It’s flexible enough to feed a crowd with different tastes, simple enough to pull off without stress, and satisfying enough to make you the hero of game day. Whether you’re tailgating in a parking lot, hosting a party at home, or just feeding a hungry family on a Tuesday night, this spread delivers.
I love this recipe because it’s not fussy. It doesn’t require precision or fancy techniques. It just asks you to pick good ingredients, bake the potatoes right, and let people build their own perfect bite. That’s the kind of cooking I believe in — simple, generous, and built for sharing.
Now I want to hear from you. What’s your go-to topping combo? Do you go classic with cheddar and bacon, or do you get creative with buffalo chicken or Tex-Mex flavors? Drop your favorite combination in the comments below — I’m always looking for new ideas. And if you make this for your next tailgate, tag me so I can see your spread. Happy eating, friends.
Frequently Asked Questions
Can I use sweet potatoes instead of russet potatoes?
Absolutely. Sweet potatoes work beautifully in this recipe. They have a lower glycemic index and a slightly sweeter flavor that pairs well with savory toppings. Bake them at 400°F for 45-55 minutes, or until tender. Adjust your topping choices — I find that smoky bacon, sharp cheddar, and a drizzle of maple syrup works particularly well with sweet potatoes.
How do I prevent my baked potatoes from being dry?
Dry potatoes usually result from overbaking or using potatoes that are past their prime. Stick to the 60-75 minute range at 425°F, and test with a fork before removing from the oven. The interior should be fluffy, not mealy. Also, don’t skip the butter — it adds moisture and richness that makes every bite satisfying. If you’re worried about dryness, you can also brush the cut sides of the potato with a little olive oil before adding toppings.
Can I make this recipe in a slow cooker or Instant Pot?
You can, but the texture won’t be the same. Slow cookers produce steamed potatoes with soft skins — fine for a quick meal, but not ideal for a loaded potato bar where crispy skin is part of the appeal. If you’re in a hurry, the Instant Pot can cook potatoes in 12-15 minutes, but you’ll need to finish them under the broiler for 5 minutes to crisp the skins. For best results, stick with the oven method.
How far in advance can I prep the toppings?
Most toppings can be prepped a day ahead. Shred the cheese, cook and crumble the bacon, slice the green onions, and chop the jalapeños. Store each in separate airtight containers in the refrigerator. Wait to dice the avocado until just before serving — it browns quickly. The potatoes themselves can be baked a day ahead and reheated in a 350°F oven for 10-15 minutes before serving.
What if I don’t have a cooling rack for baking?
No problem. If you don’t have a cooling rack that fits your baking sheet, you have two options. First, you can flip the potatoes halfway through baking to crisp both sides. Second, you can bake them directly on the sheet pan — they’ll still be good, just slightly less crispy on the bottom. Alternatively, you can use a wire cooling rack from a different pan, as long as it’s oven-safe up to 425°F.
Pin This Recipe!
Best Loaded Tailgate Baked Potato Bar (Easy & Perfect)
This loaded tailgate baked potato bar is a full-on interactive meal that feeds a crowd without making you spend the whole game in the kitchen. It features crispy-skinned, fluffy-centered russet potatoes with a lineup of classic and game-changing toppings that balance creamy, crunchy, salty, and tangy flavors.
- Prep Time: 15 minutes
- Cook Time: 75 minutes
- Total Time: 90 minutes
- Yield: 8 servings 1x
- Category: Main Course
- Cuisine: American
Ingredients
- 8 large russet potatoes (scrubbed clean, dried thoroughly)
- 2 tablespoons olive oil (or avocado oil)
- 1 teaspoon kosher salt
- 1/2 teaspoon garlic powder (optional)
- 1 1/2 cups sharp cheddar cheese (shredded fresh)
- 1 cup sour cream (full-fat preferred)
- 8 slices bacon (cooked until crispy, crumbled)
- 4 green onions (sliced thin, both white and green parts)
- 4 tablespoons unsalted butter (softened)
- 1/2 cup pickled jalapeños (drained, chopped)
- 1/2 cup cooked pulled pork (optional)
- 1/4 cup ranch dressing (for drizzling)
- 1/4 cup chopped fresh chives
- 1 avocado (diced, tossed with lime juice)
Instructions
- Preheat oven to 425°F (220°C). Position rack in center. Scrub potatoes thoroughly, dry completely, and pierce each 6-8 times with a fork.
- Place potatoes in a large bowl. Drizzle with olive oil, sprinkle with kosher salt (and garlic powder if using). Rub to coat evenly.
- Place a cooling rack inside a rimmed baking sheet. Arrange potatoes on rack with at least 1 inch space. Bake 60-75 minutes, rotating sheet at 30 minutes. Potatoes are done when a fork slides in easily and skin is crispy. For extra-crispy skin, broil last 2-3 minutes.
- While potatoes bake, cook bacon until crispy (bake at 400°F for 15-18 minutes). Drain and crumble. Shred cheddar cheese. Slice green onions and chives. Dice avocado and toss with lime juice. Drain and chop pickled jalapeños. Warm pulled pork if using.
- Let potatoes rest 5 minutes after baking. Transfer to platter or keep on baking sheet. Arrange all toppings in separate bowls.
- To serve: slice potato open lengthwise, fluff interior with fork, add pat of butter, salt and pepper. Layer with cheese, bacon, sour cream, green onions, and other toppings. Drizzle with ranch and sprinkle chives. Serve immediately.
Notes
Don’t wrap potatoes in foil during baking—it steams the skin. Choose potatoes of similar size for even cooking. Salt skins generously to draw out moisture and crisp. Let potatoes rest 5 minutes after baking. Warm toppings to room temperature before serving. Double up on bacon—it disappears fast. For melty cheese, broil for 30 seconds after adding cheese.
Nutrition
- Serving Size: 1 loaded potato with
- Calories: 520
- Sugar: 3
- Sodium: 680
- Fat: 28
- Saturated Fat: 12
- Carbohydrates: 52
- Fiber: 6
- Protein: 18
Keywords: loaded baked potato bar, tailgate food, game day recipe, potato bar, baked potato toppings, crowd-pleasing, make-ahead, budget-friendly


