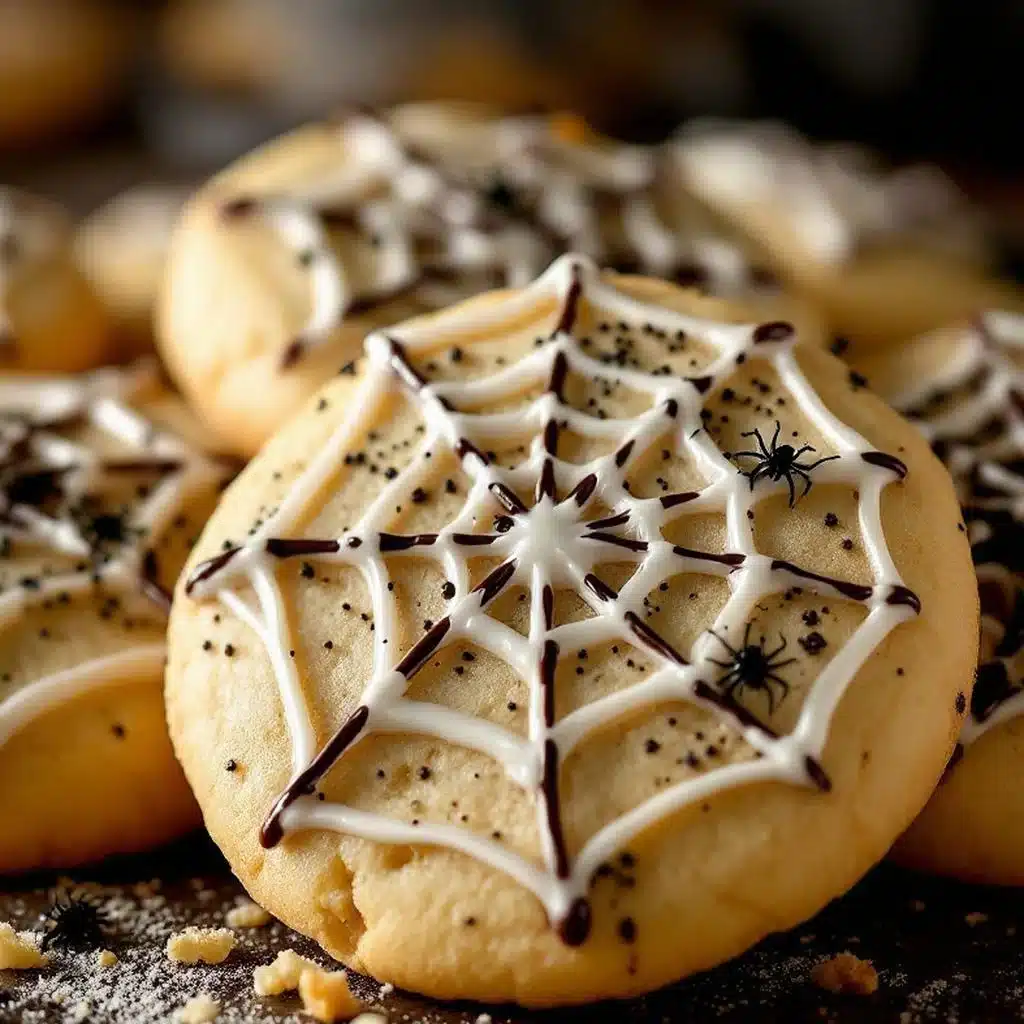
For a while, I just accepted that Halloween treats were going to taste like artificial coloring and rushed decisions. My pantry usually held bags of pre-made dough or boxes of mix because, honestly, I didn’t have the patience for rolling and chilling for hours. You know how it is when October hits and suddenly everyone wants spooky aesthetics, but your energy is already drained from work and school runs. I’d settle for store-bought cookies that were either too hard or too sweet, lacking that homemade soul you crave.
The gap wasn’t just about sugar; it was about the spiderweb effect. I wanted that intricate, creepy-crawly look without spending three hours piping royal icing by hand. It felt impossible to find a balance between easy preparation and a result that actually looked professional. Most tutorials required stiff peaks and steady hands, which I definitely didn’t have at 8 PM on a Tuesday.
Then I stumbled onto a technique involving a simple toothpick drag through wet icing. It wasn’t magic, just physics. The first batch came out looking like a spider had actually walked across it. It was matter-of-fact, really. No grand revelation, just a realization that I could make something special with ingredients I already owned.
The quiet satisfaction came when my kids ate them before I could even take a photo. They didn’t care about the artistry, just the sweetness, but I knew I had cracked the code. Now, these cookies are a staple. They stick because they solve the problem of looking impressive while keeping my sanity intact.
Why You’ll Love This Recipe
There is a specific kind of magic in baking that brings the whole house together, and these spooky easy halloween spiderweb sugar cookies deliver that without the stress. I’ve tested dozens of sugar cookie recipes over the years, from the overly crisp shortbread styles to the soft, cake-like varieties. This one hits the sweet spot—literally and figuratively. It uses a method that ensures the dough stays tender and doesn’t spread too much in the oven, which is crucial for keeping those delicate web designs intact.
Here is why this recipe earns a permanent spot in your seasonal rotation:
* **Quick & Easy:** The dough comes together in about 15 minutes, and you can skip the long chill if you’re in a rush, though a quick 30-minute rest helps with handling. Perfect for last-minute party prep or busy weeknights.
* **Simple Ingredients:** No fancy grocery trips needed. You likely already have flour, butter, sugar, and eggs in your kitchen. The only specialty item is black food coloring, which is cheap and versatile.
* **Perfect for Halloween:** Great for classroom parties, haunted house events, or just a cozy dinner with friends who appreciate a little seasonal flair.
* **Crowd-Pleaser:** Always gets rave reviews from kids and adults alike. The visual impact is huge, even if the taste is comforting and familiar.
* **Unbelievably Delicious:** The texture and flavor combo is next-level comfort food. It’s not just a pretty face; it tastes like real butter and vanilla.
What makes this recipe different from the rest is the icing technique. Most people think spiderweb cookies require advanced piping skills. They don’t. By using a two-tone icing method and a simple drag, you create an illusion of complexity that is actually quite simple. I learned this the hard way after ruining several batches with over-piped details. This method is forgiving. If your web looks a bit asymmetrical, it just looks more like a real spider’s work, which is the whole point anyway.
This recipe isn’t just good—it is the kind that makes you close your eyes after the first bite. It’s comfort food reimagined for the spookiest holiday of the year. It allows you to be creative without the pressure of perfection.
What Ingredients You Will Need
This recipe uses simple, wholesome ingredients to deliver bold flavor and satisfying texture without the fuss. The key to a great sugar cookie is the ratio of fat to flour, and this recipe strikes that balance perfectly. You don’t need any unusual pantry items, which makes it accessible for anyone looking to bake on a budget or with limited supplies.
Here is what you will need to gather:
**For the Cookie Dough:**
* **Unsalted butter, softened:** 1 cup (2 sticks). I recommend using high-quality European-style butter for a richer flavor, but standard supermarket brands work fine too.
* **Granulated sugar:** 1 cup. This provides structure and crisp edges.
* **Brown sugar, packed:** ½ cup. Adds moisture and a hint of caramel depth, keeping the cookies soft in the middle.
* **Large eggs, room temperature:** 2. Room temperature eggs emulsify better with the butter, creating a smoother dough.
* **Vanilla extract:** 2 teaspoons. Use pure vanilla, not imitation, for that authentic bakery smell.
* **All-purpose flour:** 3 cups. Sifted to remove lumps and ensure a tender crumb.
* **Baking powder:** 1 teaspoon. Helps the cookies rise slightly without spreading too much.
* **Salt:** 1 teaspoon. Balances the sweetness and enhances the overall flavor profile.
**For the Spiderweb Icing:**
* **Powdered sugar (confectioners’ sugar):** 2-3 cups. Sifted to avoid lumps in your icing.
* **Meringue powder:** 2 tablespoons. This stabilizes the icing, making it safer to handle and easier to pipe. If you can’t find it, you can use pasteurized egg whites, but meringue powder is more reliable.
* **Water:** 4-6 tablespoons. Adjust for desired consistency.
* **Black food coloring:** Gel-based is best. Liquid coloring can thin out the icing too much. I prefer AmeriColor Super Black or similar brands for intense color without changing the texture.
* **White food coloring or extra powdered sugar:** To keep one batch of icing bright white for contrast.
The beauty of this ingredient list is its flexibility. If you are dairy-free, you can swap the butter for a high-quality vegan butter stick. For a gluten-free option, use a 1:1 gluten-free flour blend that includes xanthan gum. The substitutions are straightforward and won’t compromise the final look.
Equipment Needed
You don’t need a professional kitchen to make these cookies, but having the right tools makes the process smoother.
* **Stand mixer or hand mixer:** Essential for creaming the butter and sugar until fluffy. Doing this by hand is possible but requires significant arm strength.
* **Baking sheets:** Rimless sheets are ideal for even heat distribution, but rimmed sheets work too. Just rotate them halfway through baking.
* **Parchment paper or silicone baking mats:** Prevents sticking and ensures easy cleanup. I prefer silicone mats for consistency.
* **Small bowls:** You will need at least two bowls for the icing—one for white and one for black.
* **Piping bags or zip-top bags:** For applying the icing. If you don’t have piping bags, sturdy zip-top bags work well. Just cut off a tiny corner.
* **Toothpicks or skewers:** Crucial for creating the web pattern. You’ll use these to drag through the icing.
* **Cookie cutters (optional):** If you want perfect shapes, use round or spider-shaped cutters. Otherwise, you can freehand scoop the dough.
I once tried using a fork to create the web pattern, and it just mashed the icing. The toothpick is the secret weapon here. It’s thin enough to create delicate lines without disturbing the base layer. Also, keep a bowl of water nearby to dip your toothpick if the icing gets too thick to drag smoothly.
Preparation Method
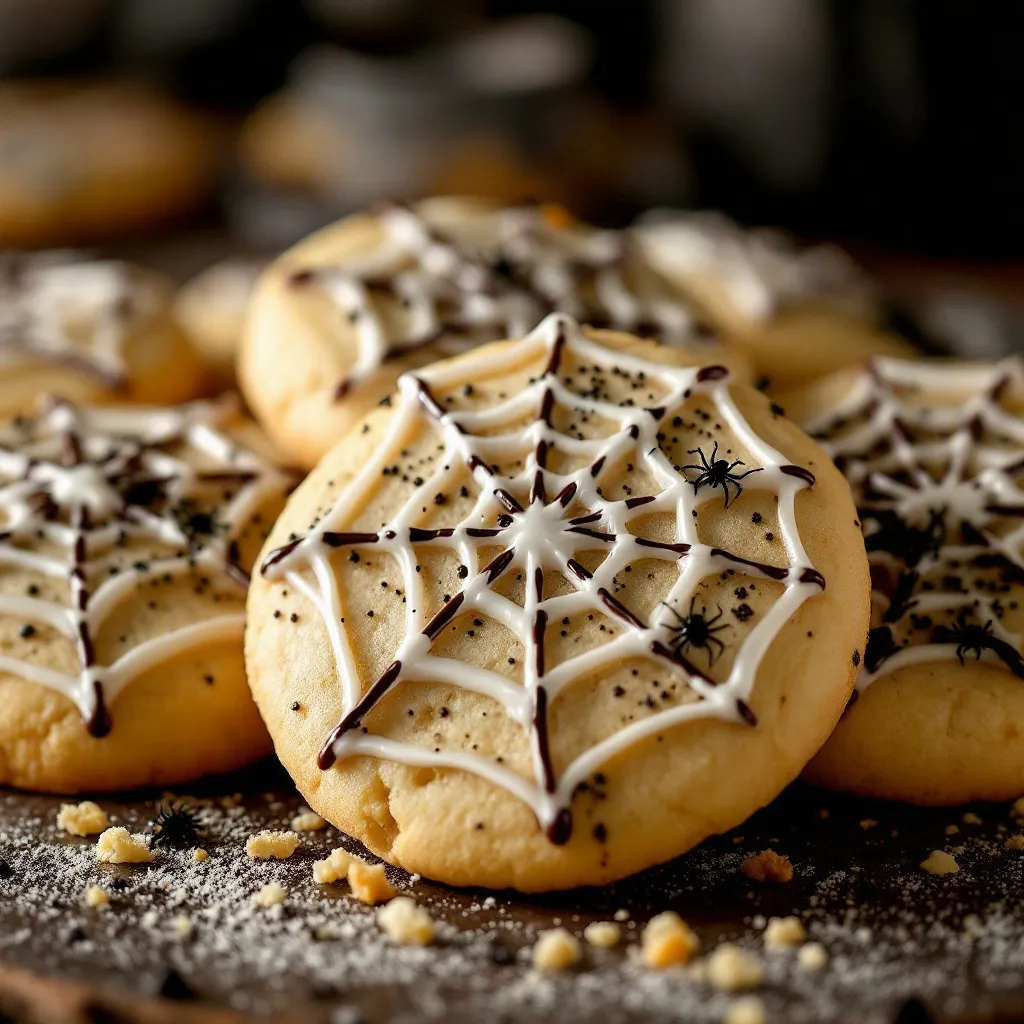
Getting these cookies ready involves a few key stages, but each one is straightforward if you pay attention to the details. Here is how to bring it all together.
1. **Cream the Butter and Sugars:** In a large mixing bowl, beat the softened butter, granulated sugar, and brown sugar on medium speed until the mixture is light and fluffy. This usually takes about 3-4 minutes. Don’t rush this step; air incorporation helps the cookies rise properly.
2. **Add Wet Ingredients:** Beat in the eggs one at a time, ensuring each is fully incorporated before adding the next. Mix in the vanilla extract. The mixture should look smooth and creamy.
3. **Combine Dry Ingredients:** In a separate bowl, whisk together the flour, baking powder, and salt. This ensures even distribution of the leavening agent.
4. **Mix Dough:** Gradually add the dry ingredients to the wet mixture on low speed. Mix just until combined. Overmixing at this stage can develop gluten, leading to tough cookies. The dough should be soft but not sticky.
5. **Chill the Dough:** Cover the dough and refrigerate for at least 30 minutes. This step is crucial for preventing excessive spreading. If you’re short on time, you can skip it, but the cookies may lose their shape.
6. **Preheat Oven:** Preheat your oven to 350°F (175°C). Line your baking sheets with parchment paper.
7. **Shape Cookies:** Scoop about 1.5 tablespoons of dough per cookie. Roll them into balls and place them on the baking sheet, spacing them about 2 inches apart. You can flatten them slightly with your palm if you prefer a flatter cookie.
8. **Bake:** Bake for 10-12 minutes, or until the edges are lightly golden. The centers should still look slightly soft. They will firm up as they cool.
9. **Cool Completely:** Let the cookies cool on the baking sheet for 5 minutes, then transfer them to a wire rack to cool completely. Warm cookies will melt the icing, ruining the design.
10. **Prepare Icing:** While cookies cool, mix the powdered sugar, meringue powder, and water to form a thick, pipeable consistency. Divide the icing into two bowls. Leave one white and add black food coloring to the other. Mix until smooth.
11. **Pipe Base Layer:** Pipe a thick, irregular circle of white icing onto each cooled cookie. It doesn’t need to be perfect; just cover most of the surface.
12. **Add Black Dots:** Pipe small dots of black icing over the white base. Place them randomly.
13. **Create Web:** Immediately use a toothpick to drag from the center outwards, and then from the outer edges inwards, creating a web pattern. Rotate the cookie as you work to keep the design centered.
14. **Dry:** Let the icing dry completely before handling or packaging. This can take 1-2 hours depending on humidity.
Cooking Tips & Techniques
Baking is as much about technique as it is about ingredients. Here are some pro tips to ensure your spiderweb cookies turn out perfectly every time.
* **Butter Temperature Matters:** Your butter should be softened but still cool to the touch. If it’s too warm, the cookies will spread too much. If it’s too cold, you won’t get a smooth cream.
* **Don’t Overbake:** Sugar cookies continue to cook on the hot baking sheet after you take them out of the oven. Pull them when they are just set. Overbaking leads to hard, crunchy cookies instead of tender ones.
* **Icing Consistency:** The icing should be thick enough to hold its shape but fluid enough to drag with a toothpick. If it’s too thick, add water a teaspoon at a time. If it’s too thin, add more powdered sugar.
* **Timing is Key:** You must create the web pattern while the white icing is still wet. If it starts to set, the toothpick will pull up chunks of icing instead of creating lines. Work quickly.
* **Rotating the Cookie:** As you drag the toothpick, rotate the cookie in your hand. This helps maintain a radial symmetry in the web design. It’s a small motion that makes a big difference.
* **Avoid Condensation:** Make sure your cookies are completely cool before icing. Any residual heat will cause the icing to slide off or melt.
I once tried to ice warm cookies, and it was a disaster. The icing slid right off, and I had to scrape them clean and start over. Lesson learned: patience pays off.
Variations & Adaptations
While the classic black and white spiderweb is iconic, there are many ways to adapt this recipe to suit different tastes or themes.
* **Colorful Webs:** Instead of black icing, use purple, green, or orange gel food coloring. This adds a festive touch and appeals to children who might be afraid of black.
* **Glitter Dust:** Once the icing is dry, you can lightly dust the cookies with edible gold or silver glitter. This adds a spooky shimmer that catches the light.
* **Chocolate Base:** Dip the bottom half of the cookie in melted chocolate before icing. This adds a rich flavor contrast and makes the cookie look more like a spider’s body.
* **Gluten-Free Option:** Use a 1:1 gluten-free flour blend. The texture may be slightly more crumbly, so handle with care.
* **Vegan Adaptation:** Swap butter for vegan butter and eggs for flax eggs (1 tbsp ground flaxseed mixed with 3 tbsp water per egg). The flavor will be slightly different, but the web design will still work.
I tried a purple and green version for a Halloween party, and it looked amazing. The colors blended beautifully in the web pattern, creating a tie-dye effect that was surprisingly elegant.
Serving & Storage Suggestions
These cookies are best served at room temperature, allowing the buttery flavor to shine. They pair well with a glass of cold milk or a cup of hot coffee. For a Halloween party, arrange them on a tiered stand with other spooky treats.
* **Storage:** Store cookies in an airtight container at room temperature for up to 5 days. Place parchment paper between layers to prevent sticking.
* **Freezing:** You can freeze the baked cookies for up to 3 months. Thaw them at room temperature before icing. Do not freeze iced cookies, as the icing may become sticky or crack.
* **Reheating:** These cookies are best eaten fresh. If you need to warm them, do so for no more than 10 seconds in the microwave.
The flavors develop slightly over the first day, becoming softer and more cohesive. They make great gifts too, especially when packaged in clear cellophane bags tied with black ribbon.
Nutritional Information & Benefits
These cookies are a treat, so enjoy them in moderation. Each cookie contains approximately 150-180 calories, depending on size and icing thickness.
* **Carbohydrates:** The primary source of energy comes from the sugars and flour.
* **Fat:** Butter provides fat, which contributes to the rich flavor and texture.
* **Protein:** Minimal protein content, primarily from the eggs and flour.
For those with dietary restrictions, note that this recipe contains gluten, dairy, and eggs. Use the substitutions mentioned earlier to accommodate allergies. While not a health food, they are a fun way to celebrate the season with loved ones.
Conclusion
These spooky easy halloween spiderweb sugar cookies are a testament to the idea that baking doesn’t have to be complicated to be beautiful. They offer a perfect blend of ease and impact, making them ideal for any occasion. I love them because they bring out my inner artist without requiring professional skills. They are forgiving, delicious, and always a hit.
I encourage you to experiment with colors and shapes. Make them your own. Whether you stick to the classic black and white or try a vibrant palette, the joy is in the making. Share your creations with friends and family, and don’t forget to leave a comment with your results. Happy baking, and happy Halloween!
Frequently Asked Questions
Can I use liquid food coloring instead of gel?
Liquid food coloring can thin out the icing, making it runny and difficult to pipe. Gel coloring is more concentrated and maintains the icing’s consistency, resulting in a better web pattern.
How do I fix a web that looks messy?
If the web looks messy, it might be because the icing started to set before you dragged the toothpick. Work faster next time, or add a drop of water to the icing to keep it wetter. Embrace imperfections; they add to the spooky charm.
Can I make the dough ahead of time?
Yes, you can make the dough up to 3 days in advance. Store it in the refrigerator in an airtight container. Let it come to room temperature slightly before rolling and baking.
Why did my cookies spread too much?
This usually happens if the butter was too warm or if the dough wasn’t chilled enough. Ensure your butter is softened but not melted, and chill the dough for at least 30 minutes before baking.
Can I freeze the iced cookies?
It’s not recommended to freeze iced cookies as the icing may become sticky or crack upon thawing. Freeze the baked cookies first, then ice them after thawing.
Pin This Recipe!

Spooky Easy Halloween Spiderweb Sugar Cookies
These spiderweb sugar cookies offer a professional, spooky look without the stress of advanced piping skills. Using a simple toothpick drag technique on two-tone icing, they are easy to make, delicious, and perfect for Halloween parties.
- Prep Time: 15 minutes
- Cook Time: 10-12 minutes
- Total Time: 45 minutes
- Yield: Approximately 24 cookies 1x
- Category: Dessert
- Cuisine: American
Ingredients
- 1 cup (2 sticks) unsalted butter, softened
- 1 cup granulated sugar
- ½ cup brown sugar, packed
- 2 large eggs, room temperature
- 2 teaspoons vanilla extract
- 3 cups all-purpose flour, sifted
- 1 teaspoon baking powder
- 1 teaspoon salt
- 2–3 cups powdered sugar (confectioners’ sugar), sifted
- 2 tablespoons meringue powder
- 4–6 tablespoons water
- Black gel food coloring
- White food coloring or extra powdered sugar
Instructions
- In a large mixing bowl, beat the softened butter, granulated sugar, and brown sugar on medium speed until light and fluffy (3-4 minutes).
- Beat in the eggs one at a time, ensuring each is fully incorporated, then mix in the vanilla extract.
- In a separate bowl, whisk together the flour, baking powder, and salt.
- Gradually add the dry ingredients to the wet mixture on low speed, mixing just until combined.
- Cover the dough and refrigerate for at least 30 minutes.
- Preheat oven to 350°F (175°C) and line baking sheets with parchment paper.
- Scoop about 1.5 tablespoons of dough per cookie, roll into balls, and place on baking sheets 2 inches apart.
- Bake for 10-12 minutes until edges are lightly golden; centers should look slightly soft.
- Let cookies cool on the baking sheet for 5 minutes, then transfer to a wire rack to cool completely.
- While cookies cool, mix powdered sugar, meringue powder, and water to form a thick, pipeable consistency.
- Divide icing into two bowls; leave one white and add black food coloring to the other.
- Pipe a thick, irregular circle of white icing onto each cooled cookie.
- Pipe small dots of black icing randomly over the white base.
- Immediately use a toothpick to drag from the center outwards and outer edges inwards to create a web pattern.
- Let the icing dry completely (1-2 hours) before handling or packaging.
Notes
Ensure butter is softened but cool to the touch to prevent spreading. Chill dough for at least 30 minutes. Create the web pattern while the white icing is still wet. Cookies can be frozen for up to 3 months before icing, but do not freeze iced cookies.
Nutrition
- Serving Size: 1 cookie
- Calories: 165
- Sugar: 16
- Sodium: 120
- Fat: 8
- Saturated Fat: 5
- Carbohydrates: 22
- Fiber: 0.5
- Protein: 2
Keywords: Halloween cookies, spiderweb cookies, sugar cookies, easy baking, Halloween treats, spiderweb icing, holiday baking