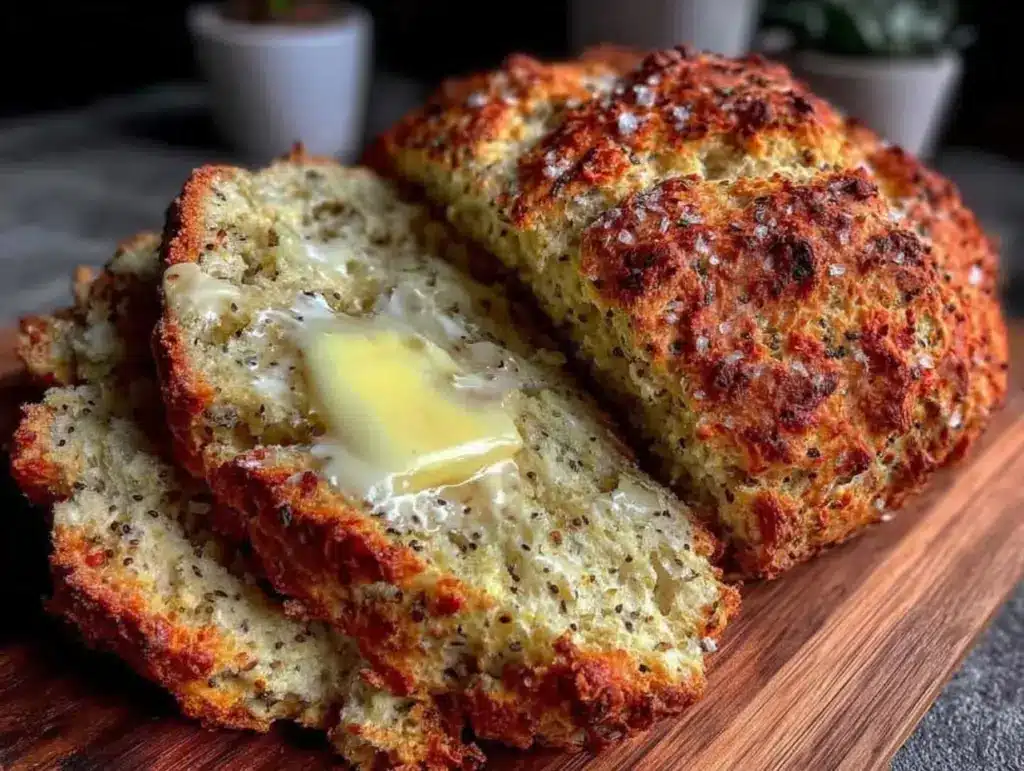
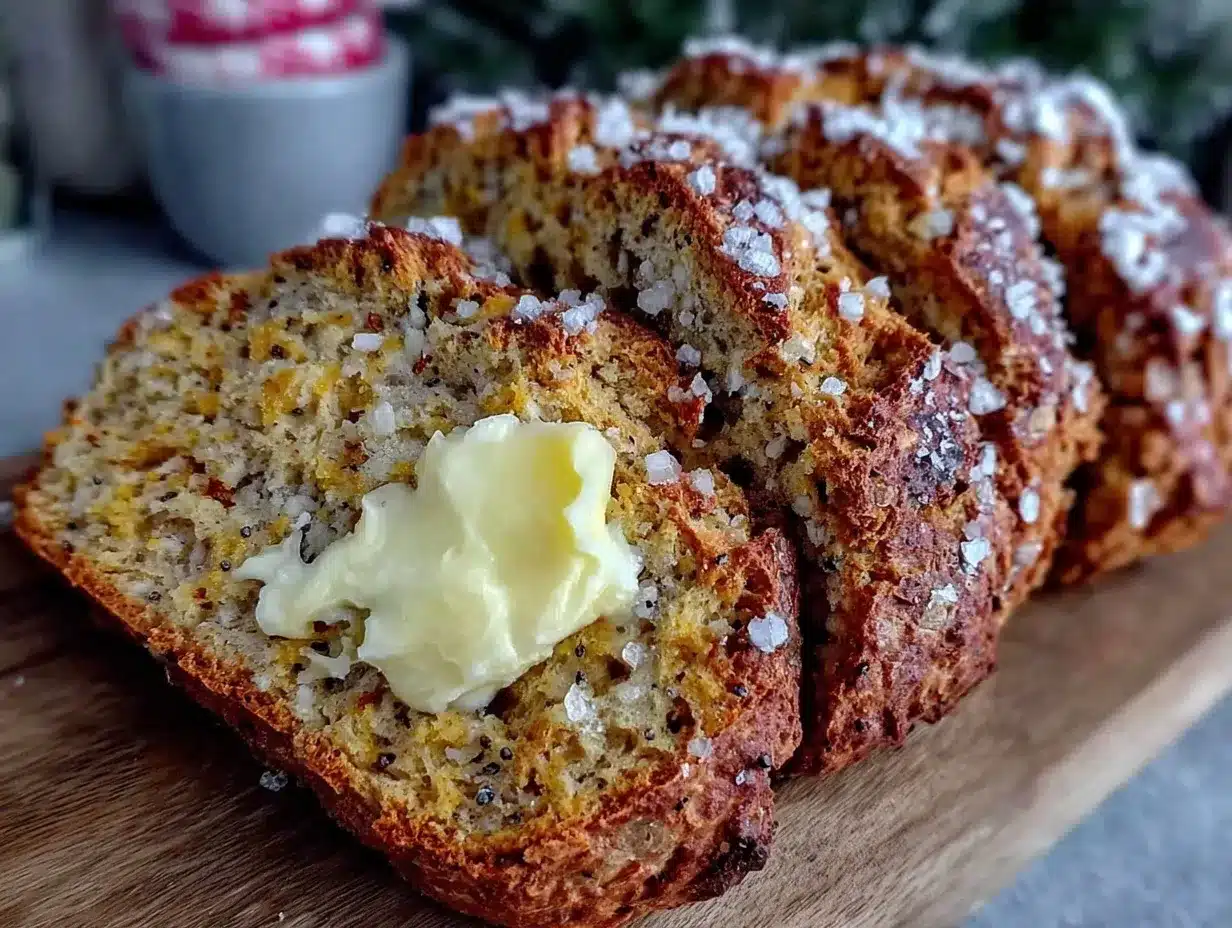
Let me tell you, the scent of warm, freshly baked Irish soda bread wafting through the kitchen is enough to make anyone’s mouth water. There’s something truly magical about that golden crust, cracked and rustic, hiding a tender crumb inside that’s just begging to be slathered with creamy butter. The first time I baked this Traditional Irish Soda Bread with Butter, it was on a chilly, rainy afternoon when I wanted something comforting but fuss-free. I was instantly hooked — the kind of moment where you pause, take a deep breath, and just smile because you know you’re onto something truly special.
When I was knee-high to a grasshopper, my grandma used to make soda bread every Sunday, and the house would smell like a warm hug. Years ago, I stumbled upon this recipe trying to recreate that nostalgic feeling, and honestly, I wish I’d found it sooner. My family couldn’t stop sneaking slices off the cooling rack (and I can’t really blame them). This cozy traditional Irish soda bread is dangerously easy to make and provides pure, nostalgic comfort.
You know what? This bread is perfect for potlucks, a sweet treat for your kids with jam, or to brighten up your Pinterest cookie board with something hearty and wholesome. I’ve tested this recipe multiple times (in the name of research, of course), and it has become a staple for family gatherings and gifting. Trust me, it feels like a warm hug on a plate, and you’re going to want to bookmark this one.
Why You’ll Love This Recipe
Honestly, this Traditional Irish Soda Bread recipe hits all the right notes. After countless trials and tweaks, I’ve perfected a version that’s both simple and incredibly satisfying. Here’s why you’ll want to bake it over and over:
- Quick & Easy: Comes together in under 30 minutes, perfect for busy weeknights or last-minute cravings.
- Simple Ingredients: No fancy grocery trips needed; you likely already have everything in your kitchen.
- Perfect for Cozy Gatherings: Great for Sunday brunch, St. Patrick’s Day celebrations, or warming up a chilly evening.
- Crowd-Pleaser: Always gets rave reviews from kids and adults alike, especially with a pat of butter melting on top.
- Unbelievably Delicious: The texture and flavor combo is next-level comfort food — crusty outside with a soft, tender inside.
This isn’t just another soda bread recipe. The secret is a perfectly balanced pinch of baking soda with a touch of buttermilk tang, creating that iconic rise without fuss. Plus, I like to add a little brown sugar for a hint of sweetness that brings the whole loaf together in a way that’s just *chef’s kiss*. You’ll close your eyes after that first bite, I promise. It’s comfort food reimagined—simple, soulful, and totally stress-free.
What Ingredients You Will Need
This recipe uses simple, wholesome ingredients to deliver bold flavor and satisfying texture without the fuss. Most are pantry staples, and if you have a well-stocked kitchen, you’re halfway there already.
- All-purpose flour – 4 cups (480g), the base for that hearty bread structure.
- Baking soda – 1 teaspoon, the magic leavening agent that makes soda bread rise quickly.
- Salt – 1 teaspoon, to balance and enhance flavor.
- Buttermilk – 1¾ cups (420ml), room temperature (adds tang and activates the baking soda). If you don’t have buttermilk, mix 1¾ cups milk with 1 tablespoon vinegar or lemon juice and let it sit for 5 minutes.
- Brown sugar – 1 tablespoon (optional), for a subtle sweetness that rounds out the flavor (I recommend light brown sugar for best results).
- Unsalted butter – 3 tablespoons, melted and cooled (plus extra for serving), adds richness and a tender crumb.
- Optional add-ins: A handful of raisins or currants (for a traditional touch), or caraway seeds for a bit of earthy flavor.
For a gluten-free twist, you can swap the all-purpose flour with a 1:1 gluten-free baking flour blend, but I haven’t tested that as much, so results may vary. Also, if you’re dairy-free, swap buttermilk with a plant-based milk plus lemon juice mixture. I personally stick with classic ingredients for that authentic taste, but it’s nice to know there’s room for flexibility!
Equipment Needed
- Mixing bowl: A large one to combine your dry and wet ingredients comfortably.
- Measuring cups and spoons: For precise ingredient amounts — trust me, baking soda measurements matter!
- Wooden spoon or sturdy spatula: For mixing the dough — it’s a bit sticky but manageable.
- Baking sheet or cast-iron skillet: Both work well; I prefer a cast-iron skillet for that lovely crust.
- Sharp knife or bread lame: To score the dough before baking (makes that classic cross on top).
- Cooling rack: To let your bread rest without getting soggy.
If you don’t have a cast-iron skillet, a rimmed baking sheet lined with parchment paper works just fine. I’ve tried silicone mats too, but the crust isn’t quite as crisp. Pro tip: keep your knife sharp when scoring to avoid squishing the dough. And hey, if you’re on a budget, mixing by hand is perfectly fine — no fancy stand mixer needed here.
Preparation Method
- Preheat your oven to 425°F (220°C). Place your cast-iron skillet or baking sheet inside to heat up while you prepare the dough — this blast of heat helps form a crusty bottom.
- Mix dry ingredients: In a large bowl, whisk together 4 cups (480g) all-purpose flour, 1 teaspoon baking soda, 1 teaspoon salt, and 1 tablespoon brown sugar (if using). Make sure it’s well combined so the leavening is evenly distributed.
- Add wet ingredients: Pour in 1¾ cups (420ml) buttermilk and 3 tablespoons melted butter. Stir gently with a wooden spoon until the dough begins to come together. It should be soft and slightly sticky but not too wet — if it’s too dry, add a splash more buttermilk.
- Form the dough: Turn the dough out onto a floured surface. With lightly floured hands, gently knead it just 3-4 times to bring it into a round loaf shape. Avoid over-kneading — you want to keep it tender.
- Score the dough: Transfer the loaf to a piece of parchment paper or a floured baking sheet. Using a sharp knife, cut a deep “X” about ½ inch (1.25 cm) deep across the top. This helps the bread rise evenly and is traditional Irish soda bread style.
- Bake: Carefully place the loaf (with parchment if used) onto the preheated skillet or baking sheet. Bake for 30–35 minutes, rotating halfway, until the crust is deep golden and a skewer inserted comes out clean.
- Cool: Remove from the oven and transfer to a cooling rack. Let it rest for at least 20 minutes before slicing — I know it’s hard to wait, but this step is key for the crumb to set properly.
Pro tip: If you tap the bottom of the loaf, it should sound hollow when done. If not, pop it back in for another 5 minutes and keep an eye on it.
Cooking Tips & Techniques
Making perfect Irish soda bread is honestly pretty straightforward, but a few tricks learned through trial and error help make it foolproof.
- Don’t over-mix or knead: The dough is wetter and looser than typical bread dough, so handle it gently. Overworking turns it tough.
- Use fresh baking soda: Old baking soda loses its punch, so test it by adding a little to vinegar — it should fizz vigorously.
- Preheat your baking surface: Placing the dough onto a hot skillet or baking sheet creates a beautiful crust and better oven spring.
- Score deeply: The “X” on top isn’t just for looks — it allows the bread to expand evenly and prevents cracking.
- Buttermilk temperature: Room temperature buttermilk activates baking soda properly. Cold buttermilk slows the reaction, leading to denser bread.
I once rushed the cooling step (guilty!) and ended up with a gummy center — lesson learned! Also, timing is key; I like to prep the dough while the oven preheats so everything flows smoothly. Multitasking here is your friend.
Variations & Adaptations
This traditional Irish soda bread recipe is wonderfully flexible, so you can tweak it to suit your tastes or dietary needs.
- Sweet Variation: Add a handful of raisins or currants and a teaspoon of cinnamon for a warmer, fruity loaf.
- Herb-Infused: Mix in chopped fresh rosemary or thyme with a teaspoon of caraway seeds for a savory twist perfect with soups.
- Gluten-Free Option: Swap all-purpose flour with a gluten-free baking blend (make sure it contains xanthan gum). Keep an eye on moisture levels as GF flours vary.
- Dairy-Free: Replace buttermilk with almond or oat milk plus a tablespoon of lemon juice or vinegar to mimic the acidity.
Personally, I tried adding chopped sun-dried tomatoes and basil once – it was a bit unexpected but surprisingly tasty! Feel free to experiment with your favorite add-ins. Just remember, the key is not to overload the dough so it still rises beautifully.
Serving & Storage Suggestions
Serve your Traditional Irish Soda Bread warm or at room temperature, slathered generously with butter. Honestly, a little honey or jam on the side never hurts either. This bread pairs wonderfully with hearty stews, a sharp cheddar, or simply a cup of strong tea.
To store, wrap the cooled bread tightly in plastic wrap or place it in an airtight container at room temperature for up to 2 days. For longer storage, slice and freeze in a zip-top bag for up to 3 months. When ready to eat, toast slices straight from frozen or thaw at room temperature.
Reheating in a 350°F (175°C) oven for 5-7 minutes refreshes the crust nicely, making it taste almost freshly baked again. Flavors actually mellow and deepen a bit if you let it rest overnight, so making it a day ahead for gatherings is a great idea.
Nutritional Information & Benefits
This cozy Irish soda bread is a wholesome choice, made without yeast and relying on simple ingredients. Each slice (about 60g) offers roughly 150-180 calories, with moderate carbs and a touch of fat from butter.
Buttermilk adds a bit of protein and calcium, and the bread’s lack of yeast means it’s easier to digest for some folks. It’s naturally free from refined sugars (unless you add brown sugar or raisins), and you can keep it dairy-free or gluten-free with substitutions.
It’s a comforting, filling bread that feels indulgent but is actually pretty straightforward fuel for your day. I love that I can make it from pantry staples and still offer something nutritious and satisfying.
Conclusion
So there you have it — a Traditional Irish Soda Bread with Butter recipe that’s simple, speedy, and downright delicious. This bread is worth trying because it delivers that warm, homemade feeling without the hours of waiting or complicated steps.
Feel free to customize with add-ins or tweak the ingredients to suit your preferences. Honestly, every time I make this bread, it reminds me why I love simple, honest food that brings people together.
If you give this recipe a go, I’d love to hear how it turned out for you! Drop a comment below with your favorite twists or questions. And hey, don’t forget to share it with friends who need a little cozy bread in their lives. Happy baking, friends!
FAQs
What makes Irish soda bread different from regular bread?
Irish soda bread uses baking soda and buttermilk instead of yeast, which means it rises quickly and has a denser, tender crumb with a slightly tangy flavor.
Can I use regular milk instead of buttermilk?
You can, but you’ll need to add 1 tablespoon of lemon juice or vinegar to 1¾ cups of milk and let it sit for 5 minutes to mimic buttermilk’s acidity, which activates the baking soda.
How do I know when soda bread is fully baked?
The crust should be golden brown, and tapping the bottom of the loaf will produce a hollow sound. You can also insert a skewer into the center — it should come out clean.
Can I freeze Irish soda bread?
Yes! Slice it first, then freeze in an airtight bag for up to 3 months. Toast slices directly from frozen or thaw before serving.
What’s the best way to store leftover soda bread?
Wrap it tightly in plastic wrap or place it in an airtight container at room temperature for 1-2 days. For longer storage, freeze it as mentioned above.
Pin This Recipe!
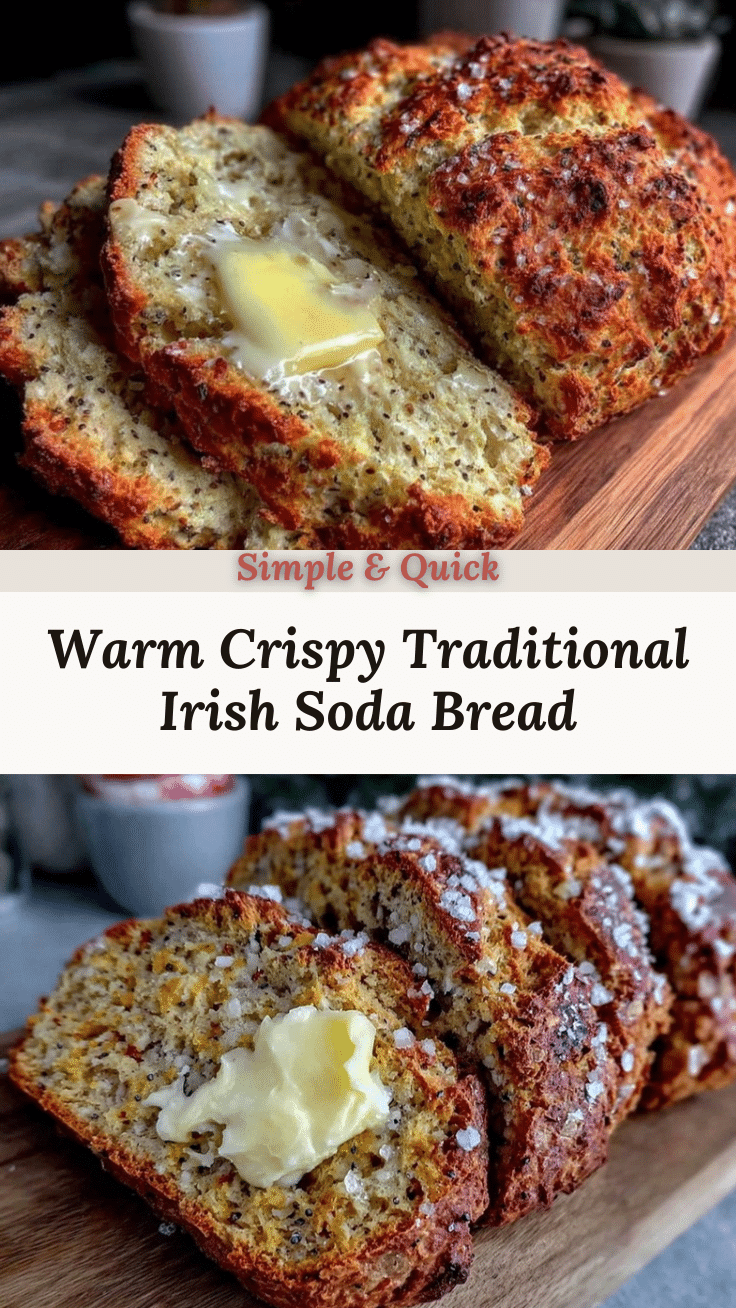
Traditional Irish Soda Bread
A quick and easy traditional Irish soda bread recipe with a golden crust and tender crumb, perfect for cozy gatherings and simple comfort food.
- Prep Time: 10 minutes
- Cook Time: 30-35 minutes
- Total Time: 40-45 minutes
- Yield: 8 servings 1x
- Category: Bread
- Cuisine: Irish
Ingredients
- 4 cups (480g) all-purpose flour
- 1 teaspoon baking soda
- 1 teaspoon salt
- 1 tablespoon brown sugar (optional)
- 1¾ cups (420ml) buttermilk, room temperature
- 3 tablespoons unsalted butter, melted and cooled
- Optional add-ins: raisins or currants, caraway seeds
Instructions
- Preheat your oven to 425°F (220°C). Place your cast-iron skillet or baking sheet inside to heat up while you prepare the dough.
- In a large bowl, whisk together flour, baking soda, salt, and brown sugar (if using) until well combined.
- Pour in buttermilk and melted butter. Stir gently with a wooden spoon until the dough begins to come together. If too dry, add a splash more buttermilk.
- Turn the dough onto a floured surface and knead lightly 3-4 times to form a round loaf. Avoid over-kneading.
- Transfer the loaf to parchment paper or a floured baking sheet. Score a deep ‘X’ about ½ inch deep across the top with a sharp knife.
- Place the loaf onto the preheated skillet or baking sheet. Bake for 30–35 minutes, rotating halfway, until crust is deep golden and a skewer inserted comes out clean.
- Remove from oven and transfer to a cooling rack. Let rest for at least 20 minutes before slicing.
Notes
Do not over-mix or knead the dough to keep it tender. Use fresh baking soda for best rise. Preheat baking surface for a crisp crust. Score the dough deeply to allow even rising. Let bread cool completely before slicing to avoid gummy texture.
Nutrition
- Serving Size: 1 slice (about 60g)
- Calories: 165
- Sugar: 2
- Sodium: 350
- Fat: 6
- Saturated Fat: 3.5
- Carbohydrates: 25
- Fiber: 1
- Protein: 4
Keywords: Irish soda bread, traditional soda bread, quick bread, buttermilk bread, easy bread recipe, homemade bread, rustic bread


