Let me tell you, the scent of crushed Oreo cookies mingling with sweet, velvety cream cheese is enough to make anyone’s mouth water before the first bite. The first time I whipped up this creamy no-bake Oreo cheesecake delight, I was instantly hooked. It was one of those rare moments where you pause, take a deep breath, and just smile because you know you’ve stumbled onto something truly special. Years ago, when I was knee-high to a grasshopper, my grandma used to make a baked cheesecake that took hours and hours. But this no-bake version? It’s dangerously easy and delivers pure, nostalgic comfort with way less fuss.
Honestly, my family couldn’t stop sneaking pieces off the cooling rack (and I can’t really blame them). This dessert’s creamy texture paired with crunchy Oreo bits hits that perfect balance that’s hard to find. You know what? It’s perfect for potlucks, a sweet treat for your kids after school, or just to brighten up your Pinterest cookie board. After testing this recipe multiple times in the name of research, of course, it’s become a staple for family gatherings, gifting, and those cozy nights when you want something that feels like a warm hug. Trust me, you’re going to want to bookmark this one.
Why You’ll Love This Recipe
This creamy no-bake Oreo cheesecake delight isn’t just any dessert—it’s a crowd-pleaser that’s as quick as it is delicious. I’ve tried countless cheesecake recipes, but this one stands out because of its simplicity and the way it captures the essence of Oreo magic without needing an oven.
- Quick & Easy: Comes together in under 20 minutes, perfect for busy weeknights or last-minute cravings.
- Simple Ingredients: No fancy grocery trips needed; you likely already have everything in your kitchen.
- Perfect for Any Occasion: Great for birthdays, potlucks, or just an indulgent weekend treat.
- Crowd-Pleaser: Always gets rave reviews from kids and adults alike—there’s just something about that Oreo crunch!
- Unbelievably Delicious: The texture and flavor combo is next-level comfort food, creamy and crunchy in all the right ways.
What sets this recipe apart? It’s all in the technique—whipping the cream cheese just right, folding in the crushed Oreos gently, and letting the fridge do the magic. It’s not just a cheesecake; it’s an experience that makes you close your eyes after the first bite. This recipe is comfort food reimagined—faster, easier, but with the same soul-soothing satisfaction. Whether you’re impressing guests without stress or turning a simple meal into a memorable moment, this cheesecake delight has you covered.
What Ingredients You Will Need
This recipe uses simple, wholesome ingredients to deliver bold flavor and satisfying texture without the fuss. Most are pantry staples, and the Oreos give it that iconic crunch and chocolatey goodness.
- Oreos: About 24 cookies, roughly 200 grams (7 oz), crushed (reserve some for topping). I prefer Oreo Original for that classic flavor, but feel free to use Golden Oreos for a twist.
- Unsalted Butter: 6 tablespoons (85 grams), melted – helps bind the crust together with a buttery richness.
- Cream Cheese: 16 ounces (450 grams), softened to room temperature – the star of the creamy filling. I trust Philadelphia for the best texture.
- Powdered Sugar: ¾ cup (90 grams), sifted – adds just the right sweetness without graininess.
- Heavy Whipping Cream: 1 cup (240 ml), chilled – whipped to stiff peaks to give that light, airy texture.
- Vanilla Extract: 1 teaspoon – enhances the overall flavor without overpowering.
Optional: For a little extra flair, you can add mini Oreo pieces in the filling or a drizzle of chocolate syrup on top. If you want a gluten-free option, try gluten-free sandwich cookies instead.
Equipment Needed
- Springform Pan: 9-inch (23 cm) diameter – makes releasing the cheesecake a breeze. No springform? A regular pie dish works fine, just be careful when serving.
- Mixing Bowls: Two medium-sized bowls for the crust and filling.
- Electric Mixer or Stand Mixer: For whipping the cream and beating the cream cheese smooth. You can use a hand whisk, but it’ll take some elbow grease.
- Food Processor or Plastic Bag & Rolling Pin: To crush Oreos finely. I usually toss them in a ziplock and bash gently with a rolling pin—no fancy gadget needed.
- Spatula: For folding ingredients gently and smoothing the cheesecake surface.
Keeping your cream cheese and whipping cream cold (except the cream cheese when softening) makes a world of difference in texture. Also, clean, dry bowls help the cream whip better—trust me, I’ve learned this the hard way!
Preparation Method
- Prepare the Crust: Crush 16 Oreos into fine crumbs using a food processor or by placing them in a ziplock bag and rolling over them with a rolling pin. Combine these crumbs with the melted butter in a bowl until evenly moistened. Press the mixture firmly into the bottom of your 9-inch springform pan, creating an even layer. Place the crust in the fridge to chill while you prepare the filling. (About 10 minutes)
- Whip the Cream Cheese: In a large bowl, beat the softened cream cheese using an electric mixer on medium speed until smooth and creamy, about 2-3 minutes. Scrape down the sides to avoid lumps and ensure even mixing.
- Add the Sweetness and Flavor: Gradually add the sifted powdered sugar and vanilla extract to the cream cheese, beating until fully incorporated and silky smooth. The sugar should dissolve completely, giving a light sweetness without grit.
- Whip the Heavy Cream: In a separate chilled bowl, whip the heavy cream on high speed until stiff peaks form—this usually takes 3-5 minutes. Be careful not to overwhip, or you’ll end up with butter (been there, done that!).
- Combine and Fold: Gently fold a third of the whipped cream into the cream cheese mixture to lighten it, then fold in the remaining cream carefully to keep the airy texture. Next, fold in the remaining 8 crushed Oreos, leaving some chunks for texture. Pour this creamy filling over the chilled crust, smoothing the top with a spatula.
- Chill to Set: Cover the cheesecake with plastic wrap and refrigerate for at least 4 hours, preferably overnight. This resting time lets the flavors meld and the cheesecake firm up perfectly.
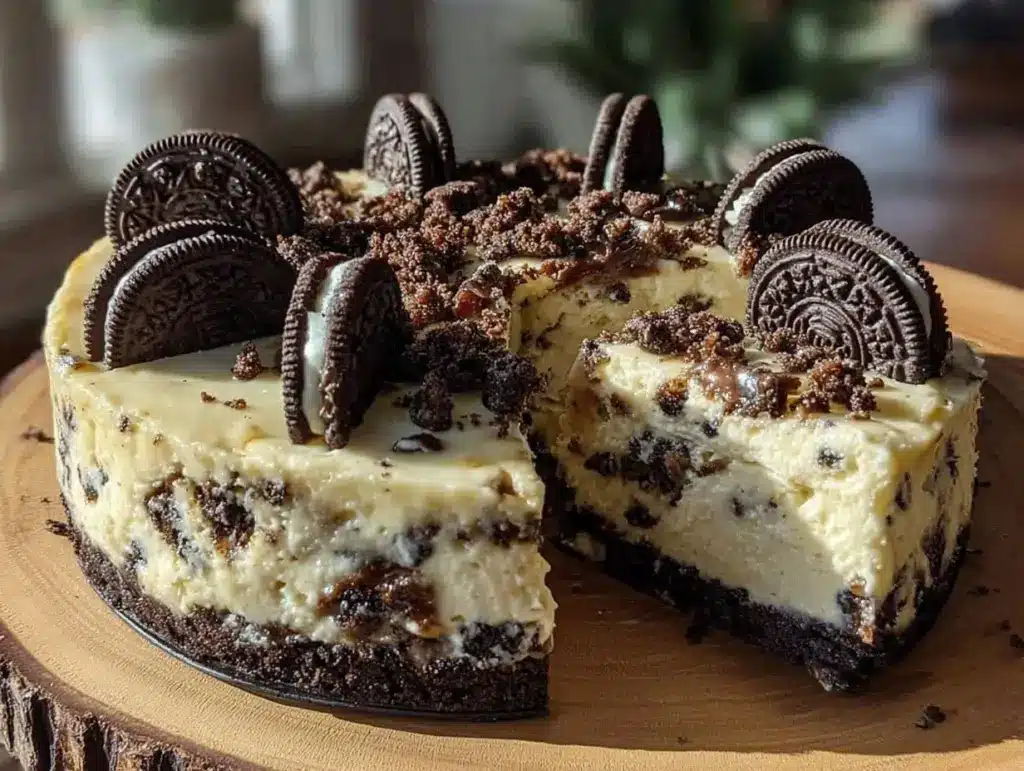
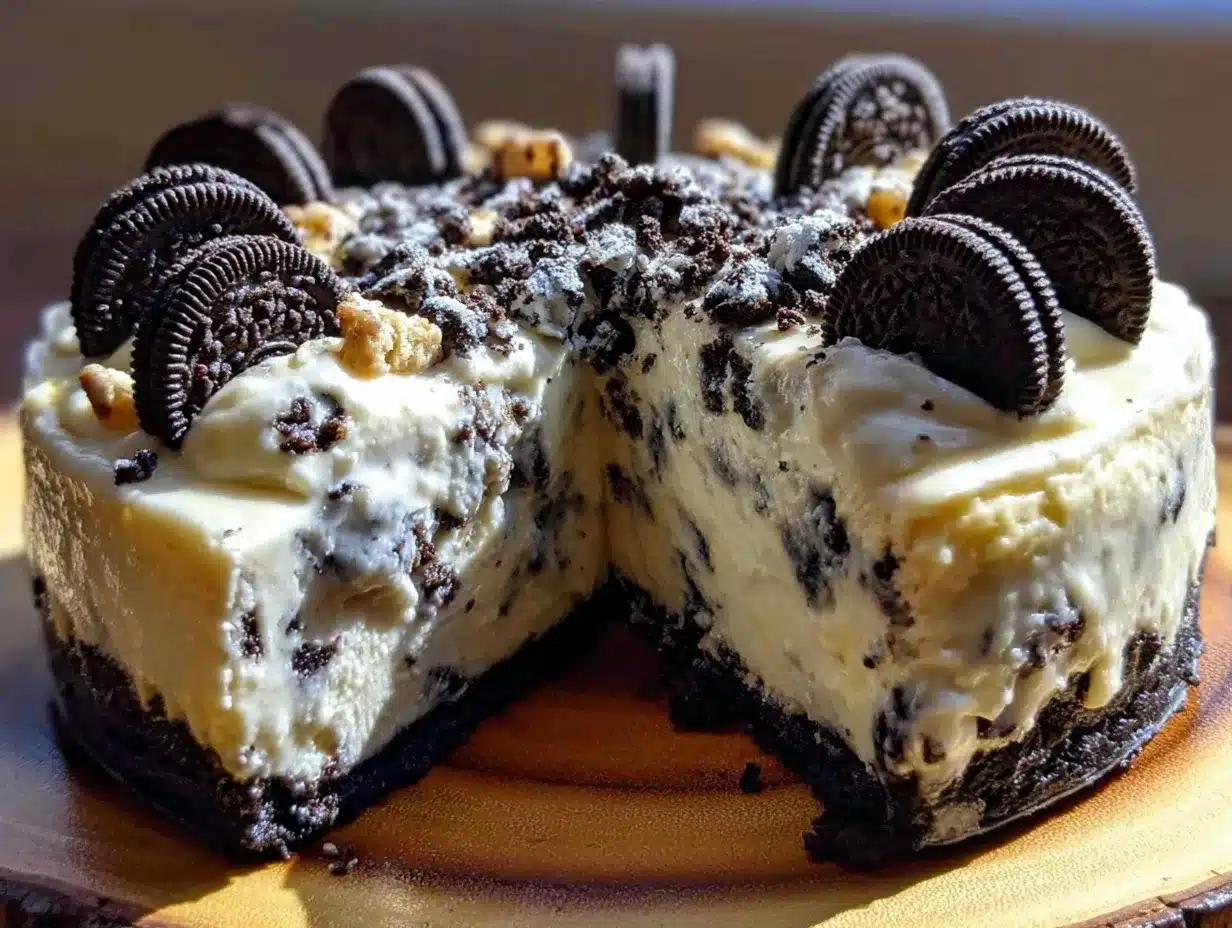
- Serve: Before serving, sprinkle the reserved crushed Oreos on top for a pretty, crunchy finish. Release the sides of the springform pan and slice with a sharp knife, wiping it clean between cuts for neat slices.
Pro tip: If your filling seems a bit too soft after chilling, an extra hour or two in the fridge can work wonders. Also, let the cheesecake sit at room temperature for 10 minutes before serving to soften up just a bit for that melt-in-your-mouth feel.
Cooking Tips & Techniques
Whipping the cream correctly is key here—if it’s too soft, your cheesecake won’t hold its shape; too stiff, and it can turn grainy. Chill your mixing bowl and beaters in the freezer for 10 minutes before whipping to help achieve the perfect stiffness. Also, make sure your cream cheese is softened but not melted; room temperature is best to avoid lumps.
Folding is an art—use a gentle hand with a rubber spatula to combine whipped cream and cream cheese. You want to keep as much air as possible to keep the filling light and fluffy. I’ve learned the hard way that overmixing can deflate your filling and make it dense.
When pressing the crust, pack it firmly but don’t overdo it; a thin, even base is all you need. Using a springform pan helps with easy removal, but if you don’t have one, line your pan with parchment paper for a smooth release.
Lastly, patience is a virtue. The chilling time is non-negotiable. Rushing it can mean a runny mess. Plan ahead, and your cheesecake will reward you with that perfect creamy texture every time.
Variations & Adaptations
- Flavor Twists: Add a tablespoon of instant coffee powder to the cream cheese mixture for a mocha Oreo cheesecake sensation.
- Fruit Infusion: Swirl in some fresh raspberries or strawberries for a fruity tang that balances the chocolatey richness.
- Dairy-Free Version: Swap cream cheese and heavy cream for coconut cream and dairy-free cream cheese alternatives. Use gluten-free sandwich cookies if needed.
- Chocolate Lovers: Mix in mini chocolate chips into the filling or drizzle melted dark chocolate over the top before chilling.
- Crust Swap: Use crushed graham crackers or digestive biscuits instead of Oreos for a lighter base.
One time, I tried adding peanut butter swirls into the filling—dangerously good! It’s a simple tweak that adds a nutty depth and makes people ask for seconds.
Serving & Storage Suggestions
This cheesecake is best served chilled but let it sit out for about 10 minutes to soften slightly before slicing. It pairs wonderfully with fresh berries or a drizzle of caramel sauce. For drinks, a cold glass of milk or a cup of strong coffee complements it beautifully.
Store leftovers covered tightly in the refrigerator for up to 4 days. If you want to keep it longer, freeze the cheesecake (whole or in slices) wrapped well in plastic wrap and foil—thaw overnight in the fridge before serving.
Reheating isn’t recommended as it’s meant to be enjoyed cold, but if you prefer a softer texture, just let it come to room temperature naturally. The flavors deepen over time, making leftovers even more satisfying.
Nutritional Information & Benefits
This creamy no-bake Oreo cheesecake delight clocks in around 350 calories per generous slice, with a decent amount of protein from the cream cheese and fat from the butter and cream. The Oreos do add sugar and carbs, so enjoy in moderation.
Key ingredients like cream cheese provide calcium and vitamin A, while the whipped cream adds richness without heaviness when used in moderation. For those watching gluten intake, swapping Oreos for gluten-free cookies keeps this dessert accessible.
From a wellness perspective, this treat feels indulgent but can be part of a balanced diet when paired with wholesome meals and enjoyed mindfully.
Conclusion
To wrap it up, this creamy no-bake Oreo cheesecake delight is a dessert that checks all the boxes: easy, delicious, and crowd-pleasing. You can totally customize it to your taste and dietary needs, making it a versatile go-to recipe. Honestly, I love this cheesecake because it brings back cozy memories without the hassle of baking, and it’s just plain fun to make.
Give it a try, play around with the variations, and please share how yours turns out—I’d love to hear your twists and tips! This dessert is more than a recipe; it’s a little slice of happiness you can make in minutes. Happy indulging!
FAQs About Creamy No-Bake Oreo Cheesecake Delight
Can I use low-fat cream cheese for this recipe?
You can, but the texture might be less creamy and a bit more dense. Full-fat cream cheese gives the best flavor and smoothness.
How long can I store this cheesecake in the fridge?
Keep it covered and refrigerated for up to 4 days. After that, the texture and flavor might start to decline.
Can I make this cheesecake ahead of time?
Absolutely! It actually tastes better after chilling overnight, making it perfect for preparing a day ahead of your event.
What if I don’t have a springform pan?
No worries! Use a regular pie dish lined with parchment paper for easier removal, though slices might be less neat.
Is there a vegan version of this cheesecake?
Yes! Use dairy-free cream cheese and coconut cream, plus vegan sandwich cookies. Just keep in mind the texture might be slightly different.
Pin This Recipe!
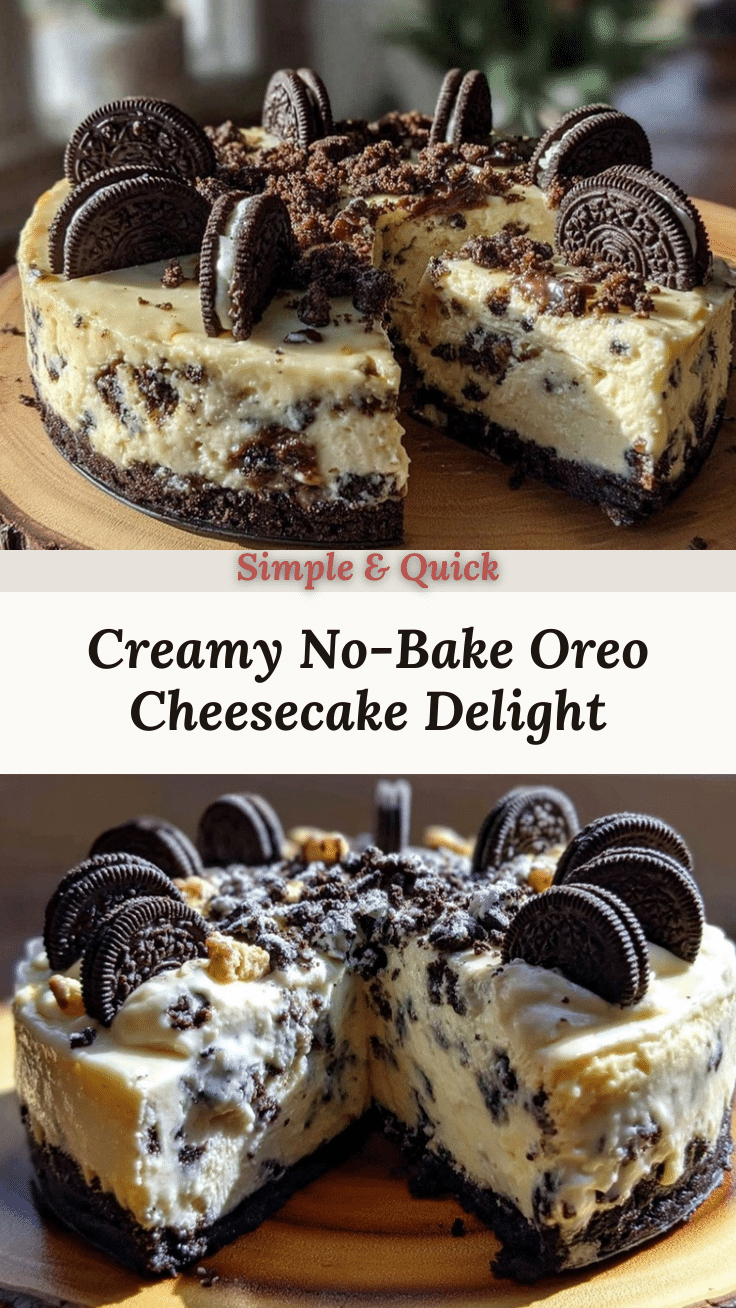
Creamy No-Bake Oreo Cheesecake Delight

A quick and easy no-bake Oreo cheesecake that combines creamy texture with crunchy Oreo bits, perfect for any occasion and a crowd-pleaser dessert.
- Prep Time: 15 minutes
- Cook Time: 0 minutes
- Total Time: 4 hours 15 minutes
- Yield: 12 servings 1x
- Category: Dessert
- Cuisine: American
Ingredients
- 24 Oreos (about 200 grams or 7 oz), crushed (reserve some for topping)
- 6 tablespoons (85 grams) unsalted butter, melted
- 16 ounces (450 grams) cream cheese, softened to room temperature
- 3/4 cup (90 grams) powdered sugar, sifted
- 1 cup (240 ml) heavy whipping cream, chilled
- 1 teaspoon vanilla extract
Instructions
- Prepare the crust: Crush 16 Oreos into fine crumbs using a food processor or by placing them in a ziplock bag and rolling over them with a rolling pin.
- Combine Oreo crumbs with melted butter until evenly moistened.
- Press the mixture firmly into the bottom of a 9-inch springform pan to create an even layer and chill in the fridge for about 10 minutes.
- Whip the cream cheese in a large bowl using an electric mixer on medium speed until smooth and creamy, about 2-3 minutes.
- Gradually add sifted powdered sugar and vanilla extract to the cream cheese, beating until fully incorporated and silky smooth.
- In a separate chilled bowl, whip the heavy cream on high speed until stiff peaks form, about 3-5 minutes.
- Gently fold one-third of the whipped cream into the cream cheese mixture to lighten it, then fold in the remaining whipped cream carefully to keep the airy texture.
- Fold in the remaining 8 crushed Oreos, leaving some chunks for texture.
- Pour the creamy filling over the chilled crust and smooth the top with a spatula.
- Cover with plastic wrap and refrigerate for at least 4 hours, preferably overnight.
- Before serving, sprinkle reserved crushed Oreos on top, release the sides of the springform pan, and slice with a sharp knife.
Notes
Keep cream cheese softened but not melted for best texture. Chill mixing bowls and beaters before whipping cream to achieve stiff peaks. Fold whipped cream gently to keep filling airy. Chill cheesecake for at least 4 hours or overnight for best results. Let cheesecake sit at room temperature for 10 minutes before serving for a melt-in-your-mouth texture.
Nutrition
- Serving Size: 1 slice (1/12th of c
- Calories: 350
- Sugar: 22
- Sodium: 250
- Fat: 25
- Saturated Fat: 15
- Carbohydrates: 28
- Fiber: 1
- Protein: 6
Keywords: no-bake cheesecake, Oreo cheesecake, easy dessert, creamy cheesecake, Oreo dessert, no oven dessert