October was finally showing up the way it should—cold enough for a sweater, the light going soft and golden by four in the afternoon. I had a stick of butter softening on the counter, a can of pumpkin I’d been saving since last year, and absolutely no plan. That’s usually when the best things happen, isn’t it? I wanted something that smelled like fall but wasn’t another pumpkin bread. Something with a little chew, a little warmth, and that specific kind of sweetness that doesn’t hit you all at once.
The idea of browning the butter came from a batch of brownies I’d made the week before—that nutty, almost toasty smell that fills the kitchen and makes you feel like you know what you’re doing. And snickerdoodles? They’ve always been my quiet favorite. Not flashy, not loaded with chocolate chips, just a simple cinnamon-sugar cookie that somehow feels like a hug. Combining the two felt right. Like putting on your favorite sweater and realizing it still fits perfectly.
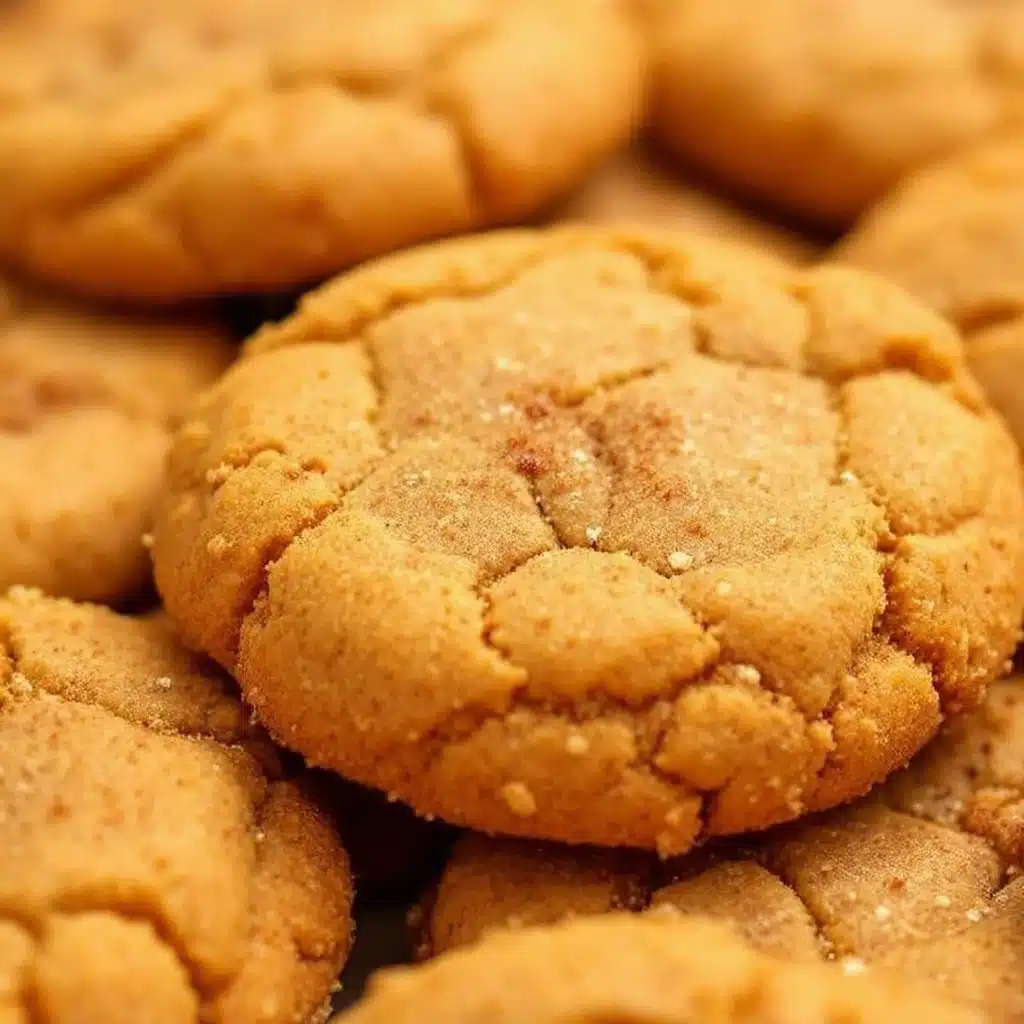
These Best Brown Butter Pumpkin Snickerdoodle Cookies are the result of that slow, unplanned Sunday. They’re soft in the middle with slightly crisp edges, and the brown butter adds this deep, almost caramel-like flavor that plays beautifully with the pumpkin and cinnamon. They’re not trying to be the fanciest cookie on the table. They just are what they are—and honestly, that’s what makes them so good.
Why You’ll Love This Recipe
I’ve tested this recipe four times to get the texture just right. Pumpkin can be tricky—it adds moisture, which is great for tenderness, but it can also make cookies cakey instead of chewy. The brown butter adds richness and depth, and the cream of tartar gives that signature snickerdoodle tang. Here’s what makes these cookies worth every minute in the kitchen:
- Deep, nutty flavor – Browning the butter is a simple step that adds incredible complexity. It’s the kind of flavor that makes people ask, “What’s in these?”
- Soft and chewy texture – These cookies stay tender for days, thanks to the pumpkin and the perfect ratio of wet to dry ingredients.
- No mixer required – You can whisk everything by hand. Less cleanup, more cookies.
- Perfect for fall baking – They smell like cinnamon, nutmeg, and browned butter. Your whole kitchen will feel cozy.
- Kid-approved and crowd-pleasing – I brought a batch to a friend’s potluck and they disappeared before the main course.
These aren’t just another pumpkin cookie. The brown butter makes them feel special without being fussy, and the cinnamon-sugar coating adds that satisfying little crunch. They’re the kind of cookie you make when you want to impress without stressing yourself out.
What Ingredients You Will Need
This recipe uses simple, everyday ingredients, but a few key choices make a real difference. Here’s what you’ll need and why each one matters.
- Unsalted butter – 1 cup (2 sticks). Browning the butter is essential here. I use unsalted so I can control the salt level. European-style butter like Kerrygold browns beautifully and adds extra richness.
- Canned pumpkin puree – ½ cup. Make sure it’s 100% pumpkin, not pumpkin pie filling. Libby’s is my go-to. Pat the pumpkin with a paper towel to remove excess moisture—this prevents soggy cookies.
- Granulated sugar – 1 cup. Adds sweetness and helps with browning.
- Light brown sugar – ½ cup, packed. Adds moisture and a hint of molasses flavor that pairs perfectly with brown butter.
- Large egg – 1, room temperature. Helps bind everything together.
- Vanilla extract – 1 teaspoon. Use pure vanilla extract for the best flavor.
- All-purpose flour – 2 cups. Spoon and level it—don’t scoop directly from the bag or you’ll end up with dry cookies.
- Cream of tartar – 1 teaspoon. This is what gives snickerdoodles their signature tangy flavor and soft texture. Don’t skip it.
- Baking soda – ½ teaspoon. Helps the cookies spread just enough.
- Salt – ½ teaspoon. Balances the sweetness and enhances the brown butter.
- Pumpkin pie spice – 1 teaspoon. You can use store-bought or make your own with cinnamon, nutmeg, ginger, and cloves.
- Ground cinnamon – 1 teaspoon (in the dough) + 3 tablespoons (for rolling). The rolling mixture creates that classic snickerdoodle look and flavor.
- Ground nutmeg – ¼ teaspoon. Adds warmth. Freshly grated is lovely if you have it.
For the cinnamon-sugar coating:
- Granulated sugar – ¼ cup
- Ground cinnamon – 3 tablespoons
Substitution notes: You can use gluten-free all-purpose flour blend (like Bob’s Red Mill 1-to-1) for a gluten-free version. For a dairy-free option, use vegan butter—just make sure it’s suitable for browning. Coconut sugar can replace granulated sugar, but the texture will be slightly more crumbly.
Equipment Needed
You don’t need fancy tools for this recipe. Here’s what I use:
- Medium saucepan – For browning the butter. Light-colored pans make it easier to see the color change.
- Large mixing bowl – For the wet ingredients.
- Medium mixing bowl – For the dry ingredients.
- Whisk – A sturdy whisk works better than a spatula for combining everything smoothly.
- Rubber spatula – For scraping every last bit of brown butter.
- Baking sheets – Two standard half-sheet pans. Line them with parchment paper for easy cleanup.
- Cooling rack – Lets air circulate so the bottoms don’t get soggy.
- Cookie scoop – I use a 1.5-tablespoon scoop for consistent sizes. A spoon works fine too.
- Small bowl – For the cinnamon-sugar coating.
If you don’t have a kitchen scale, that’s okay—just spoon and level your flour carefully. I’ve made these cookies with a cheap whisk and a fork, and they still turned out great. Don’t overthink the equipment.
Preparation Method
Let’s walk through this step by step. I’ll include visual cues so you know exactly what to look for.
- Brown the butter. Place the butter in a medium saucepan over medium heat. Stir occasionally with a rubber spatula. After about 5–7 minutes, the butter will start to foam and turn golden. Watch closely—small brown specks will appear at the bottom, and it will smell nutty and rich. Remove from heat immediately and pour into a heatproof bowl. Let it cool for 10–15 minutes. It should be warm but not hot when you add it to the sugar.
- Mix the wet ingredients. In a large bowl, whisk together the cooled brown butter, granulated sugar, and brown sugar until smooth and combined. Add the pumpkin puree, egg, and vanilla extract. Whisk until everything is well incorporated. The mixture will look thick and glossy.
- Combine the dry ingredients. In a separate medium bowl, whisk together the flour, cream of tartar, baking soda, salt, pumpkin pie spice, cinnamon, and nutmeg. Make sure there are no lumps—cream of tartar can be clumpy.
- Make the dough. Gradually add the dry ingredients to the wet ingredients, stirring with a spatula or wooden spoon until just combined. Don’t overmix—stop as soon as you no longer see streaks of flour. The dough will be soft and slightly sticky.
- Chill the dough. Cover the bowl with plastic wrap and refrigerate for at least 30 minutes. This step is crucial. Chilling firms up the butter and prevents the cookies from spreading too much in the oven. You can chill for up to 24 hours—the flavor only gets better.
- Preheat and prep. Preheat your oven to 350°F (175°C). Line two baking sheets with parchment paper. In a small bowl, mix together the ¼ cup granulated sugar and 3 tablespoons cinnamon for the coating.
- Shape and coat. Scoop rounded tablespoons of dough (about 1.5 tablespoons each) and roll them into balls. Roll each ball generously in the cinnamon-sugar mixture until fully coated. Place them on the prepared baking sheets, spacing them about 2 inches apart.
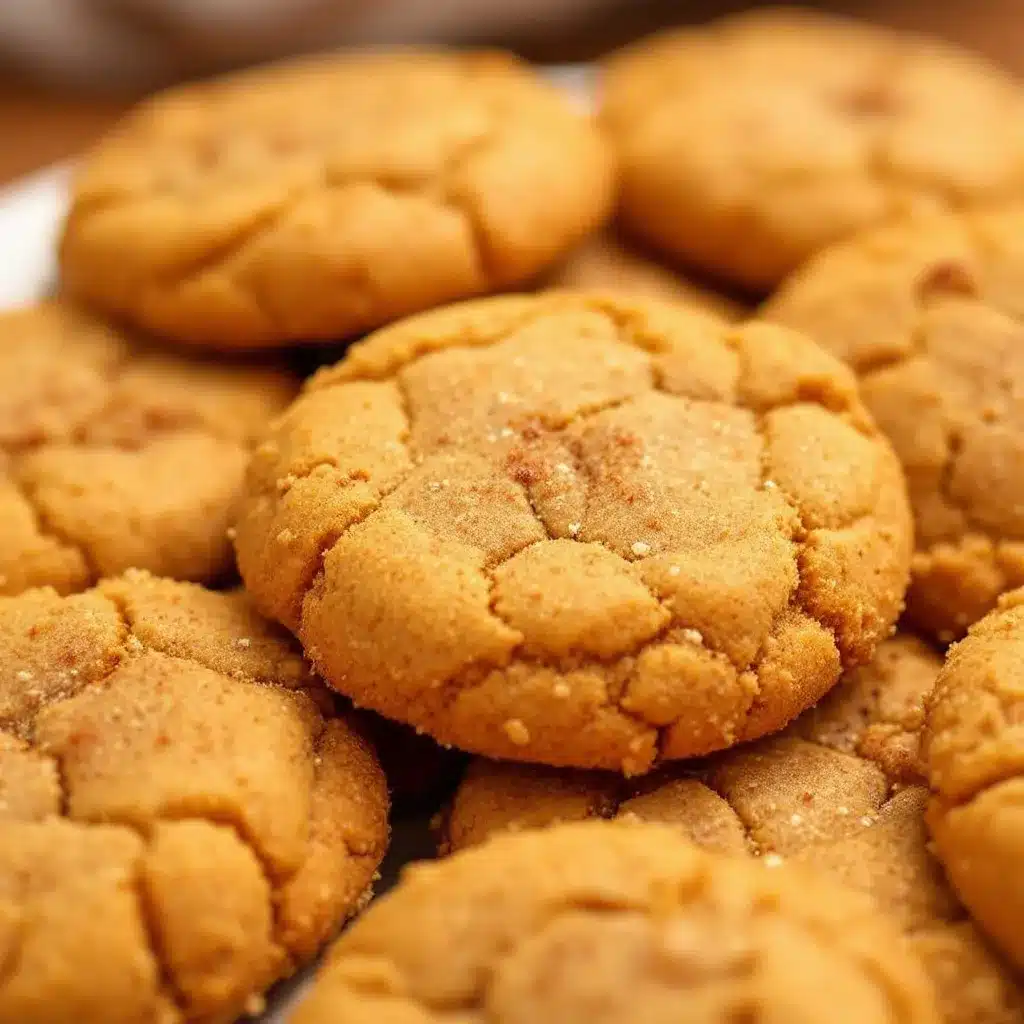
- Bake. Bake one sheet at a time for 10–12 minutes. The cookies will look puffy and slightly cracked on top. The edges should be set but the centers will still look soft and slightly underdone—that’s exactly what you want. They’ll continue to set as they cool.
- Cool. Let the cookies rest on the baking sheet for 5 minutes. This helps them firm up without becoming hard. Then transfer them to a cooling rack to cool completely. The centers will sink slightly and develop that perfect chewy texture.
Pro tip: If you want thicker cookies, chill the dough for a full hour. If you prefer thinner, crispier edges, skip the chilling step—but be prepared for more spread.
Cooking Tips & Techniques
I’ve made plenty of mistakes with pumpkin cookies over the years. Here’s what I’ve learned so you don’t have to repeat them.
Don’t skip browning the butter. I know it’s an extra step, but it takes less than 10 minutes and completely transforms the flavor. The first time I made these, I was lazy and used melted butter. They were fine. But the brown butter version? That’s the one people beg me to make again. The nutty, toasty notes are irreplaceable.
Pat your pumpkin dry. Pumpkin puree holds a lot of water. If you add it straight from the can, your cookies will be more cakey than chewy. Spread the pumpkin on a paper towel-lined plate, press another paper towel on top, and let it sit for a few minutes. You’ll be amazed at the difference.
Watch your baking time. Every oven runs differently. Start checking at 10 minutes. The cookies should look puffy and cracked, with edges that are just starting to turn golden. If you wait until they look fully done, they’ll be overbaked and dry. Trust me—I’ve ruined a batch that way.
Use a cookie scoop for consistency. Uniform sizes mean even baking. If some cookies are bigger than others, you’ll end up with burnt edges and raw centers. A simple scoop fixes that problem instantly.
Let them cool on the sheet. I know it’s tempting to move them right away, but those 5 minutes on the hot baking sheet are what set the centers without drying them out. Patience pays off here.
Variations & Adaptations
This recipe is forgiving and easy to adapt. Here are some of my favorite twists.
- Pumpkin Chocolate Chip Snickerdoodles – Fold in ½ cup of semi-sweet chocolate chips after mixing the dough. The chocolate pairs beautifully with the brown butter and cinnamon.
- Vegan Version – Use vegan butter that browns well (Miyoko’s works great) and replace the egg with a flax egg (1 tablespoon ground flaxseed + 3 tablespoons water, let sit for 5 minutes). The texture will be slightly more delicate but still delicious.
- Gluten-Free Option – Substitute the all-purpose flour with a 1-to-1 gluten-free baking flour blend. I’ve tested this with Bob’s Red Mill and King Arthur Measure for Measure, and both worked well. Add an extra tablespoon of flour if the dough feels too sticky.
- Spiced Sugar Coating – Add ½ teaspoon of ground ginger or cardamom to the cinnamon-sugar mixture for a more complex flavor profile.
- Pumpkin Cream Cheese Filling – For a stuffed version, chill the dough, then flatten each ball, add a small dollop of cream cheese mixed with a little powdered sugar, and seal the dough around it. Bake as directed—just watch for leaks.
I tried the chocolate chip version last weekend and honestly couldn’t stop eating them. The combination of nutty brown butter, warm cinnamon, and melted chocolate is dangerously good.
Serving & Storage Suggestions
These cookies are best served slightly warm, when the centers are still soft and the cinnamon-sugar coating is perfectly crunchy. I like to serve them with a cold glass of milk or a hot cup of chai tea. They also pair beautifully with a scoop of vanilla ice cream for a simple dessert.
For storage, keep the cookies in an airtight container at room temperature. They’ll stay fresh for up to 5 days—if they last that long. I’ve found they actually taste even better on day two, after the flavors have had time to meld.
To freeze, place the baked and cooled cookies in a single layer in a freezer-safe container or bag. They’ll keep for up to 3 months. Thaw at room temperature for about 30 minutes, then warm them in a 300°F oven for 5 minutes to revive that fresh-baked texture.
You can also freeze the unbaked dough balls. Roll them in the cinnamon-sugar coating, place them on a baking sheet, and freeze until solid. Transfer to a freezer bag. When you’re ready to bake, add 2–3 extra minutes to the baking time—no need to thaw.
If you’re planning a fall party or holiday gathering, these cookies are perfect for making ahead. I’ve brought them to game day spreads and they always get rave reviews. They’re also a great addition to a cheese ball board for a sweet-and-savory contrast.
Nutritional Information & Benefits
Here’s an approximate nutritional breakdown per cookie (based on 24 cookies):
- Calories: 145
- Fat: 7g
- Carbohydrates: 20g
- Protein: 2g
- Fiber: 1g
- Sugar: 12g
Pumpkin is rich in vitamin A and fiber, which supports eye health and digestion. Cinnamon has anti-inflammatory properties and may help regulate blood sugar. And while brown butter isn’t exactly a health food, it does add a richness that means you’re satisfied with one or two cookies instead of half the batch.
This recipe is vegetarian and can be made gluten-free or vegan with simple substitutions. It contains dairy and gluten in its standard form, so adjust accordingly for allergies.
I’m not a nutritionist, but I love that these cookies feel a little more wholesome than your average sugar bomb. They’re a treat—but a treat made with real ingredients and a lot of love.
Conclusion
These Best Brown Butter Pumpkin Snickerdoodle Cookies are everything I want in a fall cookie—soft, chewy, warmly spiced, and just a little bit special. The brown butter adds a depth of flavor that makes them taste like you spent hours in the kitchen, when really they come together in about 30 minutes of active time.
I hope you make these on a quiet Sunday afternoon, or for a gathering with people you love. I hope they fill your kitchen with that incredible smell of cinnamon and browned butter. And I hope you eat at least one while it’s still warm—that’s non-negotiable.
If you try this recipe, I’d love to hear about it. Leave a comment below, share a photo on Pinterest, or tag me in your baking adventures. Your tweaks and variations inspire me every time. Happy baking, friend.
Frequently Asked Questions
Can I use pumpkin pie filling instead of pumpkin puree?
No, please don’t. Pumpkin pie filling is pre-sweetened and spiced, which will throw off the balance of the recipe. Stick with 100% pure pumpkin puree for the best results.
Why do I need to chill the dough?
Chilling the dough solidifies the brown butter, which prevents the cookies from spreading too much in the oven. It also allows the flavors to meld and develop. Even 30 minutes makes a noticeable difference.
Can I make these cookies without cream of tartar?
Cream of tartar is what gives snickerdoodles their signature tangy flavor and soft texture. If you don’t have it, you can substitute with 1 teaspoon of lemon juice or white vinegar, but the flavor won’t be exactly the same. For a closer match, use ½ teaspoon of baking powder instead of the cream of tartar and baking soda combo.
How do I know when the brown butter is ready?
Watch for the butter to foam, then turn golden with small brown specks at the bottom of the pan. It should smell nutty and toasty—like toasted hazelnuts. Remove it from the heat immediately to prevent burning.
Can I double this recipe?
Absolutely. This recipe doubles beautifully. Just make sure you brown the butter in two batches—crowding the pan can cause uneven browning. The dough also freezes well, so you can bake half now and save the rest for later.
Pin This Recipe!
Best Brown Butter Pumpkin Snickerdoodles
Soft and chewy snickerdoodles with deep brown butter flavor, warm pumpkin spice, and a classic cinnamon-sugar coating. Perfect for fall baking.
- Prep Time: 15 minutes
- Cook Time: 12 minutes
- Total Time: 1 hour 2 minutes (including 30 minutes chilling)
- Yield: 24 cookies 1x
- Category: Dessert
- Cuisine: American
Ingredients
- 1 cup (2 sticks) unsalted butter
- ½ cup canned pumpkin puree (100% pumpkin, not pie filling)
- 1 cup granulated sugar
- ½ cup light brown sugar, packed
- 1 large egg, room temperature
- 1 teaspoon pure vanilla extract
- 2 cups all-purpose flour (spooned and leveled)
- 1 teaspoon cream of tartar
- ½ teaspoon baking soda
- ½ teaspoon salt
- 1 teaspoon pumpkin pie spice
- 1 teaspoon ground cinnamon (in dough)
- ¼ teaspoon ground nutmeg
- ¼ cup granulated sugar (for coating)
- 3 tablespoons ground cinnamon (for coating)
Instructions
- Brown the butter: Place butter in a medium saucepan over medium heat. Stir occasionally with a rubber spatula. After 5–7 minutes, butter will foam and turn golden with small brown specks. Remove from heat immediately and pour into a heatproof bowl. Let cool for 10–15 minutes until warm but not hot.
- Mix wet ingredients: In a large bowl, whisk together cooled brown butter, granulated sugar, and brown sugar until smooth. Add pumpkin puree, egg, and vanilla extract. Whisk until well incorporated and glossy.
- Combine dry ingredients: In a separate medium bowl, whisk together flour, cream of tartar, baking soda, salt, pumpkin pie spice, cinnamon, and nutmeg until no lumps remain.
- Make the dough: Gradually add dry ingredients to wet ingredients, stirring with a spatula or wooden spoon until just combined. Do not overmix. Dough will be soft and slightly sticky.
- Chill the dough: Cover bowl with plastic wrap and refrigerate for at least 30 minutes (up to 24 hours).
- Preheat and prep: Preheat oven to 350°F (175°C). Line two baking sheets with parchment paper. In a small bowl, mix ¼ cup granulated sugar and 3 tablespoons cinnamon for coating.
- Shape and coat: Scoop rounded tablespoons of dough (about 1.5 tablespoons each) and roll into balls. Roll each ball generously in cinnamon-sugar mixture. Place on prepared baking sheets, spacing 2 inches apart.
- Bake: Bake one sheet at a time for 10–12 minutes. Cookies will look puffy and slightly cracked on top; edges should be set but centers still soft. They will continue to set as they cool.
- Cool: Let cookies rest on baking sheet for 5 minutes, then transfer to a cooling rack to cool completely.
Notes
Pat pumpkin puree dry with paper towels to remove excess moisture for chewier cookies. Chilling dough is crucial to prevent spreading. For thicker cookies, chill for 1 hour. For thinner edges, skip chilling. Cookies stay fresh up to 5 days at room temperature in an airtight container. Freeze baked cookies for up to 3 months or unbaked dough balls for later use.
Nutrition
- Serving Size: 1 cookie
- Calories: 145
- Sugar: 12
- Sodium: 95
- Fat: 7
- Saturated Fat: 4
- Carbohydrates: 20
- Fiber: 1
- Protein: 2
Keywords: brown butter, pumpkin, snickerdoodles, fall cookies, cinnamon sugar, pumpkin spice


