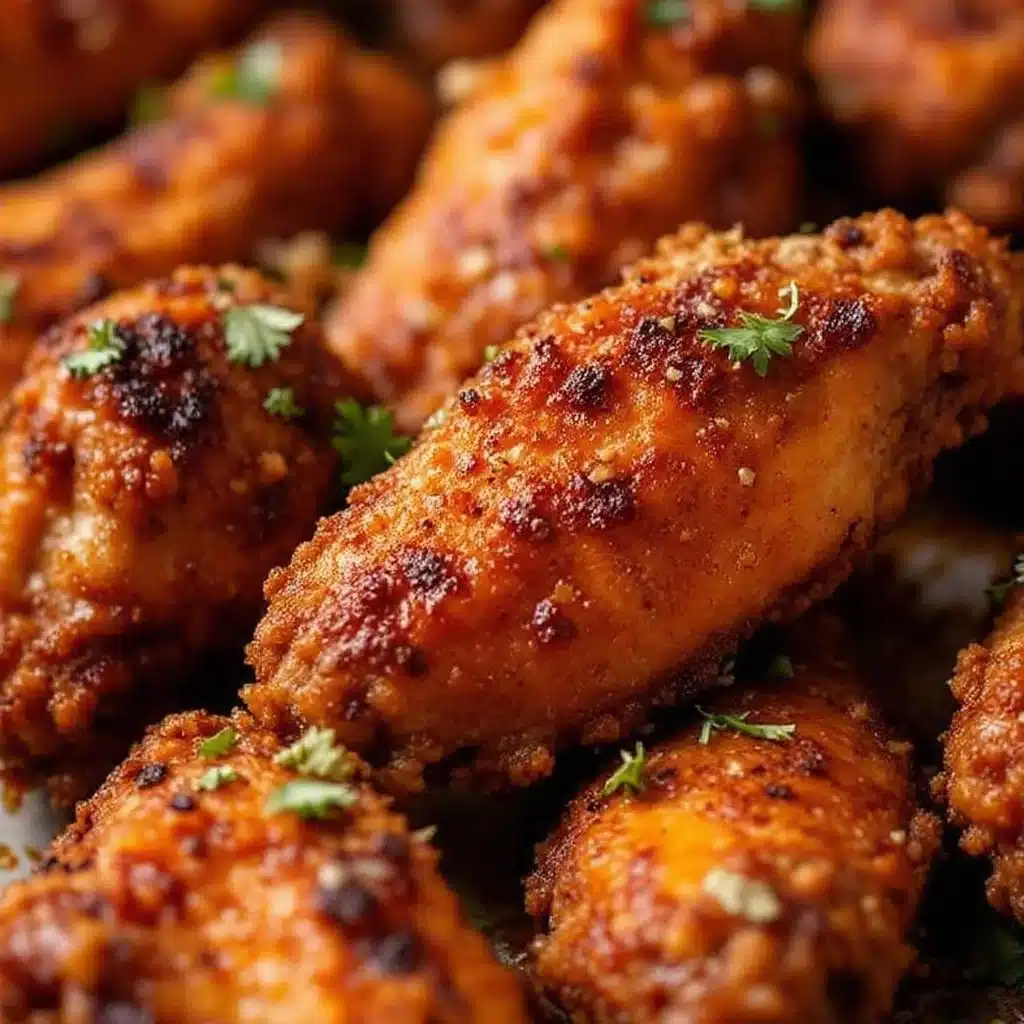
The foil tray was empty before kickoff of the second quarter. I remember staring at it, confused for a second — I’d made forty wings. Forty. And they were just… gone. My brother-in-law had sauce on his chin, my cousin was licking her fingers, and my dad just looked at me and said, “You’re making these next week, right?” That was three seasons ago, and I haven’t missed a single Sunday since.
Honestly, I wasn’t even trying to reinvent the wheel that day. I just wanted crispy baked chicken wings that didn’t require me to stand over a vat of hot oil while everyone else was watching the pregame show. You know the struggle — you want to be part of the fun, but you also want to bring something that actually tastes like it came from a sports bar. These wings solved that problem completely.
The secret? It’s not complicated, and that’s exactly the point. A little technique, a little patience, and you end up with wings that are genuinely crunchy on the outside and ridiculously tender inside. No deep fryer required. No mess. Just pure, unapologetic wing perfection that disappears faster than you can say “touchdown.”
If you’ve ever been let down by baked wings that turned out sad and flabby, I get it. I’ve been there too. But these crispy baked chicken wings are different — and once you try them, you’ll understand why I can’t stop making them.
Why You’ll Love This Recipe
Let me tell you why these crispy baked chicken wings have become the official snack of my household every game day. First off, they’re incredibly easy. You don’t need any fancy equipment or culinary school training. If you can pat a wing dry and toss it in seasoning, you’ve got this handled.
- Quick & Easy: From fridge to table in about 55 minutes, with only about 10 minutes of actual hands-on work. That leaves you plenty of time to set up the snack spread and argue about fantasy picks.
- Simple Ingredients: Chicken wings, baking powder, salt, and your favorite seasoning. That’s it. No weird specialty items you’ll never use again.
- Perfect for Game Day: Whether it’s football Sunday, March Madness, or just a Tuesday night game, these wings fit the occasion perfectly.
- Crowd-Pleaser: I’ve served these to picky eaters, wing snobs, and people who swear by fried only — and they all come back for more.
- Unbelievably Delicious: The texture is what gets everyone. That shatteringly crisp skin gives way to juicy, tender meat. It’s the kind of bite that makes you close your eyes for a second.
What makes these wings different from every other baked wing recipe out there? It’s the technique. Most recipes skip the crucial step of drying the wings properly or use the wrong type of baking powder. I’ve tested this method dozens of times, tweaking temperatures and times until I got it just right. These wings are tested, approved, and guaranteed to deliver that deep-fried crunch without the deep fryer.
These aren’t just good “for baked wings.” They’re good wings, period. And on football Sunday, when the stakes are high and the snacks need to deliver, that’s exactly what you want.
What Ingredients You Will Need
This recipe relies on a short list of ingredients, each playing a specific role in creating that perfect crispy texture and big flavor. Here’s everything you’ll need:
For the Wings
- 3 pounds chicken wings (about 15-18 whole wings, separated into drumettes and flats) — Look for fresh wings if you can find them, but frozen and thawed work fine too. I prefer buying the party pack that’s already separated, but whole wings are easy to cut yourself.
- 1 ½ tablespoons baking powder (aluminum-free, not baking soda!) — This is the magic ingredient. It raises the pH of the skin, helping it brown and crisp up in the oven. Trust me on this one — don’t skip it.
- 1 ½ teaspoons kosher salt — I use Diamond Crystal. If you’re using table salt, cut the amount in half or your wings will be too salty.
- 1 teaspoon garlic powder — Adds that savory backbone that makes wings so addictive.
- ½ teaspoon black pepper — Freshly ground, if you have it.
For the Sauce (Classic Buffalo)
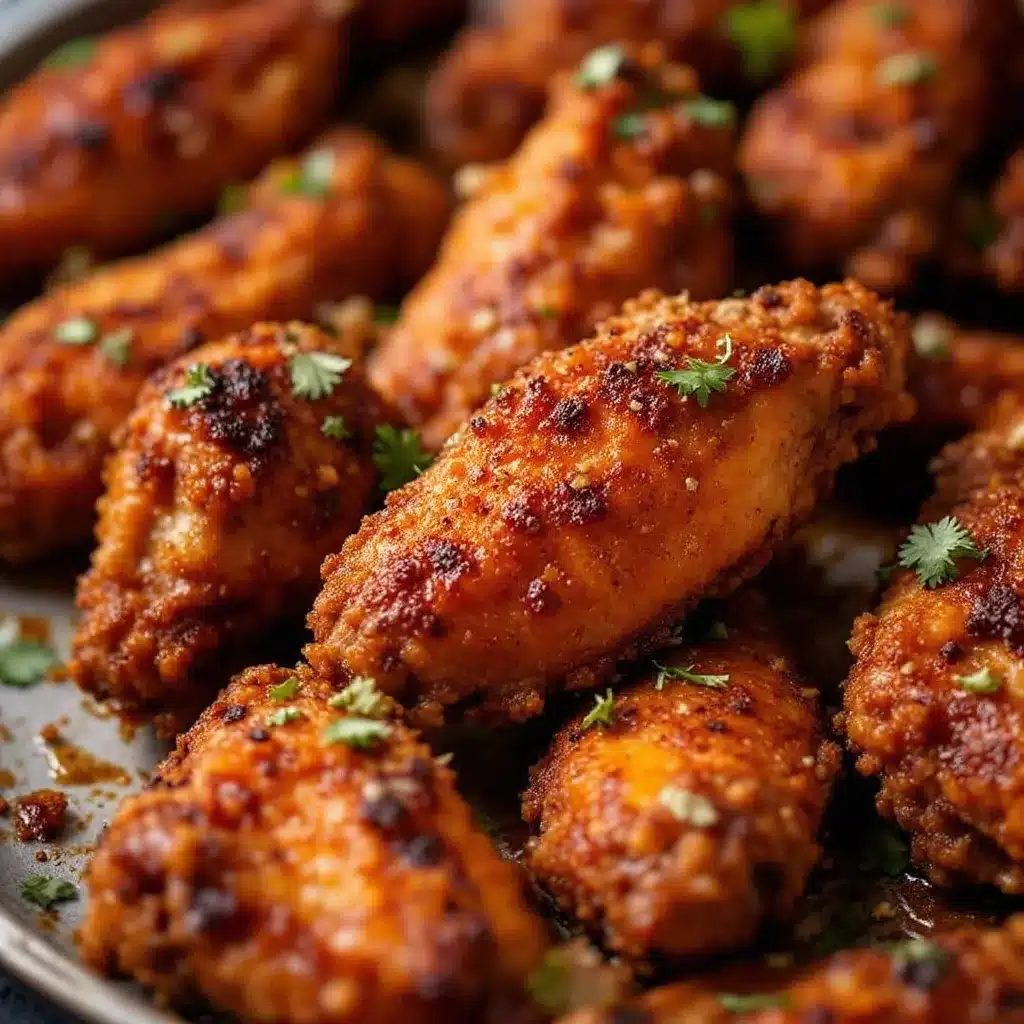
- ½ cup hot sauce (Frank’s RedHot is my go-to — it’s the standard for a reason)
- ¼ cup unsalted butter, melted
- 1 tablespoon honey (balances the heat and helps the sauce cling to the wings)
- 1 teaspoon Worcestershire sauce (adds depth you won’t even notice until it’s missing)
For Serving
- Blue cheese or ranch dressing — I’m a blue cheese person myself, especially with something like this crispy buffalo cauliflower bites that uses a similar dip.
- Celery and carrot sticks — Non-negotiable for the full wing experience.
The beauty of this ingredient list is its flexibility. You can swap the buffalo sauce for your favorite store-bought wing sauce, or make your own BBQ version by mixing ½ cup barbecue sauce with 2 tablespoons apple cider vinegar. If you’re watching your sodium, use a low-sodium hot sauce and reduce the added salt slightly.
One thing I’ve learned the hard way: check your baking powder label. Some brands contain aluminum, which can leave a metallic aftertaste on your wings. I use Rumford or Bob’s Red Mill — both are aluminum-free and work perfectly every time.
Equipment Needed
You don’t need much to pull these off, which is part of the appeal. Here’s what you’ll want to have on hand:
- Large baking sheet (half-sheet pan works best) — Make sure it has a rim to catch any drips.
- Wire rack that fits inside your baking sheet — This is key for air circulation. The wings sit above the pan, allowing hot air to reach all sides and keeping them from steaming in their own juices.
- Paper towels — Lots of them. You’ll be drying wings like your life depends on it.
- Large mixing bowl — For tossing wings with the dry ingredients.
- Small saucepan — For making the sauce (or you can use a microwave-safe bowl).
- Tongs — For handling hot wings without burning your fingers.
- Instant-read thermometer (optional but recommended) — Wings are done at 165°F, but I pull them at 170°F for better texture.
If you don’t have a wire rack, don’t panic. You can still make these wings — just flip them halfway through cooking and expect the bottom to be slightly less crispy. I’ve done it, and honestly, nobody complained. Also, if you’re making a big batch for a party, you can use two racks stacked on two pans. Just rotate them halfway through for even cooking.
Preparation Method
Alright, let’s get to the good part. Follow these steps carefully, and you’ll have wings that rival anything from your favorite wing joint.
- Prep the wings — Start by patting your wings completely dry with paper towels. I mean really dry. Like, use five or six towels and press firmly. Any moisture on the skin will steam instead of crisp, and we’re not making steamed wings today. If you have time, leave them uncovered in the fridge for an hour — this dries them out even more.
- Preheat and position — Set your oven to 425°F (220°C). Place your oven rack in the upper third position, about 6-8 inches from the heating element. This gives you that intense heat needed for crisping without burning.
- Mix the dry coating — In a large bowl, combine the baking powder, salt, garlic powder, and black pepper. Whisk it together so everything is evenly distributed. This is your crispy coating mixture.
- Season the wings — Add the dried wings to the bowl and toss them with your hands until every piece is evenly coated. Don’t be shy — really work it in there. The mixture should look like a light dusting on each wing. Let them sit for 10 minutes at room temperature. This allows the baking powder to start working its magic.
- Arrange on the rack — Place your wire rack inside the baking sheet. Arrange the wings in a single layer with space between each piece. Overcrowding is the enemy of crispiness — if they’re touching, they’ll steam. If you have too many wings, use two pans.
- Bake for 30 minutes — Put the pan in the oven and set a timer for 30 minutes. Don’t open the door during this time. You want that heat to stay consistent.
- Flip and rotate — After 30 minutes, carefully flip each wing using tongs. Rotate the pan front to back for even cooking. Return to the oven for another 20-25 minutes. The wings should be deep golden brown and the skin should look crackled and crisp. If they need more time, give them 5 more minutes — every oven runs differently.
- Make the sauce — While the wings finish baking, combine the hot sauce, melted butter, honey, and Worcestershire sauce in a small saucepan over low heat. Whisk until smooth and warm. Don’t let it boil — you just want it warm enough to coat the wings easily.
- Toss and serve — Transfer the hot wings to a large bowl. Pour the sauce over them and toss gently until every wing is coated. The wings should be hot when they hit the sauce — this helps the sauce adhere better. Serve immediately with dressing and veggies on the side.
One thing I always do: taste a piece of the skin before saucing. If it’s not crunchy enough for you, pop them back in the oven for 5 more minutes. Better to check than to end up with soggy wings.
Cooking Tips & Techniques
After making these crispy baked chicken wings more times than I can count, I’ve picked up a few tricks that make a real difference. Here’s what I wish someone had told me when I started:
The drying step is non-negotiable. I know it’s tedious. I know you want to just toss them in the bowl and move on. But moisture is the enemy of crispiness, and those paper towels are your best friend. I once skipped this step when I was in a rush, and the wings came out pale and rubbery. Never again.
Don’t use too much baking powder. More isn’t better here. If you overdo it, the wings can develop a bitter taste and an unappealing white residue. Stick to the measurements in the recipe — 1 ½ tablespoons for 3 pounds of wings is the sweet spot.
Let the wings rest after seasoning. That 10-minute rest before baking isn’t just for show. It gives the salt time to penetrate the meat while the baking powder starts drawing out any remaining moisture from the skin. This double action is what gives you that ultra-crisp result.
Use a thermometer for consistency. I know wing temperature can be tricky because of the bones, but an instant-read thermometer inserted into the thickest part of the drumette (avoiding the bone) should read 165°F minimum. I pull mine at 170°F for better texture — the meat stays juicy but the skin gets extra crispy.
Make extra sauce. I always double the sauce recipe. Some wings need a heavy coating, and you might want extra for dipping. Leftover sauce keeps in the fridge for weeks and is amazing on everything from crispy loaded nachos to roasted vegetables.
Timing matters. These wings are best served immediately after saucing. If you’re making them for a party, time the final bake so the wings come out right when guests arrive. You can prep everything ahead — dry the wings, mix the coating, make the sauce — and then just bake and toss when it’s go time.
Variations & Adaptations
One of the best things about this recipe is how easily it adapts to different tastes and dietary needs. Here are some of my favorite variations:
Spicy Garlic Parmesan
Skip the buffalo sauce and toss the baked wings with ¼ cup melted butter, 4 minced garlic cloves, ½ cup grated Parmesan cheese, and a pinch of red pepper flakes. The garlic gets fragrant and the Parmesan creates a savory crust that’s absolutely addictive.
Honey BBQ
Mix ½ cup of your favorite barbecue sauce with 2 tablespoons honey and 1 tablespoon apple cider vinegar. Toss the hot wings in this mixture for a sweet and tangy option that even the kids will love. I’ve served these at parties alongside apple cider pulled pork sliders for a full game day spread.
Korean Gochujang Glaze
Whisk together 3 tablespoons gochujang (Korean chili paste), 2 tablespoons soy sauce, 1 tablespoon honey, 1 tablespoon rice vinegar, and 1 teaspoon sesame oil. Toss with the baked wings and garnish with sesame seeds and sliced green onions. This one’s a showstopper.
Lemon Pepper (No Sauce)
For a lighter option, skip the sauce entirely. After baking, toss the wings with 2 tablespoons melted butter, 1 tablespoon lemon zest, 1 teaspoon cracked black pepper, and a pinch of salt. The lemon cuts through the richness beautifully.
Air Fryer Adaptation
If you have an air fryer, you’re in luck. Follow the same prep steps, then cook the wings at 400°F for 12-15 minutes, flip, and cook another 10-12 minutes. They come out even crispier than the oven version, if you can believe it.
For a gluten-free version, simply ensure your baking powder is gluten-free (most are) and use a gluten-free hot sauce. The recipe is naturally low-carb and keto-friendly if you skip the honey in the sauce.
Serving & Storage Suggestions
These wings are best served hot, right after tossing in the sauce. I like to pile them on a large platter with celery and carrot sticks tucked around the edges. A bowl of blue cheese or ranch dressing in the center completes the picture. If you’re going for a full spread, these wings pair perfectly with crispy bacon-wrapped jalapeno popper football bites for the ultimate game day lineup.
For drinks, an ice-cold beer is the classic choice — a light lager or IPA works great. If you’re not drinking beer, a crisp cider or even a sparkling water with lime cuts through the richness nicely.
Storage: Leftover wings (if you have any) can be stored in an airtight container in the refrigerator for up to 4 days. The key is to store them without the sauce if possible — sauced wings tend to get soggy. Keep the sauce separate and toss just before reheating.
Reheating: The oven is your best friend here. Place wings on a wire rack over a baking sheet and reheat at 375°F for 10-12 minutes. This brings back the crispiness better than the microwave ever could. If you’re in a hurry, an air fryer at 350°F for 5-7 minutes works wonders too.
Freezing: You can freeze baked (but unsauced) wings for up to 3 months. Lay them flat on a baking sheet until frozen solid, then transfer to a freezer bag. To serve, thaw in the fridge overnight, then reheat and toss with fresh sauce. The texture holds up remarkably well.
One thing I’ve noticed: the flavors actually develop a bit after a day in the fridge. If you’re making these for a party, you can bake them a day ahead, refrigerate unsauced, and then reheat and toss on game day. Nobody will know they weren’t made fresh.
Nutritional Information & Benefits
Here’s the approximate nutritional breakdown for a serving of 4-5 wings (with buffalo sauce):
| Nutrient | Amount |
|---|---|
| Calories | 380-420 |
| Protein | 32g |
| Fat | 26g |
| Saturated Fat | 10g |
| Carbohydrates | 4g |
| Fiber | 0g |
| Sugar | 3g |
| Sodium | 980mg |
Chicken wings are actually a good source of protein, selenium, and B vitamins. The skin contains collagen, which is great for joint health and skin elasticity. The baking powder method also reduces the fat content compared to deep-frying — you’re using way less oil, which means fewer calories and less saturated fat.
If you’re watching your sodium, use a low-sodium hot sauce and reduce the added salt. For a lower-fat option, skip the butter in the sauce and use a vinegar-based hot sauce instead. The wings themselves are naturally keto-friendly and low-carb, making them a great option for anyone following a low-carb lifestyle.
Just remember: these are still wings. They’re a treat, not a health food. But compared to the fried version from a restaurant, you’re saving yourself a good amount of oil and calories without sacrificing any of the flavor or crunch.
Conclusion
These crispy baked chicken wings have become a staple in my kitchen for a reason. They deliver everything you want from a wing — crunch, flavor, juiciness — without the hassle and mess of deep frying. And on football Sunday, when the game is on and the couch is calling, that convenience matters more than you’d think.
I love that this recipe is flexible enough to adapt to whatever sauce or seasoning you’re craving. Want buffalo? Done. Feeling like something sweet and smoky? Easy. Hosting a crowd with different tastes? Make a few batches with different sauces and let everyone pick their favorite.
Honestly, the best compliment I ever got on these wings was from my uncle, who runs a barbecue food truck. He took one bite, looked at me, and said, “These are baked?” And then he ate eight more. That’s when I knew this recipe was a keeper.
If you make these crispy baked chicken wings, I’d love to hear how they turned out. Drop a comment below and let me know your favorite sauce combination, or tag me in your photos. And if you have a game day tradition that involves wings, tell me about that too — I’m always looking for new ideas to try!
Now go make some wings, put on the game, and enjoy every crunchy, saucy bite. You’ve earned it.
Frequently Asked Questions
Can I use frozen wings for this recipe?
Yes, but you need to thaw them completely first. Pat them extra dry after thawing, as frozen wings release more moisture. I recommend thawing in the fridge overnight for best results.
Why are my baked wings not crispy?
Most likely, the wings weren’t dried thoroughly enough before seasoning, or the baking powder was old or the wrong type. Make sure you’re using aluminum-free baking powder (not baking soda) and pat those wings completely dry with paper towels.
Can I make these wings ahead of time for a party?
Absolutely! Bake the wings without sauce, let them cool, and refrigerate for up to 2 days. On game day, reheat them on a wire rack at 375°F for 10-12 minutes, then toss with fresh sauce. They’ll taste just as good as fresh.
What’s the best way to reheat leftover wings?
Skip the microwave — it makes the skin rubbery. Instead, reheat in the oven at 375°F for 10-12 minutes, or in an air fryer at 350°F for 5-7 minutes. If you stored them with sauce, the skin won’t be as crispy, but the flavor will still be great.
Can I use this method for chicken thighs or drumsticks?
Yes! The same technique works beautifully for other chicken parts. Adjust cooking time based on size — bone-in thighs need about 35-40 minutes, and drumsticks need 30-35 minutes. Use a thermometer to check for doneness at 165°F.
Pin This Recipe!

Crispy Baked Chicken Wings: Game Day Ready in 55 Minutes
These crispy baked chicken wings deliver deep-fried crunch without the deep fryer. Perfect for game day, they’re easy to make with simple ingredients and a foolproof technique.
- Prep Time: 10 minutes
- Cook Time: 50 minutes
- Total Time: 55 minutes
- Yield: 4 servings 1x
- Category: Appetizer
- Cuisine: American
Ingredients
- 3 pounds chicken wings (about 15–18 whole wings, separated into drumettes and flats)
- 1 ½ tablespoons baking powder (aluminum-free)
- 1 ½ teaspoons kosher salt (use half if using table salt)
- 1 teaspoon garlic powder
- ½ teaspoon black pepper
- ½ cup hot sauce (Frank’s RedHot recommended)
- ¼ cup unsalted butter, melted
- 1 tablespoon honey
- 1 teaspoon Worcestershire sauce
- Blue cheese or ranch dressing for serving
- Celery and carrot sticks for serving
Instructions
- Prep the wings: Pat wings completely dry with paper towels. For extra crispiness, leave uncovered in the fridge for 1 hour.
- Preheat and position: Set oven to 425°F (220°C). Place oven rack in the upper third position, about 6-8 inches from the heating element.
- Mix the dry coating: In a large bowl, combine baking powder, salt, garlic powder, and black pepper. Whisk to combine.
- Season the wings: Add dried wings to the bowl and toss until evenly coated. Let sit for 10 minutes at room temperature.
- Arrange on the rack: Place a wire rack inside a large baking sheet. Arrange wings in a single layer with space between each piece.
- Bake for 30 minutes: Place pan in the oven and bake for 30 minutes without opening the door.
- Flip and rotate: After 30 minutes, flip each wing using tongs. Rotate the pan front to back. Return to oven for another 20-25 minutes until deep golden brown and crisp.
- Make the sauce: While wings bake, combine hot sauce, melted butter, honey, and Worcestershire sauce in a small saucepan over low heat. Whisk until smooth and warm. Do not boil.
- Toss and serve: Transfer hot wings to a large bowl. Pour sauce over and toss gently until coated. Serve immediately with dressing and veggies.
Notes
The drying step is crucial for crispiness. Use aluminum-free baking powder to avoid metallic aftertaste. For best results, serve immediately after saucing. Leftover unsauced wings can be stored in the refrigerator for up to 4 days and reheated in the oven at 375°F for 10-12 minutes.
Nutrition
- Serving Size: 4-5 wings
- Calories: 400
- Sugar: 3
- Sodium: 980
- Fat: 26
- Saturated Fat: 10
- Carbohydrates: 4
- Protein: 32
Keywords: crispy baked chicken wings, game day wings, buffalo wings, baked chicken wings, easy wings


