
Honestly, I thought using black raspberries in crumble bars sounded like a mistake until the first bite told me otherwise. I’ve always been a bit wary of these tiny, tart berries—they seem too delicate, too finicky for a dessert where texture really counts. Plus, crumble bars usually call for the classic red raspberries or blueberries, right? But one afternoon, when the farmers market had an overload of black raspberries on sale, I figured, what the heck, I’ll try something new. The kitchen smelled faintly of summer, with a tang that pulled me in despite my skepticism.
As I layered that deep purple filling under a buttery oat topping, I kept wondering if the bars would hold together or turn into a soggy mess. But when they finally came out of the oven, golden and crisp with a crackling oat crust, I was surprised. The black raspberries had softened just enough to become jammy and sweet, with a hint of tartness that cut through the richness. The oat topping added a nutty crunch, balancing the whole thing perfectly.
This recipe stuck with me because it’s that rare dessert that feels both homey and a little adventurous. It’s not overly sweet, which I appreciate, and those crispy edges? They’re addictive. What began as a doubtful experiment turned into a favorite that I now bring out whenever I want something comforting but a touch unexpected. And honestly, it’s the kind of recipe you can trust to impress without fuss or fancy ingredients.
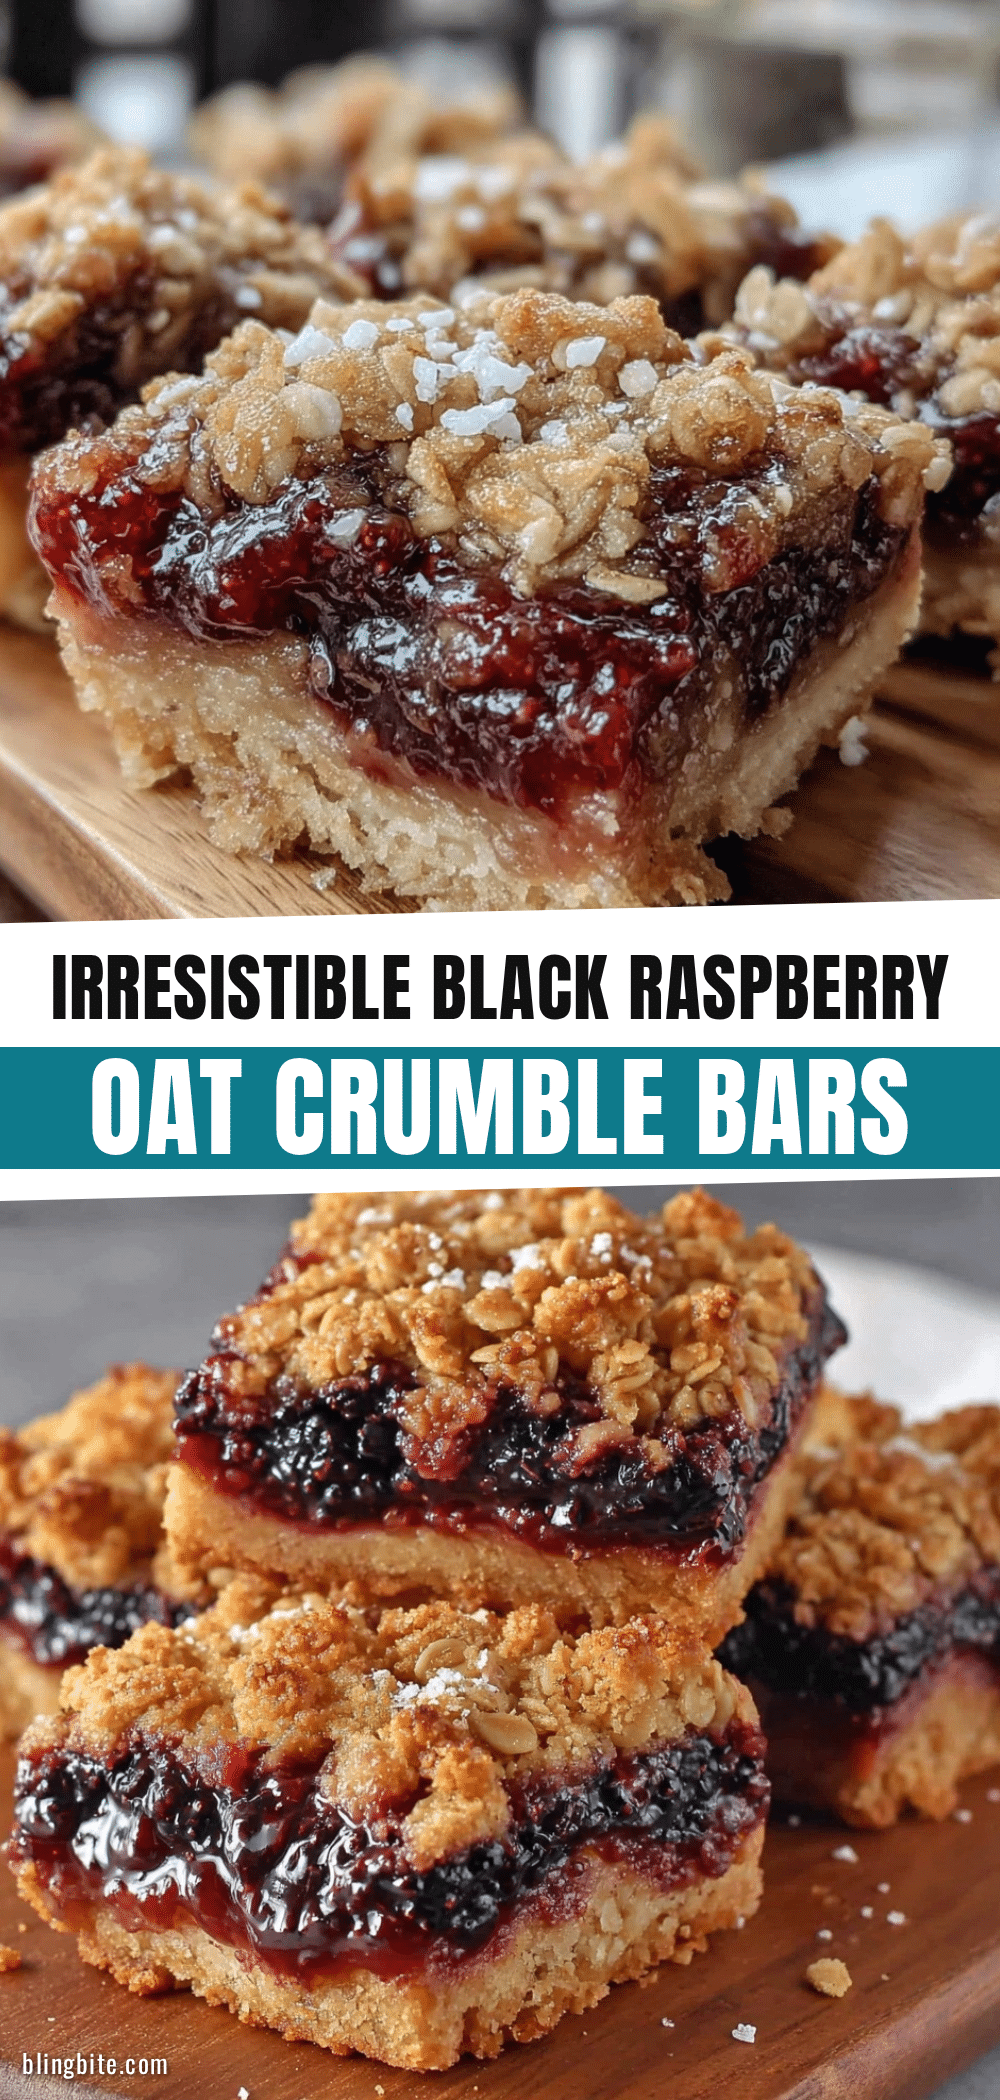
Why You’ll Love This Crispy Black Raspberry Crumble Bars Recipe
After testing several versions (and yes, I was stubborn about getting it just right), these bars became a kitchen staple. Here’s what makes this recipe stand apart:
- Quick & Easy: Ready in about 45 minutes from start to finish, perfect for those last-minute dessert cravings or casual weekend baking.
- Simple Ingredients: Most are pantry staples like oats and butter, plus fresh or frozen black raspberries—no need for specialty stores.
- Perfect for Any Occasion: Great for brunch spreads, potlucks, or a cozy afternoon snack with tea or coffee.
- Crowd-Pleaser: The crispy oat topping paired with jammy tartness always wins compliments from kids and adults alike.
- Unbelievably Delicious: The contrast between the crunchy oat crumble and soft berry filling hits all the right notes in texture and flavor.
What makes these bars different? The oat topping isn’t just sprinkled on—it’s pressed and baked to golden perfection, creating that signature crispiness. Plus, the black raspberries give a richer, slightly earthier flavor compared to typical red varieties. It’s comfort food with a twist that’s both nostalgic and fresh.
Honestly, this recipe isn’t just good—it’s the kind of treat that makes you pause and savor, maybe even close your eyes for a second. If you love easy, reliable desserts that don’t feel basic, this is it.
What Ingredients You Will Need
This recipe uses simple, wholesome ingredients to deliver bold flavor and satisfying texture without the fuss. Most are easy to find and pantry-friendly.
- For the Crust and Topping:
- All-purpose flour (1 ½ cups / 190g) – provides structure and tenderness
- Rolled oats (1 ½ cups / 135g) – for that iconic oat crumble texture (I prefer Bob’s Red Mill for consistent quality)
- Light brown sugar (¾ cup / 150g) – adds subtle caramel notes
- Unsalted butter (¾ cup / 170g), cold and cubed – gives richness and crispness
- Ground cinnamon (1 tsp) – enhances the oat topping with warm spice
- Salt (¼ tsp) – balances sweetness
- For the Filling:
- Black raspberries (3 cups / about 450g), fresh or frozen, thawed – the star of the show, bursting with unique tartness
- Granulated sugar (½ cup / 100g) – sweetens and helps thicken the berry filling
- Fresh lemon juice (1 tbsp) – brightens the berry flavor and balances sweetness
- Cornstarch (2 tbsp) – thickens the filling, preventing sogginess
- Vanilla extract (1 tsp) – adds depth to the filling
If you can’t find black raspberries, fresh or frozen red raspberries work well, though the flavor will be a bit brighter and less earthy. For gluten-free options, swap the all-purpose flour with almond flour or a gluten-free blend, and double-check your oats are certified gluten-free. For a dairy-free version, use coconut oil instead of butter—it changes the topping’s texture slightly but still delicious.
Equipment Needed
- Baking pan: A 9×13-inch (23×33 cm) glass or metal baking dish works perfectly. I’ve found glass helps the bottom cook evenly without burning.
- Mixing bowls: At least two – one for the crust/topping and one for the filling.
- Food processor (optional): Great for quickly pulsing oats and butter together, but you can also do it by hand with a pastry cutter or your fingers.
- Measuring cups and spoons: Accurate measurements make a big difference in texture.
- Spatula or spoon: For mixing the filling and pressing the topping.
- Cooling rack: Essential for letting the bars cool completely to set up that perfect crumble texture.
If you’re on a budget, a fork or two can replace the food processor for mixing the topping. Just be patient and use cold butter for the best results. Also, keeping your butter chilled until assembly is a small trick I always use to get that crisp, flaky topping rather than greasy crumbs.
Preparation Method
- Prepare your baking pan: Preheat the oven to 350°F (175°C). Line a 9×13-inch baking dish with parchment paper, leaving an overhang on two sides to lift the bars out easily later.
- Make the oat crust and topping: In a large bowl, combine 1 cup (125g) of flour, oats, brown sugar, cinnamon, and salt. Add the cold, cubed butter. Using a food processor pulse a few times until the mixture looks like coarse crumbs. If mixing by hand, use a pastry cutter or your fingertips to blend until pea-sized crumbs form. Reserve about 1 ½ cups of this mixture for the topping.
- Press the crust: Press the remaining oat mixture firmly into the bottom of your prepared pan to form an even layer. Bake for about 12 minutes or until lightly golden at the edges. This pre-baking step helps avoid a soggy bottom.
- Prepare the filling: While the crust bakes, mix the black raspberries, sugar, lemon juice, vanilla, cornstarch, and the remaining ½ cup (65g) of flour in a medium bowl. Toss gently until well combined but don’t mash the berries.
- Assemble the bars: Remove the crust from the oven and spread the raspberry filling evenly over it. Then sprinkle the reserved oat topping evenly on top, pressing down gently but not flattening completely.
- Bake the bars: Return to the oven and bake for 30-35 minutes, until the topping is golden brown and the filling is bubbling at the edges. Keep an eye to avoid over-browning.
- Cool completely: Transfer the pan to a cooling rack and let the bars cool for at least 2 hours or until fully set. This step is crucial for clean slices and that signature crispy texture.
- Slice and serve: Use the parchment overhang to lift the bars from the pan. Cut into squares or rectangles with a sharp knife. These bars are lovely on their own or paired with a scoop of vanilla ice cream.
One tip: if your topping seems too crumbly, adding an extra tablespoon of cold butter can help it hold together better. Also, don’t rush the cooling step; warm bars tend to fall apart.
Cooking Tips & Techniques
Perfecting crispy black raspberry crumble bars requires a few little tricks I picked up over time:
- Butter temperature matters: Cold butter is key for that flaky, crisp oat topping. If it melts too soon, the topping becomes greasy and dense.
- Don’t skip pre-baking the crust: This step helps avoid a soggy bottom, especially with juicy berries like black raspberries.
- Balance your filling: Black raspberries can be quite tart, so adjusting sugar to taste is okay. But too much sugar can make the filling runny.
- Use cornstarch or flour as a thickener: This keeps the filling from oozing out when cut.
- Let bars cool fully: Patience pays off with neat slices and that coveted crisp edge.
- Multitasking tip: While the crust pre-bakes, prepare your filling to save time.
I learned the hard way that rushing the cooling or skipping the cornstarch leads to a melty mess rather than tidy bars. Also, if you enjoy a bit of chew, don’t overmix your oat topping—leave some bits larger for texture contrast.
Variations & Adaptations
These crumble bars are a great base for customizing to your taste or dietary needs:
- Berry swaps: Use fresh or frozen blueberries, red raspberries, or a mix of berries for different flavor profiles. In summer, fresh berries make the filling extra vibrant.
- Gluten-free option: Substitute all-purpose flour with almond flour or a gluten-free blend. Make sure to use certified gluten-free oats.
- Nutty twist: Add chopped walnuts or pecans (about ½ cup) to the oat topping for extra crunch and flavor.
- Dairy-free: Replace butter with coconut oil or a vegan butter alternative. The texture will be slightly different but still tasty.
- Spiced filling: Stir in a pinch of ground ginger or cardamom with the berries for a warm, cozy note.
Personally, I once tried mixing in a little cream cheese swirl into the filling for a richer bite—unexpectedly delicious and perfect for a brunch treat. For a completely different take, you might like how this recipe pairs with the flaky layers of a puff pastry baked brie with cranberry chutney for festive occasions.
Serving & Storage Suggestions
These crumble bars are best enjoyed at room temperature or slightly chilled. The chewy oat topping crisps up nicely once cooled, making each bite satisfying. Serve them on their own or with a dollop of whipped cream or vanilla ice cream for an extra indulgent touch.
If you’re hosting a gathering, these bars fit right in alongside savory snacks like the crispy buffalo cauliflower bites, balancing sweet and spicy flavors beautifully.
For storage, keep the bars in an airtight container at room temperature for up to 3 days. They also freeze well—wrap individual bars tightly and freeze for up to 2 months. Thaw overnight in the fridge and warm slightly before serving to bring back some crispness.
Over time, the flavors meld and the oats soften a little, which some people prefer for a more tender bite. If you want to freshen them up, a quick 5-minute toast in a 325°F (160°C) oven revives that crisp topping.
Nutritional Information & Benefits
Each serving of these crispy black raspberry crumble bars (assuming 12 bars per batch) contains approximately:
| Calories | Fat | Carbohydrates | Fiber | Sugar | Protein |
|---|---|---|---|---|---|
| 250 kcal | 12g | 34g | 4g | 18g | 3g |
Black raspberries are a powerhouse of antioxidants and vitamin C, supporting immune health. The oats contribute heart-healthy fiber and sustained energy. This recipe offers a treat that feels indulgent yet carries wholesome benefits.
Keep in mind, it’s a dessert, so enjoy in moderation. For those watching carbs or gluten, the variations section has you covered with alternatives. I appreciate desserts that bring some nutritional value without compromising on flavor or texture.
Conclusion
These crispy black raspberry crumble bars with oat topping are a testament to how a little experiment can turn into a beloved classic. With simple ingredients and straightforward steps, you get a dessert that’s both comforting and uniquely flavorful. I love how adaptable the recipe is—whether you’re craving a quick sweet fix or a crowd-pleasing treat, it fits the bill.
The crispy oat topping paired with that jammy, tart black raspberry filling is a combo I keep coming back to, especially when I want something nostalgic but not ordinary. Give it your own spin with different berries or nuts, and you might find your new favorite too.
When you try this recipe, I’d love to hear how you customized it or what moments you baked it for—sharing those stories keeps the magic alive. Baking’s better when it’s shared, even if just through words.
Frequently Asked Questions About Crispy Black Raspberry Crumble Bars
Can I use frozen black raspberries for this recipe?
Yes! Just thaw them completely and drain any excess liquid before mixing with the other filling ingredients to avoid a soggy crust.
How do I store leftover crumble bars?
Store them in an airtight container at room temperature for up to 3 days, or freeze wrapped individually for up to 2 months.
Can I make these bars gluten-free?
Absolutely. Use gluten-free oats and substitute the all-purpose flour with almond flour or a gluten-free baking blend.
What’s the best way to get a crispy oat topping?
Cold butter is key. Also, pre-baking the crust and cooling the bars completely before slicing helps maintain crispiness.
Can these bars be made ahead of time?
Yes, they can be baked a day ahead and stored at room temperature or in the fridge. Just bring them to room temp or warm slightly before serving for best texture.
Pin This Recipe!
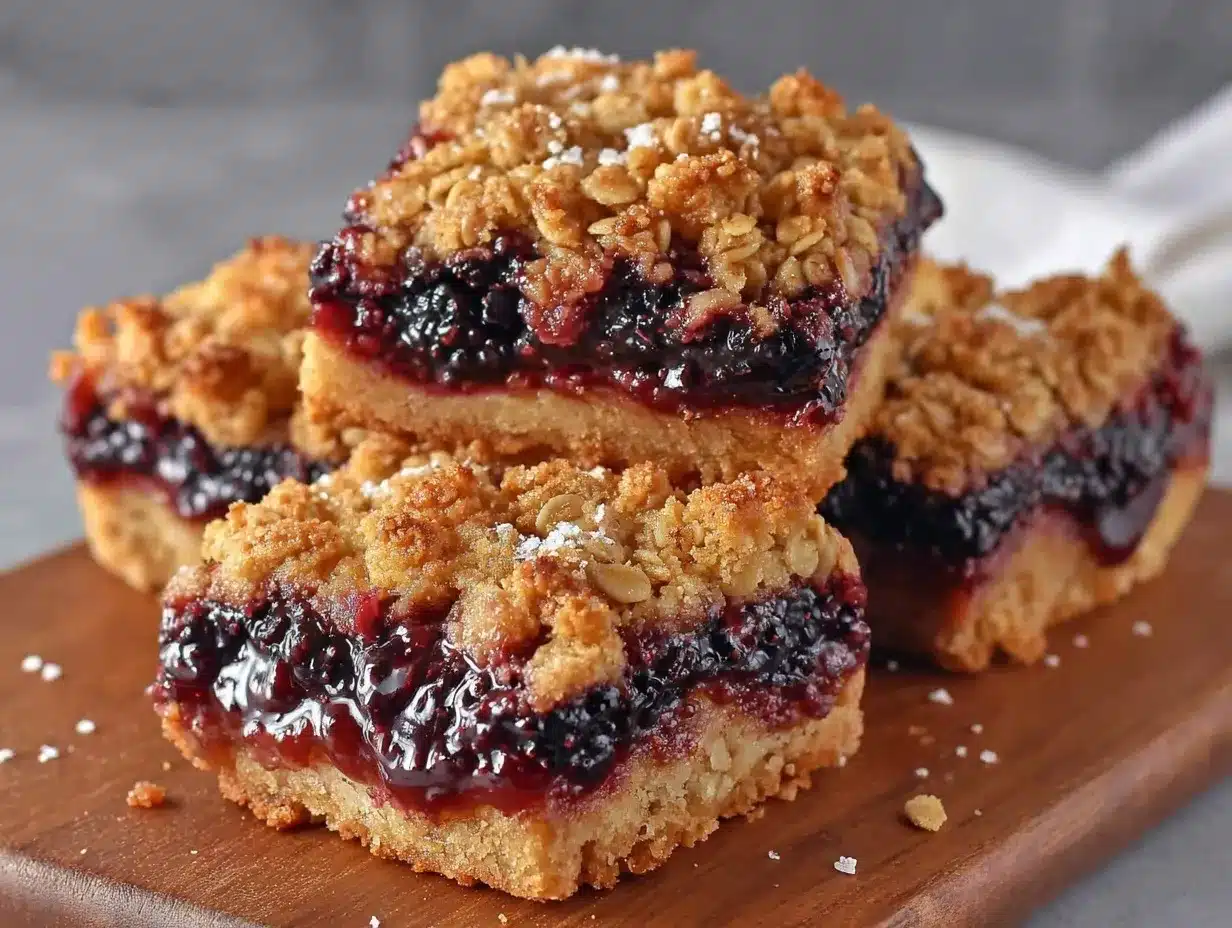
Crispy Black Raspberry Crumble Bars
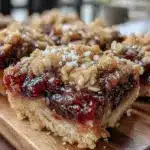
These crispy black raspberry crumble bars feature a jammy tart filling under a buttery oat topping, delivering a perfect balance of crunchy texture and sweet-tart flavor. Easy to make with simple pantry ingredients, they are a crowd-pleasing dessert perfect for any occasion.
- Prep Time: 15 minutes
- Cook Time: 45 minutes
- Total Time: 1 hour
- Yield: 12 bars 1x
- Category: Dessert
- Cuisine: American
Ingredients
- 1 ½ cups all-purpose flour (190g), divided
- 1 ½ cups rolled oats (135g)
- ¾ cup light brown sugar (150g)
- ¾ cup unsalted butter (170g), cold and cubed
- 1 tsp ground cinnamon
- ¼ tsp salt
- 3 cups black raspberries (about 450g), fresh or frozen, thawed
- ½ cup granulated sugar (100g)
- 1 tbsp fresh lemon juice
- 2 tbsp cornstarch
- 1 tsp vanilla extract
Instructions
- Preheat the oven to 350°F (175°C). Line a 9×13-inch baking dish with parchment paper, leaving an overhang on two sides to lift the bars out easily later.
- In a large bowl, combine 1 cup (125g) of flour, oats, brown sugar, cinnamon, and salt. Add the cold, cubed butter. Using a food processor, pulse a few times until the mixture looks like coarse crumbs. If mixing by hand, use a pastry cutter or your fingertips to blend until pea-sized crumbs form. Reserve about 1 ½ cups of this mixture for the topping.
- Press the remaining oat mixture firmly into the bottom of your prepared pan to form an even layer. Bake for about 12 minutes or until lightly golden at the edges.
- While the crust bakes, mix the black raspberries, sugar, lemon juice, vanilla, cornstarch, and the remaining ½ cup (65g) of flour in a medium bowl. Toss gently until well combined but don’t mash the berries.
- Remove the crust from the oven and spread the raspberry filling evenly over it. Then sprinkle the reserved oat topping evenly on top, pressing down gently but not flattening completely.
- Return to the oven and bake for 30-35 minutes, until the topping is golden brown and the filling is bubbling at the edges.
- Transfer the pan to a cooling rack and let the bars cool for at least 2 hours or until fully set.
- Use the parchment overhang to lift the bars from the pan. Cut into squares or rectangles with a sharp knife. Serve as desired.
Notes
Use cold butter for a flaky, crisp oat topping. Pre-bake the crust to avoid sogginess. Let bars cool completely before slicing for clean cuts and crispy texture. If topping is too crumbly, add an extra tablespoon of cold butter. Frozen black raspberries should be thawed and drained to prevent soggy crust. Variations include using other berries, adding nuts, or making gluten-free or dairy-free substitutions.
Nutrition
- Serving Size: 1 bar (assuming 12 b
- Calories: 250
- Sugar: 18
- Fat: 12
- Carbohydrates: 34
- Fiber: 4
- Protein: 3
Keywords: black raspberry crumble bars, oat topping, easy dessert, homemade crumble bars, berry bars, quick dessert, oat crumble, black raspberry dessert


