“The summer I turned thirty, I found myself standing in my cluttered kitchen at midnight, trying to quiet the rumbling in my stomach. The power had gone out earlier that evening, and with no way to order food, I figured I’d try baking bread. Honestly, I wasn’t expecting much—flour everywhere, a cracked bowl, and a half-forgotten packet of yeast were my only allies. But the smell that filled the air as it baked? That golden, crispy crust? It was something else entirely. This crispy rustic Italian bread recipe wasn’t planned, but it quickly became my go-to comfort in the chaos.”
You know that feeling when you bite into something so simple yet so satisfying it stops you in your tracks? That’s what this bread does. It’s got this crust that snaps with just the right crunch and a soft, chewy center that feels like a warm hug after a long day. I mean, I’m not supposed to play favorites with recipes, but this one? It’s a keeper.
Maybe you’ve been there—looking for a homemade bread that doesn’t require a bakery’s worth of equipment or a day-long schedule. This recipe came from a friend’s kitchen, where she whipped it up “no big deal” style during a casual Tuesday night. It stuck with me because it’s honest, rustic, and perfectly imperfect—like the best kind of homemade bread should be.
Why You’ll Love This Recipe
This crispy rustic Italian bread recipe has been tested and loved through countless kitchen trials. As someone who’s baked bread in everything from tiny apartment ovens to large family kitchens, I can tell you this one hits the mark every time.
- Quick & Easy: Comes together in about 3 hours, including rising time, which is pretty fast for artisan-style bread.
- Simple Ingredients: Uses pantry staples – flour, yeast, salt, water – nothing fancy or hard to find.
- Perfect for Any Meal: Whether it’s breakfast toasted with butter, a sandwich base, or alongside a hearty stew, it fits right in.
- Crowd-Pleaser: Friends and family rave about the crunchy crust and tender crumb every time.
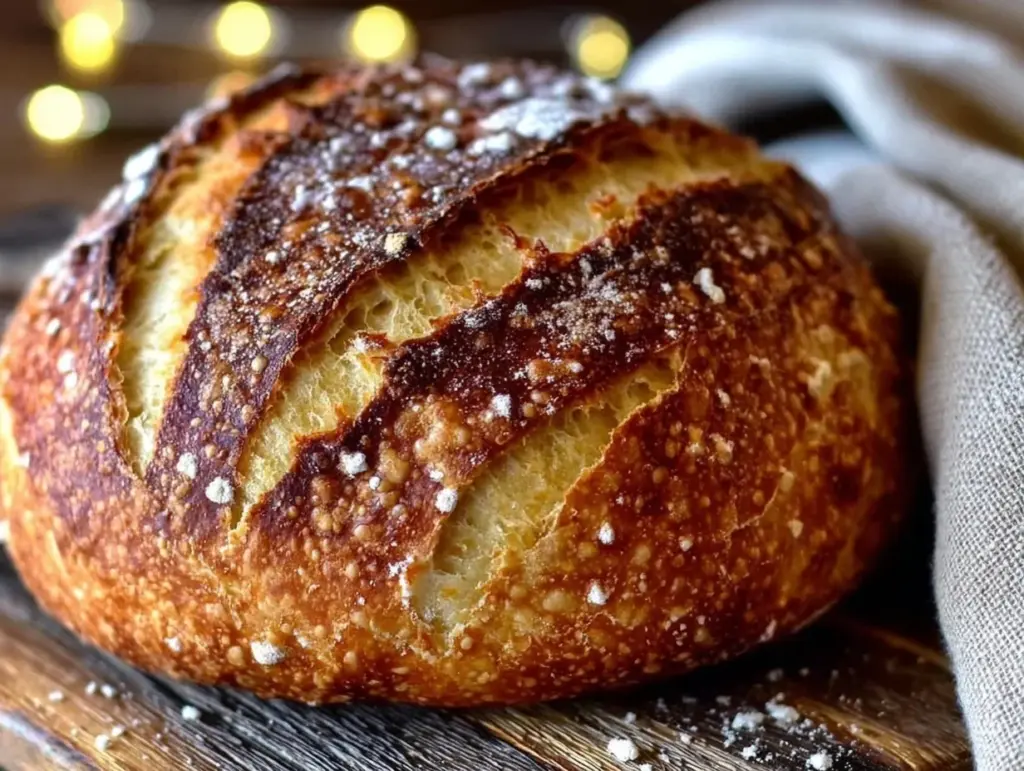
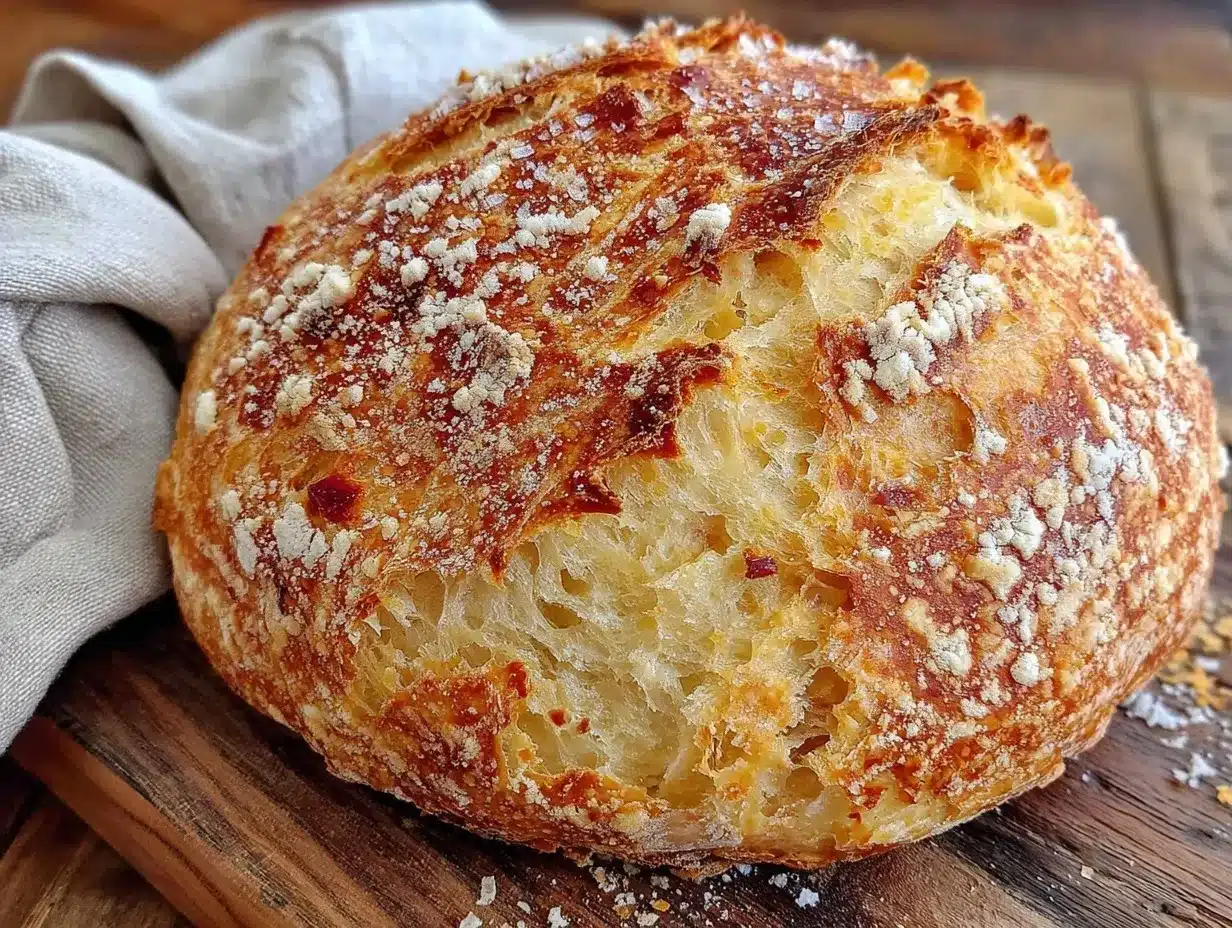
- Unbelievably Delicious: The combination of a long ferment and high heat oven baking creates a flavor that feels both rustic and refined.
What sets this apart is the balance of a crisp crust with a chewy inside. Using a simple pre-ferment method brings out the flavor without complicated steps. Plus, baking on a hot tray or stone gives that crackling crust that makes you want to keep slicing. This isn’t just any loaf; it’s the kind of bread that makes you close your eyes after the first bite, savoring every chew.
What Ingredients You Will Need
This recipe uses simple, wholesome ingredients to deliver bold flavor and satisfying texture without the fuss. Most are pantry staples, and you can tweak a few if needed.
- All-purpose flour – 4 cups (480 g), preferably unbleached for best flavor and texture.
- Active dry yeast – 2 ¼ teaspoons (one packet), I like Fleischmann’s for consistent results.
- Warm water – 1 ¾ cups (420 ml), around 105°F (40°C) to activate the yeast properly.
- Salt – 2 teaspoons (10 g), enhances flavor and strengthens gluten.
- Olive oil – 2 tablespoons (30 ml), adds richness and helps crust color (optional but recommended).
- Sugar – 1 teaspoon (4 g), helps yeast activation (can be omitted for a low-sugar option).
Substitution tips: Use bread flour instead of all-purpose for a chewier texture. For gluten-free, swap flour with a gluten-free blend designed for yeast breads. If you’re out of active dry yeast, instant yeast works too but reduce water slightly.
Look for fresh yeast packets with a recent expiration date for best rise. If you want a more rustic flavor, try using some whole wheat flour (up to 1 cup) in place of all-purpose, but keep in mind it will affect the crumb.
Equipment Needed
- Large mixing bowl: For combining ingredients comfortably; glass or stainless steel works well.
- Dough scraper or spatula: Helps in mixing and folding the dough without sticking to hands.
- Kitchen scale: Optional but highly recommended for accurate measurements, especially flour.
- Baking sheet or pizza stone: A heavy baking sheet works fine; a pizza stone gives a better crust if preheated.
- Kitchen towel or plastic wrap: To cover the dough during rises and keep it from drying out.
- Oven thermometer: Helpful if your oven runs hot or cold, ensuring the right baking temperature.
If you don’t have a pizza stone, no worries! I’ve baked this bread on a regular baking sheet and still gotten a great crust. Just preheat the sheet in the oven to mimic the stone’s heat retention. Also, a cast-iron skillet can work if you want to create steam by adding hot water during baking.
Preparation Method
- Activate the yeast: In your large mixing bowl, combine 1 ¾ cups (420 ml) of warm water with 1 teaspoon (4 g) sugar and 2 ¼ teaspoons (7 g) of active dry yeast. Let it sit for about 5–10 minutes until foamy. If it doesn’t foam, your yeast might be old—try again with fresh yeast.
- Mix the dough: Add 4 cups (480 g) of all-purpose flour and 2 teaspoons (10 g) salt to the yeast mixture. Stir with a dough scraper or wooden spoon until the ingredients form a shaggy dough. Then add 2 tablespoons (30 ml) olive oil and mix until combined.
- Knead the dough: Transfer the dough to a lightly floured surface. Knead for about 8–10 minutes until the dough is smooth, elastic, and slightly tacky but not sticky. If it sticks too much, sprinkle a little flour, but don’t overdo it or the bread will be dense.
- First rise: Place the dough in a lightly oiled bowl, cover with a damp kitchen towel or plastic wrap, and let it rise in a warm, draft-free spot for 1 ½ to 2 hours, or until doubled in size. I usually put mine near the stove or on top of the fridge.
- Shape the loaf: Gently deflate the dough on a floured surface and shape it into a round or oval loaf. Try not to punch it down too hard; just enough to release big air bubbles.
- Second rise: Place the shaped dough on a parchment-lined baking sheet or preheated pizza stone. Cover loosely with a towel and let it rise for another 30–45 minutes until puffy.
- Preheat the oven: While the dough is rising, preheat your oven to 450°F (230°C). If using a pizza stone, place it in the oven to heat as well.
- Score and bake: Just before baking, use a sharp knife or bread lame to score the top of the loaf with a few shallow slashes. This lets steam escape and helps the bread expand. Place the bread in the oven, and for a crispy crust, add a pan of hot water on the bottom rack to create steam.
- Bake time: Bake for 25–30 minutes. The bread should be golden brown with a crackly crust. Tap the bottom of the loaf; it should sound hollow. If not, bake a few minutes longer but watch carefully so it doesn’t burn.
- Cool: Transfer the bread to a wire rack and let it cool completely before slicing. I know it’s tempting to cut right away, but cooling lets the crumb set nicely.
Pro tip: If you want extra crunch, leave the loaf uncovered during the last 5 minutes of baking. Also, don’t skip scoring—the cuts give your bread that rustic artisan look and prevent bursting in unexpected places.
Cooking Tips & Techniques
Let me tell you, baking rustic bread can feel tricky at first, but a few tricks make all the difference.
- Watch your water temperature: Too hot and you’ll kill the yeast; too cold and it won’t activate. Aim for warm, like a cozy bath—around 105°F (40°C).
- Don’t add too much flour: It’s tempting when dough feels sticky, but adding too much makes bread dry and heavy. A little tackiness is fine.
- Use steam in the oven: Adding water to a hot pan creates steam, which keeps the crust from hardening too soon and gives you that classic crackly texture.
- Practice your scoring: The angle and depth of your cuts control how your bread expands. Shallow, quick slashes work best.
- Timing is everything: Letting the dough rise fully is crucial—underproofed dough won’t have that airy crumb, while overproofed can collapse.
- Multitask during rises: Use rising time to prep other meal components or clean up. Trust me, it saves stress later.
I once forgot to score a loaf because my phone rang mid-prep. The bread puffed up and cracked oddly on one side. Not a disaster, but it reminded me how scoring is key to that perfect rustic look! So keep your tools nearby and focus up.
Variations & Adaptations
- Whole Wheat Rustic: Replace 1 to 1 ½ cups of all-purpose flour with whole wheat flour for a nuttier flavor and denser crumb.
- Herbed Italian Bread: Add 1 tablespoon of dried Italian herbs like rosemary, thyme, and oregano to the dough for an aromatic twist.
- Gluten-Free Option: Use a gluten-free flour blend designed for yeast breads; note that texture will differ, and rising times may vary.
- Sourdough Adaptation: Substitute yeast with 1 cup of active sourdough starter and adjust water accordingly for a tangy flavor.
Personally, I tried mixing in sun-dried tomatoes and olives once, which gave a lovely Mediterranean vibe—great for sandwiches. If you want to bake this bread in a Dutch oven, preheat the pot and bake covered for 20 minutes, then uncover for the last 10 to mimic steam.
Serving & Storage Suggestions
Serve this bread warm or at room temperature. The crust is best enjoyed fresh, but the crumb stays soft for days.
- Serving ideas: Slather with good olive oil and balsamic vinegar, or pair with soups, stews, and salads.
- Storage: Wrap cooled bread loosely in a clean kitchen towel and store at room temperature for up to 2 days.
- Freezing: Slice and freeze in airtight bags for up to 3 months. Toast slices straight from the freezer for a fresh taste.
- Reheating: Warm in a 350°F (175°C) oven for 5-10 minutes to refresh the crust.
Fun fact: The flavor deepens slightly after a day, so if you can resist, wait until the next day to slice for sandwiches or bruschetta. But hey, sometimes that warm first slice with melting butter wins out!
Nutritional Information & Benefits
This rustic Italian bread is a wholesome choice with simple ingredients and no preservatives. Here’s an approximate breakdown per serving (1 slice, about 60 grams):
| Calories | 160 |
|---|---|
| Carbohydrates | 32 g |
| Protein | 5 g |
| Fat | 2 g |
| Fiber | 1.5 g |
Made with minimal ingredients, this bread is naturally free from artificial additives and low in sugar. Using olive oil adds healthy fats, while flour provides energy-sustaining carbs. For those watching gluten intake, swapping flours can help adapt this recipe. Just a heads-up: it contains gluten and yeast, so it’s not suitable for people with celiac disease or yeast sensitivities.
From my wellness perspective, baking your own bread lets you control what goes in, making it a mindful and rewarding kitchen ritual.
Conclusion
This crispy rustic Italian bread recipe is a beautiful balance of simplicity and flavor that anyone can make at home. Whether you’re a novice baker or someone who’s tried and failed at bread before, this recipe offers a straightforward path to delicious homemade loaves.
Feel free to customize it with herbs, whole grains, or even a sourdough starter to make it your own. What I love most is how this bread brings people together—whether it’s a casual dinner or a special sandwich, it turns ordinary moments into something a little more special.
If you give it a go, I’d love to hear how it turns out! Share your tweaks, tips, or even funny kitchen mishaps in the comments. Here’s to crunchy crusts and warm crumbs—happy baking!
FAQs
What’s the best flour to use for rustic Italian bread?
All-purpose flour works well, but bread flour gives a chewier texture. You can also mix in some whole wheat for more flavor.
How do I know if my yeast is still good?
Proof your yeast by mixing it with warm water and a pinch of sugar. If it foams within 10 minutes, it’s active and ready to use.
Can I make this bread without a pizza stone?
Yes! A heavy baking sheet preheated in the oven works fine and still gives a nice crust.
Why is scoring the bread important?
Scoring allows steam to escape and controls how the bread expands during baking, giving it that classic rustic look.
How can I get a crispier crust?
Add steam to your oven by placing a pan of hot water on the bottom rack while baking and avoid covering the bread while it cools.
Pin This Recipe!
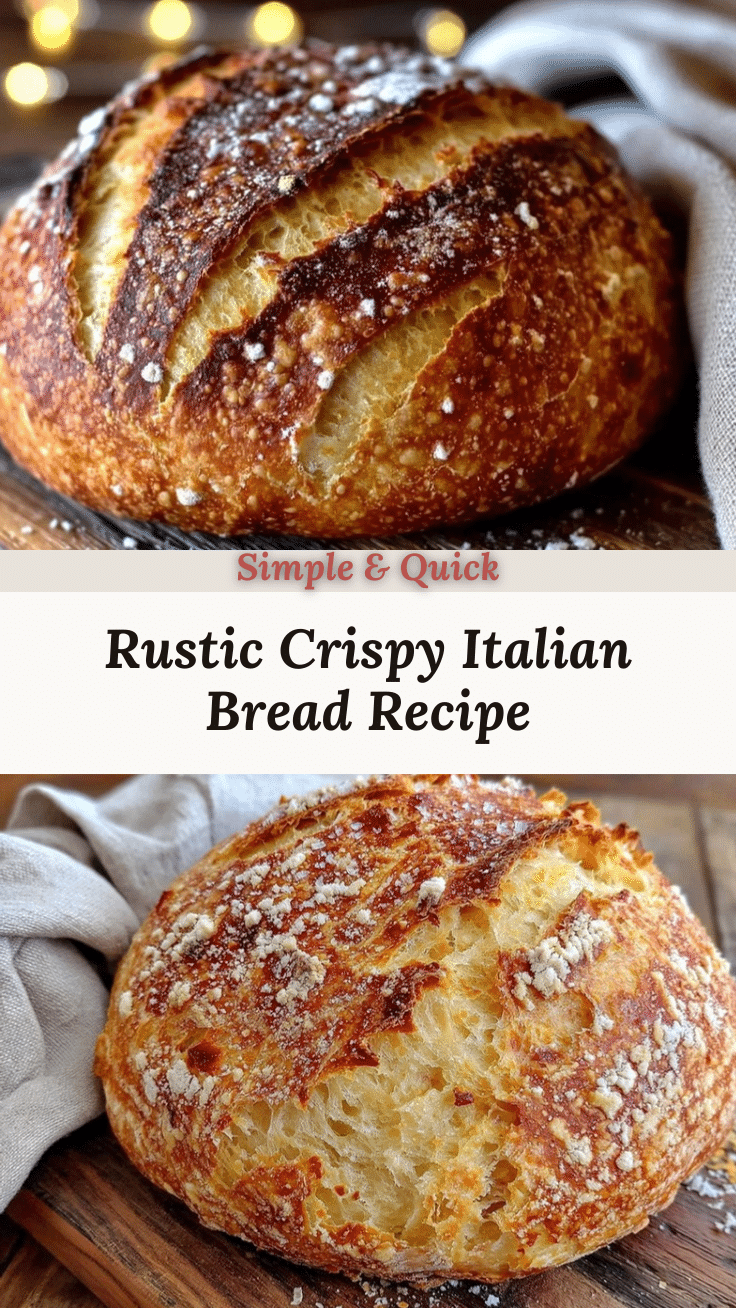
Crispy Rustic Italian Bread

A simple and quick homemade rustic Italian bread with a crispy crust and chewy center, perfect for any meal and easy to make with pantry staples.
- Prep Time: 20 minutes
- Cook Time: 30 minutes
- Total Time: 3 hours
- Yield: 1 loaf (about 8-10 servings) 1x
- Category: Bread
- Cuisine: Italian
Ingredients
- 4 cups (480 g) all-purpose flour, preferably unbleached
- 2 ¼ teaspoons (one packet) active dry yeast
- 1 ¾ cups (420 ml) warm water, around 105°F (40°C)
- 2 teaspoons (10 g) salt
- 2 tablespoons (30 ml) olive oil (optional but recommended)
- 1 teaspoon (4 g) sugar (optional for yeast activation)
Instructions
- Activate the yeast: In a large mixing bowl, combine 1 ¾ cups warm water with 1 teaspoon sugar and 2 ¼ teaspoons active dry yeast. Let sit for 5–10 minutes until foamy.
- Mix the dough: Add 4 cups all-purpose flour and 2 teaspoons salt to the yeast mixture. Stir until a shaggy dough forms. Add 2 tablespoons olive oil and mix until combined.
- Knead the dough: Transfer to a lightly floured surface and knead for 8–10 minutes until smooth, elastic, and slightly tacky but not sticky.
- First rise: Place dough in a lightly oiled bowl, cover with a damp towel or plastic wrap, and let rise in a warm spot for 1 ½ to 2 hours until doubled in size.
- Shape the loaf: Deflate dough gently and shape into a round or oval loaf without punching down too hard.
- Second rise: Place shaped dough on parchment-lined baking sheet or preheated pizza stone. Cover loosely and let rise for 30–45 minutes until puffy.
- Preheat oven to 450°F (230°C). If using a pizza stone, place it in the oven to heat.
- Score and bake: Score the top of the loaf with shallow slashes. Place bread in oven and add a pan of hot water on the bottom rack to create steam.
- Bake for 25–30 minutes until golden brown with a crackly crust. Tap bottom of loaf; it should sound hollow.
- Cool: Transfer bread to a wire rack and cool completely before slicing.
Notes
Use warm water around 105°F to activate yeast properly. Avoid adding too much flour during kneading to keep bread light. Adding steam in the oven helps create a crispy crust. Score the bread before baking to control expansion and prevent cracking. Let bread cool completely before slicing for best texture.
Nutrition
- Serving Size: 1 slice (about 60 gr
- Calories: 160
- Fat: 2
- Carbohydrates: 32
- Fiber: 1.5
- Protein: 5
Keywords: rustic bread, Italian bread, homemade bread, crispy crust bread, easy bread recipe, artisan bread


