My neighbor wasn’t trying to impress anyone. I’d stopped by to borrow a ladder—honestly, one of those mundane errands you put off for weeks—and the smell hit me before I even got to her front door. That warm, buttery, cheesy aroma that just wraps around you like a hug you didn’t know you needed. She opened the door with flour on her cheek and a wooden spoon in her hand, completely unbothered by the fact that she was creating what I would later call the best baked mac and cheese I’d ever tasted.
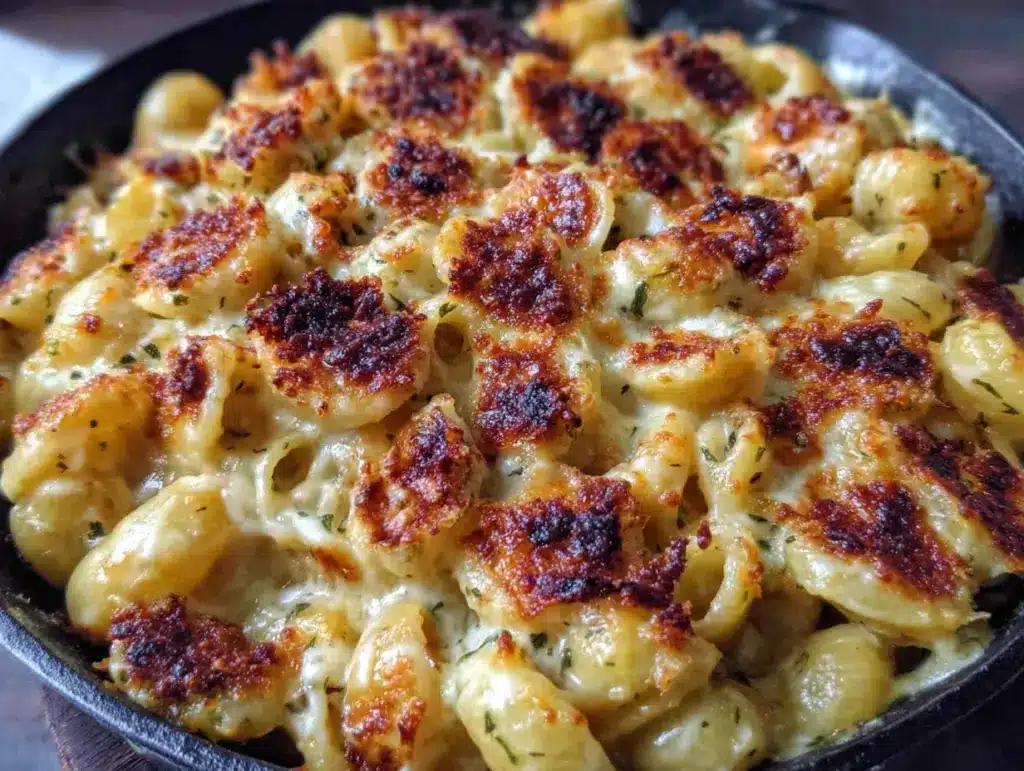
“Oh, it’s nothing,” she said when I asked what was in the oven. “Just something I threw together for the kids.” Let me tell you, that “nothing” was everything. The top was golden and crunchy, and when she pulled it out, the panko topping crackled in the most satisfying way. I stood there in her kitchen, ladder completely forgotten, watching her scoop out a portion for me to take home. She handed it over like it was no big deal, like she hadn’t just changed my entire approach to comfort food.
That first bite—honestly, I closed my eyes. The creamy, velvety cheese sauce clinging to every piece of pasta, contrasted with that crispy, buttery panko crust on top. It was the kind of baked mac and cheese that makes you forget every boxed version you’ve ever settled for. I mean, maybe you’ve been there—you think you know a dish, and then someone shows you what it’s really supposed to taste like. That day, standing in her cozy kitchen with steam fogging up the windows, I knew I had to figure out how she did it.
So I went home, ladder in hand and a container of mac and cheese in the other, and I started testing. It took a few tries to get that perfect balance of creamy and crispy, but this recipe right here? This is it. This is the one that stopped me in my tracks on a random Tuesday afternoon. And now I’m sharing it with you, because some recipes are too good to keep to yourself.
Why You’ll Love This Recipe
Let’s be real for a second—there are a million baked mac and cheese recipes out there. But this one? It’s different. I’ve tested this recipe more times than I care to admit, tweaking the cheese blend, adjusting the bake time, and perfecting that panko topping until it was just right. Here’s why this version stands out from the crowd:
- Quick & Easy: This comes together in about 45 minutes from start to finish, making it perfect for a cozy weeknight dinner or a last-minute potluck contribution. The hands-on time is only about 20 minutes.
- Simple Ingredients: No fancy cheese shops or specialty grocery stores required. Everything on this list is something you can find at your local supermarket—probably already in your kitchen.
- Perfect for Cozy Season: This is the dish you want when the weather turns chilly and you need something warm and comforting. It’s also a showstopper at holiday gatherings, Sunday dinners, and potlucks.
- Crowd-Pleaser: I’ve served this to kids, picky eaters, and cheese snobs alike, and every single person has gone back for seconds. It’s one of those rare recipes that appeals to everyone.
- Unbelievably Delicious: The texture is what sets this apart—creamy, luscious cheese sauce with a crispy, golden panko crust that adds the perfect crunch. It’s comfort food at its finest.
What makes this recipe different from the rest is the technique. I use a combination of sharp cheddar and Gruyère for the perfect melt, and I add a secret ingredient—a pinch of nutmeg—that brings out the nuttiness of the cheese without being overpowering. The panko topping gets tossed in melted butter and a touch of garlic powder, creating a crust that’s crispy, golden, and absolutely irresistible. This isn’t just another baked mac and cheese—it’s the one you’ll come back to again and again.
This recipe is the kind that makes you close your eyes after the first bite. It’s comfort food reimagined—richer, creamier, and more satisfying than anything you’ve had before. Perfect for impressing guests without stress, or turning a simple Tuesday night dinner into something memorable.
What Ingredients You Will Need
This baked mac and cheese uses simple, wholesome ingredients to deliver that rich, creamy flavor and satisfying crispy topping. Most of these are pantry staples, and the few fresh ingredients are easy to find at any grocery store. Let’s break down what you’ll need and why each one matters.
For the Pasta
- 1 pound (450g) elbow macaroni — You can use cavatappi, shells, or rotini if you prefer. I like elbows for that classic mac and cheese feel, but any short pasta with nooks and crannies works great. Cook it one minute less than al dente since it will continue cooking in the oven.
For the Cheese Sauce
- 4 tablespoons (56g) unsalted butter — This forms the base of your roux. I prefer unsalted so I can control the salt level, but salted butter works if you reduce the added salt slightly.
- 1/4 cup (31g) all-purpose flour — This thickens the sauce. For a gluten-free version, you can use a 1:1 gluten-free flour blend.
- 3 cups (710ml) whole milk — Whole milk gives the creamiest results. You can use 2% in a pinch, but the sauce won’t be as rich. Avoid skim milk—it won’t give you that velvety texture.
- 1 cup (240ml) heavy cream — This adds extra richness and helps the sauce stay creamy even after baking. If you don’t have heavy cream, you can use all milk, but reduce it to 3 1/2 cups total.
- 2 cups (226g) sharp cheddar cheese, shredded — I recommend shredding your own cheese from a block. Pre-shredded cheese has anti-caking agents that prevent smooth melting. Sharp cheddar gives you that bold, tangy flavor.
- 1 cup (113g) Gruyère cheese, shredded — Gruyère melts like a dream and adds a nutty, slightly sweet flavor. If you can’t find Gruyère, use Gouda or Fontina as a substitute.
- 1/2 cup (56g) Parmesan cheese, finely grated — This adds a salty, umami kick that deepens the overall flavor. I recommend Parmigiano-Reggiano for the best results.
- 1 teaspoon Dijon mustard — Don’t skip this! It doesn’t make the sauce taste like mustard—it just enhances the cheese flavor and adds a subtle tang.
- 1/2 teaspoon garlic powder — For a gentle savory note that complements the cheese.
- 1/4 teaspoon smoked paprika — Adds a hint of smokiness and a beautiful color to the sauce.
- 1/8 teaspoon freshly grated nutmeg — This is my secret ingredient. Nutmeg has a magical ability to bring out the nuttiness in cheese without being detectable on its own.
- 1 teaspoon salt — Adjust to taste, but remember the cheese adds salt too.
- 1/2 teaspoon black pepper — Freshly ground is best.
For the Crispy Panko Topping
- 1 cup (90g) panko breadcrumbs — Panko gives you the crispiest texture compared to regular breadcrumbs. They’re larger and flakier, which means more crunch.
- 3 tablespoons (42g) unsalted butter, melted — This helps the panko toast to golden perfection in the oven.
- 1/4 cup (28g) Parmesan cheese, finely grated — Adds flavor and helps the topping brown beautifully.
- 1/4 teaspoon garlic powder — For extra savory depth in the crust.
- Pinch of salt
Ingredient Selection Tips
When it comes to cheese, I always recommend buying blocks and shredding them yourself. I know it’s tempting to grab the pre-shredded bags, but trust me on this—the sauce will be noticeably smoother and creamier. For the best flavor, look for a sharp cheddar that’s been aged at least 6 months. I personally love Cabot Seriously Sharp or Tillamook Extra Sharp. For the Gruyère, any good-quality Swiss-style cheese works. And please, splurge on a real Parmesan wedge—the powdery stuff in the green can just doesn’t melt the same way.
Equipment Needed
You don’t need a professional kitchen to make this baked mac and cheese, but having the right tools makes the process so much smoother. Here’s what you’ll need:
- Large pot (6-8 quart) — For boiling the pasta. Make sure it’s big enough to give the pasta room to move around.
- Medium saucepan — For making the cheese sauce. A heavy-bottomed pan works best to prevent scorching.
- 9×13-inch baking dish — This is the perfect size for this recipe. A 3-quart casserole dish works too. If you want a deeper dish, use an 8×8-inch pan and expect a slightly longer bake time.
- Whisk — Essential for making a smooth roux and cheese sauce without lumps.
- Wooden spoon or silicone spatula — For stirring the pasta and sauce together.
- Cheese grater — Please grate your own cheese! A box grater or Microplane works great.
- Measuring cups and spoons — For accurate measurements.
- Colander — For draining the pasta.
- Small bowl — For mixing the panko topping.
If you don’t have a 9×13-inch dish, you can use two 8×8-inch pans or even individual ramekins for single servings—just reduce the bake time to about 15-20 minutes. I’ve also made this in a cast-iron skillet for a rustic look, and it works beautifully. Just make sure your skillet is at least 12 inches in diameter.
Preparation Method
Alright, let’s get cooking! This recipe comes together in a few simple steps, and I’ll walk you through each one with tips I’ve learned from making this dozens of times.
Step 1: Preheat and Prepare
Preheat your oven to 375°F (190°C). Grease your 9×13-inch baking dish with butter or non-stick spray. This step is crucial—trust me, you don’t want to be scraping baked-on cheese off the dish later.
Step 2: Cook the Pasta
Bring a large pot of salted water to a rolling boil—it should taste like the sea, as they say. Add your elbow macaroni and cook for 1 minute less than the package directions for al dente. For most brands, that’s about 6-7 minutes. The pasta will finish cooking in the oven, so you want it slightly firm. Drain the pasta in a colander, but don’t rinse it—you want that starch to help the sauce cling to the noodles. Set it aside while you make the sauce.
Step 3: Make the Roux
In your medium saucepan, melt the 4 tablespoons of butter over medium heat. Once it’s fully melted and starting to bubble, add the flour. Whisk constantly for about 1-2 minutes until the mixture turns a light golden color and smells slightly nutty. This is your roux, and it’s the foundation of your cheese sauce. Don’t rush this step—cooking the flour removes that raw taste and ensures a smooth sauce.
Step 4: Build the Cheese Sauce
Slowly pour in the milk and heavy cream while whisking continuously. I mean it—keep whisking! If you stop, you’ll get lumps. Continue whisking until the mixture is smooth and starts to thicken, about 3-4 minutes. You’ll know it’s ready when it coats the back of a spoon. Reduce the heat to low.
Now, add your shredded cheeses one handful at a time, stirring gently after each addition until fully melted. This gradual approach prevents the sauce from breaking or becoming grainy. Once all the cheese is incorporated, stir in the Dijon mustard, garlic powder, smoked paprika, nutmeg, salt, and pepper. Taste the sauce—yes, taste it now! Adjust the seasoning if needed. It should be slightly saltier than you think because it will mellow out when mixed with the pasta.
Step 5: Combine Pasta and Sauce
Add the drained pasta to the saucepan with the cheese sauce. Gently fold everything together until every piece of macaroni is coated in that creamy, cheesy goodness. Don’t be rough—you don’t want to break the pasta. If the sauce seems too thick, add a splash of milk to loosen it up. It should be slightly looser than you think because it will thicken as it bakes.
Step 6: Assemble the Dish
Pour the mac and cheese mixture into your prepared baking dish and spread it into an even layer. Now, for the best part—the topping! In a small bowl, combine the panko breadcrumbs, melted butter, grated Parmesan, garlic powder, and a pinch of salt. Stir until the breadcrumbs are evenly coated. Sprinkle this mixture evenly over the top of the mac and cheese. Don’t press it down—you want it to stay light and airy for maximum crunch.
Step 7: Bake to Perfection
Place the dish in the preheated oven and bake for 20-25 minutes. You’re looking for the sauce to be bubbly around the edges and the top to be golden brown and crispy. If the top isn’t as brown as you’d like after 20 minutes, you can switch the oven to broil for the last 1-2 minutes—but watch it carefully! Panko can go from golden to burnt in a flash.
Step 8: Rest and Serve
Here’s the hardest part—let it rest for 5-10 minutes before serving. I know, I know, you want to dig in immediately. But this resting time allows the sauce to set slightly, so you get those beautiful, creamy layers instead of a soupy mess. Trust me on this one. Serve it warm, and prepare for compliments.
Cooking Tips & Techniques
After making this baked mac and cheese more times than I can count, I’ve picked up a few tricks that make all the difference. Let me share them with you so you can nail it on your first try.
Don’t overcook the pasta. This is probably the most common mistake I see. If you cook the pasta to full al dente, it will turn mushy after baking. Cook it one minute less than the package directions—it should still have a slight bite to it. The oven will finish the job perfectly.
Shred your own cheese. I know I’ve said this before, but it bears repeating. Pre-shredded cheese is coated with cellulose and anti-caking agents that prevent it from melting smoothly. Your sauce will be grainy instead of silky. Take the extra two minutes to grate your own—you’ll taste the difference.
Low and slow for the sauce. When you’re melting the cheese into the sauce, keep the heat on low. High heat can cause the cheese to separate and become greasy. Patience is your friend here. If the sauce starts to look oily or grainy, remove it from the heat immediately and whisk in a splash of cold milk to bring it back together.
Season in layers. Don’t just rely on the cheese for flavor. Season the pasta water generously, season the roux, and season the final sauce. Each layer of seasoning builds depth. That said, be careful with salt—some cheeses are saltier than others, so taste as you go.
Let it rest. I know I mentioned this in the instructions, but it’s worth repeating. That 5-10 minute rest period is non-negotiable if you want perfect slices. I once skipped it because I was hungry and impatient, and let me tell you—it was a mess. A delicious mess, but a mess nonetheless.
Watch the broiler. If you decide to broil the top for extra crunch, stay right there by the oven. Panko can burn in seconds. I learned this the hard way when I walked away to answer a text and came back to a smoking kitchen. Set a timer for 1 minute and check it constantly.
Variations & Adaptations
One of the best things about this baked mac and cheese is how versatile it is. Here are some of my favorite variations that I’ve tested and loved:
Add Some Protein
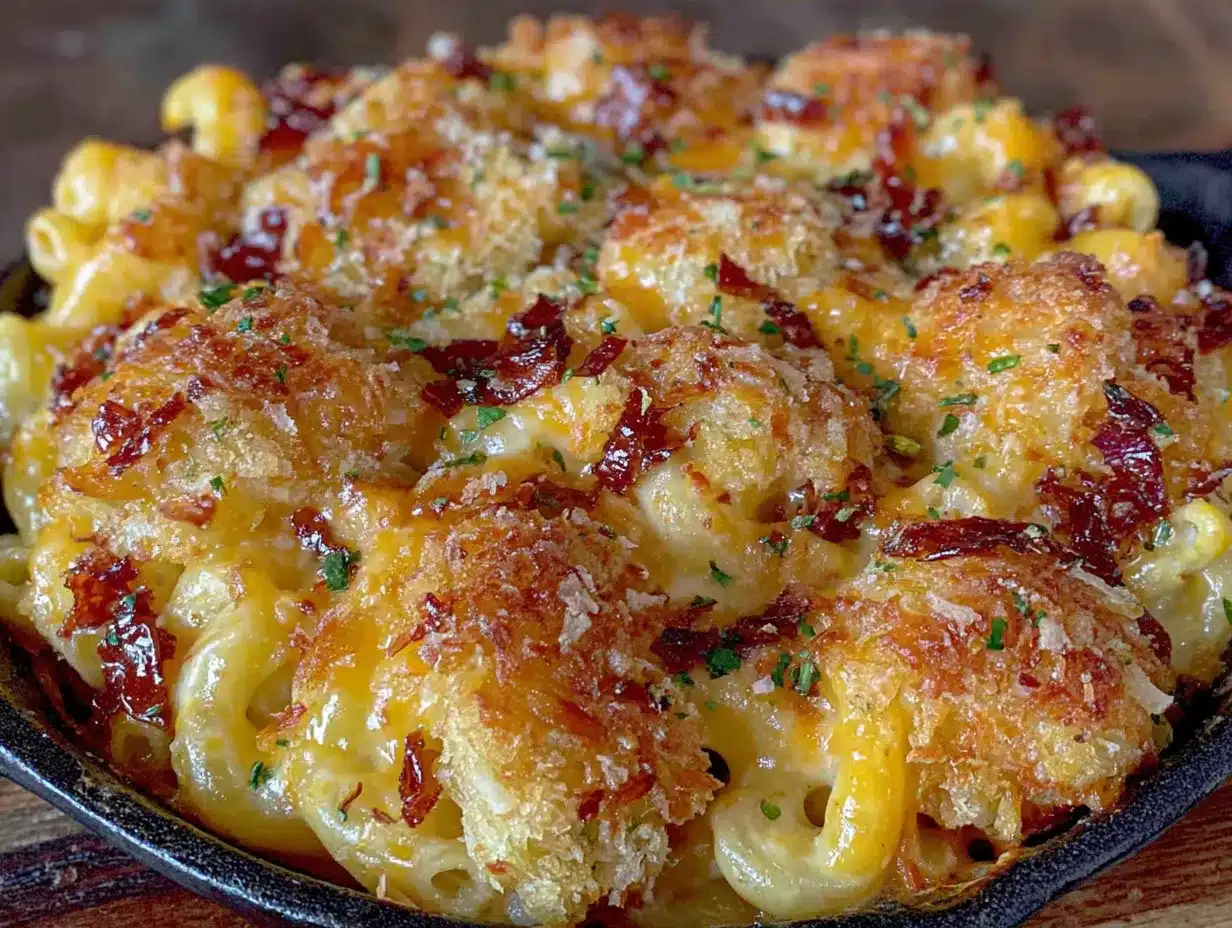
Turn this into a complete meal by adding cooked, crumbled bacon, diced ham, or shredded rotisserie chicken. Stir them in when you combine the pasta and sauce. My personal favorite is bacon—the smoky, salty crunch pairs perfectly with the creamy cheese sauce. Just cook about 6 strips until crispy, crumble them, and fold them in before baking. Reserve a few pieces to sprinkle on top for garnish.
Veggie-Packed Version
This is a great way to sneak in some vegetables. Steam some broccoli florets, sauté some mushrooms, or roast some cherry tomatoes and fold them into the mac and cheese before baking. Roasted butternut squash or caramelized onions add a touch of sweetness that’s absolutely divine. I love adding sautéed spinach and sun-dried tomatoes for an Italian-inspired twist.
Spicy Kick
If you like a little heat, add 1/2 teaspoon of cayenne pepper or red pepper flakes to the cheese sauce. You can also use pepper jack cheese instead of some of the cheddar for a milder heat that builds as you eat. A drizzle of sriracha or hot honey over the finished dish is also amazing.
Gluten-Free Adaptation
Use a 1:1 gluten-free flour blend for the roux and gluten-free pasta. Make sure your panko is labeled gluten-free—many brands offer it now. The texture will be slightly different, but still delicious. I’ve tested this with Barilla gluten-free elbows and King Arthur Measure for Measure flour, and the results were fantastic.
Dairy-Free Option
Use unsweetened oat milk or cashew milk for the sauce, and a dairy-free butter substitute. For the cheese, look for high-quality dairy-free cheddar shreds that melt well—I’ve had good luck with Violife and Miyoko’s brands. The sauce won’t be as creamy, but it’s still satisfying. Nutritional yeast can help add that cheesy flavor.
Serving & Storage Suggestions
This baked mac and cheese is best served warm, straight from the oven, when the top is still crispy and the sauce is perfectly creamy. Let it rest for 5-10 minutes before serving to allow the sauce to set. I like to scoop it out with a large spoon, making sure each serving gets some of that golden panko topping.
For a complete meal, serve it alongside a simple green salad with a tangy vinaigrette—the acidity cuts through the richness beautifully. Roasted vegetables like asparagus, Brussels sprouts, or green beans also pair wonderfully. If you’re feeling indulgent, serve it with some crusty bread to soak up any extra cheese sauce.
As for beverages, this dish pairs beautifully with a crisp white wine like Sauvignon Blanc or a light Pinot Noir. For non-alcoholic options, a sparkling water with lemon or a cold glass of milk is perfect.
Storage Instructions
Leftovers can be stored in an airtight container in the refrigerator for up to 4 days. The panko topping will lose some of its crunch, but the flavor will still be amazing. To reheat, place individual portions in the microwave for 1-2 minutes, or reheat the entire dish in a 350°F oven for about 15-20 minutes. If reheating in the oven, cover with foil to prevent the top from burning.
You can also freeze this baked mac and cheese for up to 3 months. Assemble the dish completely but don’t bake it. Cover tightly with plastic wrap and then foil. When you’re ready to eat, thaw it in the refrigerator overnight, then bake as directed, adding about 10 minutes to the bake time since you’re starting from cold. The texture won’t be quite as creamy as fresh, but it’s still a lifesaver on busy nights.
Nutritional Information & Benefits
Let’s be honest—this baked mac and cheese is comfort food, not health food. But that doesn’t mean it can’t be part of a balanced diet! Here’s the estimated nutritional breakdown per serving (based on 8 servings):
| Nutrient | Amount per Serving |
|---|---|
| Calories | 520 |
| Total Fat | 32g |
| Saturated Fat | 19g |
| Cholesterol | 95mg |
| Sodium | 680mg |
| Total Carbohydrates | 38g |
| Dietary Fiber | 2g |
| Sugars | 6g |
| Protein | 22g |
| Calcium | 450mg |
This dish is a good source of calcium and protein, thanks to all that cheese and milk. The Parmesan and Gruyère also provide some vitamin A and B12. If you want to lighten it up, you can use low-fat milk and reduce the cheese by about 1/4 cup, but honestly, this is a recipe meant to be enjoyed in moderation. I say go for it, savor every bite, and balance it out with lighter meals the rest of the week.
One note for those with dietary concerns: this recipe contains dairy and gluten. For allergen-friendly options, check out the variations section above.
Conclusion
This baked mac and cheese with crispy panko topping is more than just a recipe—it’s the kind of dish that creates memories. I think back to that day at my neighbor’s house, standing in her cozy kitchen with the smell of cheese and butter filling the air, and I smile. That’s what food should do. It should stop you in your tracks, make you forget about your to-do list, and remind you that simple things can be extraordinary.
I hope you give this recipe a try and make it your own. Maybe you’ll add bacon, maybe you’ll throw in some broccoli, or maybe you’ll keep it exactly as written. Whatever you do, I promise you won’t be disappointed. This is comfort food at its finest—creamy, cheesy, and topped with that irresistible golden crunch.
When you make it, I’d love to hear how it turned out! Drop a comment below and let me know if you made any changes or if it became a new family favorite. And if you loved it, share it with a friend who needs a little comfort in their life. Happy cooking, friend—you’ve got this!
Frequently Asked Questions
Can I make this baked mac and cheese ahead of time?
Absolutely! You can assemble the entire dish (without baking) up to 24 hours in advance. Cover it tightly with foil and refrigerate. When you’re ready to bake, add about 10 minutes to the bake time since you’re starting from cold. You might want to add a little extra milk to the sauce before assembling if it seems too thick after chilling.
Why is my cheese sauce grainy?
Grainy cheese sauce usually happens for one of two reasons: the heat was too high when you added the cheese, or you used pre-shredded cheese. Keep the heat on low when melting the cheese, and always shred your own from a block. If your sauce does turn grainy, you can try whisking in a splash of cold milk or cream to smooth it out.
Can I use different types of cheese?
Definitely! While I love the combination of sharp cheddar and Gruyère, you can experiment with other cheeses. Gouda, Fontina, Monterey Jack, and even Brie all work beautifully. Just avoid using only soft cheeses like Brie or Camembert, as they won’t provide enough structure. A good rule of thumb is to use a mix of one hard cheese (like cheddar) and one melting cheese (like Gruyère or Gouda).
How do I get the panko topping extra crispy?
For the crispiest topping, make sure your panko is well-coated in melted butter—this helps it toast evenly. You can also broil the dish for the last 1-2 minutes of baking, but watch it carefully to prevent burning. Another trick is to toast the panko in a dry skillet for 2-3 minutes before adding the butter, which gives it a head start on crispiness.
Can I freeze leftovers?
Yes! Baked mac and cheese freezes beautifully for up to 3 months. Let it cool completely, then portion it into airtight containers or wrap the entire dish tightly in plastic wrap and foil. To reheat, thaw in the refrigerator overnight and warm in a 350°F oven for about 20 minutes, or microwave individual portions for 2-3 minutes. The panko topping won’t be as crispy after freezing, but the flavor will still be amazing.
Pin This Recipe!
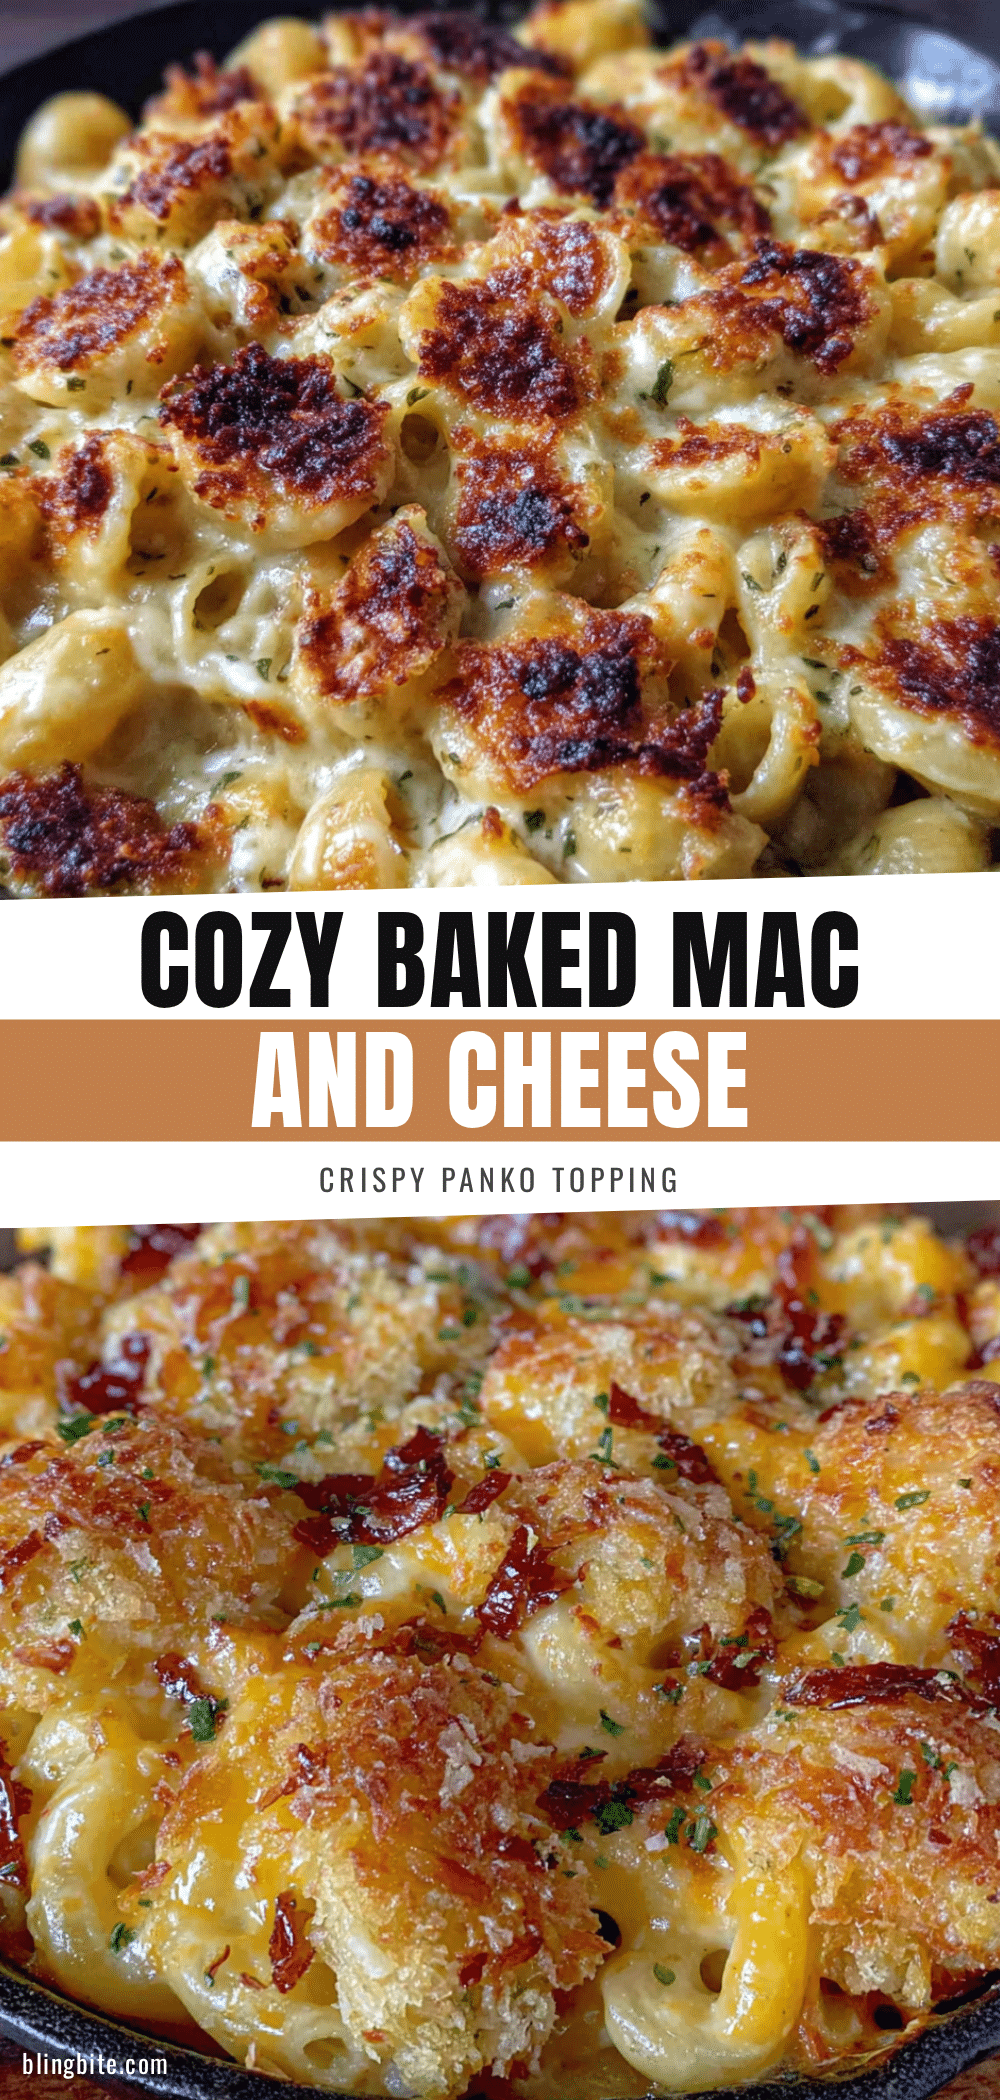
Easy Baked Mac and Cheese with Crispy Panko Topping
This creamy, cheesy baked mac and cheese features a crispy panko topping that adds the perfect crunch. Made with sharp cheddar and Gruyère, it’s comfort food at its finest.
- Prep Time: 20 minutes
- Cook Time: 25 minutes
- Total Time: 45 minutes
- Yield: 8 servings 1x
- Category: Main Course
- Cuisine: American
Ingredients
- 1 pound (450g) elbow macaroni
- 4 tablespoons (56g) unsalted butter
- 1/4 cup (31g) all-purpose flour
- 3 cups (710ml) whole milk
- 1 cup (240ml) heavy cream
- 2 cups (226g) sharp cheddar cheese, shredded
- 1 cup (113g) Gruyère cheese, shredded
- 1/2 cup (56g) Parmesan cheese, finely grated
- 1 teaspoon Dijon mustard
- 1/2 teaspoon garlic powder
- 1/4 teaspoon smoked paprika
- 1/8 teaspoon freshly grated nutmeg
- 1 teaspoon salt
- 1/2 teaspoon black pepper
- 1 cup (90g) panko breadcrumbs
- 3 tablespoons (42g) unsalted butter, melted
- 1/4 cup (28g) Parmesan cheese, finely grated
- 1/4 teaspoon garlic powder
- Pinch of salt
Instructions
- Preheat your oven to 375°F (190°C). Grease your 9×13-inch baking dish with butter or non-stick spray.
- Bring a large pot of salted water to a rolling boil. Add elbow macaroni and cook for 1 minute less than the package directions for al dente (about 6-7 minutes). Drain in a colander, do not rinse.
- In a medium saucepan, melt 4 tablespoons of butter over medium heat. Add flour and whisk constantly for 1-2 minutes until the mixture turns light golden and smells nutty.
- Slowly pour in the milk and heavy cream while whisking continuously. Continue whisking until the mixture is smooth and starts to thicken, about 3-4 minutes. Reduce heat to low.
- Add shredded cheeses one handful at a time, stirring gently after each addition until fully melted. Stir in Dijon mustard, garlic powder, smoked paprika, nutmeg, salt, and pepper. Taste and adjust seasoning.
- Add the drained pasta to the saucepan with the cheese sauce. Gently fold together until every piece of macaroni is coated.
- Pour the mac and cheese mixture into the prepared baking dish and spread into an even layer.
- In a small bowl, combine panko breadcrumbs, melted butter, grated Parmesan, garlic powder, and a pinch of salt. Stir until evenly coated. Sprinkle this mixture evenly over the top of the mac and cheese.
- Bake for 20-25 minutes until the sauce is bubbly around the edges and the top is golden brown and crispy. If desired, broil for the last 1-2 minutes, watching carefully.
- Let rest for 5-10 minutes before serving. Serve warm.
Notes
Cook pasta one minute less than al dente to prevent mushiness. Shred your own cheese for a smoother sauce. Let the dish rest for 5-10 minutes before serving to allow the sauce to set. For extra crispy topping, broil for the last 1-2 minutes, watching carefully to avoid burning.
Nutrition
- Serving Size: 1 serving
- Calories: 520
- Sugar: 6
- Sodium: 680
- Fat: 32
- Saturated Fat: 19
- Carbohydrates: 38
- Fiber: 2
- Protein: 22
Keywords: baked mac and cheese, macaroni and cheese, panko topping, comfort food, cheesy pasta, easy dinner