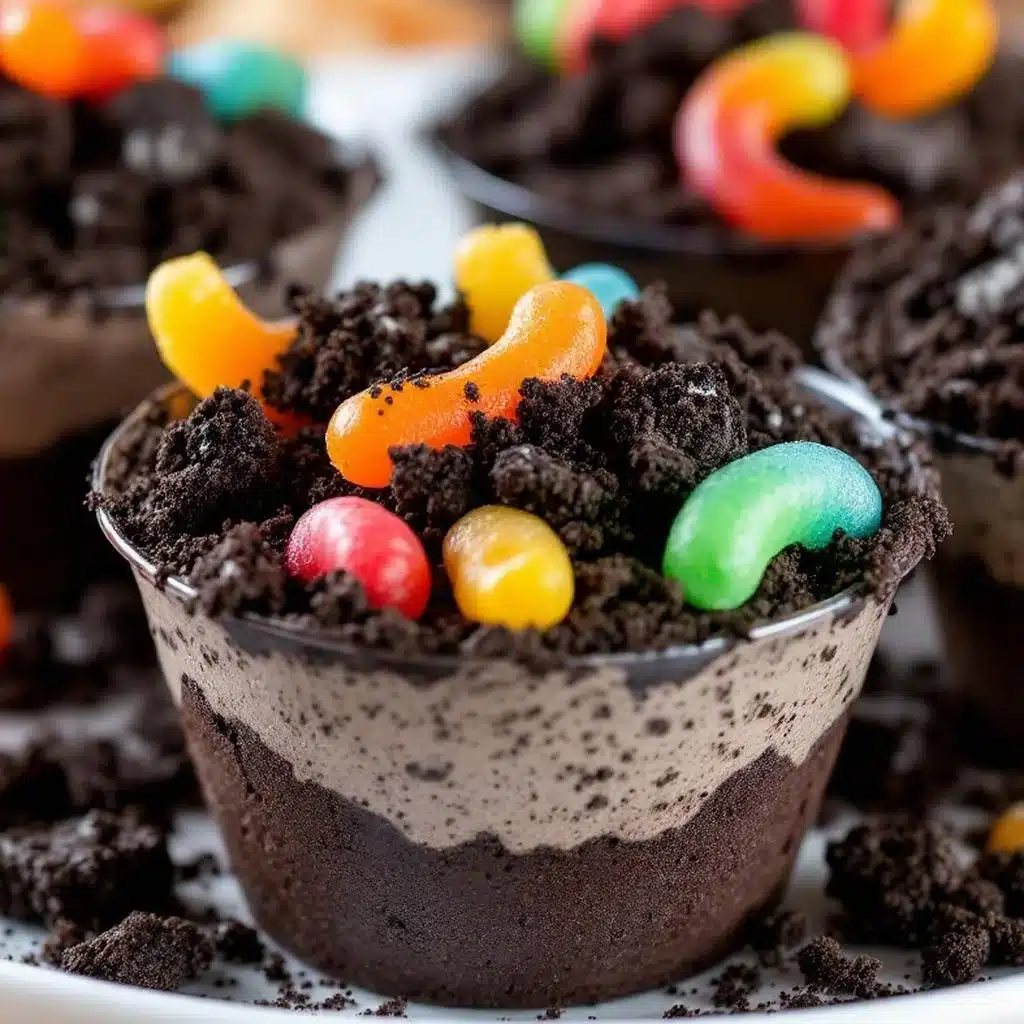
My sister laughed when I told her I was bringing Halloween dirt cups to the family party. “You mean the ones with the gummy worms?” she said, and I could hear the eye roll through the phone. She thought it was a kids-only thing, something you throw together five minutes before the school party starts. And honestly? I kind of got it. Most dirt cups are just pudding and crushed cookies thrown in a cup with zero thought. They look cute but taste forgettable. But I had been testing a version that actually tasted like something—real chocolate flavor, creamy texture, that satisfying crunch that doesn’t turn to mush by the second bite. I brought a tray of these Easy Halloween Dirt Cups with Oreo Crumbles and Gummy Worms to prove a point.
The thing disappeared before the actual dinner started. My brother-in-law, who swears he doesn’t eat “cute food,” grabbed two. My niece asked for the recipe three times. And my sister? She texted me the next morning asking if I could bring them to her office potluck. That’s the moment I knew this wasn’t just another Halloween novelty. These dirt cups actually deliver on flavor while still being ridiculously fun to look at. They’re the kind of dessert that makes adults act like kids and kids feel like they’re getting away with something.
So here’s the thing—these aren’t complicated. You don’t need a pastry bag or a candy thermometer. But they do need a little attention to detail if you want them to taste as good as they look. I’ve made enough mediocre versions to know exactly where things go wrong, and I’m going to walk you through every step so yours turn out perfect the first time. Because honestly? A Halloween dessert should be memorable for the right reasons.
Why You’ll Love This Recipe
Let me tell you why these dirt cups have become my most-requested Halloween recipe, year after year. I’ve tested this version at least a dozen times across different gatherings—family parties, school events, even a grown-up Halloween dinner where everyone pretended they were too sophisticated for themed desserts (spoiler: they weren’t).
- Quick & Easy: You can have these assembled in under 20 minutes of active work. The hardest part is waiting for the pudding to set, and that’s just fridge time while you do literally anything else.
- Simple Ingredients: No specialty baking aisle hunting. Pudding mix, milk, Oreos, cream cheese, whipped topping, and gummy worms. That’s it. You probably have most of these in your kitchen right now.
- Perfect for Parties: These are individual servings, which means no slicing, no serving spoons, no mess. Grab and go. Great for Halloween parties, classroom celebrations, trunk-or-treat events, or even a spooky movie night at home.
- Crowd-Pleaser: I’ve watched picky eaters, health-conscious friends, and dessert snobs all go back for seconds. The texture and flavor combo hits that nostalgic sweet spot without being cloying.
- Unbelievably Delicious: Here’s where these dirt cups differ from every other version you’ve seen. The cream cheese layer adds a tangy richness that balances the sweetness. The pudding is made with whole milk for real creaminess. And the Oreo crumble stays crunchy because of a simple trick I’ll share below.
What makes this recipe different from the rest is the texture game. Most dirt cups turn into a soggy mess within an hour. Not these. The layers stay distinct, the crunch lingers, and every spoonful gives you that satisfying contrast between creamy and crispy. This isn’t just another Halloween dessert—it’s the one people will ask you to bring every single year.
What Ingredients You Will Need
This recipe uses simple, straightforward ingredients to create something that tastes way more complex than it is. Everything is available at any regular grocery store, and most items are pantry staples you probably already have on hand.
For the Chocolate Pudding Layer
- 1 box (3.9 oz) instant chocolate pudding mix — I prefer Jell-O brand for consistent results, but any instant mix works. Do not use cook-and-serve pudding; it won’t set properly for this recipe.
- 2 cups cold whole milk — Whole milk gives the richest, creamiest texture. You can use 2% in a pinch, but avoid skim milk—the pudding will be too thin and won’t hold its structure.
For the Cream Cheese Layer (the secret weapon)
- 4 oz cream cheese, softened to room temperature — This is non-negotiable for the texture. Cold cream cheese will leave lumpy pockets in your mixture. Let it sit on the counter for at least 30 minutes before starting.
- 1/4 cup powdered sugar — Adds just enough sweetness without graininess. Regular granulated sugar won’t dissolve properly here.
- 1/2 teaspoon vanilla extract — Pure vanilla extract makes a difference. Skip the imitation stuff for this one.
- 1 cup whipped topping, thawed — Cool Whip or any store brand works fine. If you want to go homemade, whip 1/2 cup heavy cream with 1 tablespoon powdered sugar until stiff peaks form.
For the Oreo Crust and Dirt Crumbles
- 1 package (14.3 oz) regular Oreo cookies — About 36 cookies. Do not use double-stuff; the cream filling throws off the crumble texture and makes it too sweet. Regular Oreos are perfect for that realistic “dirt” look.
- 3 tablespoons melted unsalted butter — This is the trick that keeps your crumble crunchy instead of soggy. The butter coats the crumbs and creates a barrier against the moisture from the pudding.
For Decoration
- Gummy worms — About 2-3 per cup. I like the sour ones for a tangy contrast, but regular works great too. Trolli and Black Forest both hold up well without getting sticky.
- Optional: Green-tinted shredded coconut — For “grass” effect. Toss 1/2 cup shredded coconut with 2-3 drops green food coloring in a zip-top bag and shake until evenly tinted.
- Optional: Small plastic spiders or tombstone decorations — Just for fun. Make sure they’re food-safe and cleaned first.
Equipment Needed
You don’t need any fancy equipment for these dirt cups, which is part of what makes them so accessible. Here’s what you’ll need:
- 8-10 small clear cups or glasses — Clear plastic cups (9 oz size) are perfect for parties and let you see the layers. You can also use small mason jars, glass tumblers, or even disposable wine glasses for a fancier look. I’ve used everything from Solo cups to vintage juice glasses, and they all work.
- Electric hand mixer or stand mixer — For beating the cream cheese mixture until smooth. You can do this by hand with a whisk, but it takes some elbow grease and you risk lumps.
- Food processor or zip-top bag and rolling pin — For crushing the Oreos. A food processor gives the most consistent texture, but a zip-top bag and a rolling pin works great too. Let out some aggression—it’s Halloween, after all.
- Medium mixing bowls (2-3) — One for the pudding, one for the cream cheese mixture, and one for the Oreo crumbs.
- Rubber spatula — For folding the whipped topping into the cream cheese mixture without deflating it.
- Measuring cups and spoons — Standard set for accurate measurements.
- Small offset spatula or spoon — For even layering. Not essential but makes the process neater.
If you don’t have a food processor, don’t worry. I’ve made these more times with a bag and rolling pin than with the machine. Just make sure you crush the Oreos finely enough—you want the texture of actual garden soil, not gravel.
Preparation Method
Let me walk you through this step by step. I’ve organized it so you can multitask efficiently without feeling rushed.
Step 1: Make the Oreo Dirt Crumbles
Start by separating the Oreo cookies. You need 36 cookies total. Twist each one open and scrape the cream filling into a small bowl. You won’t use the filling for this recipe (save it for another project or just eat it—no judgment). Place the chocolate wafers in a food processor and pulse until you get fine crumbs. You want them consistent, like coarse sand. Transfer the crumbs to a medium bowl, pour in the 3 tablespoons of melted butter, and stir with a fork until every crumb is coated. This butter coating is what keeps your dirt crunchy instead of turning into paste when it touches the pudding. Set the crumbs aside. If using the bag method, place the wafers in a gallon-size zip-top bag, seal it, and crush with a rolling pin until fine. Then transfer to a bowl and mix in the melted butter.
Step 2: Prepare the Chocolate Pudding
In a medium bowl, whisk together the instant chocolate pudding mix and 2 cups of cold whole milk. Whisk vigorously for about 2 minutes until the mixture thickens. It will be loose at first, then suddenly get noticeably thicker. That’s the sign it’s working. Let the pudding sit for 5 minutes at room temperature to set up slightly. Don’t rush this step—the pudding needs that initial set time to create a stable layer. While it sits, move on to the cream cheese mixture.
Step 3: Make the Cream Cheese Layer
In another medium bowl, beat the softened cream cheese with an electric mixer on medium speed until completely smooth, about 1 minute. Scrape down the sides of the bowl. Add the powdered sugar and vanilla extract, then beat again until combined and fluffy, about 30 seconds. Gently fold in the thawed whipped topping using a rubber spatula. Fold, don’t stir—you want to keep the air in the whipped topping to maintain that light, mousse-like texture. The mixture should be smooth, pale, and pillowy. Set it aside.
Step 4: Layer the Cups
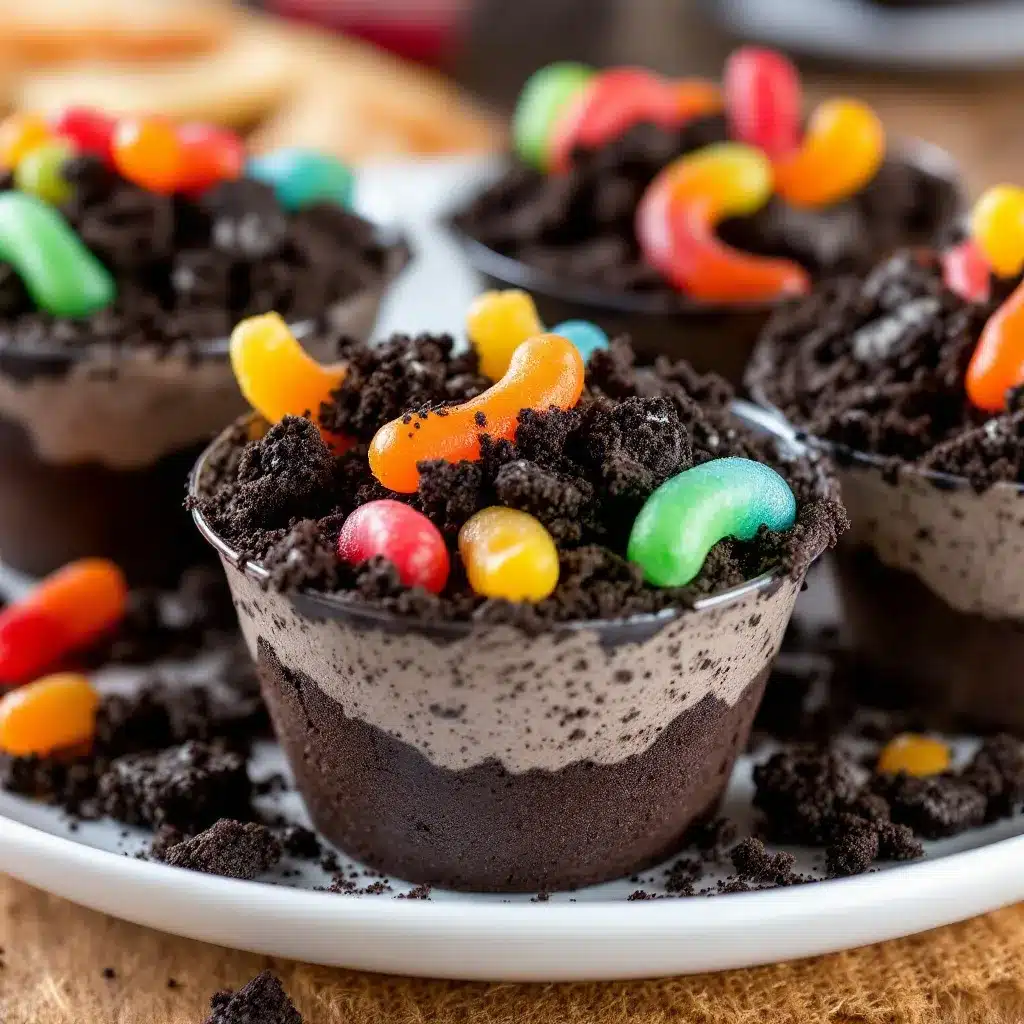
Now comes the fun part. Take your clear cups and arrange them on a baking sheet (this makes moving them to the fridge much easier). Start with a base layer of Oreo crumbs—about 2 tablespoons per cup, pressed down gently with the back of a spoon. This creates a stable foundation. Next, add a layer of the cream cheese mixture—about 2 to 3 tablespoons, spread evenly. Then add a layer of chocolate pudding—about 3 to 4 tablespoons. Repeat the layers: another sprinkle of Oreo crumbs, another layer of cream cheese mixture, and finish with a final layer of chocolate pudding. The goal is to have visible stripes when you look at the cup from the side. Leave about 1/2 inch of space at the top for the final dirt topping.
Step 5: Top with Dirt and Worms
Sprinkle a generous layer of the buttered Oreo crumbs on top of each cup. This is the “dirt” surface. Don’t be shy—you want it thick enough to completely cover the pudding. Press a few gummy worms into the top so they look like they’re crawling out of the dirt. You can also stick one halfway down the side of the cup for a worm that’s “burrowing” through the layers. If using the green coconut grass, sprinkle a little around the worms before adding the final crumb layer.
Step 6: Chill Before Serving
This is the most important step. Refrigerate the assembled dirt cups for at least 2 hours before serving. Overnight is even better. The chilling time allows the pudding to fully set and the flavors to meld together. The cream cheese layer firms up and creates that beautiful separation between the chocolate layers. Do not skip this step—serving them immediately will result in runny pudding and a muddled texture. Trust me, I learned this the hard way when I tried to rush them for a last-minute party.
Cooking Tips & Techniques
I’ve made enough dirt cups to know exactly where things can go sideways. Here are the hard-earned lessons that will save you from my mistakes.
The soggy crumble problem — This is the number one complaint people have with dirt cups. The Oreo crumbs turn into a brown paste within an hour. The fix is the melted butter coating I mentioned earlier. It creates a fat barrier that prevents the moisture from the pudding from saturating the crumbs. I tried skipping this step once to save time, and by the time the party started, my dirt cups looked like mud puddles. Never again.
Temperature matters more than you think — Cold ingredients are your friend here. Use cold milk for the pudding. Make sure the cream cheese is at room temperature before beating it, but everything else should be cold. When you’re layering, work quickly and get the cups into the fridge as soon as possible. The faster they chill, the cleaner the layers will stay.
Don’t overmix the pudding — Whisk the pudding mix and milk just until it thickens. Overmixing can break down the starches and prevent the pudding from setting properly. You’ll see it go from thin to thick in about 2 minutes. Stop right there.
Layer with intention — Use the back of a spoon to gently spread each layer to the edges of the cup. If you just dump everything in the middle, you’ll get uneven layers and the visual effect is lost. Take the extra 10 seconds per cup to smooth things out. The presentation is half the fun of these desserts.
Timing your prep — I’ve found that making the Oreo crumbs and cream cheese mixture a day ahead saves a ton of stress. Store the crumbs in an airtight container at room temperature and the cream cheese mixture in the fridge. Then on party day, all you have to do is make the pudding and assemble. This is my go-to strategy for Halloween parties when I’m already juggling a million other things.
Variations & Adaptations
One of the best things about this recipe is how easily it adapts to different tastes and dietary needs. Here are some variations I’ve tried and loved.
Gluten-Free Version — Swap the regular Oreos for gluten-free chocolate sandwich cookies. Gluten-free Oreos exist and work perfectly. Everything else in the recipe is naturally gluten-free, so this is an easy switch that most people won’t even notice.
Dairy-Free Version — Use your favorite dairy-free milk (I like oat milk for its creaminess) and a dairy-free instant pudding mix. Replace the cream cheese with a vegan cream cheese alternative and use coconut whipped topping instead of regular. The texture will be slightly different but still delicious. I tested this with a friend who has dairy allergies and she gave it her seal of approval.
Peanut Butter Dirt Cups — Add 1/4 cup creamy peanut butter to the cream cheese mixture before folding in the whipped topping. The peanut butter adds a savory richness that pairs beautifully with the chocolate. Use peanut butter sandwich cookies instead of Oreos for an extra punch. This version disappeared fastest at my Halloween party last year.
Pumpkin Spice Dirt Cups — For a fall twist, replace the chocolate pudding with vanilla or butterscotch pudding and add 1/2 cup pumpkin puree and 1 teaspoon pumpkin pie spice to the cream cheese layer. Top with crushed graham crackers instead of Oreos for a different “dirt” texture. This is perfect for Thanksgiving or fall harvest parties.
Individual Trifle Jars — If you want to get fancy, layer these in small mason jars and tie a ribbon around the lid. They make adorable party favors or gifts for Halloween hosts. I’ve done this for adult Halloween parties and they’re always a hit.
Spicy Chocolate Version — Add 1/4 teaspoon cayenne pepper and 1/2 teaspoon cinnamon to the Oreo crumbs before adding the butter. The heat sneaks up on you and adds a surprising depth to the chocolate. This is for adventurous eaters only, but it’s become my personal favorite version.
Serving & Storage Suggestions
These dirt cups are best served cold, straight from the fridge. The contrast between the cold, creamy layers and the crunchy Oreo topping is what makes them so satisfying. Pull them out about 10 minutes before serving to take the chill off slightly, which allows the flavors to open up a bit more.
Presentation ideas — Arrange the cups on a black platter or a tray lined with orange and black napkins. Add a few extra gummy worms scattered around the tray for a creepy-crawly effect. If you’re serving these at a party, label them with a small sign that says “Worm Farm” or “Dirt Pudding” for extra Halloween fun.
What to serve with them — These dirt cups pair beautifully with a warm apple cider or a pumpkin spice latte for a cozy fall treat. For an adult Halloween party, they go surprisingly well with a dark stout beer or a bourbon-spiked hot chocolate. The rich chocolate flavors stand up to bold drinks without being overpowered.
Storage instructions — Keep the assembled dirt cups covered in the refrigerator for up to 3 days. The texture is best within the first 24 hours, but they’ll still be good for a couple of days after that. The key is keeping them covered so they don’t absorb odors from the fridge. I use plastic wrap pressed directly onto the surface of each cup, then cover the whole tray with foil.
Can you freeze them? — I don’t recommend freezing these. The pudding and cream cheese layers will separate when thawed, leaving you with a watery mess. The Oreo crumbs will also lose their crunch. These are best made fresh and eaten within a few days.
Make-ahead tip — You can assemble the cups up to 24 hours in advance. In fact, they taste better the next day because the flavors have had time to meld. Just wait to add the gummy worms until right before serving, or they’ll absorb moisture and become soft and sticky.
Nutritional Information & Benefits
Let’s be real—these are a treat, not a health food. But here’s the nutritional breakdown for one serving (based on 10 servings per recipe) so you can plan accordingly:
- Calories: Approximately 380-420 per cup
- Fat: 22g
- Carbohydrates: 48g
- Protein: 6g
- Sugar: 34g
- Fiber: 2g
If you’re watching your sugar intake, you can use sugar-free pudding mix and sugar-free whipped topping. The cream cheese layer can be made with low-fat cream cheese, though the texture will be slightly less rich. I’ve made a lighter version for school parties and honestly, nobody noticed the difference.
Potential allergens: This recipe contains dairy, wheat (from the Oreos), and soy (from the Oreos and some pudding mixes). If you’re serving these at a party where allergies might be a concern, the gluten-free and dairy-free variations above are great alternatives.
From a wellness perspective, I believe in balance. Halloween comes once a year, and these dirt cups are part of the fun. They’re made with real ingredients—no artificial flavors or preservatives—and the portion size is built into the individual cups, which helps with mindful eating. Plus, the cream cheese adds a small amount of protein and calcium. That’s my story and I’m sticking to it.
Conclusion
These Easy Halloween Dirt Cups with Oreo Crumbles and Gummy Worms have become a staple in my Halloween rotation for good reason. They’re simple enough to throw together on a busy weeknight, impressive enough to bring to any party, and delicious enough that people actually eat them instead of just taking a photo for Instagram. The layers stay distinct, the crunch lasts, and every spoonful delivers that perfect combination of creamy chocolate and buttery cookie crumble.
What I love most about this recipe is how it brings people together. There’s something about digging into a cup of “dirt” with a gummy worm staring back at you that makes even the most serious adult crack a smile. It’s Halloween magic in a cup—no tricks, just treats.
I’d love to hear how yours turn out. Did you add any fun decorations? Did you try one of the variations? Drop a comment below and let me know. And if you’re looking for more easy Halloween treats, check out these crispy loaded nachos for a savory option or these seven-layer taco dip cups for another crowd-pleasing appetizer. Happy Halloween, and happy eating!
Frequently Asked Questions
Can I make these dirt cups the night before?
Absolutely. In fact, they’re better the next day. The flavors meld together and the layers set up perfectly. Just wait to add the gummy worms until right before serving so they stay firm and chewy instead of getting soft and sticky from the moisture.
Why did my Oreo crumbs get soggy?
This usually happens when you skip the melted butter step or if you didn’t let the pudding set long enough before layering. The butter creates a barrier that keeps the crumbs from absorbing moisture from the pudding. Also, make sure your pudding is fully set (at least 5 minutes at room temperature plus the chilling time) before you start layering.
Can I use homemade pudding instead of instant?
I wouldn’t recommend it. Homemade pudding has a different consistency and won’t set as firmly as instant pudding. It also tends to be thinner, which means it will soak into the Oreo crumbs more quickly. Instant pudding is specifically formulated to set up quickly and hold its structure, which is exactly what you need for these layered cups.
How long do these keep in the fridge?
They’ll stay good for up to 3 days in the refrigerator if kept covered. The texture is best within the first 24 hours, but they’re still perfectly edible for a couple of days after that. After day 3, the Oreo crumbs start to soften significantly and the cream cheese layer can begin to separate slightly.
Can I use a different type of cookie for the dirt?
Yes! Chocolate wafer cookies, gluten-free chocolate sandwich cookies, or even crushed chocolate graham crackers all work well. The key is to use a chocolate cookie that crushes into a fine, sand-like texture. Avoid cookies with creamy fillings (like double-stuff Oreos) because the extra cream throws off the texture and makes the crumbs clump together.
Pin This Recipe!
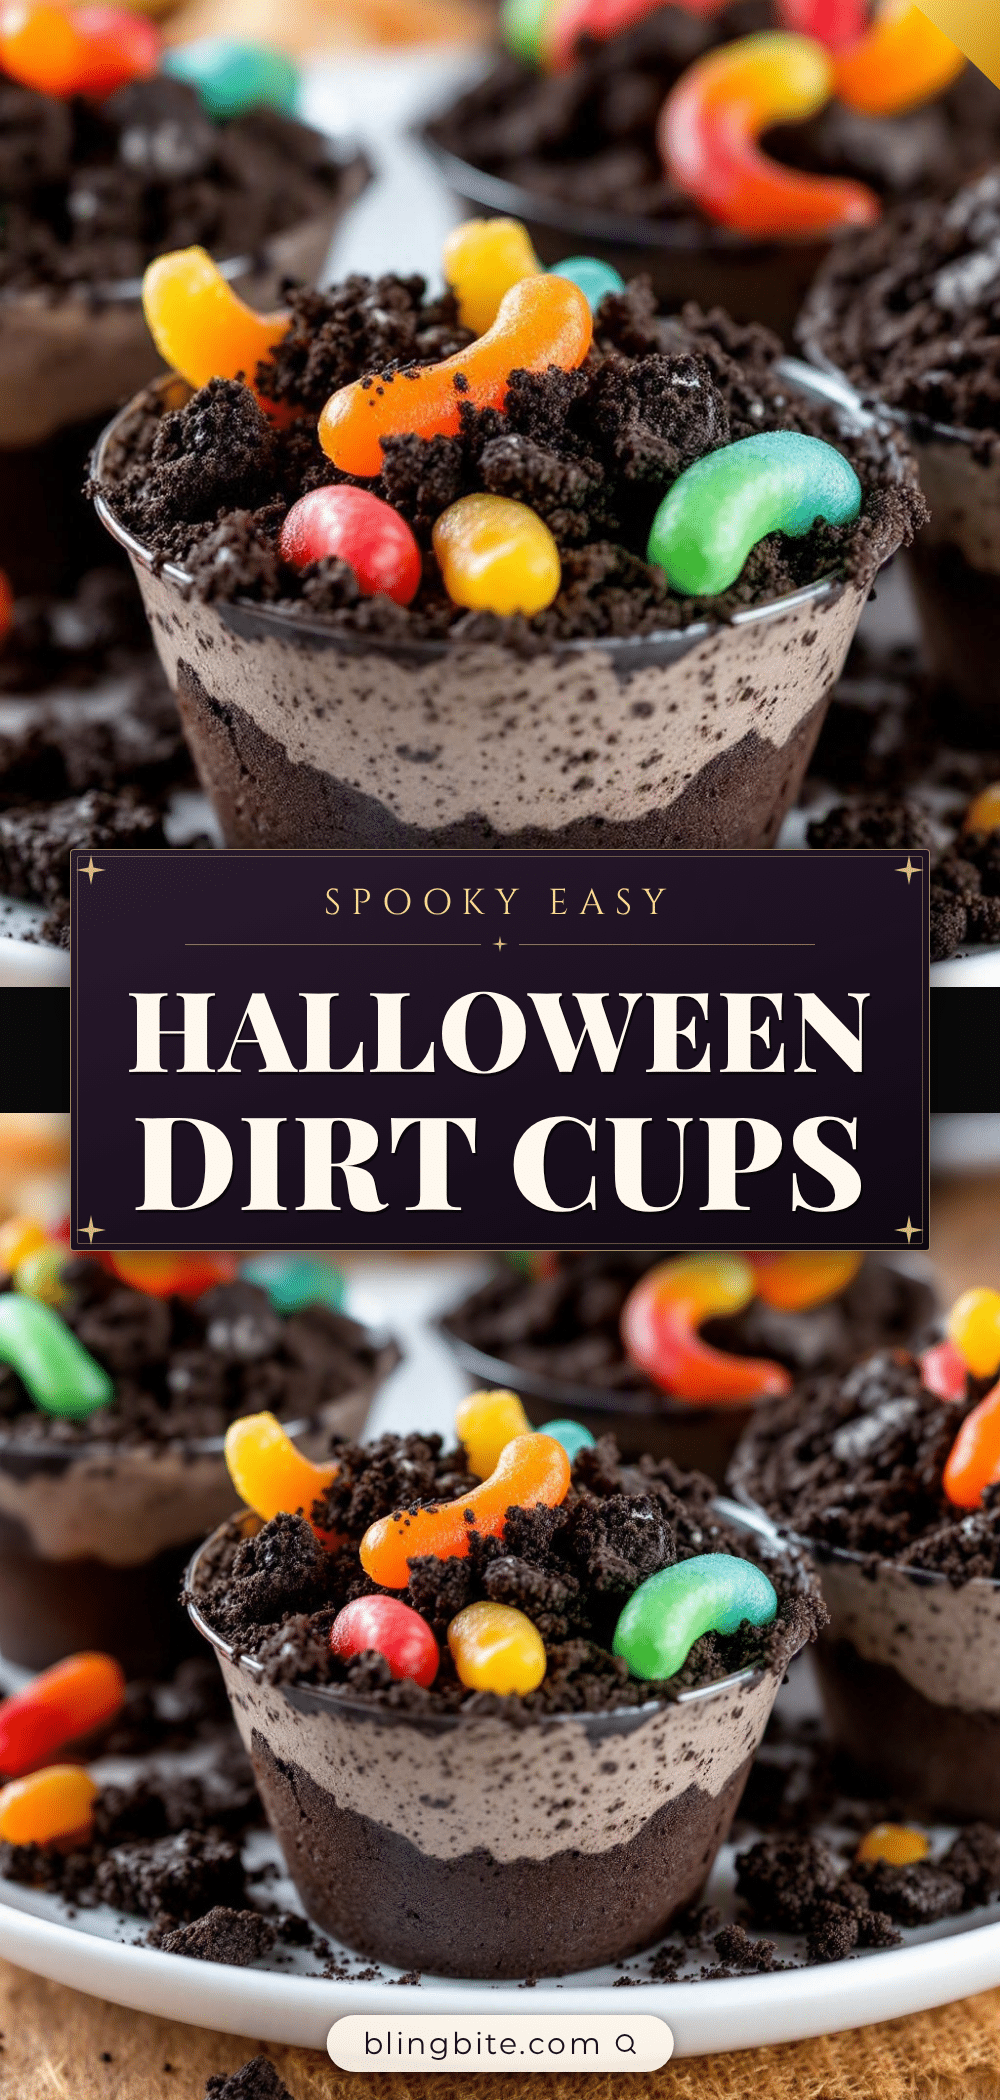
Easy Halloween Dirt Cups Recipe with Oreo Crumbles & Gummy Worms
These Easy Halloween Dirt Cups with Oreo Crumbles and Gummy Worms are a fun, no-bake dessert that delivers real chocolate flavor, creamy texture, and a satisfying crunch. Perfect for Halloween parties, they feature layers of chocolate pudding, a tangy cream cheese mixture, and buttery Oreo crumbs that stay crunchy.
- Prep Time: 20 minutes
- Cook Time: 0 minutes
- Total Time: 2 hours 20 minutes (includes chilling)
- Yield: 8-10 servings 1x
- Category: Dessert
- Cuisine: American
Ingredients
- 1 box (3.9 oz) instant chocolate pudding mix
- 2 cups cold whole milk
- 4 oz cream cheese, softened to room temperature
- 1/4 cup powdered sugar
- 1/2 teaspoon vanilla extract
- 1 cup whipped topping, thawed
- 1 package (14.3 oz) regular Oreo cookies (about 36 cookies)
- 3 tablespoons unsalted butter, melted
- Gummy worms (about 2-3 per cup)
- Optional: 1/2 cup shredded coconut, green food coloring (for grass effect)
- Optional: Small plastic spiders or tombstone decorations
Instructions
- Make the Oreo dirt crumbles: Separate 36 Oreo cookies, scraping off the cream filling. Place the chocolate wafers in a food processor and pulse until fine crumbs form. Transfer to a bowl, add 3 tablespoons melted butter, and stir until every crumb is coated. Set aside.
- Prepare the chocolate pudding: In a medium bowl, whisk together the instant chocolate pudding mix and 2 cups cold whole milk for about 2 minutes until thickened. Let sit for 5 minutes at room temperature.
- Make the cream cheese layer: In another bowl, beat the softened cream cheese with an electric mixer until smooth. Add powdered sugar and vanilla extract, beat until fluffy. Gently fold in the thawed whipped topping until smooth and pillowy.
- Layer the cups: In clear cups, add a base layer of Oreo crumbs (about 2 tablespoons), then a layer of cream cheese mixture (2-3 tablespoons), then a layer of chocolate pudding (3-4 tablespoons). Repeat layers, ending with a final layer of chocolate pudding. Leave about 1/2 inch of space at the top.
- Top with dirt and worms: Sprinkle a generous layer of buttered Oreo crumbs on top. Press gummy worms into the top so they look like they’re crawling out. Optionally, add green-tinted coconut grass around the worms.
- Chill before serving: Refrigerate for at least 2 hours, or overnight, before serving. This allows the pudding to set and flavors to meld.
Notes
The melted butter coating on the Oreo crumbs is key to keeping them crunchy. Use cold milk for the pudding and work quickly when layering. For best results, chill overnight. Add gummy worms just before serving to prevent them from getting soft.
Nutrition
- Serving Size: 1 cup
- Calories: 400
- Sugar: 34
- Sodium: 380
- Fat: 22
- Saturated Fat: 12
- Carbohydrates: 48
- Fiber: 2
- Protein: 6
Keywords: Halloween dirt cups, Oreo dirt cups, gummy worm dessert, no-bake Halloween dessert, easy Halloween treat


