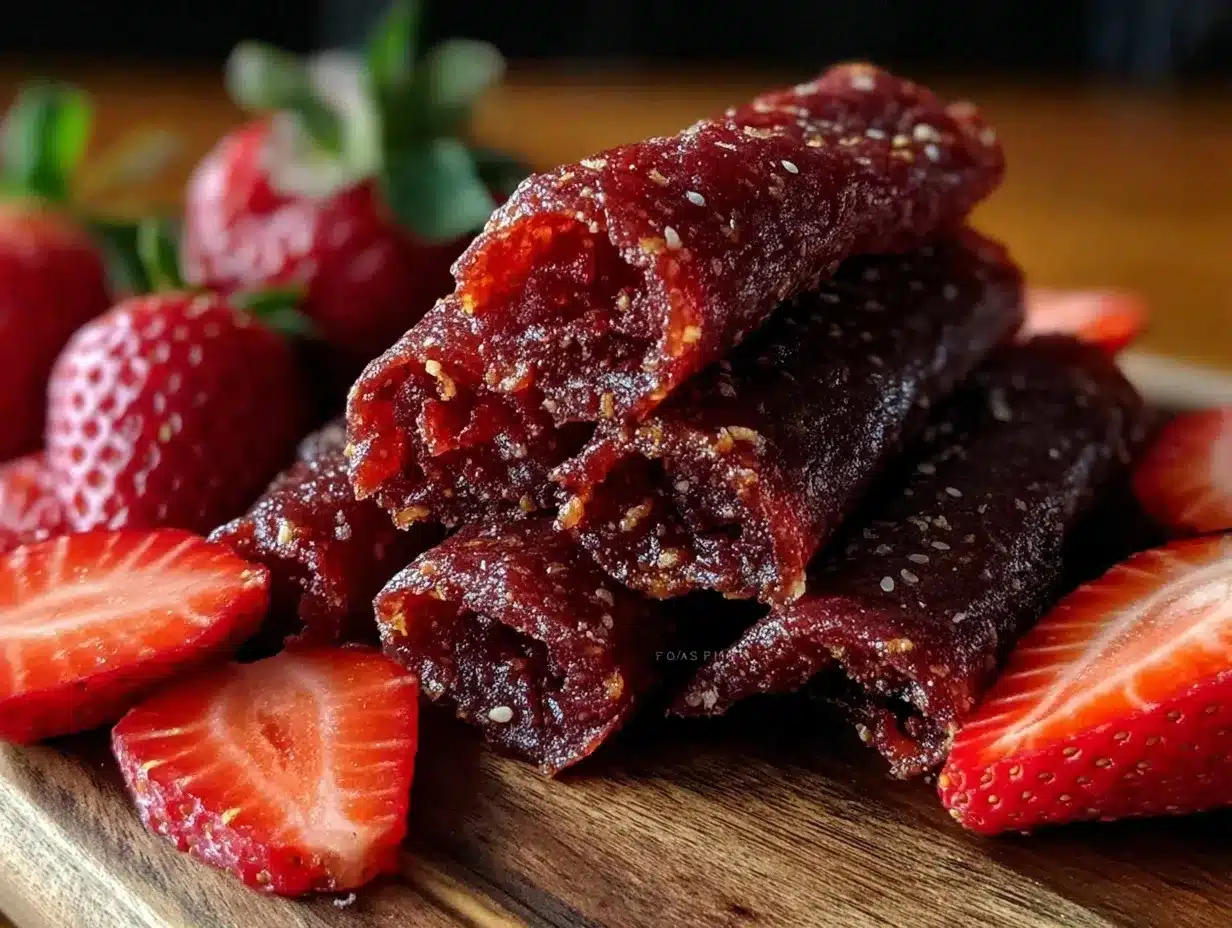
“You know that moment when you bite into a store-bought fruit roll-up and wonder why it tastes more like candy than fruit? I wasn’t expecting cooking advice from my accountant, but there I was, watching her shuffle papers while telling me about her grandmother’s homemade fruit roll-ups made with real strawberries. That story stuck with me, especially after a hectic Tuesday when my kids were craving snacks, and the pantry was looking bare. I decided to give it a shot — honestly, it was a bit messy (I forgot to line the baking sheet once), but the result was surprisingly delightful.
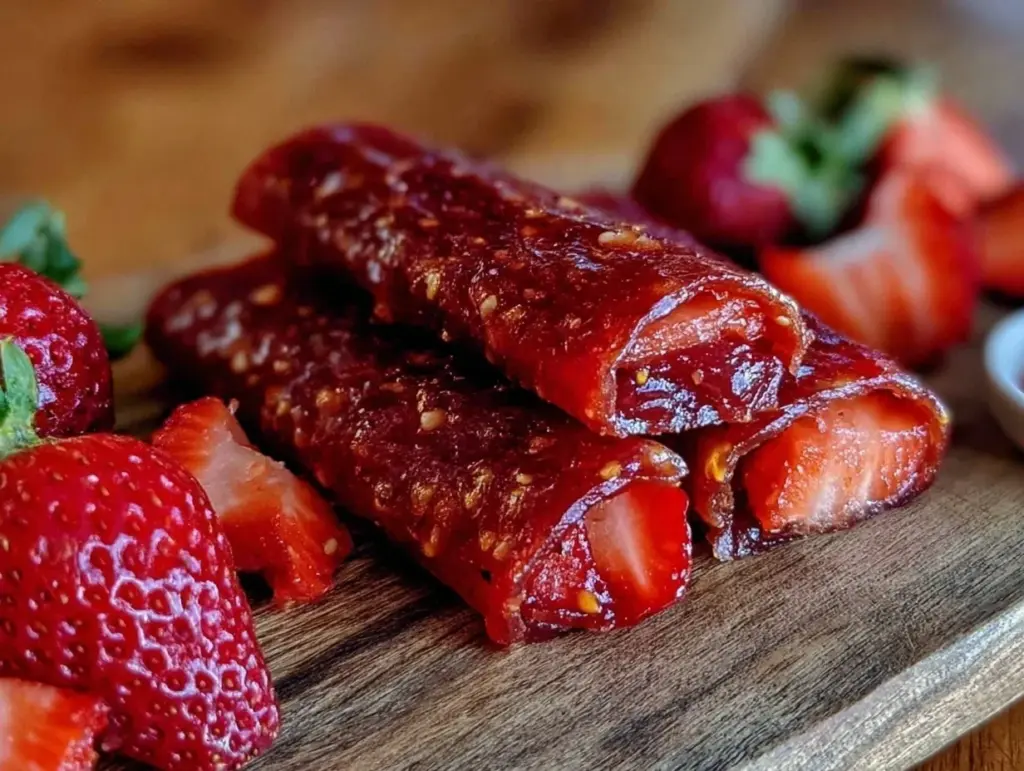
The texture was soft but chewy, the flavor vibrant and fresh, and the natural sweetness of strawberries really shone through. It was nothing like the artificial versions we’re used to. Maybe you’ve been there too—looking for a snack that’s both fun and wholesome, without all the processed junk. This easy homemade fruit roll-ups recipe with real strawberries became a staple in my kitchen because it’s simple, satisfying, and a little nostalgic in the best way.
Plus, it’s a treat that’s fun to make with kids or friends, and it fills your home with that sweet, fruity aroma that just makes you smile. Let me tell you, once you try this recipe, you might wonder why you ever bought the store-bought kind again!
Why You’ll Love This Recipe
This easy homemade fruit roll-ups recipe with real strawberries isn’t just a snack; it’s a little slice of happiness wrapped in a roll. I’ve put it through the test multiple times—trust me, getting the perfect chew and flavor balance wasn’t instant, but now it’s foolproof and family-approved. Here’s why it’s a keeper:
- Quick & Easy: Comes together in about 30 minutes of hands-on time, perfect for last-minute snack cravings or weekend fun.
- Simple Ingredients: Uses fresh strawberries and just a few pantry staples; no strange additives or preservatives.
- Perfect for Snack Time: Ideal for lunchboxes, road trips, or a guilt-free sweet fix anytime.
- Crowd-Pleaser: Kids and adults rave about the natural strawberry flavor and chewy texture.
- Unbelievably Delicious: The real fruit shines, delivering a fresh, tangy sweetness that’s far from artificial.
What sets this recipe apart is the straightforward method that lets the strawberries do the talking. No gelatin, no weird chemicals—just pure fruit goodness. Plus, I’ve found that roasting the strawberries before pureeing adds a subtle depth that you won’t get with raw fruit. Honestly, it’s like rediscovering fruit roll-ups the way they should be. You’ll find yourself closing your eyes after the first bite and thinking, “Why didn’t I make these sooner?”
What Ingredients You Will Need
This recipe uses simple, wholesome ingredients that come together to create a bold, fruity flavor and a satisfyingly chewy texture without any fuss. Most of these are pantry staples, and the star ingredient, fresh strawberries, can even be swapped for seasonal berries if you like.
- Fresh Strawberries, about 3 cups (450g), hulled and sliced – choose ripe, fragrant berries for the best flavor
- Granulated Sugar, 1/4 cup (50g) – balances the tartness of the strawberries; you can adjust based on sweetness
- Lemon Juice, 2 tablespoons (30ml) – adds brightness and helps preserve color
- Honey or Maple Syrup, 2 tablespoons (30ml) – for natural sweetness and a bit of chewiness
- Optional: A pinch of salt – enhances flavor depth without making it salty
If you’re looking to make this gluten-free, dairy-free, or vegan, no worries—this recipe is naturally free from those allergens. For a lower-sugar option, try swapping sugar for additional honey or use a sugar substitute like erythritol, but keep in mind it may affect texture slightly.
I recommend using organic strawberries when possible, and I’ve had great results with Driscoll’s brand for consistent freshness. If fresh strawberries aren’t in season, frozen work just fine—just thaw and drain excess liquid before use. In summer, swapping strawberries for fresh raspberries or blackberries can be a fun twist.
Equipment Needed
- Baking Sheet: A rimmed baking sheet about 9×13 inches (23×33 cm) works perfectly; I line mine with parchment paper to prevent sticking.
- Food Processor or Blender: For pureeing the strawberries into a smooth mixture.
- Saucepan: To cook down the puree gently; a heavy-bottomed pan helps prevent scorching.
- Spatula: A heatproof silicone spatula is best for stirring and spreading the puree evenly on the baking sheet.
- Oven: For dehydrating the fruit roll-ups at low heat.
- Sharp Knife: To cut the fruit leather into strips once dried.
If you don’t have a food processor, a high-speed blender will do just fine. For those on a budget, a basic blender and a sturdy baking sheet lined with parchment paper are all you really need. I’ve tried using silicone mats instead of parchment, but parchment tends to peel off more easily after drying.
Maintaining your food processor blades sharp makes pureeing the fruit an absolute breeze, and wiping down your baking sheet promptly after use prevents sticky buildup.
Preparation Method
- Preheat the Oven: Set your oven to 170°F (75°C) or the lowest possible setting to gently dry the fruit leather. This low temperature is key to drying without cooking the fruit too much. (Time: 5 minutes)
- Prepare Strawberries: Rinse and hull about 3 cups (450g) of fresh strawberries. Slice them roughly to help with blending.
- Roast the Strawberries: Place the sliced strawberries on a baking sheet lined with parchment and roast for 10 minutes to intensify flavor—this step is optional but highly recommended. (Tip: Keep an eye so they don’t dry out completely.)
- Puree the Fruit: Transfer roasted strawberries to a food processor or blender. Add 1/4 cup (50g) granulated sugar, 2 tablespoons (30ml) lemon juice, 2 tablespoons (30ml) honey or maple syrup, and a pinch of salt if using. Blend until completely smooth. (If the mixture is too thick to spread, add a teaspoon of water.)
- Cook Down the Puree: Pour the puree into a saucepan over medium-low heat. Stir constantly for about 5-7 minutes until it slightly thickens. This step helps reduce moisture for better drying.
- Spread the Mixture: Pour the thickened puree onto the parchment-lined baking sheet. Use a spatula to spread it evenly to about 1/8 inch (3 mm) thickness. Try to keep the edges smooth and uniform for even drying.
- Dry in the Oven: Place the sheet in the oven and dry for 4-6 hours. Check every hour after 4 hours—when the edges start to peel away and the center is no longer tacky, it’s ready. (Tip: The roll-up should be pliable but not sticky.)
- Cool and Cut: Let the fruit leather cool completely on the baking sheet. Carefully peel it off the parchment. Use a sharp knife or kitchen scissors to cut it into strips or shapes.
- Store: Roll the strips in parchment paper or plastic wrap to keep them from sticking together. Store in an airtight container at room temperature for up to 2 weeks.
Pro tip: If your fruit roll-ups are sticking to the parchment, try chilling them briefly to firm up before peeling. Also, avoid spreading the puree too thin—it might dry out and become brittle.
Cooking Tips & Techniques
One of the trickiest parts of making homemade fruit roll-ups is getting the right drying time. Too short, and you get sticky messes; too long, and they turn brittle. I’ve learned to start checking around 4 hours, then every 30 minutes after that. Keeping the oven on the lowest setting is essential to preserve the fruity flavor without caramelizing the sugars.
When roasting the strawberries, don’t rush the process. That gentle heat brings out a natural sweetness and a bit of complexity that raw fruit won’t deliver. I once skipped this step and ended up with a rather tart, less flavorful roll-up—lesson learned!
Spreading the puree evenly is another vital technique. You want a uniform thickness so the drying time is consistent. I like to use an offset spatula to smooth edges and avoid thin spots that dry too quickly.
If you’re in a hurry, a food dehydrator is a fantastic alternative to the oven, drying the fruit leather faster and more evenly. Just follow your dehydrator’s instructions for fruit leathers.
Lastly, be patient! Homemade fruit roll-ups take time, but the process is forgiving. If your first batch is a bit sticky, just dry it a little longer next time or try spreading the puree a bit thicker.
Variations & Adaptations
- Mixed Berry Roll-Ups: Swap half the strawberries with blueberries or raspberries for a colorful berry blend.
- Apple-Cinnamon Twist: Use unsweetened applesauce mixed with a teaspoon of cinnamon and a splash of lemon juice for a fall-inspired roll-up.
- Low-Sugar Version: Omit granulated sugar and use 3 tablespoons of honey or maple syrup instead to keep it naturally sweet.
- Vegan and Paleo-Friendly: Stick to natural sweeteners like maple syrup and avoid any added sugars if preferred.
- Spicy Kick: Add a pinch of ground ginger or cayenne pepper for a subtle spicy note that pairs surprisingly well with the sweetness.
I once tried adding a handful of chopped mint leaves to the strawberry puree—it was a refreshing twist that my family surprisingly enjoyed. Feel free to experiment with your favorite fruits and spices!
Serving & Storage Suggestions
Serve these homemade fruit roll-ups at room temperature as a delightful, portable snack. They’re perfect for lunchbox treats, afternoon pick-me-ups, or even a sweet nibble after dinner.
Pair them with a cold glass of milk, a cup of herbal tea, or alongside a cheese platter for a fun contrast of flavors. They also make charming party favors when wrapped in parchment and tied with a ribbon.
Store the roll-ups in an airtight container at room temperature away from direct sunlight. They keep well for up to 2 weeks. For longer storage, wrap them tightly and freeze for up to 3 months. When you’re ready to enjoy, thaw at room temperature for 15 minutes.
Over time, the flavors deepen and the texture becomes chewier, which many find even more enjoyable. Just avoid humid environments to keep them from getting sticky.
Nutritional Information & Benefits
Each serving (approx. one roll-up strip) contains roughly 70 calories, 0.5g fat, 16g carbohydrates, 2g fiber, and 1g protein, depending on thickness and added sweeteners.
Strawberries are packed with vitamin C, antioxidants, and dietary fiber, making these fruit roll-ups a healthier alternative to processed snacks. The lemon juice not only brightens flavor but also adds a small vitamin C boost.
This recipe is naturally gluten-free, dairy-free, and vegan if you swap honey for maple syrup, making it accessible for many dietary needs. Just note that strawberries are a common allergen for some, so double-check if sharing with sensitive eaters.
From a wellness perspective, these fruit roll-ups offer a satisfying sweet treat without artificial colors, flavors, or preservatives—perfect for anyone mindful of clean eating.
Conclusion
Making easy homemade fruit roll-ups with real strawberries is a rewarding way to enjoy a nostalgic snack with a fresh, natural twist. It’s simple, fun, and surprisingly forgiving—perfect for those moments when you want a quick, wholesome treat without the usual processed guilt.
Feel free to tweak the sweetness, try different fruits, or add your favorite spices to make it truly your own. I love this recipe because it brings a little joy to snack time and shows that sometimes the best flavors come from the simplest ingredients.
If you give this recipe a try, please share your experience or any creative adaptations you come up with—I’d love to hear how your homemade fruit roll-ups turn out!
Happy snacking!
FAQs
Can I use frozen strawberries for this recipe?
Yes! Just thaw them completely and drain any excess liquid before blending to avoid a watery puree.
How long do homemade fruit roll-ups last?
Stored in an airtight container at room temperature, they last about 2 weeks. You can freeze them for up to 3 months.
Can I make fruit roll-ups without added sugar?
Absolutely. You can omit granulated sugar and rely on the natural sweetness of the fruit and added honey or maple syrup.
What if my fruit roll-ups stick to the parchment paper?
Try cooling them completely or chilling briefly before peeling. Using parchment paper rather than silicone mats also helps.
Is there a way to speed up drying time?
A food dehydrator works great and reduces drying time significantly. Otherwise, spreading the puree slightly thinner can help but watch for brittleness.
Pin This Recipe!
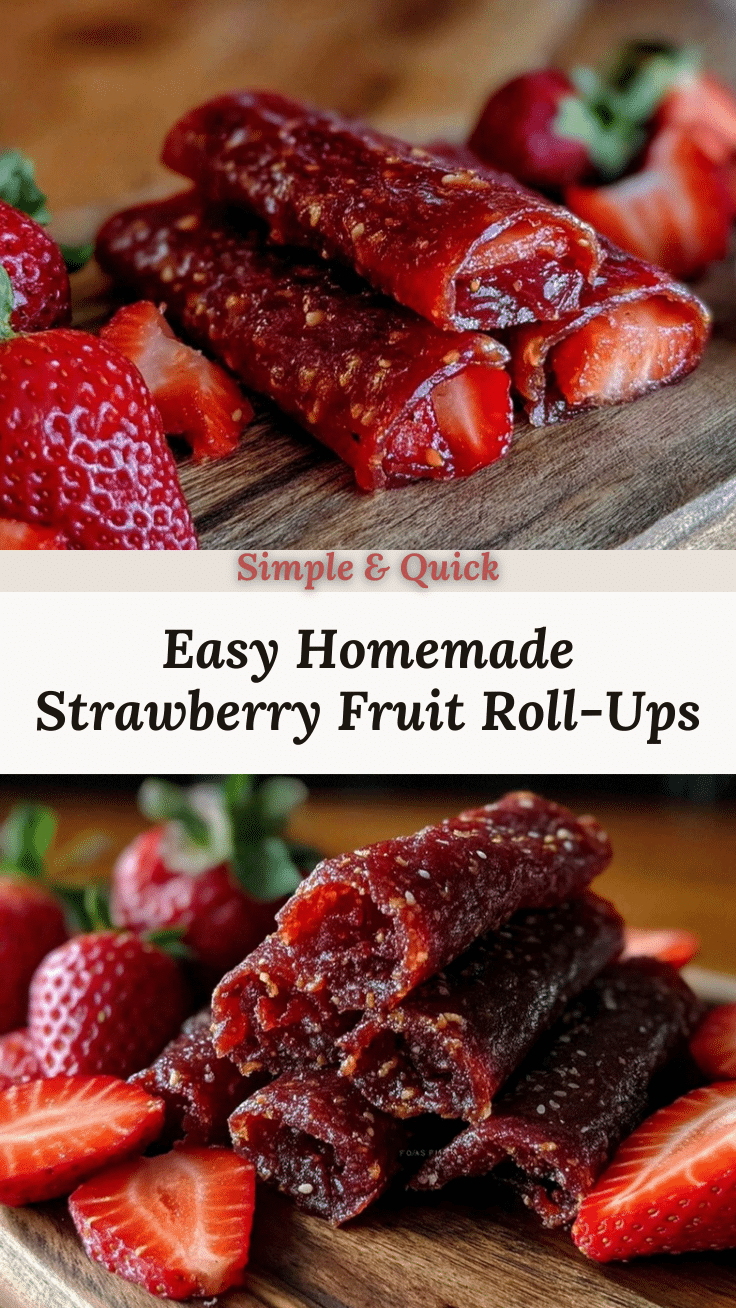
Easy Homemade Fruit Roll-Ups with Real Strawberries

A simple and wholesome recipe for homemade fruit roll-ups using fresh strawberries, perfect for a fun and healthy snack with a soft, chewy texture and vibrant flavor.
- Prep Time: 15 minutes
- Cook Time: 4-6 hours
- Total Time: 4 hours 15 minutes to 6 hours 15 minutes
- Yield: About 8-10 roll-up strips 1x
- Category: Snack
- Cuisine: American
Ingredients
- 3 cups (450g) fresh strawberries, hulled and sliced
- 1/4 cup (50g) granulated sugar
- 2 tablespoons (30ml) lemon juice
- 2 tablespoons (30ml) honey or maple syrup
- Pinch of salt (optional)
Instructions
- Preheat the oven to 170°F (75°C) or the lowest possible setting to gently dry the fruit leather.
- Rinse and hull about 3 cups (450g) of fresh strawberries. Slice them roughly to help with blending.
- Place the sliced strawberries on a baking sheet lined with parchment and roast for 10 minutes to intensify flavor (optional).
- Transfer roasted strawberries to a food processor or blender. Add granulated sugar, lemon juice, honey or maple syrup, and a pinch of salt if using. Blend until completely smooth. Add a teaspoon of water if mixture is too thick to spread.
- Pour the puree into a saucepan over medium-low heat. Stir constantly for about 5-7 minutes until it slightly thickens.
- Pour the thickened puree onto the parchment-lined baking sheet. Spread evenly to about 1/8 inch (3 mm) thickness.
- Place the sheet in the oven and dry for 4-6 hours. Check every hour after 4 hours until edges peel away and center is no longer tacky.
- Let the fruit leather cool completely on the baking sheet. Peel off the parchment carefully and cut into strips or shapes.
- Roll the strips in parchment paper or plastic wrap and store in an airtight container at room temperature for up to 2 weeks.
Notes
Roasting strawberries before pureeing enhances flavor. Use parchment paper instead of silicone mats to prevent sticking. Check drying progress after 4 hours and every 30 minutes thereafter to avoid brittleness. A food dehydrator can speed drying time. Chill roll-ups briefly if sticking to parchment before peeling.
Nutrition
- Serving Size: One roll-up strip
- Calories: 70
- Fat: 0.5
- Carbohydrates: 16
- Fiber: 2
- Protein: 1
Keywords: fruit roll-ups, homemade snacks, strawberry fruit leather, healthy snacks, kids snacks, natural fruit snacks


