I had sworn off homemade gifts. For years. Not because I’m a Grinch or anything, it’s just that my track record was, well, embarrassing. The one year I attempted DIY candles, they looked like melted crayons. The knitted scarf I tried? Let’s just say it was more of a knot than a scarf. So when my friend Sarah mentioned she was doing a “homemade Christmas” for her extended family, I nodded politely while internally writing her off as a masochist.
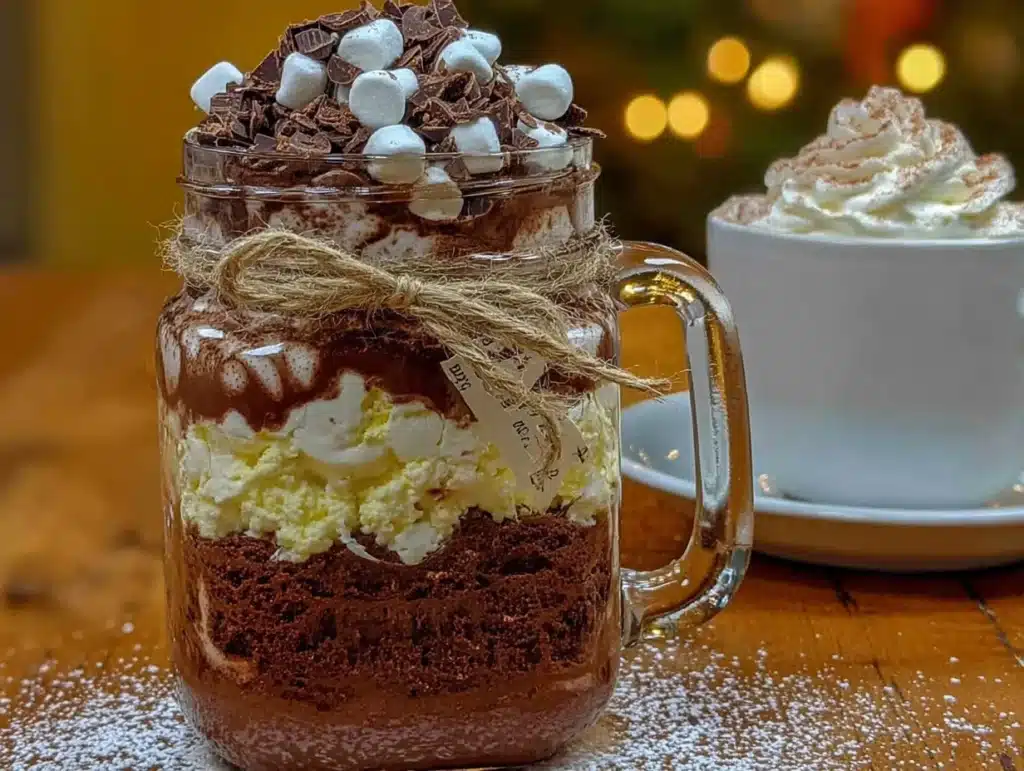
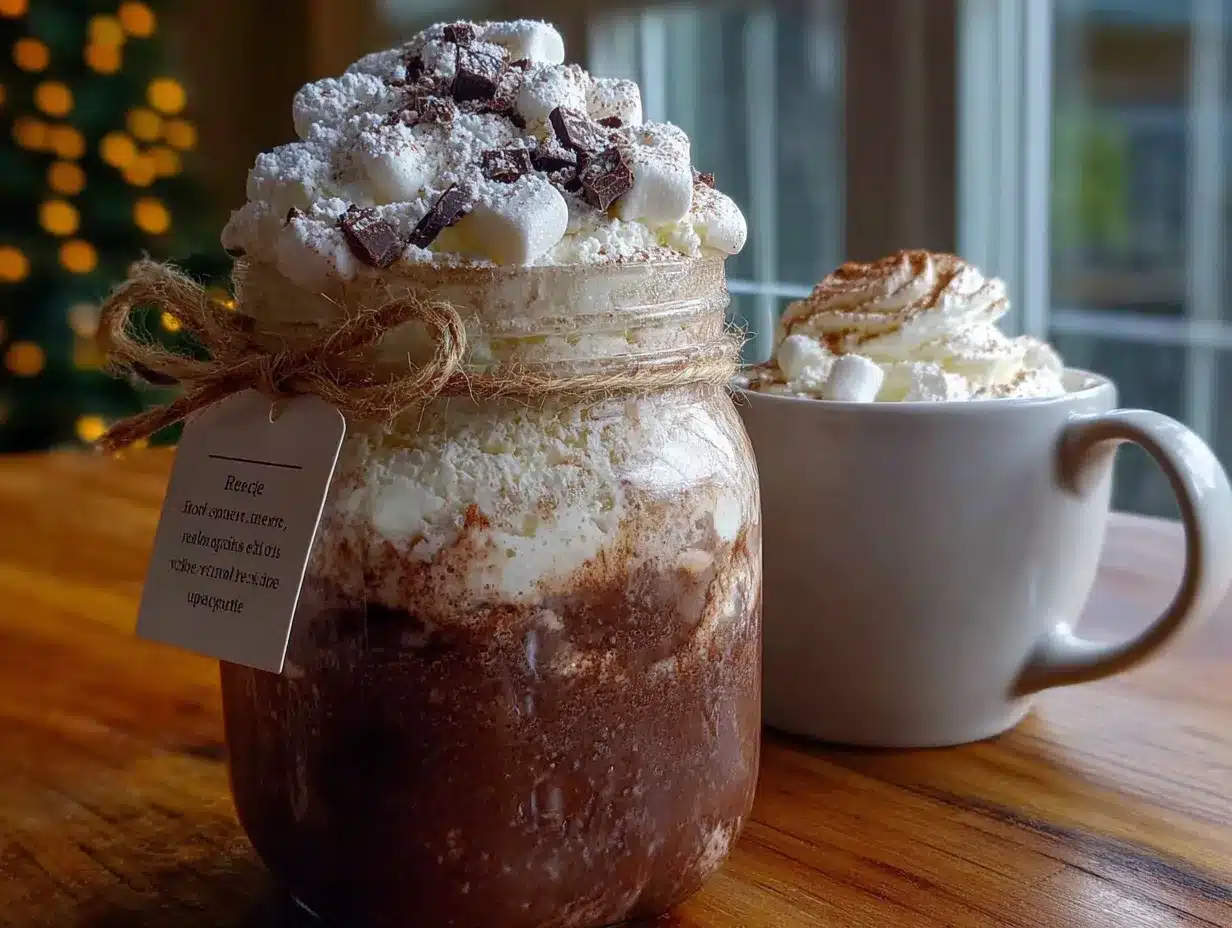
Then I walked into her kitchen two weeks later. Stacked on her counter were a dozen mason jars, each filled with a beautiful, layered mix of cocoa powder, sugar, and tiny chocolate shavings. They were tied with twine and had little tags that read, “Just add hot milk.” It was the most practical, thoughtful, and genuinely beautiful gift I’d seen. And I stood there, holding one, feeling completely caught in the act of being wrong.
So I asked for the recipe. She shrugged and said, “It’s just hot cocoa mix, but the trick is the good chocolate.” That moment changed my whole approach to gifting. I mean, honestly, who doesn’t love hot chocolate? And this version is so simple, you can make a whole batch in ten minutes flat. Maybe you’ve been there—wanting to give something personal but not having the time or skill for elaborate crafts. This is your solution. This quick homemade hot cocoa mix in a jar gift is the one that finally made me a believer.
Why You’ll Love This Recipe
Look, I get it. You’re busy. Between work, family, and the general chaos of life, the last thing you need is a complicated project. This homemade hot cocoa mix in a jar gift is the perfect answer to, “What do I give someone who has everything?” It’s thoughtful, delicious, and takes almost no time.
- Quick & Easy : You can whip up a dozen jars in under 20 minutes. Seriously. It’s just measuring and layering.
- Simple Ingredients : No weird, hard-to-find items. You probably have most of this in your pantry right now.
- Perfect for Gifting : Birthdays, holidays, teacher appreciation, or just because. It’s a gift that says, “I care enough to make you something warm and cozy.”
- Crowd-Pleaser : Kids love it, adults love it, and it’s easily customizable for dietary needs.
- Unbelievably Delicious : This isn’t that watery, artificial-tasting mix from a box. The real chocolate and a pinch of salt make it next-level good.
What makes this recipe different from the rest? It’s the little details. I use a mix of high-quality cocoa powder and finely chopped dark chocolate. That extra step gives you a rich, velvety texture that instant mixes just can’t touch. Plus, the layering in the jar looks so pretty, you don’t even need to wrap it. It’s comfort in a jar, ready to go.
This recipe isn’t just good—it’s the kind that makes you close your eyes after the first sip. It’s the holiday spirit, reimagined as a warm mug. Perfect for impressing your neighbors without the stress of a full baking project.
What Ingredients You Will Need
This recipe uses simple, wholesome ingredients to deliver a rich, chocolatey experience. The key is using good-quality components because the flavor really shines through.
- Granulated Sugar (1 cup / 200g) : Provides the necessary sweetness. You can use organic cane sugar if you prefer. Avoid powdered sugar, as it contains cornstarch and can make the mix clumpy.
- Unsweetened Cocoa Powder (1/2 cup / 50g) : I recommend a Dutch-processed cocoa like Valrhona or Droste for a smoother, less acidic flavor. It’s worth the splurge for gifts.
- Finely Chopped Dark Chocolate (1/2 cup / 85g) : This is the secret ingredient. Use a 70% dark chocolate bar and chop it into tiny pieces. It melts into the milk, creating a luxurious texture. Ghirardelli or Lindt work beautifully.
- Powdered Milk (1/2 cup / 60g) : This adds creaminess and allows the mix to be used with water if needed. For a non-dairy version, use powdered coconut milk or just omit it and instruct the recipient to use milk.
- Pinch of Fine Sea Salt (1/4 tsp) : Don’t skip this! It balances the sweetness and enhances the chocolate flavor. I like Maldon sea salt for its clean taste.
- Optional: Mini Marshmallows or Crushed Peppermint : For an extra festive touch, add a small bag of mini marshmallows to the jar or include a sprinkle of crushed candy canes on top of the mix.
Ingredient Selection Tip: When buying your dark chocolate bar, look for one that doesn’t have any weird additives or oils. A simple, high-quality bar will give you the best melt. I once used a cheap “chocolate” bar, and the mix was grainy and sad. Learn from my mistake!
Substitution Guidance: If you’re making this for someone who is dairy-free, simply use dark chocolate that’s certified dairy-free and omit the powdered milk. The mix will still be delicious when prepared with oat or almond milk.
Equipment Needed
You don’t need a fancy kitchen to make these gifts. Here’s what you’ll need:
- Quart-Size Mason Jars (4 jars) : Wide-mouth jars are easiest to fill. You can also use any decorative jar with a tight-fitting lid.
- Measuring Cups and Spoons : Standard set will do.
- Small Mixing Bowl : For combining the dry ingredients (optional, but helps ensure even distribution).
- Funnel : A wide-mouth funnel is a lifesaver for getting the mix into the jars without spilling. If you don’t have one, you can roll a piece of parchment paper into a cone.
- Sharp Knife and Cutting Board : For chopping the dark chocolate into fine pieces.
- Twine, Ribbon, and Gift Tags : For decorating the jars. I love using natural jute twine and simple kraft paper tags.
Budget-Friendly Tip: Don’t have mason jars? You can often find them at thrift stores for a dollar each. Just make sure they are clean and the lids seal tightly. I once used repurposed pasta sauce jars, and they looked just as charming with a bit of paint and ribbon.
Preparation Method
This is the easiest part. Follow these steps, and you’ll have beautiful gifts in no time.
-
Prepare Your Workspace : Clear your counter and gather all your ingredients and equipment. This recipe moves fast, so having everything within reach helps. (I learned this the hard way when I knocked over a jar of cocoa powder looking for my funnel.)
-
Chop the Chocolate : Take your dark chocolate bar and chop it into very small pieces, about the size of chocolate chips. You want them small enough to dissolve easily in hot milk. Don’t worry about being perfect—irregular pieces look beautiful in the jar. Aim for about 1/2 cup (85g) of chopped chocolate.
-
Mix the Dry Ingredients (Optional but Recommended) : In a small bowl, whisk together the sugar, cocoa powder, powdered milk, and salt. This step ensures that the flavors are evenly distributed. If you’re in a huge rush, you can layer them directly in the jar, but I find the mix is more consistent if you combine them first.
-
Layer the Jars : Place your funnel in the first jar. Start by adding a layer of the cocoa-sugar mixture. Then, add a layer of the chopped dark chocolate. Repeat the layers until the jar is full. The goal is to create a pretty, striped effect. For a standard quart jar, you’ll do about 3-4 layers of each. Gently tap the jar on the counter after each layer to settle the ingredients.
-
Seal and Decorate : Once the jar is full, screw the lid on tightly. Wipe the outside of the jar with a damp cloth to remove any stray cocoa powder. Now for the fun part—decorating! Cut a square of fabric or parchment paper, place it over the lid, and screw the ring on. Tie a piece of twine or ribbon around the neck of the jar.
-
Attach the Instructions Tag : This is crucial. You need to tell the recipient how to use it. Write or print a small tag that says: “To make: Heat 1 cup of milk (dairy or non-dairy) until hot. Stir in 3 tablespoons of this mix. Enjoy!” I like to add a little note on the back that says, “Made with love for you.”
Warning: Do not pack the ingredients too tightly. You want the layers to be visible, and if you pack them down, the mix can become a solid brick.
Cooking Tips & Techniques
Over the years, I’ve made a few mistakes so you don’t have to. Here are my best tips for perfect results every time.
- The Chocolate Size Matters : I once chopped the chocolate into big chunks because I was in a hurry. They looked pretty in the jar, but they didn’t melt properly in the milk. Keep those pieces small—think sand-like or the size of a pea.
- Don’t Skip the Salt : I know it sounds weird, but a pinch of salt in the mix makes the chocolate taste more chocolatey. It’s a simple trick professional bakers use. Trust me on this one.
- Taste Test Your Mix : Before you fill all your jars, make a small test mug. Heat some milk and stir in 3 tablespoons of your mix. Adjust the sweetness or chocolate level before you commit to the whole batch. I had to re-do an entire batch once because I realized the sugar was a bit low.
- Multitasking Strategy : While your chocolate is chopping, you can have your jars and tags ready to go. This recipe is so fast that the limiting factor is usually how quickly you can chop. I like to chop all the chocolate first, then do the mixing and layering assembly-line style.
- Consistency is Key : For a truly professional look, make sure your layers are even. Use a measuring spoon to scoop the same amount for each layer. It takes a little more time, but the result is a jar that looks like it came from a fancy boutique.
Variations & Adaptations
One of the best things about this recipe is how easy it is to customize. Here are a few of my favorite variations.
- Spicy Mexican Hot Cocoa : Add 1/2 teaspoon of ground cinnamon and a pinch of cayenne pepper to the dry mix. The warmth of the spice pairs beautifully with the rich chocolate. I made this for a friend who loves mole sauce, and she said it was the best gift she got that year.
- Peppermint Hot Cocoa : Crush a few candy canes into small pieces and layer them into the jar along with the chocolate. You can also add a drop of peppermint extract to the sugar before mixing. It’s incredibly festive for Christmas.
- Vegan & Dairy-Free Version : Use a high-quality dairy-free dark chocolate (like Enjoy Life brand) and omit the powdered milk. Instruct the recipient to use oat milk or almond milk. The flavor is just as rich, and it’s a thoughtful option for friends with dietary restrictions.
- Extra Decadent “Gourmet” Version : Add a layer of vanilla bean powder (just a pinch) or a small handful of freeze-dried raspberries to the jar. The fruit adds a pop of color and a tart contrast to the sweet chocolate.
Serving & Storage Suggestions
This mix is meant to be a gift, but you can absolutely make a batch for yourself. Here’s how to enjoy it best.
- Serving Temperature : The mix is designed to be stirred into hot milk. Heat your milk on the stovetop or in the microwave until it’s steaming but not boiling. Pour it into a mug and stir in 3 tablespoons of the mix until fully dissolved.
- Presentation : Top with a cloud of whipped cream, a few mini marshmallows, or a dusting of cocoa powder. For a fancy touch, add a cinnamon stick or a peppermint stirrer.
- Storage : If you’re making a batch for yourself, store the mix in an airtight container at room temperature. It will keep for up to 3 months. Keep it away from direct sunlight and heat, which can cause the chocolate to bloom (get white spots). It’s still safe to eat, just not as pretty.
- Reheating : This is a dry mix, so there’s no reheating needed. But if you make a mug and it gets cold, you can reheat it in the microwave for 30 seconds.
- Flavor Development : The flavors actually meld together over time. If you can, let the jar sit for a day or two before gifting. The sugar and cocoa will absorb a bit of the chocolate’s aroma, making the whole mix taste more cohesive.
Nutritional Information & Benefits
Let’s be real—this is a treat. But it’s made with real ingredients, which is always better than the processed stuff.
- Estimated per serving (3 tbsp mix with 1 cup whole milk): Calories: 280, Fat: 12g, Carbs: 38g, Protein: 8g.
- Health Benefits : Dark chocolate is packed with antioxidants and can help improve heart health. Cocoa powder is rich in flavonoids, which have anti-inflammatory properties. Plus, the act of making a warm drink can be a calming ritual.
- Dietary Considerations : This recipe can easily be made gluten-free (just check your chocolate label) and dairy-free (as noted in the variations). It is vegetarian-friendly.
- Potential Allergens : Contains dairy (from powdered milk). The chocolate may contain soy lecithin. Always check labels if gifting to someone with allergies.
- Personal Wellness Note : I love that this mix allows me to control the sugar level. You can easily reduce the sugar by a quarter cup if you prefer a less sweet drink. It’s a small way to make a treat feel a little more balanced.
Conclusion
So there you have it. A quick homemade hot cocoa mix in a jar gift that’s as fun to make as it is to give. It’s the perfect solution for anyone who wants to give a thoughtful, personal gift without spending hours in the kitchen. I’ve been making these for three holiday seasons now, and they’re always a hit. My neighbor even asked me for the recipe because she wanted to make them for her book club!
I encourage you to make this recipe your own. Swap in different chocolates, add your favorite spices, or use a unique jar. The possibilities are endless. And honestly, the best part is seeing the smile on someone’s face when they realize you made them something with your own hands.
Have you made a batch of these yet? I’d love to hear about it! Drop a comment below and tell me what variations you tried. And if you found this helpful, please share it with a friend who loves to give heartfelt gifts. Happy gifting, and stay warm!
Frequently Asked Questions
Can I use a different type of chocolate?
Absolutely! You can use milk chocolate for a sweeter mix, or white chocolate for a creamy vanilla version. Just keep in mind that the flavor profile will change. I’ve even used a salted caramel dark chocolate bar, and it was incredible.
How long does the hot cocoa mix last in the jar?
Stored in an airtight container at room temperature, it will stay fresh for about 3 months. I recommend making it within a week or two of gifting for the best flavor. The chocolate might start to bloom after a while, but it’s still safe to eat.
Can I make this without powdered milk?
Yes, you can! The powdered milk is there so the mix can be used with water. If you omit it, just make sure to tell the recipient to use milk (dairy or non-dairy) instead of water. The mix will be just as delicious.
What if I don’t have a funnel?
No problem! You can use a piece of parchment paper rolled into a cone shape, or you can carefully spoon the mix in using a small measuring cup. Just take your time to avoid spills. I’ve done it both ways, and the funnel is just a little less messy.
Can I double this recipe?
Yes, this recipe scales beautifully. If you’re making gifts for a whole group, just multiply the ingredients by the number of jars you need. I once made 20 jars for a holiday party, and it took me about an hour from start to finish.
Pin This Recipe!
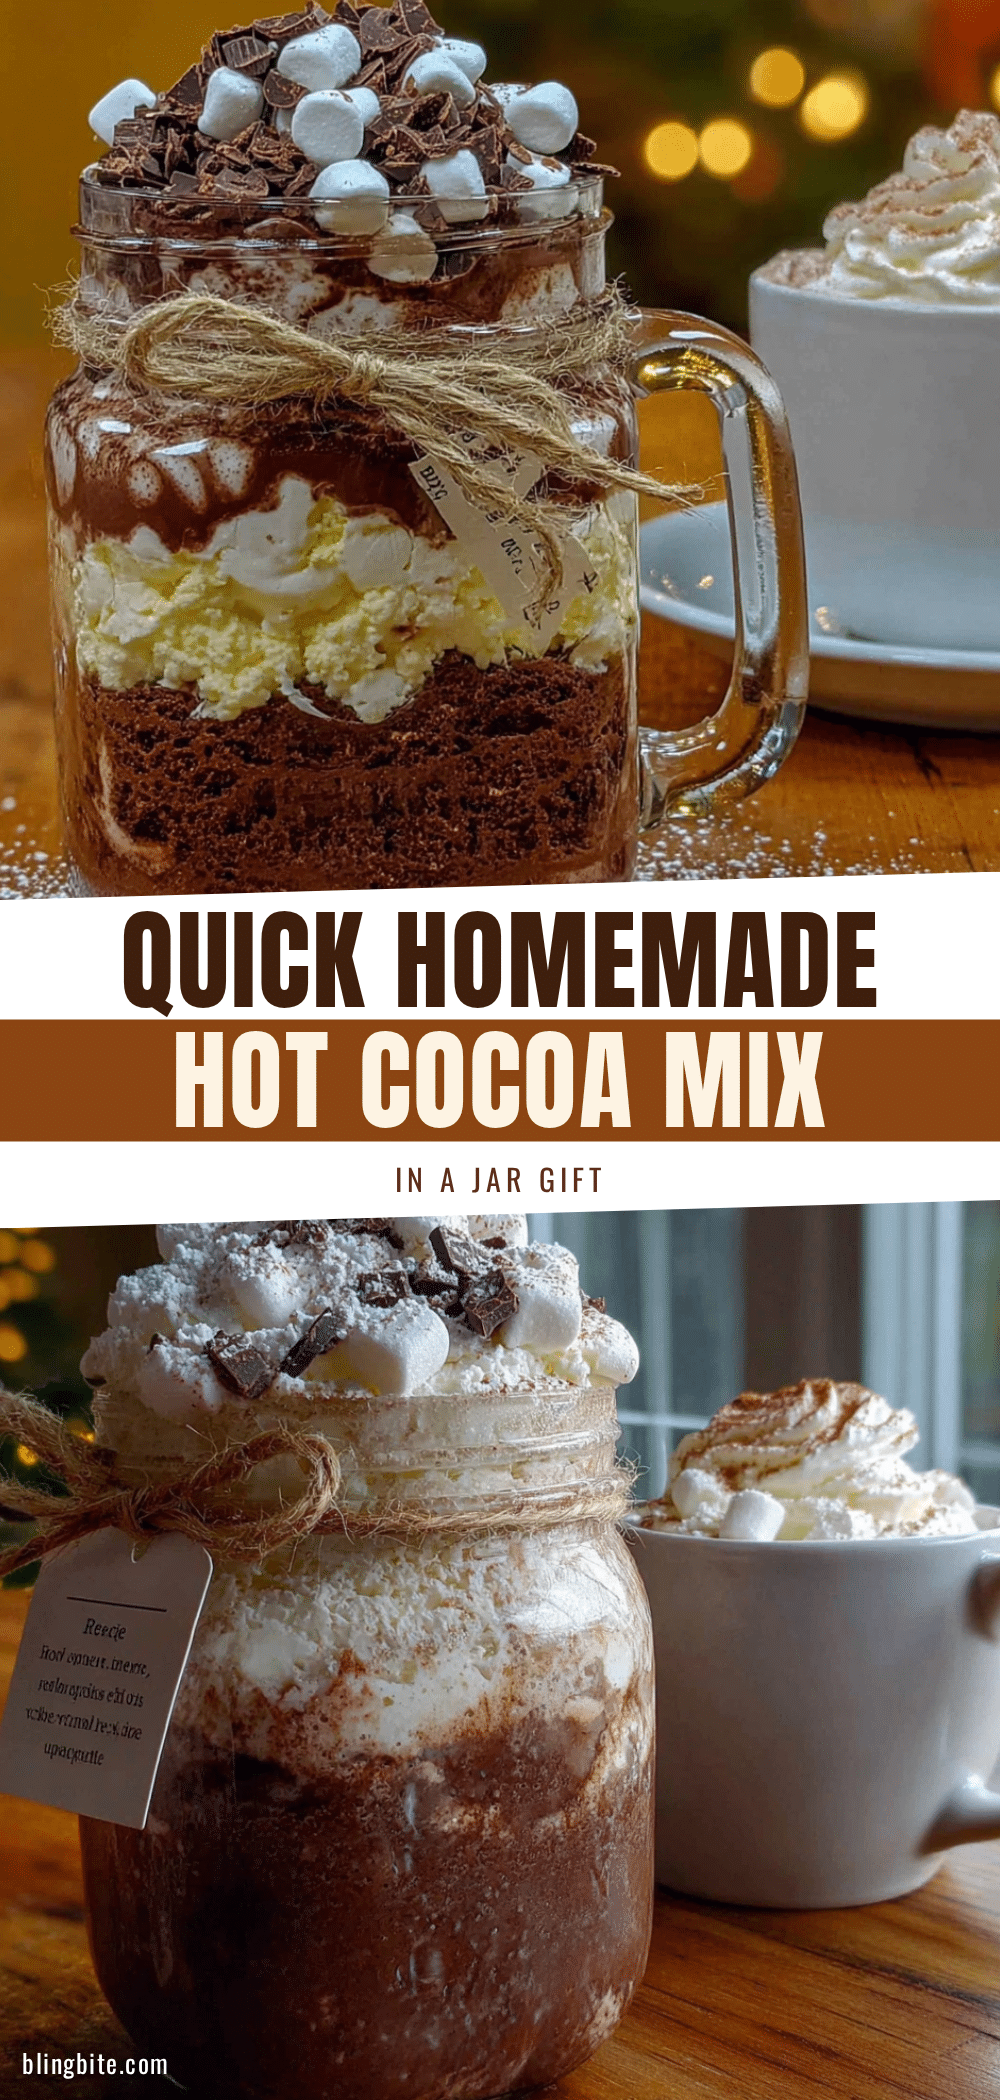
Easy Homemade Hot Cocoa Mix in a Jar Gift

This quick and easy homemade hot cocoa mix in a jar is the perfect thoughtful gift for any occasion. Made with simple ingredients like cocoa powder, dark chocolate, and a pinch of salt, it creates a rich, velvety hot chocolate that’s far better than any store-bought mix.
- Prep Time: 10 minutes
- Cook Time: 0 minutes
- Total Time: 10 minutes
- Yield: 4 servings (4 jars, each serving about 3 tbsp mix) 1x
- Category: Beverage
- Cuisine: American
Ingredients
- 1 cup (200g) granulated sugar
- 1/2 cup (50g) unsweetened cocoa powder (preferably Dutch-processed)
- 1/2 cup (85g) finely chopped dark chocolate (70% cocoa)
- 1/2 cup (60g) powdered milk
- 1/4 tsp fine sea salt
- Optional: mini marshmallows or crushed peppermint for garnish
Instructions
- Prepare your workspace: Clear your counter and gather all ingredients and equipment.
- Chop the dark chocolate into very small pieces, about the size of chocolate chips. Aim for 1/2 cup (85g).
- In a small bowl, whisk together the sugar, cocoa powder, powdered milk, and salt until evenly combined.
- Place a funnel in a quart-size mason jar. Layer the cocoa-sugar mixture and chopped dark chocolate, repeating until the jar is full (about 3-4 layers each). Gently tap the jar on the counter after each layer to settle.
- Seal the jar tightly with the lid. Wipe the outside clean. Decorate with fabric, twine, or ribbon as desired.
- Attach a gift tag with instructions: ‘To make: Heat 1 cup of milk (dairy or non-dairy) until hot. Stir in 3 tablespoons of this mix. Enjoy!’
Notes
For best results, use high-quality Dutch-processed cocoa and a good dark chocolate bar (70% cocoa). Do not pack the ingredients too tightly in the jar to maintain visible layers. The mix can be stored in an airtight container at room temperature for up to 3 months. For a dairy-free version, use dairy-free dark chocolate and omit the powdered milk; instruct the recipient to use non-dairy milk.
Nutrition
- Serving Size: 3 tablespoons mix wi
- Calories: 280
- Sugar: 32
- Sodium: 180
- Fat: 12
- Saturated Fat: 7
- Carbohydrates: 38
- Fiber: 3
- Protein: 8
Keywords: hot cocoa mix, homemade gift, mason jar gift, hot chocolate mix, easy gift, Christmas gift, DIY gift