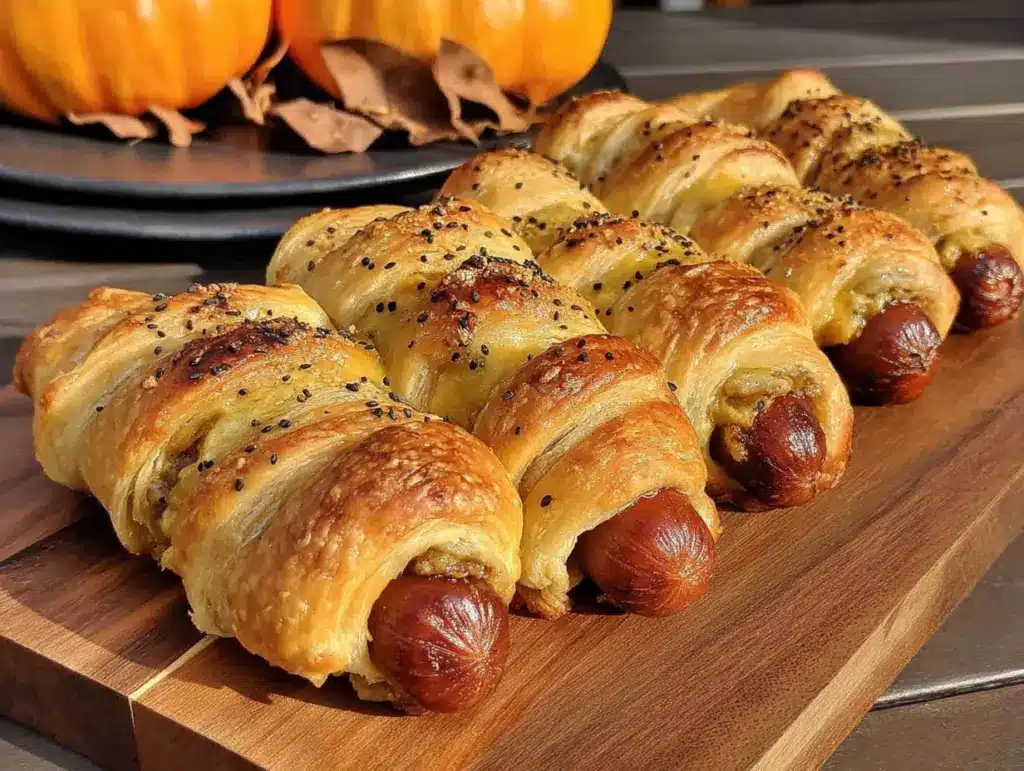
The school Halloween party was in four hours and I’d completely forgotten. I mean, completely. My son had reminded me that morning, but between a deadline at work, a leaking sink, and the dog getting into the trash, it had slipped my mind entirely. By the time I realized, I had about twenty minutes to throw something together before we had to leave. Everyone else would be bringing elaborate, Pinterest-perfect treats—those witch hat cookies with the fancy icing, the graveyard dirt cups with gummy worms, the pumpkin-shaped Rice Krispie treats dipped in orange chocolate. And me? I had a package of hot dogs and a can of crescent rolls in my fridge. Honestly, I almost just grabbed a bag of chips from the pantry and called it a day.
But then I remembered these mummy hot dogs I’d seen floating around online. They looked so simple that I figured they couldn’t possibly be good enough for a party. I mean, hot dogs wrapped in bread? That’s basically just a pig in a blanket with extra steps, right? I was already picturing my sad little tray sitting next to the elaborate creations everyone else brought. But I had nothing to lose. So I rolled out those crescent rolls, cut them into strips, and wrapped them around the hot dogs like little bandages. I left a tiny gap for the “face,” added two little dots of mustard for eyes, and popped them in the oven. I didn’t even have time to clean up the flour mess on my counter.
Well, let me tell you—my tray was the first one empty. Kids were grabbing them by the handful, and even the parents kept coming back for “just one more.” Someone actually asked me if I’d gotten the recipe from a fancy food blog. I almost laughed out loud. These mummy hot dogs were the easiest thing I’d ever brought to a party, and they completely stole the show. Now, I make them every single year, and they never fail to get the same reaction. Maybe you’ve been there—scrambling at the last minute, convinced you’ve failed before you’ve even started. Trust me, this recipe is your saving grace.
Why You’ll Love This Recipe
Let’s be real for a second. Halloween is chaotic enough without spending hours in the kitchen. That’s why these easy spooky mummy hot dogs are an absolute lifesaver. They come together in under 20 minutes, which is faster than you can say “trick or treat.” You don’t need any special skills, fancy equipment, or weird ingredients. Just basic pantry staples that you probably already have on hand.
- Quick & Easy: From start to finish, you’re looking at about 15 minutes of prep and a quick bake. Perfect for those last-minute school parties or when the kids suddenly announce they need snacks for the neighborhood Halloween gathering.
- Simple Ingredients: No trips to specialty stores. No hunting for obscure spices. Just hot dogs, crescent roll dough, and a few condiments. That’s it.
- Perfect for Halloween: These little guys are made for spooky season. They look adorable on a platter, and kids absolutely lose their minds over them. Great for parties, classroom celebrations, or even a fun dinner before trick-or-treating.
- Crowd-Pleaser: I’ve yet to meet a kid who doesn’t love hot dogs wrapped in dough. And the mummy theme? It’s just fun. Adults love them too—they’re nostalgic and ridiculously satisfying.
- Unbelievably Delicious: The combination of salty hot dog and flaky, buttery crescent roll is classic comfort food. The mustard eyes add a tiny tangy pop that cuts through the richness. It’s simple, but it works perfectly.
What makes these different from just regular pigs in a blanket? It’s the presentation. The way the dough is wrapped to look like bandages, the little mustard eyes peeking out—it transforms a simple snack into something that feels special. You don’t need to be a professional baker or a crafty parent to pull these off. They look impressive, but they’re secretly the easiest thing on the table. And honestly, that’s my favorite kind of recipe.
This is the kind of food that makes you feel like you’ve got it all together, even when you’re secretly running on chaos and caffeine. It’s Halloween comfort food at its finest—fun, fast, and foolproof.
What Ingredients You Will Need
This recipe uses the simplest ingredients to create something that looks way more complicated than it actually is. Most of these are probably already in your kitchen. If not, a quick trip to any grocery store will set you up.
- Hot dogs: 8 standard-size hot dogs. You can use beef, pork, turkey, or even plant-based options. I personally prefer all-beef hot dogs for the best flavor and snap when you bite into them. Look for ones that are plump and not too skinny—they hold up better during baking. If you’re feeding a crowd, grab a couple of packs.
- Crescent roll dough: 1 can (8 ounces) of refrigerated crescent rolls. I usually grab Pillsbury, but any brand works fine. The key is getting the seamless sheet version if you can find it—it’s easier to cut into uniform strips. If you only have the perforated ones, just pinch the seams together before cutting. You’ll need about 8 strips per hot dog, so plan accordingly. For a bigger batch, use two cans.
- Yellow mustard: For the eyes. You’ll need just a tiny amount—maybe a teaspoon total. The yellow color shows up best against the baked dough. You can also use ketchup or sriracha if you want different colored eyes, but mustard is the classic choice. I like French’s for its bright color and tangy flavor.
- Egg wash (optional): 1 large egg beaten with 1 tablespoon of water. This gives the dough a beautiful golden-brown shine. If you’re in a hurry, you can skip it—the dough will still brown on its own, just not as deeply. I usually do it because it makes them look that much more polished.
- Sesame seeds or poppy seeds (optional): A light sprinkle adds a little texture and makes them look even more like “real” baked goods. Totally optional, but a nice touch if you have them on hand.
- Cooking spray or parchment paper: To line your baking sheet. I prefer parchment paper because nothing sticks and cleanup is effortless. If you don’t have either, a light coating of butter or oil on the pan works too.
And that’s genuinely it. No secret ingredients, no complicated spice blends. Just five or six items that you can grab in the regular grocery aisle. I love recipes like this because they prove you don’t need a stocked pantry or a culinary degree to make something that feels special. The magic is in how you put it together, not what you put in it.
One quick note on the hot dogs: if you’re serving these at a party where kids might be running around, consider cutting each hot dog into smaller pieces before wrapping. Mini mummy bites are even more fun and easier for little hands to grab. Just adjust the baking time down by a couple of minutes.
Equipment Needed
You don’t need much to make these mummy hot dogs. That’s part of the beauty. But having the right tools makes the process smoother and more enjoyable.
- Baking sheet: A standard half-sheet pan works perfectly. I’ve used the same beat-up one for years, and it still does the job. If you’re making a double batch, you might need two sheets or bake in batches.
- Parchment paper: My go-to for easy cleanup. It prevents sticking and saves you from scrubbing. You can also use a silicone baking mat if you have one.
- Sharp knife or pizza cutter: For cutting the crescent roll dough into strips. A pizza cutter makes quick work of it, but a regular knife works just fine. I’ve used both, and honestly, the pizza cutter is a little faster.
- Pastry brush (optional): For applying the egg wash. If you don’t have one, you can use a paper towel or just your fingers—it’s not a precision job. I’ve definitely used my fingers in a pinch.
- Small bowl: For whisking the egg wash. Any small bowl or ramekin works.
- Toothpick: For dotting the mustard eyes. You can also use the tip of a knife or a squeeze bottle if you have one. I find a toothpick gives you the most control for tiny dots.
- Cooling rack (optional): If you want the baked mummies to cool evenly without getting soggy on the bottom. Not essential, but nice if you have one.
That’s it. No stand mixer, no food processor, no special gadgets. If you have a working oven and a flat surface, you’re good to go. I’ve made these in a friend’s tiny apartment kitchen with a dull knife and no parchment paper, and they still turned out great. Don’t let the lack of fancy equipment stop you.
Preparation Method
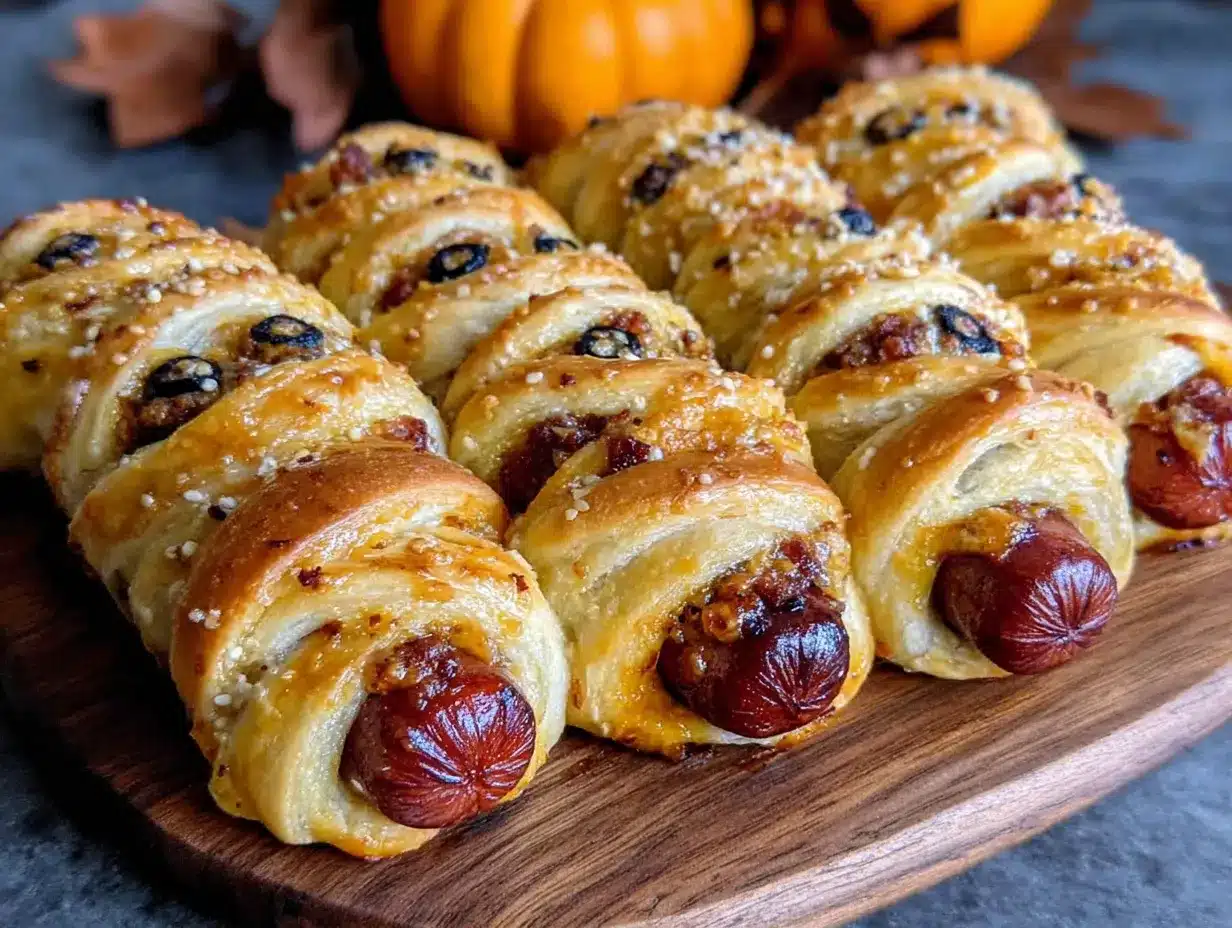
Alright, let’s get to the fun part. These mummy hot dogs come together fast, so make sure you have everything ready before you start. Here’s the step-by-step.
- Preheat your oven to 375°F (190°C). Line a baking sheet with parchment paper or lightly coat it with cooking spray. Getting the oven hot first ensures even baking. While it’s heating up, you can prep everything else.
- Unroll the crescent roll dough onto a clean cutting board or countertop. If you’re using the perforated kind, gently press the seams together to create one solid sheet. You want a flat rectangle of dough without any cracks or gaps. If the dough feels too cold and stiff, let it sit at room temperature for a couple of minutes.
- Cut the dough into thin strips. Using a sharp knife or pizza cutter, slice the dough lengthwise into strips about 1/4 to 1/2 inch wide. You should get about 8 to 10 strips per can. Don’t worry if they’re not perfectly even—the mummies will look more authentic with slightly irregular bandages. I’ve made them with perfectly uniform strips, and honestly, the messy ones look better.
- Wrap the hot dogs. Take one hot dog and start wrapping a dough strip around it at a slight angle, leaving a small gap near the top for the “face.” Overlap the strips slightly as you go, like you’re winding a bandage. Use 2 to 3 strips per hot dog, depending on how long they are. Tuck the ends of the dough under the hot dog to secure them. Repeat with the remaining hot dogs and dough strips. You should have enough strips from one can to wrap about 8 hot dogs.
- Place the wrapped hot dogs on the prepared baking sheet, leaving about an inch of space between each one. They’ll puff up a bit as they bake, so give them room to breathe. If you’re making a big batch, use two sheets or bake in batches.
- Brush with egg wash (optional). In a small bowl, beat the egg with a tablespoon of water. Lightly brush the tops of the wrapped hot dogs with the mixture. This gives them a gorgeous golden sheen. If you’re skipping this step, just move on to the next one.
- Sprinkle with seeds (optional). If you’re using sesame or poppy seeds, sprinkle a tiny pinch over each wrapped hot dog. This adds a little visual texture and makes them look even more bakery-worthy.
- Bake for 12 to 15 minutes, or until the dough is golden brown and cooked through. The hot dogs should be heated through and the dough should be flaky and puffed. Keep an eye on them after the 12-minute mark—ovens vary, and you don’t want the dough to burn. I usually check mine at 12 minutes and add a minute or two if needed.
- Let them cool slightly on the baking sheet for about 2 to 3 minutes. This allows the dough to set and makes them easier to handle. Don’t skip this step—moving them too soon can cause the dough to tear or the hot dog to slide out.
- Add the eyes. Using a toothpick or the tip of a knife, dab two small dots of yellow mustard onto the exposed “face” area of each hot dog. You want them to look like little eyes peeking out from the bandages. Don’t use too much mustard—a tiny dot is enough. I’ve made the mistake of adding big globs before, and it just looks messy. Small dots are cuter.
- Serve immediately while they’re still warm. The contrast between the hot, flaky dough and the cool mustard is perfect. If you’re taking them to a party, let them cool completely before transporting, then reheat briefly if needed.
And that’s it. Seriously. From start to finish, you’re looking at about 20 minutes total. The hardest part is waiting for them to cool enough to eat without burning your mouth. Trust me, I’ve been there.
Cooking Tips & Techniques
Over the years, I’ve made these mummy hot dogs more times than I can count. And let me tell you, I’ve learned a few things the hard way. Here are my best tips to make sure yours turn out perfect every time.
Don’t overwork the dough. Crescent roll dough is delicate and gets sticky if you handle it too much. When you’re cutting the strips, use a light touch. If the dough starts to feel warm and tacky, pop it in the fridge for 5 minutes to firm up. I learned this after a particularly frustrating session where my dough turned into a sticky mess that wouldn’t cut cleanly. Cold dough cuts like a dream.
Leave enough space for the face. When you’re wrapping the hot dogs, make sure you leave a visible gap at the top. I’ve had a few batches where I wrapped too tightly and the “face” was barely visible. The mummies need those little mustard eyes to look like mummies. Aim for about a half-inch of exposed hot dog at the top.
Use a light hand with the egg wash. Too much egg wash can make the dough soggy and prevent it from puffing up properly. A thin, even coat is all you need. Dip your pastry brush and tap off the excess before applying. If you don’t have a brush, you can use a paper towel dipped in the egg wash and gently dab it on.
Watch the oven like a hawk. Crescent roll dough goes from golden to burnt in about 30 seconds. I’m not exaggerating. Set a timer for 12 minutes and check them. If they need more time, add it in 1-minute increments. Every oven runs differently, and the first time I made these, I got distracted and ended up with charcoal mummies. Not cute.
Make ahead tip: You can assemble the mummy hot dogs up to a day in advance. Just wrap them, place them on the baking sheet, cover tightly with plastic wrap, and refrigerate. When you’re ready to bake, add a couple of minutes to the baking time since they’ll be starting from cold. This is a lifesaver for party prep.
Doubling the batch: If you’re making these for a crowd, double or triple the recipe. Just make sure you don’t overcrowd the baking sheet. Use two sheets and rotate them halfway through baking for even cooking. I’ve made 48 of these for a neighborhood party, and they disappeared in minutes.
The mustard eye trick: If you’re transporting these, wait to add the mustard eyes until just before serving. The mustard can dry out or get absorbed into the hot dog if it sits too long. Freshly dotted eyes look way cuter. I learned this the hard way when I added the eyes the night before and they looked sad and faded by morning.
Variations & Adaptations
One of the best things about this recipe is how easy it is to adapt. You can change it up based on what you have, what your family likes, or what kind of party you’re attending. Here are some of my favorite variations.
Cheesy Mummy Hot Dogs: Before wrapping the hot dogs, cut a slit lengthwise down the center and stuff it with a thin strip of cheddar or mozzarella cheese. The cheese melts as the hot dog bakes, creating a gooey, delicious surprise. Just make sure the cheese is fully enclosed so it doesn’t leak out and burn on the pan. I tried this with pepper jack once, and it was amazing—the little kick of heat was perfect.
Spicy Mummies: Swap the yellow mustard eyes for sriracha or sambal oelek. You can also brush the hot dogs with a little hot sauce before wrapping them. For an extra kick, mix some chili flakes into the dough or sprinkle cayenne on top before baking. My husband loves these, and they’re great for adult parties where kids aren’t the main audience.
Veggie Mummies: Use vegetarian or vegan hot dogs instead of meat-based ones. The rest of the recipe stays exactly the same. I’ve tried this with a few different brands, and they all work well. Just check the cooking time on the package—some vegan hot dogs heat through faster than traditional ones.
Breakfast Mummies: Swap the hot dogs for breakfast sausages or even cocktail sausages. Serve them with a side of maple syrup for dipping. The sweet and salty combination is incredible. I made these for a Halloween-themed brunch once, and they were a huge hit. The mini size also makes them perfect for little hands.
Gluten-Free Option: Use gluten-free crescent roll dough or puff pastry. Most grocery stores carry a gluten-free version now. The texture might be slightly different, but the flavor and appearance are just as good. I’ve also used gluten-free biscuit dough in a pinch—just roll it out thin and cut into strips.
Pizza Mummies: Before wrapping, brush the hot dogs with a little pizza sauce and sprinkle with Italian seasoning. Serve with warm marinara for dipping. This turns them into a mini pizza experience. My kids love this version, and it’s a fun way to switch things up if you make these often.
Dessert Mummies: For a sweet twist, swap the hot dogs for cooked sausages or even banana pieces. Use cinnamon-sugar sprinkled on the dough before wrapping, and dot the eyes with chocolate or caramel sauce. I haven’t tried this one yet, but it’s on my list for this year.
Serving & Storage Suggestions
These mummy hot dogs are best served warm, right out of the oven. The dough is flaky and tender, the hot dog is juicy, and the mustard eyes add just a hint of tang. They’re perfect on their own as a snack or appetizer, but they also pair beautifully with other dishes.
Serving Temperature: Serve them warm, but not piping hot. Let them cool for a couple of minutes after baking so the dough sets and the hot dog isn’t dangerously hot inside. Kids especially appreciate a slightly cooler temperature. If you’re serving them at a party, you can keep them warm in a low oven (200°F) for up to 30 minutes.
Presentation Ideas: Arrange them on a platter lined with black or orange napkins for a festive look. You can add a small bowl of ketchup or mustard for dipping, or even a little “graveyard” scene with crushed chocolate cookies as dirt and gummy worms. For a fun touch, serve them on a bed of shredded lettuce to look like grass.
Complementary Dishes: These mummy hot dogs go great with other Halloween snacks. Try them alongside pumpkin-shaped cheese crackers, veggie sticks with ranch dip, or a bowl of popcorn tossed with orange and black sprinkles. For a full meal, pair them with a simple side salad or a bowl of tomato soup.
Storage Instructions: Leftover mummy hot dogs can be stored in an airtight container in the refrigerator for up to 3 days. The dough will soften over time, but they’ll still taste good. To reheat, pop them in a 350°F oven for 5 to 7 minutes, or until warmed through. You can also microwave them for 20 to 30 seconds, but the dough won’t be as crispy.
Freezing: You can freeze the unbaked mummy hot dogs for up to 2 months. Assemble them as directed, place them on a baking sheet, and freeze until solid. Then transfer them to a freezer bag or container. When you’re ready to bake, add 3 to 5 minutes to the baking time—no need to thaw first. This is great for having a quick snack ready whenever the Halloween mood strikes.
Flavor Development: These are best fresh, but I’ve had them the next day and they’re still pretty good. The dough loses some of its flakiness, but the flavor is still there. If you’re making them ahead for a party, I recommend baking them fresh and adding the eyes right before serving. The visual impact is worth the extra effort.
Nutritional Information & Benefits
Let’s be honest—these mummy hot dogs are a treat, not a health food. But that doesn’t mean they can’t fit into a balanced diet. Here’s the nutritional breakdown for one mummy hot dog (based on standard ingredients).
- Calories: Approximately 180-220 calories per mummy hot dog, depending on the brand of hot dog and dough you use.
- Protein: About 7-9 grams, mostly from the hot dog. This makes them surprisingly filling for a snack.
- Carbohydrates: Around 12-15 grams, primarily from the crescent roll dough.
- Fat: Approximately 12-15 grams, with a mix of saturated and unsaturated fats from the hot dog and dough.
- Sodium: This is the main consideration. Hot dogs and crescent roll dough are both high in sodium, with each mummy containing about 400-500 mg. If you’re watching your salt intake, look for low-sodium hot dogs or reduce the portion size.
Health Benefits: While these aren’t a superfood, they do offer some benefits. Hot dogs provide protein and iron, which are important for energy and blood health. The dough provides carbohydrates for quick energy—perfect for active kids running around on Halloween night. If you use turkey or chicken hot dogs, you’ll get a leaner option with less saturated fat.
Dietary Considerations: This recipe is not gluten-free unless you use gluten-free dough. It contains dairy (in the dough and potentially the hot dog), so it’s not suitable for a dairy-free diet without substitutions. For a lower-carb option, you can wrap the hot dogs in cheese slices instead of dough—just bake until the cheese is melted and slightly crispy.
Allergen Note: Crescent roll dough typically contains wheat, milk, and soy. Hot dogs can contain soy and various preservatives. Always check labels if you’re cooking for someone with allergies. I’ve had friends with celiac disease who enjoyed these with gluten-free dough, and they said they were just as good.
My Take: I believe in balance. These mummy hot dogs are a fun, occasional treat that brings joy to Halloween celebrations. They’re not something you’d eat every day, but they’re perfect for a party. Pair them with some fresh fruit or veggie sticks, and you’ve got a well-rounded snack spread that everyone can enjoy.
Conclusion
So there you have it—easy spooky mummy hot dogs that are guaranteed to be the hit of your Halloween party. They’re quick, they’re simple, and they’re ridiculously fun. Whether you’re a seasoned home cook or a complete beginner, you can pull these off with zero stress. And honestly, that’s what makes them so special.
I love this recipe because it proves that you don’t need to be a Pinterest pro to make something memorable. Sometimes the simplest ideas are the ones that stick. Every time I make these, I think back to that frantic afternoon when I thought I’d failed my kid. And every time, I smile. These mummy hot dogs saved me that day, and now they’re a tradition in our house.
I encourage you to make these your own. Try different hot dogs, experiment with the eyes, add cheese or spice. The recipe is a starting point, not a rulebook. And when you make them, I’d love to hear how they turned out. Drop a comment below and let me know if your kids loved them, if they disappeared at the party, or if you came up with a fun variation I haven’t tried yet. Share this post with a friend who’s stressing about Halloween snacks—they’ll thank you for it.
Happy Halloween, and happy cooking! Remember, even on your most chaotic days, you’ve got this. And if all else fails, hot dogs wrapped in bread will save the day. Trust me.
Frequently Asked Questions
Can I make these mummy hot dogs ahead of time?
Yes, you can assemble them up to 24 hours in advance and keep them covered in the refrigerator. Bake them just before serving for the best texture. If you need to bake them ahead, reheat in a 350°F oven for 5-7 minutes to crisp up the dough again.
What can I use instead of crescent roll dough?
You can use puff pastry, pizza dough, or even refrigerated biscuit dough rolled thin. Each option gives a slightly different texture—puff pastry is flakier, pizza dough is chewier, and biscuit dough is softer. All work great, so use what you have on hand.
Can I use something other than mustard for the eyes?
Absolutely! Ketchup works well for red eyes, sriracha for spicy orange eyes, or even small dots of melted cheese for a gooey look. You can also use black olive slices cut into tiny circles for a more traditional mummy face.
How do I keep the dough from unraveling during baking?
Make sure to tuck the ends of the dough strips under the hot dog before placing them on the baking sheet. The dough will expand slightly as it bakes, which helps lock the strips in place. If you’re worried, you can also press the ends gently against the hot dog to secure them.
Can I make these in an air fryer?
Yes! Air fry at 350°F for 8-10 minutes, checking halfway through. The dough gets extra crispy in the air fryer, which is a nice change from the oven method. Just make sure not to overcrowd the basket—work in batches if needed.
Pin This Recipe!
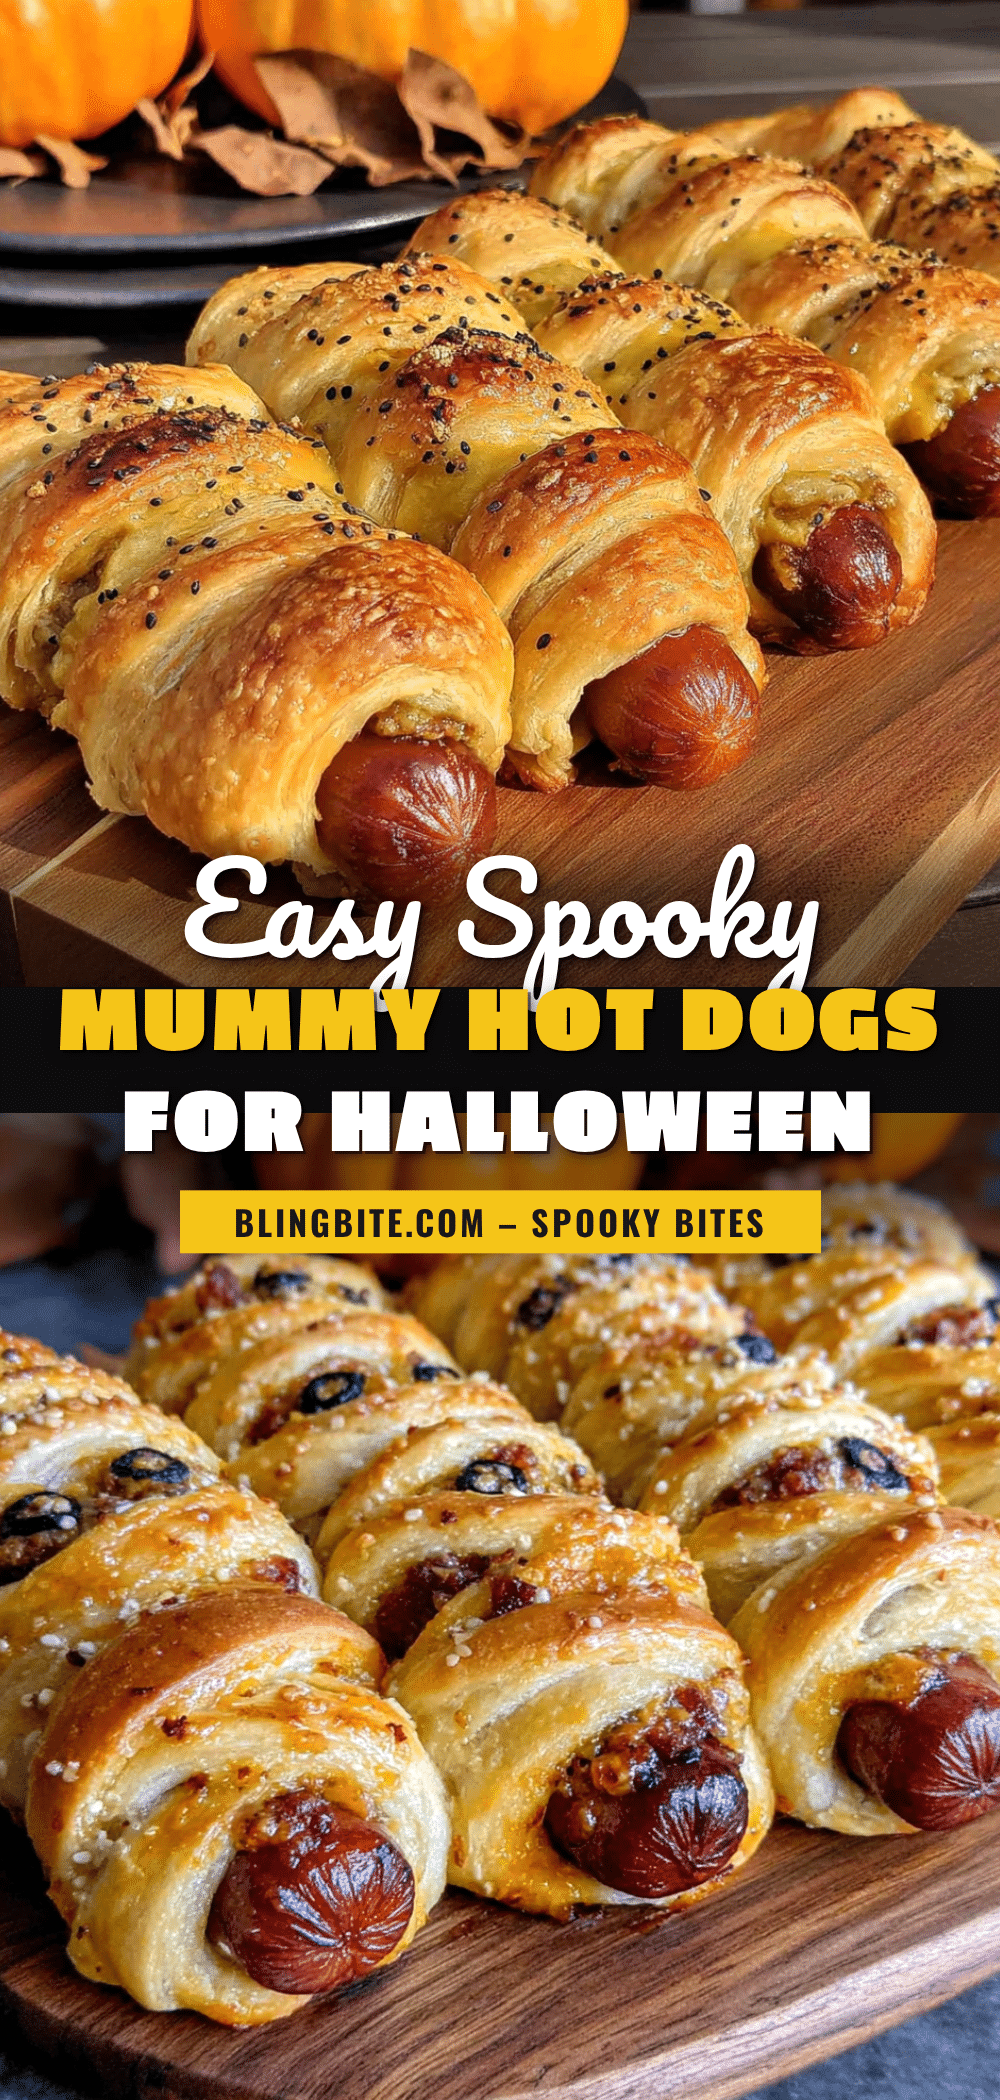
Easy Spooky Mummy Hot Dogs: Best Halloween Recipe
These easy spooky mummy hot dogs are a quick and fun Halloween treat made with hot dogs wrapped in crescent roll dough, baked until golden, and dotted with mustard eyes. Perfect for last-minute parties, they come together in under 20 minutes and are always a crowd-pleaser.
- Prep Time: 15 minutes
- Cook Time: 15 minutes
- Total Time: 20 minutes
- Yield: 8 servings 1x
- Category: Appetizer
- Cuisine: American
Ingredients
- 8 standard-size hot dogs (beef, pork, turkey, or plant-based)
- 1 can (8 ounces) refrigerated crescent roll dough (seamless sheet preferred)
- 1 teaspoon yellow mustard (for eyes)
- 1 large egg (for egg wash, optional)
- 1 tablespoon water (for egg wash, optional)
- Sesame seeds or poppy seeds (optional, for garnish)
- Cooking spray or parchment paper (for baking sheet)
Instructions
- Preheat your oven to 375°F (190°C). Line a baking sheet with parchment paper or lightly coat with cooking spray.
- Unroll the crescent roll dough onto a clean cutting board or countertop. If using perforated dough, gently press the seams together to create one solid sheet.
- Using a sharp knife or pizza cutter, slice the dough lengthwise into thin strips about 1/4 to 1/2 inch wide. You should get about 8 to 10 strips per can.
- Take one hot dog and start wrapping a dough strip around it at a slight angle, leaving a small gap near the top for the ‘face.’ Overlap the strips slightly as you go. Use 2 to 3 strips per hot dog. Tuck the ends of the dough under the hot dog to secure. Repeat with remaining hot dogs and dough strips.
- Place the wrapped hot dogs on the prepared baking sheet, leaving about an inch of space between each one.
- In a small bowl, beat the egg with 1 tablespoon of water. Lightly brush the tops of the wrapped hot dogs with the egg wash (optional).
- If using, sprinkle a tiny pinch of sesame or poppy seeds over each wrapped hot dog (optional).
- Bake for 12 to 15 minutes, or until the dough is golden brown and cooked through. Check at 12 minutes and add time in 1-minute increments if needed.
- Let the mummy hot dogs cool on the baking sheet for 2 to 3 minutes.
- Using a toothpick or the tip of a knife, dab two small dots of yellow mustard onto the exposed ‘face’ area of each hot dog to create eyes.
- Serve immediately while warm.
Notes
For best results, leave a visible gap at the top of the hot dog for the face. Use a light hand with the egg wash to avoid soggy dough. Watch the oven closely as crescent roll dough can burn quickly. For make-ahead, assemble up to 24 hours in advance and refrigerate; add a couple of minutes to baking time. Add mustard eyes just before serving to prevent drying out.
Nutrition
- Serving Size: 1 mummy hot dog
- Calories: 200
- Sugar: 3
- Sodium: 450
- Fat: 13
- Saturated Fat: 4
- Carbohydrates: 14
- Protein: 8
Keywords: mummy hot dogs, Halloween recipe, easy Halloween snack, pigs in a blanket, spooky hot dogs, kid-friendly Halloween, last-minute Halloween treat


