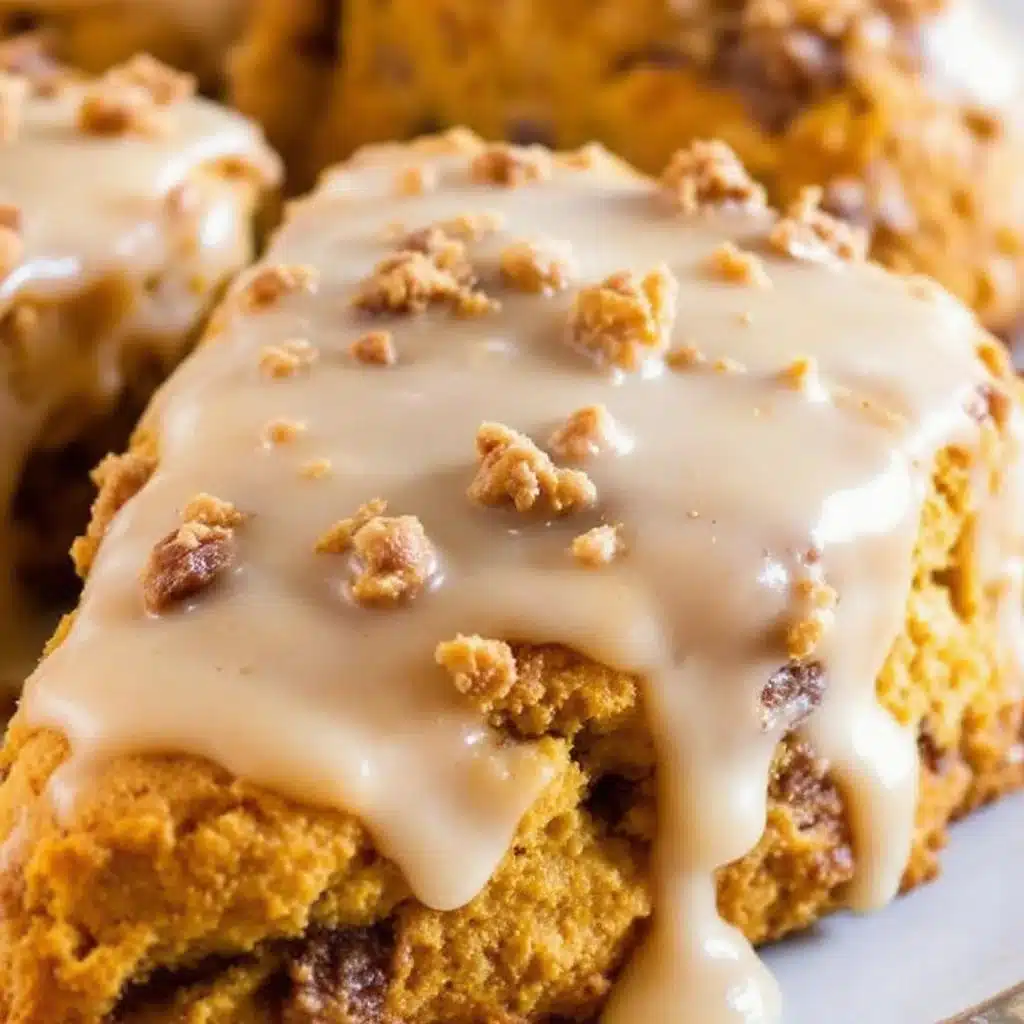
That first whiff of cinnamon and nutmeg hitting the air — the kind that wraps around you before you even step fully into the kitchen — still takes me straight to my friend Jenna’s tiny apartment, circa 2017. She had this thing about fall. I mean, a real thing. The moment the calendar flipped to September, she’d break out the pumpkin candles and start planning our annual “Pumpkin Palooza” baking day. Honestly, I thought she was a little extra about it all. Until she pulled a tray of these scones out of her oven. They were golden at the edges, soft in the middle, and dripping with a glaze that caught the afternoon light. I took one bite and just… stopped talking. That’s rare for me.
For years after, I tried to recreate that moment. I bought scones from every coffee shop within a ten-mile radius, but they were either too dry, too sweet, or just… missing that cozy soul. You know the feeling? When you want something to taste like a memory, not just a recipe. So I went back to Jenna’s kitchen, mentally. I thought about the way she didn’t rush the butter into the flour — how she worked it in slowly, almost like she was giving the dough a little patience. And I started testing. Batch after batch. Some were hockey pucks. Some were crumbly disasters. But eventually, I got there. These Perfect Pumpkin Scones with Maple Glaze are the result of all that trial and error — and honestly, they taste better than the Starbucks version ever did. They’re the reason I now understand Jenna’s fall obsession. Some things just deserve their own season.
Why You’ll Love This Recipe
Let me tell you why these scones have earned a permanent spot in my fall baking rotation — and why they’ll probably end up in yours too.
- Quick & Easy : From mixing bowl to cooling rack in under 35 minutes. No stand mixer required, no complicated techniques. Just simple, satisfying baking.
- Simple Ingredients : You likely have most of these in your pantry right now. No weird extracts or hard-to-find spices — just real, honest baking staples.
- Perfect for Fall Mornings : These scones were made for cozy weekends, crisp apple-picking afternoons, or lazy Thanksgiving mornings with a hot cup of coffee. They just feel like autumn in every bite.
- Crowd-Pleaser : I brought a batch to a neighborhood brunch last month, and three people asked for the recipe before I even finished my coffee. Kids love them. Adults love them. Even my picky-eating cousin approved.
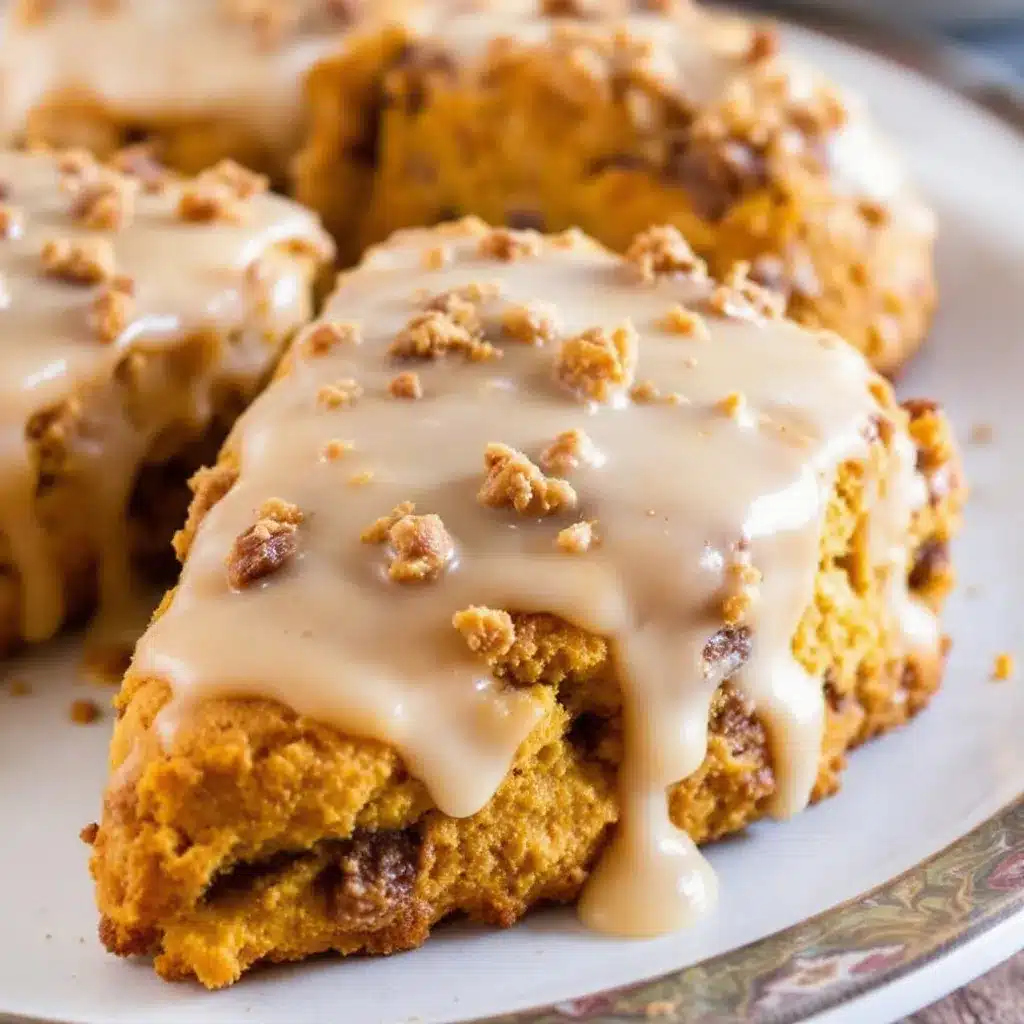
- Unbelievably Delicious : The texture is that perfect scone sweet spot — tender and flaky on the inside, with slightly crisp edges. And that maple glaze? It seeps into all the little cracks and makes everything better.
What makes these different from every other pumpkin scone recipe out there? It’s the technique. I spent weeks testing the butter-to-flour ratio, the chilling time, and the glaze consistency. These scones don’t turn out dry or cakey — they’re dense in the best way, with a crumb that actually holds together. Plus, the maple glaze isn’t just a drizzle on top. It soaks into the warm scone just enough to make every bite taste like a hug. This isn’t just another copycat recipe. It’s the version I’d serve to anyone who thinks they don’t like scones.
What Ingredients You Will Need
This recipe uses simple, wholesome ingredients to deliver that signature Starbucks flavor — but better. The magic is in how they come together, not in fancy pantry items.
- All-purpose flour (2 cups / 240g) — Gives the scones structure without making them tough. I prefer Gold Medal or King Arthur for consistent results.
- Granulated sugar (1/3 cup / 65g) — Just enough sweetness to balance the pumpkin and spices. Don’t be tempted to add more; the glaze handles the sweet factor.
- Baking powder (1 tablespoon) — This is crucial for lift. Make sure yours is fresh — test it by dropping a bit in hot water; if it fizzes, you’re good.
- Pumpkin pie spice (2 teaspoons) — You can use store-bought or make your own with cinnamon, nutmeg, ginger, and allspice. I actually prefer the homemade blend — it tastes brighter.
- Ground cinnamon (1/2 teaspoon) — Adds warmth and depth. I like Saigon cinnamon for its bold, slightly sweet kick.
- Salt (1/2 teaspoon) — Don’t skip it. Salt enhances all the warm spices and balances the sweetness.
- Unsalted butter (6 tablespoons / 85g, cold and cubed) — This is the key to flaky scones. The cold butter creates little steam pockets as it melts in the oven, giving you that tender crumb. Keep it in the fridge until the last minute.
- Pumpkin purée (1/2 cup / 120g) — Not pumpkin pie filling. Make sure you grab 100% pumpkin purée. I’ve used Libby’s for years and it never lets me down.
- Heavy cream (1/4 cup / 60ml, plus extra for brushing) — Adds richness and helps the dough come together. Whole milk works in a pinch, but the scones won’t be quite as tender.
- Vanilla extract (1 teaspoon) — A good-quality vanilla makes a difference. I use Nielsen-Massey when I’m feeling fancy.
- For the maple glaze :
- Powdered sugar (1 cup / 120g) — Sift it if you want a super smooth glaze. I’m usually too impatient, and it still turns out great.
- Pure maple syrup (2 tablespoons) — Not pancake syrup. Real maple syrup gives that deep, woodsy sweetness that makes these scones unforgettable.
- Heavy cream or milk (1-2 tablespoons) — Adjusts the consistency. You want the glaze thick enough to coat the back of a spoon but thin enough to drizzle.
Equipment Needed
You don’t need a fancy bakery setup for these scones. Here’s what I use every single time:
Large mixing bowl — A good sturdy one for mixing dry ingredients. I’ve had my Pyrex glass bowl for years, and it’s perfect for this.
Pastry cutter or two forks — For cutting the cold butter into the flour. If you don’t have a pastry cutter, honestly, two forks work just fine. Or you can use your fingertips — just work quickly so the butter stays cold.
Baking sheet — Line it with parchment paper for easy cleanup. I learned the hard way that ungreased baking sheets lead to stuck-on glaze disasters.
Bench scraper or sharp knife — For cutting the dough into triangles. A bench scraper gives you clean edges, which helps the scones rise evenly.
Pastry brush — For brushing cream on top before baking. If you don’t have one, just use the back of a spoon — it’s not pretty, but it works.
Cooling rack — Essential for letting the glaze set without turning into a sticky puddle underneath. I got mine for under $10 at a kitchen supply store, and it’s still going strong.
Small whisk — For the glaze. A fork works too, but a whisk gives you a smoother finish.
Preparation Method
- Preheat your oven to 400°F (200°C). Line a baking sheet with parchment paper. This is one of those steps you don’t want to skip — the parchment keeps the bottoms from browning too fast.
- Whisk together the dry ingredients. In a large bowl, combine the flour, sugar, baking powder, pumpkin pie spice, cinnamon, and salt. Give it a good whisk — about 10 seconds — to make sure the baking powder and spices are evenly distributed. Nobody wants a pocket of pure baking powder in their scone.
- Cut in the cold butter. Drop the cold, cubed butter into the flour mixture. Using a pastry cutter or two forks, cut the butter into the flour until the mixture looks like coarse meal with some pea-sized butter pieces remaining. This is where the flakiness comes from, so don’t overdo it. You want visible butter bits — they’ll create those dreamy layers.
- Mix the wet ingredients. In a separate small bowl, whisk together the pumpkin purée, heavy cream, and vanilla extract until smooth. It should look like a thick, orange-hued sauce. If your pumpkin purée seems watery, pat it dry with a paper towel first — too much moisture makes scones dense.
- Combine wet and dry. Pour the pumpkin mixture into the flour-butter mixture. Stir with a fork or spatula just until the dough comes together. It will look shaggy and a little dry — that’s exactly what you want. Overmixing leads to tough scones, so resist the urge to keep stirring. If the dough seems too dry to hold together, add one more tablespoon of cream.
- Shape the dough. Turn the dough out onto a lightly floured surface. Gently bring it together with your hands, patting it into a circle about 3/4-inch thick. Don’t use a rolling pin — the warmth of your hands is gentler on the butter. The dough should be about 8 inches across.
- Cut into wedges. Using a bench scraper or sharp knife, cut the circle into 8 equal wedges, like you’re slicing a pizza. Transfer the wedges to the prepared baking sheet, spacing them about 2 inches apart. They won’t spread much, but they need room for the heat to circulate.
- Chill the scones (this is important). Pop the baking sheet into the refrigerator for 15 minutes. This firms up the butter again, which means taller, flakier scones. I know it’s tempting to skip this step, but trust me — it makes a real difference. While they chill, you can make the glaze.
- Brush and bake. Remove the scones from the fridge. Brush the tops with a little extra heavy cream — this gives them that golden, slightly crisp crust. Bake for 14-16 minutes, until the edges are lightly golden and the tops feel firm to the touch. Your kitchen will smell like a fall candle factory, and it’s glorious.
- Cool slightly. Let the scones cool on the baking sheet for 5 minutes, then transfer them to a cooling rack. They need to be warm — but not hot — when you glaze them. If they’re too hot, the glaze will melt right off. Too cold, and it won’t soak in at all.
- Make the maple glaze. While the scones cool, whisk together the powdered sugar, maple syrup, and 1 tablespoon of cream. Add more cream, a teaspoon at a time, until the glaze is thick but pourable. It should drizzle off the whisk in a smooth ribbon.
- Glaze the scones. Drizzle the glaze over the warm scones using a spoon or a piping bag (I just use a zip-top bag with the corner snipped off). Let the glaze set for about 10 minutes before serving. The glaze will harden slightly but stay soft enough to sink into every crevice.
Cooking Tips & Techniques
After more batches than I care to count, here are the things I wish someone had told me before I started making scones.
Keep everything cold. This is the number one rule of scone-making. Cold butter creates steam pockets as it bakes, which gives you that light, flaky texture. If your kitchen is warm, pop the flour and butter in the freezer for 10 minutes before you start. I’ve also been known to chill my mixing bowl — it sounds extra, but it works.
Don’t overwork the dough. This was my biggest mistake early on. I’d keep kneading and patting until the dough was perfectly smooth, and my scones came out tough every time. The dough should be shaggy and a little crumbly. Handle it as little as possible. Think of it like making biscuits — gentle hands, quick movements.
Use a bench scraper for clean cuts. When you cut the dough, use a sharp, straight-down motion. Don’t saw back and forth — that seals the edges and prevents the scones from rising properly. A clean cut gives you those beautiful, jagged edges that bake up crisp and golden.
Watch the baking time. Every oven runs a little differently. Start checking at the 12-minute mark. The scones should be lightly golden on the bottom and just barely brown on the edges. If they look pale, give them another minute. Overbaked scones turn into crumbly hockey pucks, so err on the side of underdone.
Glaze while warm, not hot. I learned this one the hard way. I once glazed scones straight out of the oven, and the glaze just slid right off into a sad puddle on the baking sheet. Wait until they’re warm to the touch — about 5 minutes after they come out of the oven. That way, the glaze seeps in just enough without disappearing.
Variations & Adaptations
One of the best things about this recipe is how flexible it is. Here are a few ways I’ve tweaked it over the years.
Gluten-Free Version: Swap the all-purpose flour for a 1:1 gluten-free baking blend. I’ve had good luck with Bob’s Red Mill. The texture will be slightly more tender and a little less flaky, but they’re still delicious. Add an extra tablespoon of cream to help the dough hold together.
Vegan Adaptation: Use cold vegan butter (I like Miyoko’s) and substitute the heavy cream with full-fat coconut cream. The scones won’t be quite as rich, but the pumpkin and spices still shine. For the glaze, use maple syrup and a splash of oat milk instead of cream.
Spiced Maple Glaze: Add a pinch of cinnamon or a tiny dash of cayenne to the glaze for a warm, unexpected kick. I tried this on a whim last fall, and it’s become my go-to. The heat cuts through the sweetness beautifully.
Chocolate Chip Pumpkin Scones: Fold in 1/2 cup of mini chocolate chips after you combine the wet and dry ingredients. The chocolate adds a little richness that pairs surprisingly well with the pumpkin spice. My nephew requests these every single time he visits.
Cranberry-Orange Twist: Add 1/2 cup of dried cranberries and the zest of one orange to the dough. Swap the maple glaze for a simple orange glaze (powdered sugar + orange juice). It’s bright, tangy, and perfect for Thanksgiving morning.
Serving & Storage Suggestions
These scones are best served warm, with the glaze still slightly soft. I like to pair them with a hot latte or a mug of spiced chai — the warmth of the drink contrasts perfectly with the sweet, spiced scone. If you’re serving them for brunch, arrange them on a wooden board with little dishes of extra maple glaze and softened butter on the side. It looks beautiful and lets everyone customize their own bite.
Storage: Keep leftover scones in an airtight container at room temperature for up to 3 days. The glaze will soften a bit, but they’ll still taste amazing. If you stack them, place a piece of parchment paper between layers to prevent sticking.
Freezing: These freeze beautifully. Freeze unglazed scones on a baking sheet until solid, then transfer to a freezer bag. They’ll keep for up to 3 months. To serve, thaw at room temperature, then warm in a 300°F oven for 5 minutes. Glaze after warming. I’ve done this for holiday mornings, and nobody ever guesses they were frozen.
Reheating: Pop a scone in a 300°F oven for 5-7 minutes, or microwave for 15 seconds. The microwave is faster, but the oven brings back that crisp edge. If you’re reheating glazed scones, the microwave is gentler on the glaze.
Flavor development: Honestly, these scones are even better the next day. The spices mellow and meld together overnight, and the glaze sinks deeper into the crumb. If you can resist eating them all on day one, you’re in for a treat on day two.
Nutritional Information & Benefits
Per serving (1 scone with glaze): approximately 320 calories, 12g fat, 48g carbohydrates, 4g protein, 2g fiber, 22g sugar. These estimates will vary based on your specific ingredients and glaze amount.
While these scones are definitely a treat, there are a few bright spots. Pumpkin purée is packed with vitamin A and fiber, and the spices — cinnamon, nutmeg, ginger — have anti-inflammatory properties. Plus, using real maple syrup means you’re getting trace minerals like zinc and manganese, unlike the processed stuff.
These scones are vegetarian-friendly. For a lower-sugar option, reduce the glaze to a light drizzle or skip it altogether — the scones are still flavorful on their own. If you’re watching your saturated fat, you can substitute half the butter with coconut oil, though the texture will be slightly different.
Potential allergens: Contains wheat, dairy, and (if using) gluten. Not suitable for those with celiac disease unless you use certified gluten-free flour.
I don’t believe in labeling food as “guilty pleasures.” These scones are a pleasure, plain and simple. They’re made with real ingredients, shared with people you love, and that’s a beautiful thing.
Conclusion
If you’ve been searching for a pumpkin scone recipe that actually delivers on flavor and texture, this is it. These Perfect Pumpkin Scones with Maple Glaze are everything I wanted that first bite at Jenna’s kitchen table to be — tender, spiced, sweet, and deeply satisfying. They’re the kind of scone that makes you slow down and actually taste what you’re eating.
I hope you’ll make these your own. Maybe you’ll add extra cinnamon, or swap the glaze for a cream cheese drizzle. Maybe you’ll double the batch and surprise your neighbors on a crisp Saturday morning. That’s the beauty of a good recipe — it’s just a starting point. The real magic happens when you put your own spin on it.
I’d love to hear how yours turn out. Drop a comment below and tell me about your favorite fall baking memory, or tag me in your scone photos on social media. And if you’re craving more cozy autumn recipes, don’t miss my creamy roasted butternut squash soup with maple croutons — it’s the perfect companion to these scones on a chilly afternoon. Happy baking, friend. 🍂
Frequently Asked Questions
Can I use pumpkin pie filling instead of pumpkin purée?
No, please don’t. Pumpkin pie filling is already sweetened and spiced, which will throw off the balance of this recipe. Stick with 100% pumpkin purée for the best results. Your scones will thank you.
Why did my scones turn out dry?
Dry scones usually come from one of two things: overmixing the dough or overbaking. Handle the dough as little as possible, and start checking for doneness at the 12-minute mark. Also, make sure your pumpkin purée isn’t too watery — pat it dry if needed.
Can I make the dough ahead of time?
Absolutely. Shape the scones, place them on a parchment-lined baking sheet, and refrigerate for up to 24 hours. You can even freeze them for up to 3 months. Just add an extra minute or two to the baking time if baking from frozen.
How do I get a thicker glaze?
Add more powdered sugar, one tablespoon at a time, until the glaze reaches your desired consistency. For a thinner glaze, add more cream or milk. The glaze should be thick enough to coat the back of a spoon but still drizzle smoothly.
Can I make these without a pastry cutter?
Yes! Two forks work perfectly. You can also use a food processor — just pulse the butter into the flour until it looks like coarse meal, then transfer to a bowl and proceed with the recipe. Just be careful not to over-process.
Pin This Recipe!

Perfect Pumpkin Scones with Maple Glaze – Easy Starbucks Copycat

These Perfect Pumpkin Scones with Maple Glaze are tender, flaky, and spiced with warm fall flavors. They taste even better than the Starbucks version and come together in under 35 minutes.
- Prep Time: 15 minutes
- Cook Time: 16 minutes
- Total Time: 31 minutes
- Yield: 8 servings 1x
- Category: Breakfast
- Cuisine: American
Ingredients
- 2 cups (240g) all-purpose flour
- 1/3 cup (65g) granulated sugar
- 1 tablespoon baking powder
- 2 teaspoons pumpkin pie spice
- 1/2 teaspoon ground cinnamon
- 1/2 teaspoon salt
- 6 tablespoons (85g) unsalted butter, cold and cubed
- 1/2 cup (120g) pumpkin purée
- 1/4 cup (60ml) heavy cream, plus extra for brushing
- 1 teaspoon vanilla extract
- 1 cup (120g) powdered sugar
- 2 tablespoons pure maple syrup
- 1–2 tablespoons heavy cream or milk
Instructions
- Preheat your oven to 400°F (200°C). Line a baking sheet with parchment paper.
- In a large bowl, whisk together the flour, sugar, baking powder, pumpkin pie spice, cinnamon, and salt.
- Cut the cold butter into the flour mixture using a pastry cutter or two forks until the mixture resembles coarse meal with some pea-sized butter pieces.
- In a separate small bowl, whisk together the pumpkin purée, heavy cream, and vanilla extract until smooth.
- Pour the pumpkin mixture into the flour-butter mixture and stir just until the dough comes together. It will look shaggy and slightly dry.
- Turn the dough out onto a lightly floured surface and gently pat it into a circle about 3/4-inch thick and 8 inches across.
- Cut the circle into 8 equal wedges and transfer them to the prepared baking sheet, spacing them about 2 inches apart.
- Refrigerate the scones for 15 minutes.
- Brush the tops with a little extra heavy cream and bake for 14-16 minutes, until the edges are lightly golden and the tops feel firm.
- Let the scones cool on the baking sheet for 5 minutes, then transfer to a cooling rack.
- While the scones cool, whisk together the powdered sugar, maple syrup, and 1 tablespoon of cream. Add more cream, a teaspoon at a time, until the glaze is thick but pourable.
- Drizzle the glaze over the warm scones and let set for about 10 minutes before serving.
Notes
Keep all ingredients cold for flaky scones. Do not overwork the dough. Glaze while warm, not hot. Scones can be frozen unglazed for up to 3 months.
Nutrition
- Serving Size: 1 scone with glaze
- Calories: 320
- Sugar: 22
- Sodium: 280
- Fat: 12
- Saturated Fat: 7
- Carbohydrates: 48
- Fiber: 2
- Protein: 4
Keywords: pumpkin scones, maple glaze, Starbucks copycat, fall baking, easy scone recipe


