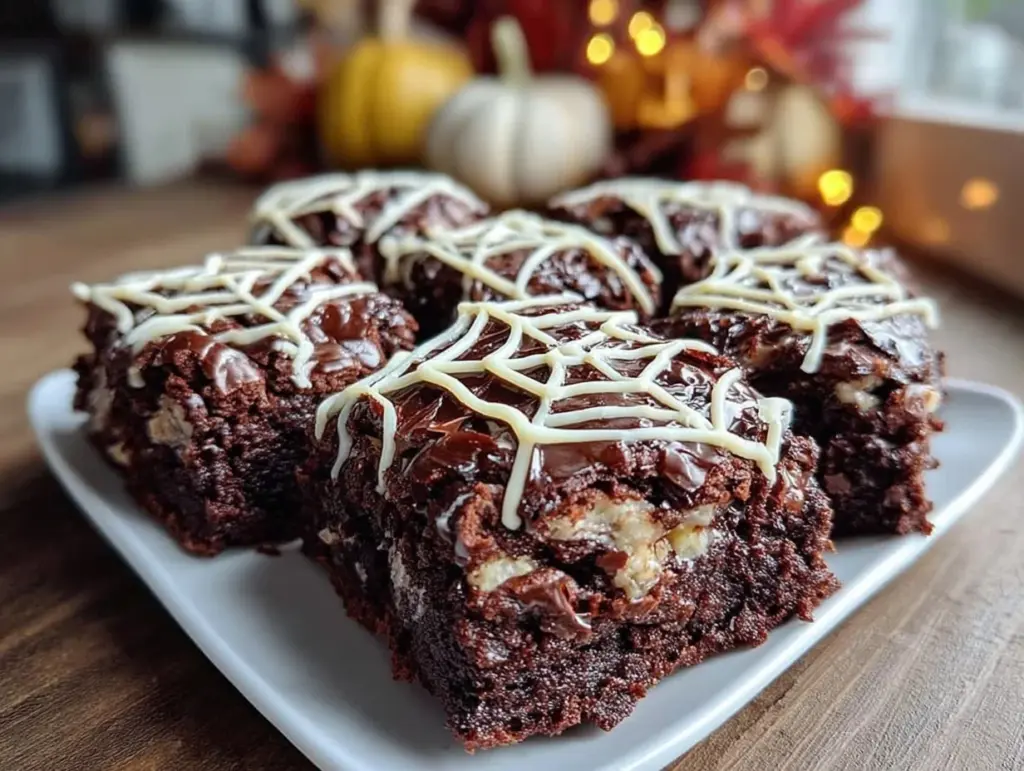
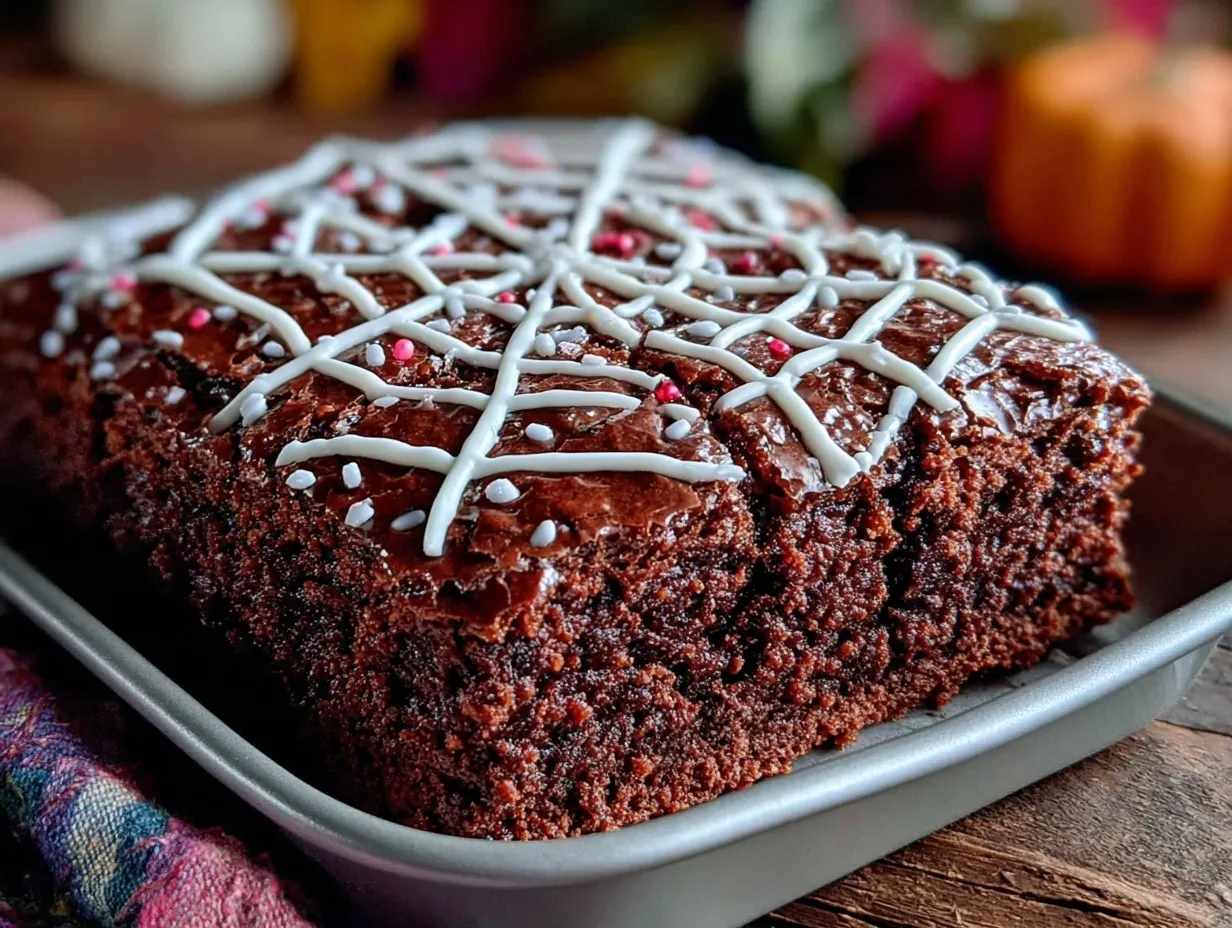
“Wait, are you seriously making a spider web on brownies?” That was the skeptical text from my friend when I sent a blurry photo of my first attempt at the perfect spider web brownie pan decorated with royal icing. Honestly, I wasn’t sure either—how would a spider web even look on a fudgy brownie? But it turned out that the simple, spooky design brought a playful twist to an otherwise classic treat. The crackling aroma of chocolate filled the kitchen, mixing oddly well with the crisp, sweet scent of royal icing drying on top.
What started as a last-minute idea to surprise my coworkers for a Halloween potluck quickly became a mini obsession. I found myself making batches of these brownies multiple times in one week, tweaking the icing consistency and perfecting the web pattern with a toothpick’s gentle drag. Late nights in the kitchen, the only sound was the soft hum of the mixer and the occasional rustle of parchment paper. Somehow, that quiet, focused moment made these brownies feel a little more special than your average chocolate dessert.
After a few tries, I realized the magic wasn’t just in the recipe—it was in the simple joy of creating a design that looked way more complicated than it really is. And the best part? Everyone asked for the recipe the next day. So here I am sharing the perfect spider web brownie pan recipe with an easy royal icing design tutorial that’s approachable for anyone, whether you’re a seasoned baker or a “not really a baker” type like me. You’ll find this recipe sticks with you—not just for Halloween, but whenever you want a fun, eye-catching treat that tastes as good as it looks.
Why You’ll Love This Recipe
Let’s be honest, brownies are great on their own, but this recipe brings an extra bit of fun and flair, making it stand out from the crowd. Having tested and retested this recipe in my own kitchen, I can say this one hits the sweet spot for both flavor and presentation.
- Quick & Easy: Ready in about 45 minutes, including baking and decorating, perfect for last-minute celebrations or when you just want a little creative outlet.
- Simple Ingredients: No exotic items here—just pantry staples that you probably already have on hand (and a bit of powdered sugar and egg whites for the royal icing).
- Perfect for Halloween & Parties: Whether it’s a spooky-themed gathering or a casual get-together, these brownies impress without stress.
- Crowd-Pleaser: Kids and adults alike love them. The rich fudgy brownie base pairs perfectly with the sweet, slightly crisp royal icing web.
- Unbelievably Delicious: The texture is moist and dense but not too heavy, while the royal icing adds a light sweetness and fun crunch.
- Standout Design: The spider web pattern is easier than it looks, thanks to a simple technique that anyone can master. It’s a creative twist that makes your brownies instantly memorable.
Compared to other brownie decorations, this royal icing spider web gives a delicate, professional look without needing fancy tools or piping skills. It’s kind of like the decadent chocolate ganache brownies but with a festive, visual punch. Honestly, it’s the kind of recipe that turns a basic pan of brownies into a conversation starter, which is why it’s stuck with me over time.
What Ingredients You Will Need
This recipe uses straightforward, wholesome ingredients to deliver rich chocolate flavor and a smooth royal icing web that dries perfectly crisp. Most are pantry staples, making this a no-fuss bake, even if you’re last-minute.
- For the Brownie Base:
- Unsalted butter – 1/2 cup (113g), melted (adds richness and moistness)
- Granulated sugar – 1 cup (200g)
- Large eggs – 2, room temperature (helps with texture)
- Vanilla extract – 1 tsp
- All-purpose flour – 3/4 cup (95g), sifted
- Unsweetened cocoa powder – 1/3 cup (35g), sifted (I like Ghirardelli for deep cocoa flavor)
- Salt – 1/4 tsp (balances sweetness)
- Baking powder – 1/4 tsp (for slight lift)
- For the Royal Icing:
- Powdered sugar – 1 cup (120g), sifted (smooth texture is key)
- Egg white – 1 large (or 2 tbsp meringue powder + 2 tbsp water as an alternative)
- Fresh lemon juice – 1/2 tsp (adds brightness)
- Vanilla extract – 1/4 tsp (optional for flavor)
- Black gel food coloring – a few drops (for spooky web effect)
Feel free to swap all-purpose flour for a gluten-free blend if needed, though this will slightly alter texture. For vegan royal icing, meringue powder is a great alternative. Also, if you’re short on fresh lemon juice, a tiny splash of white vinegar works in a pinch.
Equipment Needed
- 8×8 inch (20×20 cm) brownie pan – a standard size that bakes evenly
- Parchment paper – to line the pan for easy removal and clean edges
- Mixing bowls – one for the brownie batter, one for the royal icing
- Electric mixer or handheld whisk – for smooth batter and icing
- Fine-tipped piping bag or a plastic sandwich bag with a tiny corner snipped – for the icing design
- Toothpick or skewer – to drag lines through the icing and create the spider web effect
- Measuring cups and spoons – for accuracy
If you don’t have a fancy piping bag, a sturdy plastic bag works just fine, and you can always use a small zip-top bag and cut a tiny hole. I’ve tried both, and honestly, the plastic bag is my go-to for ease and cleanup. For the pan, I recommend a non-stick or well-seasoned brownie pan to avoid frustration during removal. Parchment paper lining is a lifesaver here.
Preparation Method
- Preheat your oven to 350°F (175°C). Line your 8×8 inch pan with parchment paper, letting some overhang for easy lifting later. This step is crucial for clean edges and no sticking.
- Melt the butter
- In a medium bowl, whisk together sugar and eggs
- Stir in vanilla extract and melted butter
- In a separate bowl, sift together flour, cocoa powder, salt, and baking powder
- Gradually add the dry ingredients
- Pour the batter into your prepared pan
- Bake for 25 to 30 minutes
- Remove from oven and let cool completely in the pan
- While brownies cool, prepare the royal icing: In a clean bowl, beat the egg white (or meringue powder mixture) until frothy. Gradually add powdered sugar, lemon juice, and vanilla, beating until thick and glossy—about 5-7 minutes. The icing should hold a soft peak.
- Divide the icing: Reserve about 3/4 cup plain white icing and tint the rest with black gel food coloring until you get a deep black shade.
- Spread the white icing evenly
- Fill your piping bag with black icing
- Use a toothpick or skewer
- Let the icing dry completely
- In a medium bowl, whisk together sugar and eggs
One pro tip: if your icing is too runny, add a bit more powdered sugar to thicken it. If it’s too stiff, a tiny splash of water helps loosen it up. Also, when dragging your toothpick, be gentle and deliberate for the cleanest lines—rushing will smudge the design.
Cooking Tips & Techniques
Getting the perfect spider web brownie pan involves a few little tricks that I learned mostly by trial and error. Let me share what helped me avoid the common pitfalls.
- Don’t skip sifting: Cocoa powder can clump and make your batter grainy. Sifting the cocoa and flour makes for a smooth batter and even crumb.
- Egg whites for royal icing: Using fresh egg whites (or meringue powder) is key for that glossy, firm icing that dries well. I once tried a quick powdered sugar glaze, but it never held the shape as nicely.
- Consistent icing thickness: The right royal icing consistency feels like thick toothpaste. Too thin and your web bleeds; too thick and it’s hard to pipe. If you’re unsure, practice piping on parchment paper first.
- Patience with drying: Impatience is the enemy here. The icing needs time to dry fully or it will crack or smudge when cut. I usually wait overnight if I can.
- Timing your decorating: Decorate only when brownies are fully cool. Warm brownies will melt the icing and ruin the design. That’s a rookie mistake I made once (and learned from).
Also, multitasking helps here—while brownies bake and cool, you can prepare the royal icing and clean up. It’s a neat workflow that avoids last-minute rushes. I found that having all ingredients pre-measured before starting saves so much stress.
Variations & Adaptations
This spider web brownie pan recipe is pretty flexible and can be adapted for different occasions or dietary needs:
- Flavor twist: Add 1/2 tsp espresso powder to the brownie batter for a mocha kick that intensifies the chocolate flavor.
- Seasonal spin: Swap black icing for orange or purple to match fall or party themes. You can also add edible glitter on top of the royal icing for sparkle.
- Dietary modifications: Use gluten-free flour blend for gluten intolerance. For vegan brownies, swap eggs for flax eggs and use aquafaba-based royal icing.
- Alternative decorating: Instead of a spider web, try piping a simple lattice or polka dots with the same royal icing recipe.
- Personal favorite: I once stuffed chopped peppermint candies into the batter before baking for a minty surprise that paired wonderfully with the sweet royal icing.
For different cooking methods, you can bake this in a larger pan for thinner brownies or even try mini muffin tins for bite-sized spider web brownie bites. Just watch the baking time carefully!
Serving & Storage Suggestions
Serve these brownies at room temperature to enjoy the royal icing’s crisp texture alongside the fudgy chocolate. They make a perfect centerpiece for a Halloween party or casual coffee break.
Pair them with a glass of cold milk, a warm cup of coffee, or even a cozy hot chocolate. They also go surprisingly well with the tangy notes of a cranberry chutney, like the one in the puff pastry baked brie appetizer I love serving during the holidays.
To store, place brownies in an airtight container at room temperature for up to 3 days, or refrigerate for up to a week. If refrigerated, let them come back to room temperature before serving to bring back that perfect chewy texture.
For longer storage, freeze brownies (cut into squares) in a single layer on a baking sheet, then transfer to a freezer-safe container. Thaw overnight in the fridge and bring to room temp before eating. The royal icing might soften slightly after freezing but still looks festive.
Over time, the flavors deepen and the icing becomes a bit more tender, making leftovers just as enjoyable if not more!
Nutritional Information & Benefits
| Nutrient | Per Serving (1 brownie) |
|---|---|
| Calories | 210 kcal |
| Fat | 12g |
| Carbohydrates | 25g |
| Protein | 3g |
| Sugar | 18g |
These brownies provide a satisfying treat with a boost of antioxidants from cocoa powder. Using real butter and eggs gives them richness and protein, while the royal icing adds sweetness without overwhelming the chocolate.
For those watching carbs, you can reduce sugar slightly or try a sugar substitute in the batter, though the texture may vary. Gluten-free options make this accessible to more people, too.
Just a heads-up: this recipe contains eggs and dairy, so it’s not suitable for egg or dairy allergies unless substitutions are made. I personally appreciate having a recipe that balances indulgence with simple ingredients and can be tailored to fit different needs.
Conclusion
The perfect spider web brownie pan with royal icing design isn’t just a recipe—it’s a way to bring a little whimsy and charm to your baking. From the fudgy chocolate base to the crisp, decorative web, it’s a treat that invites smiles and double takes.
Whether you’re baking for a seasonal party or just because you feel like making something fun, this recipe is flexible, approachable, and reliably delicious. I encourage you to play with the design and make it your own, maybe adding a personal touch like I did with peppermint bits or switching up the colors for different occasions.
This recipe holds a special place in my kitchen, reminding me that simple ingredients and a bit of creativity can make even a humble brownie feel like a little celebration. I’d love to hear how your spider web brownies turn out—don’t hesitate to share your twists or questions!
Happy baking and may your spider webs always be perfectly sweet and delightfully spooky!
FAQs
How do I make royal icing without egg whites?
You can use meringue powder mixed with water as a safe alternative to raw egg whites. Mix 2 tablespoons meringue powder with 2 tablespoons water to replace one egg white. This works great for royal icing and is safer for those concerned about raw eggs.
Can I use a different pan size for this brownie recipe?
Yes, you can bake the batter in a 9×9 inch pan for thinner brownies or mini muffin tins for bite-sized treats. Just adjust the baking time accordingly—start checking a few minutes earlier or later depending on the pan.
What’s the best way to store decorated brownies?
Store decorated brownies in an airtight container at room temperature for up to 3 days. Refrigerate if you want them to last longer, but bring to room temp before serving for the best texture. Freezing is possible but may soften the royal icing slightly.
How can I fix runny royal icing?
If your royal icing is too runny to hold shapes, add more sifted powdered sugar a tablespoon at a time until it thickens to a toothpaste-like consistency. If it’s too thick, add a few drops of water to loosen it.
Can I prepare the royal icing in advance?
Yes! Royal icing can be made a day ahead and kept covered tightly with plastic wrap to prevent drying. Give it a quick stir before using. If it thickens too much, add a few drops of water and mix to restore the right consistency.
Pin This Recipe!
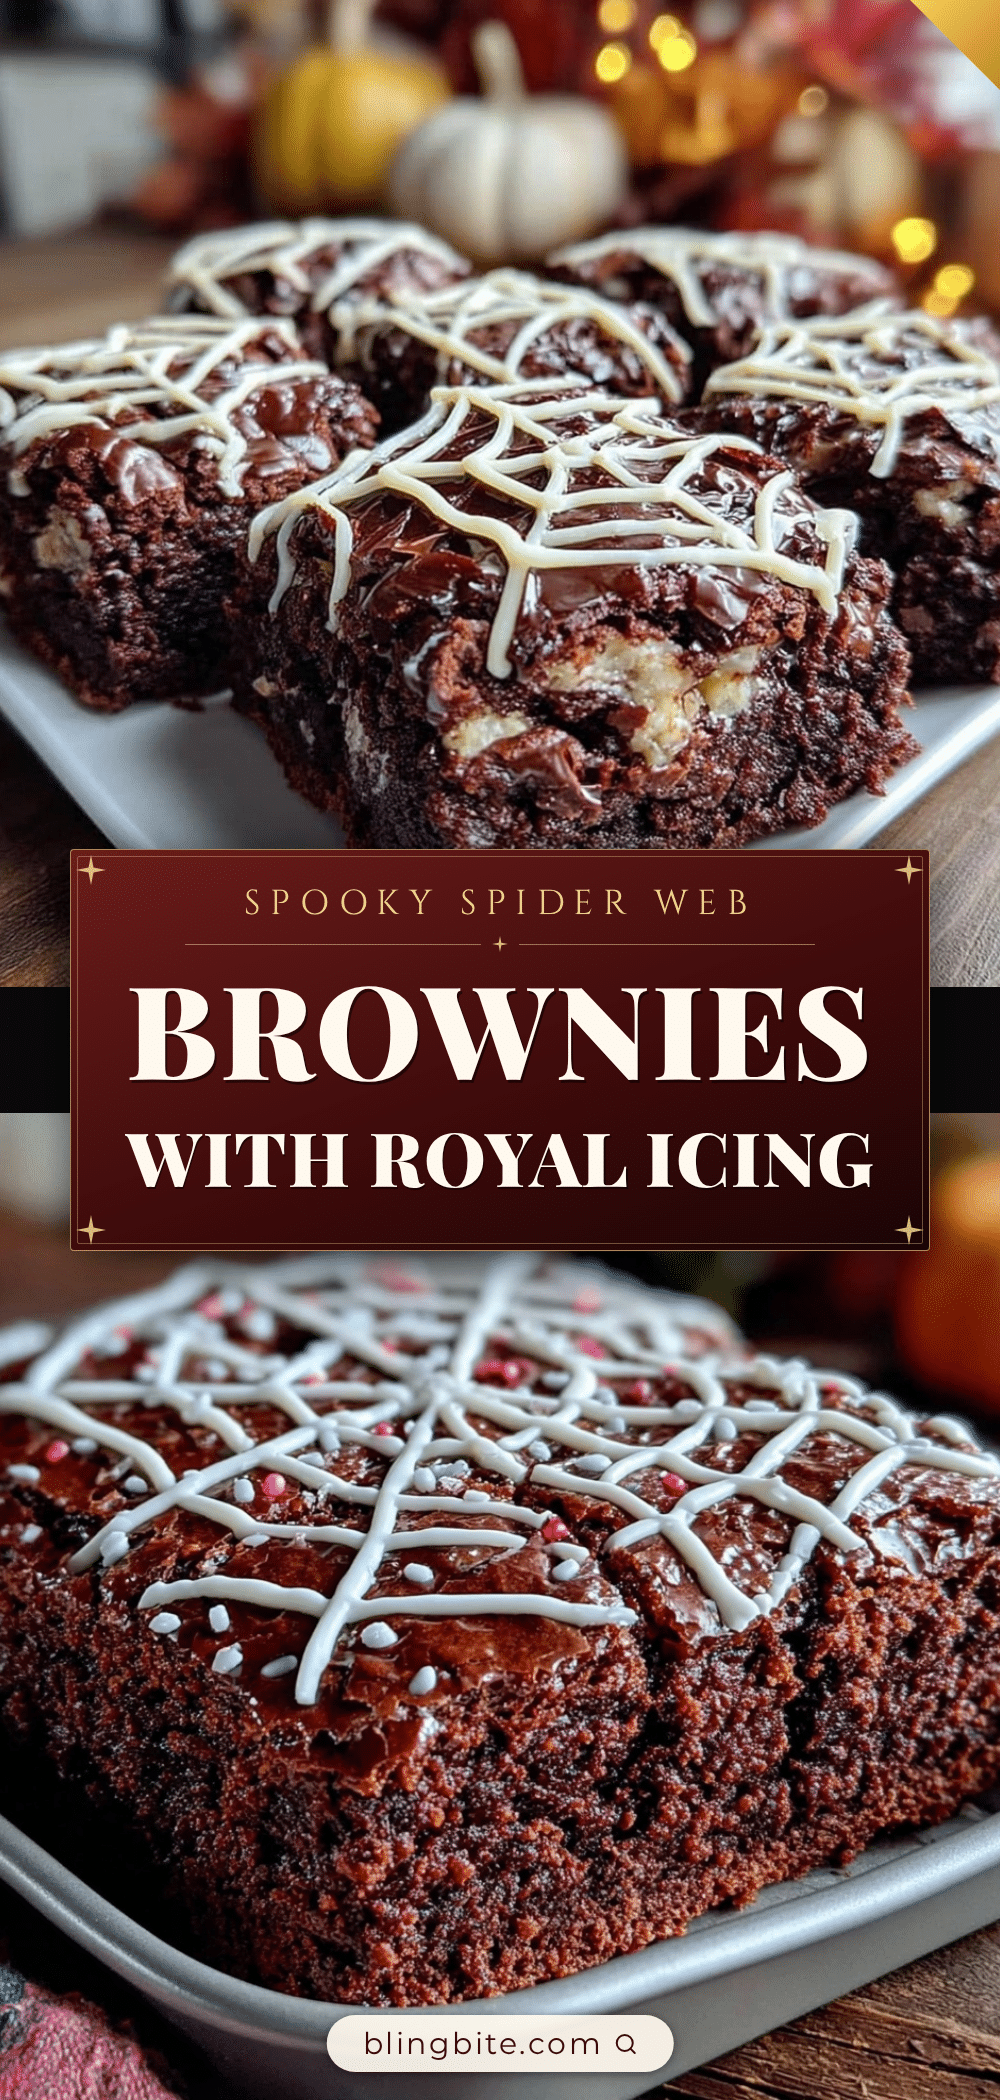
Perfect Spider Web Brownie Pan Recipe Easy Royal Icing Design Tutorial
A fudgy brownie base decorated with a simple yet spooky spider web design made from royal icing. Perfect for Halloween or any fun occasion, this recipe combines rich chocolate flavor with a crisp, sweet icing decoration.
- Prep Time: 15 minutes
- Cook Time: 30 minutes
- Total Time: 45 minutes
- Yield: 16 servings 1x
- Category: Dessert
- Cuisine: American
Ingredients
- 1/2 cup (113g) unsalted butter, melted
- 1 cup (200g) granulated sugar
- 2 large eggs, room temperature
- 1 tsp vanilla extract
- 3/4 cup (95g) all-purpose flour, sifted
- 1/3 cup (35g) unsweetened cocoa powder, sifted
- 1/4 tsp salt
- 1/4 tsp baking powder
- 1 cup (120g) powdered sugar, sifted
- 1 large egg white (or 2 tbsp meringue powder + 2 tbsp water)
- 1/2 tsp fresh lemon juice
- 1/4 tsp vanilla extract (optional)
- A few drops black gel food coloring
Instructions
- Preheat oven to 350°F (175°C). Line an 8×8 inch pan with parchment paper, leaving overhang for easy lifting.
- Melt the butter until fully liquid but not hot, about 30 seconds. Set aside to cool slightly.
- In a medium bowl, whisk together sugar and eggs until slightly thickened and pale, about 2 minutes with an electric mixer or 3-4 minutes by hand.
- Stir in vanilla extract and melted butter slowly, combining fully.
- In a separate bowl, sift together flour, cocoa powder, salt, and baking powder.
- Gradually add the dry ingredients to the wet mixture, folding gently with a spatula until just combined.
- Pour the batter into the prepared pan and smooth the top with a spatula.
- Bake for 25 to 30 minutes or until a toothpick inserted near the center comes out with a few moist crumbs.
- Remove from oven and let cool completely in the pan on a wire rack, about 1 hour.
- While brownies cool, prepare the royal icing: beat the egg white (or meringue powder mixture) until frothy.
- Gradually add powdered sugar, lemon juice, and vanilla, beating until thick and glossy, about 5-7 minutes.
- Divide the icing: reserve about 3/4 cup plain white icing and tint the rest with black gel food coloring.
- Spread the white icing evenly over the cooled brownie surface using an offset spatula or butter knife.
- Fill a piping bag with black icing and pipe concentric circles starting from the center of the brownie pan outward.
- Use a toothpick or skewer to drag lines outward from the center through the circles, creating the spider web pattern.
- Let the icing dry completely at room temperature for at least 2 hours before slicing.
Notes
If royal icing is too runny, add more powdered sugar to thicken. If too stiff, add a few drops of water. Decorate only when brownies are fully cool to prevent melting the icing. Let icing dry fully for best results. For vegan or gluten-free adaptations, substitute eggs with flax eggs and use gluten-free flour blend; use aquafaba-based royal icing for vegan option.
Nutrition
- Serving Size: 1 brownie (approxima
- Calories: 210
- Sugar: 18
- Fat: 12
- Carbohydrates: 25
- Protein: 3
Keywords: brownies, spider web design, royal icing, Halloween dessert, chocolate brownies, easy brownie recipe, festive brownies


