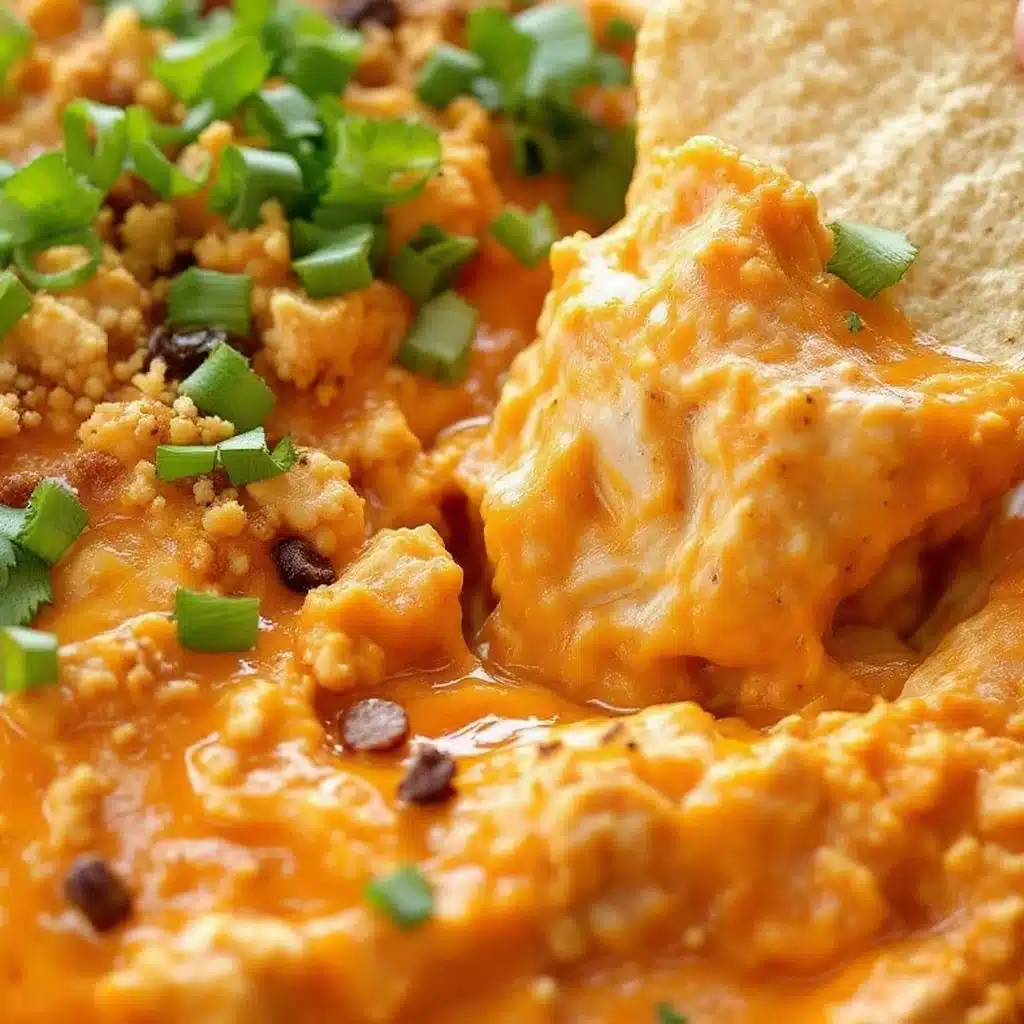
That first sharp, vinegary hit of Frank’s RedHot — the kind that makes your nose sting a little before you even take a bite — still takes me straight to my cousin’s basement apartment in Chicago. It was a freezing November afternoon, the Bears were playing some game I was only half-watching, and a slow cooker sat on the counter filled with what looked like a bubbling, cheesy mess. I remember grabbing a chip, dipping it in, and honestly, I didn’t say a word for a solid minute. I just stood there, chewing, processing the fact that something so simple could taste so ridiculously good. That was the day I learned that a great Buffalo chicken tailgate dip isn’t just about the heat — it’s about the creamy, cooling balance that keeps you going back for more, chip after chip.
Over the years, I’ve made this dip for Super Bowl parties, lazy Sunday afternoons, and even a surprise birthday gathering where it disappeared in under fifteen minutes. I’ve tweaked the ratios, swapped in different cheeses, and tested it with everything from celery sticks to soft pretzels. But the version I’m sharing today? This is the one that always gets the “can I get the recipe?” text the next morning. It’s the best easy Buffalo chicken tailgate dip recipe I’ve ever landed on — rich, spicy, and perfectly scoopable with a sturdy tortilla chip.
There’s no fussy technique here, no long list of obscure ingredients. It’s the kind of recipe that feels like a cheat code for hosting, the one you can throw together in a pinch and still look like you planned it all week. And honestly, that’s exactly why it’s become my go-to for game day and every casual get-together in between.
Why You’ll Love This Recipe
Look, I’ve made a lot of dips in my time. Some were great, some were fine, and a few ended up in the trash after one sad taste test. This Buffalo chicken tailgate dip is the one that survived every single experiment, and here’s why I think you’ll feel the same way after you try it.
- Quick & Easy : You only need about ten minutes of prep time. The oven does the heavy lifting, and you don’t have to stand over a stove stirring anything. Perfect for when guests show up early or you just forgot to plan ahead (no judgment, I’ve been there).
- Simple Ingredients : Everything on the list is something you can grab at any grocery store. No hunting down specialty items or expensive imported cheeses. Shredded chicken, cream cheese, hot sauce, ranch or blue cheese dressing, and a couple of other basics — that’s it.
- Perfect for Game Day : This dip was practically made for tailgating. It’s hearty enough to stand alone as a snack, but it also pairs beautifully with other finger foods like crispy loaded nachos or a platter of crunchy veggies.
- Crowd-Pleaser : I’ve watched people who claim they “don’t like spicy food” go back for thirds. The cream cheese and shredded cheddar mellow out the heat just enough to make it addictive without being overwhelming.
- Unbelievably Delicious : The texture is the real star here. It’s creamy, a little chunky from the chicken, and topped with a layer of melted cheese that gets all golden and bubbly. One bite and you’ll understand why this is my most-requested party recipe.
What sets this recipe apart from the dozens of others out there is the balance. I’ve tested the ratio of hot sauce to cream cheese until it hit that sweet spot where the tangy heat doesn’t overpower the richness. It’s not just another version — it’s the best easy Buffalo chicken tailgate dip recipe I’ve perfected over years of trial and error, and I genuinely think you’ll taste the difference the second you scoop into it.
This isn’t just good dip. It’s the kind that makes people hover around the kitchen island, asking when you’re making it again before they’ve even finished their first plate. And honestly, that’s the highest compliment a recipe can get.
What Ingredients You Will Need
This recipe uses simple, everyday ingredients to deliver that bold Buffalo flavor and creamy texture without any complicated steps. Most of these are probably already in your fridge or pantry, which is exactly how I like it.
- Cooked, Shredded Chicken : About 3 cups, which is roughly the amount you get from a rotisserie chicken. I usually grab one from the store to save time, but leftover grilled or baked chicken works great too. Just make sure it’s finely shredded so it mixes evenly into the dip.
- Cream Cheese : Two 8-ounce blocks, softened to room temperature. This is the backbone of the dip, giving it that luscious, scoopable texture. I recommend using full-fat cream cheese for the best results — low-fat versions can turn a little grainy when baked. Let it sit out for at least 30 minutes before mixing.
- Buffalo Hot Sauce : ¾ cup of your favorite brand. I’m partial to Frank’s RedHot Original because it has that perfect balance of heat and tang without being too vinegary. Feel free to use a spicier version if you like more kick, but stick with a classic cayenne-based sauce for the most authentic flavor.
- Ranch or Blue Cheese Dressing : ½ cup. This is where you can choose your own adventure. Ranch makes it extra creamy and mellow, while blue cheese adds a sharper, tangier note that pairs beautifully with the Buffalo sauce. I’ve used both, and honestly, it depends on my mood. For a true Buffalo experience, I lean toward blue cheese.
- Shredded Cheddar Cheese : 2 cups, divided. I use a mix of sharp cheddar and Monterey Jack for the best melt and flavor. Reserve about half a cup to sprinkle on top before baking so you get that gorgeous golden crust. Pre-shredded cheese works in a pinch, but freshly shredded melts much smoother because it doesn’t have the anti-caking coating.
- Crumbled Blue Cheese (Optional) : ¼ cup for garnishing. If you’re using blue cheese dressing, you might want to skip this, but I love adding a few crumbles on top right before serving for an extra pop of tangy flavor and texture.
- Green Onions : 3 to 4, thinly sliced. These add a fresh, mild oniony bite that cuts through the richness of the dip. I sprinkle them on after baking so they stay bright and crisp.
- Garlic Powder : 1 teaspoon. It adds a subtle savory depth that rounds out the flavors without being overpowering. Don’t skip it — it makes a difference.
- Salt and Black Pepper : To taste. Go easy on the salt since the hot sauce and cheese are already pretty salty. A few cracks of fresh black pepper right before serving is a nice touch.
For serving, you’ll want a sturdy tortilla chip that can handle a generous scoop without breaking. I love using thick restaurant-style chips or scoop-shaped ones for maximum dip-to-chip ratio. If you’re feeling fancy, this dip is also amazing with fresh celery sticks, carrot chips, or even warm soft pretzel bites.
Equipment Needed
You don’t need any fancy gadgets for this recipe, which is part of why I love it. Here’s what you’ll need:
- 9×13-inch Baking Dish : This size works perfectly for a generous batch that feeds a crowd. An 8×8-inch dish will work too if you want a thicker dip, just adjust the baking time slightly.
- Mixing Bowl : A medium-sized bowl for combining the ingredients. Nothing fancy, just something big enough to stir everything together without making a mess.
- Stand Mixer or Hand Mixer : Not strictly necessary, but it makes blending the cream cheese and hot sauce so much easier and smoother. If you don’t have one, a sturdy spatula and some elbow grease will do the job.
- Rubber Spatula : For scraping every last bit of dip into the baking dish. Trust me, you don’t want to waste any of this.
- Cutting Board and Knife : For slicing the green onions and any garnishes. A sharp chef’s knife makes quick work of it.
- Oven : Preheated to 375°F (190°C). That’s the sweet spot for getting the dip hot and bubbly without drying out the chicken.
If you don’t have a baking dish, you can use a cast iron skillet or even a small slow cooker. The slow cooker method takes a bit longer (about 2 hours on low), but it’s perfect for keeping the dip warm throughout a party. I’ve done it both ways, and honestly, the oven version gets a slightly better top crust, which I prefer.
Preparation Method
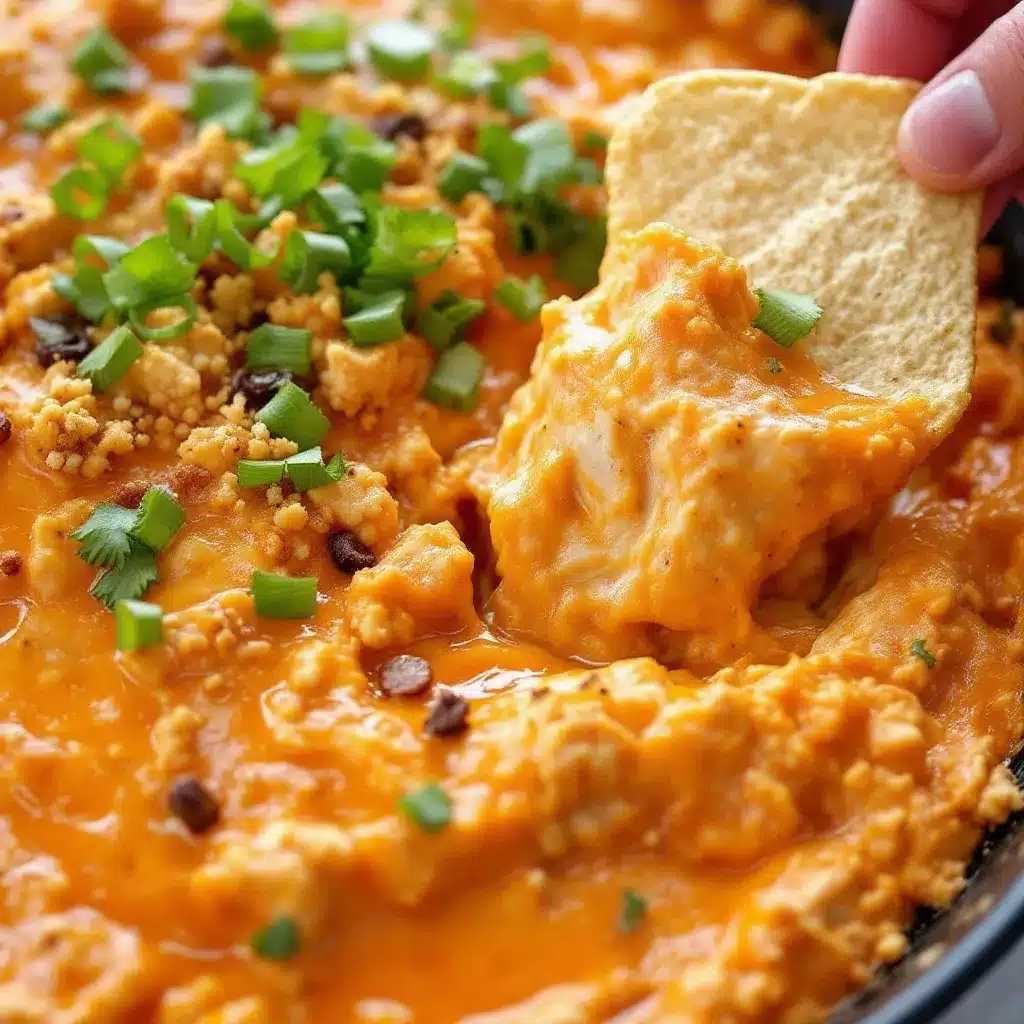
Let’s get to the fun part. This recipe comes together quickly, so I like to have all my ingredients prepped and measured before I start. It makes the whole process feel effortless.
Step 1: Preheat and Prep
Preheat your oven to 375°F (190°C). Lightly grease your 9×13-inch baking dish with a little cooking spray or a smear of butter. This helps prevent sticking and makes cleanup easier. While the oven heats up, make sure your cream cheese is soft and at room temperature. If you forgot to take it out earlier, you can microwave it in 10-second bursts until it’s just softened — but be careful not to melt it.
Step 2: Shred the Chicken
If you’re using a rotisserie chicken, remove the skin and bones, then shred the meat with two forks or your hands. You want the pieces to be small and uniform so they distribute evenly throughout the dip. Aim for about 3 cups of shredded chicken. If you’re using leftover chicken, just reheat it slightly in the microwave so it’s warm when you mix it in — this helps everything combine more smoothly.
Step 3: Mix the Cream Cheese Base
In your mixing bowl, combine the softened cream cheese, ¾ cup of Buffalo hot sauce, and ½ cup of ranch or blue cheese dressing. Beat with a hand mixer on medium speed until the mixture is completely smooth and well combined. There should be no lumps of cream cheese left. This usually takes about a minute. If you’re mixing by hand, use a spatula and really mash it against the sides of the bowl until it’s creamy.
Step 4: Add the Chicken and Cheese
Fold in the shredded chicken, 1 ½ cups of the shredded cheddar cheese, and the garlic powder. Stir until everything is evenly coated in that creamy, spicy mixture. At this point, taste a tiny bit (I know it’s tempting to eat a lot, but resist for now) and add salt and pepper if needed. Remember, the hot sauce and cheese are already salty, so go easy.
Step 5: Transfer to Baking Dish
Spread the mixture evenly into your prepared baking dish. Use the back of a spoon or a spatula to smooth it out into an even layer. Sprinkle the remaining ½ cup of shredded cheddar cheese over the top, covering the entire surface. This top layer will melt and brown into that irresistible cheesy crust.
Step 6: Bake
Place the dish in the preheated oven and bake for 20 to 25 minutes. You’ll know it’s ready when the dip is hot and bubbly around the edges and the cheese on top is melted and lightly golden. If you want a deeper golden-brown crust, you can switch the oven to broil for the last 1 to 2 minutes — but watch it closely so it doesn’t burn.
Step 7: Garnish and Serve
Remove the dip from the oven and let it rest for about 5 minutes. This helps it set slightly so it’s not too runny. Sprinkle the sliced green onions and crumbled blue cheese (if using) over the top. Serve warm with sturdy tortilla chips, celery sticks, or whatever dippers you love. I like to set it out with a small spoon so people can scoop it onto their plates without making a mess.
Cooking Tips & Techniques
Over the years, I’ve learned a few things the hard way so you don’t have to. Here are my best tips for making this dip absolutely perfect every single time.
Don’t Overbake It. I know it’s tempting to leave it in the oven until the top is super dark and crispy, but the dip can dry out if it bakes too long. You want it hot and bubbly, not stiff and separated. Pull it out as soon as the cheese is melted and the edges are gently bubbling. The residual heat will continue to cook it a little as it rests.
Room Temperature Cream Cheese is Non-Negotiable. I’ve made the mistake of trying to mix cold cream cheese, and it results in a lumpy, uneven dip. It’s frustrating and takes forever to smooth out. Set your cream cheese on the counter at least 30 minutes before you start, or give it a quick, gentle zap in the microwave if you’re short on time.
Shred Your Own Cheese. Pre-shredded cheese is convenient, I get it. But it’s coated with potato starch or cellulose to prevent clumping, which means it doesn’t melt as smoothly. For this dip, where melted cheese is kind of the whole point, taking five minutes to shred a block of cheddar makes a noticeable difference in the final texture.
Use a Sturdy Chip. This dip is thick and hearty, so a flimsy chip will break under the weight. I always go for thick, restaurant-style tortilla chips or the scoop-shaped ones that can hold a generous amount. If you’re serving a crowd, set out a few different dippers — I love pairing this with crispy buffalo cauliflower bites for a fun, veggie-forward option that still hits that same spicy note.
Make It Ahead of Time. This dip is actually one of those rare recipes that tastes even better after the flavors have had time to meld. You can assemble it completely (minus the top cheese and garnishes) up to 24 hours in advance, cover it, and keep it in the fridge. When you’re ready to bake, just add the remaining cheese on top and add about 10 extra minutes to the baking time since it’s starting from cold.
Variations & Adaptations
One of the best things about this dip is how customizable it is. Here are a few ways I’ve adapted it over the years to suit different cravings and dietary needs.
Spicy Buffalo Ranch Dip : If you love ranch dressing as much as I do, double down on it. Use ranch dressing instead of blue cheese, and add a teaspoon of dry ranch seasoning mix to the cream cheese base. It gives the dip a wonderfully herbaceous, tangy flavor that pairs perfectly with the hot sauce. This version is always a hit with kids and anyone who prefers a milder heat.
Smoky Chipotle Buffalo Dip : For a deeper, smokier flavor, substitute half of the Buffalo hot sauce with canned chipotle peppers in adobo sauce. Finely mince one or two peppers and stir them in along with a tablespoon of the adobo sauce. The result is a dip with a complex, earthy heat that’s totally different from the classic version. I love serving this one with roasted red pepper hummus on the same platter for a colorful spread.
Healthier Lightened-Up Dip : You can definitely make this dip a little lighter without sacrificing too much flavor. Use reduced-fat cream cheese and a lighter ranch dressing. Swap half the shredded cheddar for a reduced-fat version. The texture will be slightly less rich, but it’s still creamy and satisfying. I’ve also made it with shredded rotisserie chicken breast only, which keeps it leaner.
Vegetarian Buffalo Dip : Leave out the chicken and double up on the shredded cheese, or add a can of drained and rinsed chickpeas for some protein and texture. Another option is to use frozen, thawed, and well-drained spinach or chopped artichoke hearts. The creamy, spicy base works surprisingly well with vegetables.
Slow Cooker Method : For a truly hands-off approach, combine all the ingredients (except the top cheese and garnishes) in a slow cooker. Cook on low for 2 to 3 hours, stirring occasionally, until everything is melted and hot. Sprinkle the remaining cheese on top during the last 15 minutes, then garnish and serve straight from the slow cooker. This is my go-to method for large parties because it keeps the dip warm for hours.
Serving & Storage Suggestions
This dip is best served warm, straight from the oven or slow cooker. I like to set it out on a trivet or a small cutting board with a pile of tortilla chips on one side and crunchy vegetables like celery sticks, carrot chips, and bell pepper strips on the other. The cool, crisp veggies are a perfect contrast to the hot, creamy dip.
For a full game day spread, I love pairing this dip with other shareable bites. It fits right in alongside seven-layer taco dip cups for a fun, handheld twist, or with crispy bacon-wrapped jalapeno popper football bites for a truly epic snack table. If you’re serving a bigger meal, this dip also works as a hearty appetizer before something like tender slow cooker chicken fajitas.
Storage : Leftover dip keeps well in an airtight container in the refrigerator for up to 4 days. The flavors actually meld together even more overnight, so it might taste even better the next day. I’ve been known to eat it cold straight from the fridge with a spoon — don’t judge me until you’ve tried it.
Reheating : The best way to reheat this dip is in the oven or a toaster oven at 350°F (175°C) for about 10 to 15 minutes, until it’s hot and bubbly again. You can also microwave individual portions in 30-second bursts, but the texture won’t be quite as creamy. If the dip seems a little thick after refrigeration, stir in a tablespoon or two of milk or extra hot sauce before reheating to loosen it up.
Freezing : I don’t recommend freezing this dip. The cream cheese-based mixture can become grainy and separate when thawed, and the texture just isn’t the same. It’s so quick to make that you’re better off preparing it fresh when you need it.
Nutritional Information & Benefits
Let’s be real — this is indulgent party food, and I’m not here to pretend otherwise. But it does have a few redeeming qualities worth mentioning. Here’s an approximate breakdown per serving (about ¼ cup of dip, without chips):
- Calories: 220
- Fat: 18g
- Carbohydrates: 3g
- Protein: 12g
- Fiber: 0g
- Sugar: 1g
The chicken provides a solid amount of lean protein, which helps make this dip more satisfying than your average cheese dip. The cream cheese adds calcium and a good dose of healthy fats that keep you full. If you use blue cheese dressing, you’re also getting a little bit of probiotics, which is a nice bonus for gut health.
For those watching their carb intake, this dip is naturally low in carbs and can easily fit into a keto or low-carb lifestyle — just serve it with celery sticks or pork rinds instead of tortilla chips. It’s also gluten-free as written, as long as you check your hot sauce and dressing labels for any hidden wheat-based thickeners.
I like to think of this dip as a treat, not a daily staple. It’s the kind of thing you make for a celebration, a big game, or a cozy night in with friends. And honestly, a little indulgence every now and then is good for the soul.
Conclusion
This best easy Buffalo chicken tailgate dip recipe is everything I want in a party dish — it’s quick to throw together, uses ingredients I almost always have on hand, and it disappears faster than almost anything else I’ve ever served. The creamy, spicy, cheesy combination is just plain addictive, and the fact that you can customize it to suit your own taste makes it endlessly versatile.
I’d love for you to try this recipe and make it your own. Maybe you’ll add extra hot sauce for more heat, or swap in your favorite melty cheese. Maybe you’ll serve it with soft pretzels instead of chips. Whatever you do, I hope it becomes a staple in your kitchen the way it has in mine.
If you make this dip, I’d be so happy if you came back and let me know how it turned out. Leave a comment below, share a photo, or tag me on social media — I genuinely love seeing your creations. And if you have a variation that you swear by, please share it. The best recipes are the ones we pass around and make our own.
Now go preheat that oven. Your game day spread is about to get a whole lot better.
Frequently Asked Questions
Can I use canned chicken for this recipe?
Yes, you absolutely can. Drain two 12.5-ounce cans of chunk chicken breast and shred it with a fork. It’s a great shortcut, though the texture will be slightly softer than freshly shredded rotisserie chicken. Just make sure to pat it dry with paper towels so the dip doesn’t turn watery.
How can I make this dip less spicy?
Reduce the Buffalo hot sauce to ½ cup and add an extra ¼ cup of ranch or blue cheese dressing. You can also use a mild hot sauce or a “Buffalo wing sauce” that’s labeled as mild. The cream cheese and cheddar help mellow out the heat too, so even with less sauce, you’ll still get that classic Buffalo flavor.
Can I make this dip in a slow cooker?
Yes, and it’s perfect for keeping warm during a party. Combine all the ingredients except the top cheese and garnishes in a slow cooker. Cook on low for 2 to 3 hours, stirring occasionally. Sprinkle the remaining cheese on top during the last 15 minutes, then garnish and serve directly from the slow cooker.
How far in advance can I prepare this dip?
You can assemble the dip completely (minus the top cheese and garnishes) up to 24 hours ahead. Cover it tightly and store it in the refrigerator. When you’re ready to bake, add the remaining cheese on top and bake for about 30 to 35 minutes, since it’s starting from cold.
What are the best dippers for this dip besides tortilla chips?
This dip is incredibly versatile. Try it with thick-cut potato chips, soft pretzel bites, toasted baguette slices, celery sticks, carrot chips, bell pepper strips, or even crispy bacon strips for a low-carb option. Each dipper brings a different texture and flavor that pairs beautifully with the creamy, spicy dip.
Pin This Recipe!

Best Easy Buffalo Chicken Tailgate Dip Recipe

This creamy, spicy, and perfectly scoopable Buffalo chicken dip is the ultimate game day appetizer. Made with simple ingredients like shredded chicken, cream cheese, and hot sauce, it’s quick to prepare and always a crowd-pleaser.
- Prep Time: 10 minutes
- Cook Time: 25 minutes
- Total Time: 35 minutes
- Yield: 8 servings 1x
- Category: Appetizer
- Cuisine: American
Ingredients
- 3 cups cooked, shredded chicken (about 1 rotisserie chicken)
- 2 (8-ounce) blocks cream cheese, softened
- 3/4 cup Buffalo hot sauce (e.g., Frank’s RedHot)
- 1/2 cup ranch or blue cheese dressing
- 2 cups shredded cheddar cheese, divided
- 1/4 cup crumbled blue cheese (optional, for garnish)
- 3–4 green onions, thinly sliced
- 1 teaspoon garlic powder
- Salt and black pepper to taste
Instructions
- Preheat oven to 375°F (190°C). Lightly grease a 9×13-inch baking dish.
- Shred the cooked chicken into small, uniform pieces.
- In a mixing bowl, beat softened cream cheese, hot sauce, and dressing with a hand mixer until smooth.
- Fold in shredded chicken, 1 1/2 cups of the shredded cheddar, and garlic powder. Season with salt and pepper to taste.
- Spread mixture evenly into the prepared baking dish. Sprinkle remaining 1/2 cup cheddar on top.
- Bake for 20-25 minutes until hot and bubbly. For a golden top, broil for 1-2 minutes (watch closely).
- Let rest for 5 minutes. Garnish with green onions and crumbled blue cheese (if using). Serve warm with tortilla chips, celery sticks, or other dippers.
Notes
For a make-ahead option, assemble the dip (without top cheese and garnishes) up to 24 hours in advance. Add top cheese before baking and increase baking time by 10 minutes. For a slow cooker version, combine all ingredients except top cheese and garnishes; cook on low for 2-3 hours, then add top cheese for the last 15 minutes.
Nutrition
- Serving Size: 1/4 cup
- Calories: 220
- Sugar: 1
- Sodium: 580
- Fat: 18
- Saturated Fat: 10
- Carbohydrates: 3
- Protein: 12
Keywords: Buffalo chicken dip, tailgate dip, game day appetizer, easy dip recipe, spicy dip


