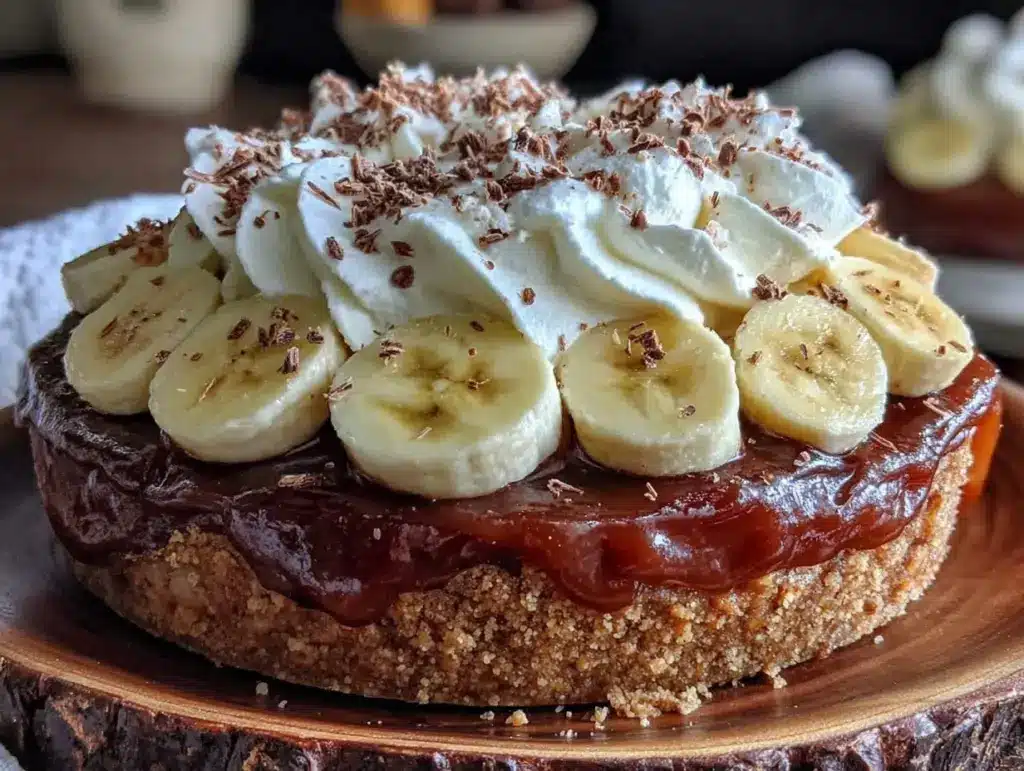
“You know that feeling when a dessert pulls you in from the hallway, and suddenly your plans for the evening change entirely? That’s exactly what happened one damp Thursday evening when my neighbor, Mrs. Lopez, invited me over for a cup of tea and this amazing creamy banoffee pie. Honestly, I wasn’t expecting much—just a casual visit—but the moment I took a bite, it was like a little party in my mouth. The layers of rich toffee and ripe banana, all wrapped up in a buttery crust, felt like comfort food with a bit of flair.
Funny thing, I had actually forgotten the pie in the fridge earlier that day and almost didn’t try it, but I’m so glad I did. Maybe you’ve been there—juggling a million things and almost missing a gem because of a busy schedule. This creamy banoffee pie with rich toffee and banana layers isn’t just another sweet treat; it’s the kind of dessert that sticks with you. It’s the kind that makes you close your eyes and savor every mouthful, even if you’re tired or distracted.
Ever since that night, I’ve been obsessed with recreating that perfect balance of silky toffee, fresh bananas, and luscious cream. Let me tell you, it’s not as fussy as it sounds, but it does require a gentle hand with the toffee to get it just right. If you love desserts that combine smooth textures with a touch of caramel sweetness, this recipe might just become your new favorite.
Why You’ll Love This Recipe
I’ve tested this creamy banoffee pie recipe more times than I can count, tweaking the toffee thickness and creaminess to get that ideal, melt-in-your-mouth experience. Here’s why this recipe stands out and why you’ll want to make it again and again:
- Quick & Easy: The entire pie comes together in under an hour, making it perfect for last-minute dessert cravings or weekend gatherings.
- Simple Ingredients: No need to hunt down obscure items; everything you need is likely already in your pantry or fridge.
- Perfect for Any Occasion: Whether it’s a casual family dinner, a potluck, or a cozy night in, this pie always impresses.
- Crowd-Pleaser: Kids and adults alike rave about the creamy texture combined with the natural sweetness of bananas and toffee.
- Unbelievably Delicious: The luscious layers create a flavor combo that feels indulgent without being overwhelming.
What makes this recipe truly different? The homemade toffee layer, which I cook slowly to reach that perfect, rich consistency without burning. Plus, blending the cream just right ensures a silky finish that’s not too stiff or runny. Honestly, it’s the kind of comfort food you want to savor while chatting with friends or savoring a quiet moment alone.
If you’ve ever struggled with soggy crusts or runny fillings in banoffee pies, this version fixes those issues with a simple toffee that sets nicely and a crust that stays crisp. I love how it’s easy enough for beginners but satisfying enough for dessert lovers who appreciate a well-crafted treat.
What Ingredients You Will Need
This creamy banoffee pie recipe uses straightforward ingredients, each playing its part to build that classic flavor and texture combo without fuss. Most of these are pantry staples, and the fresh bananas add that essential natural sweetness and freshness.
- For the crust:
- Digestive biscuits or graham crackers, crushed (about 200g / 7 oz) – I prefer McVitie’s for a sturdy base
- Unsalted butter, melted (100g / 3.5 oz) – adds richness and helps the crust hold together
- Optional: a pinch of cinnamon for warmth (adds a subtle depth)
- For the toffee layer:
- Sweetened condensed milk (1 can, 397g / 14 oz) – the star of the toffee, look for Nestlé or similar trusted brands
- Light brown sugar (100g / ½ cup) – brings caramel notes
- Unsalted butter (50g / 1.75 oz) – for creaminess and smooth texture
- Heavy cream (120ml / ½ cup) – makes the toffee luscious and spreadable
- Vanilla extract (1 tsp) – for a gentle aromatic lift
- For the banana layer:
- Ripe bananas (3 medium) – choose ones with a few brown spots for sweetness and softness
- For the cream topping:
- Heavy whipping cream (300ml / 1¼ cups), chilled – whipped until soft peaks form
- Powdered sugar (2 tbsp) – just enough to sweeten without overpowering
- Optional: shaved dark chocolate or cocoa powder for garnish
Substitution tips: For a dairy-free version, swap the butter and cream for plant-based alternatives like coconut cream and vegan butter. If you want to make it gluten-free, simply use gluten-free biscuits for the crust. And if bananas aren’t your thing, sliced ripe pears can be a surprisingly good alternative in this pie.
Equipment Needed
- A 9-inch (23 cm) springform or loose-bottom tart pan – makes it easier to remove the pie without damaging the layers
- Mixing bowls – at least two, one for the crust and one for the toffee
- Electric mixer or whisk – to whip the cream to perfect softness
- Saucepan – for cooking the toffee layer gently
- Spatula or wooden spoon – for stirring the toffee without scratching your pan
- Measuring cups and spoons – to get those precise ingredient amounts
If you don’t have a springform pan, a regular pie dish works fine, just be extra careful when serving. For whipping cream, an electric hand mixer speeds things up, but a sturdy whisk and some patience do the job too. When it comes to the saucepan, a heavy-bottomed one helps prevent scorching the toffee — I’ve learned that the hard way!
Preparation Method
- Prepare the crust (10 minutes prep + 15 minutes chilling): Crush the digestive biscuits into fine crumbs using a food processor or by placing them in a sealed bag and bashing with a rolling pin. Mix the crumbs with melted butter (and cinnamon if using) until the mixture resembles wet sand. Press this evenly into the base and up the sides of your tart pan. Pop it in the fridge to chill while you make the toffee.
- Make the toffee layer (15-20 minutes): In a medium saucepan, combine the sweetened condensed milk, brown sugar, and butter over low heat. Stir continuously with a wooden spoon to prevent sticking or burning. After the butter melts and sugar dissolves, slowly pour in the cream and add the vanilla extract. Continue stirring gently until the mixture thickens to a smooth, glossy toffee consistency. This should take about 10 minutes—watch closely to avoid scorching. Remove from heat and let it cool slightly.
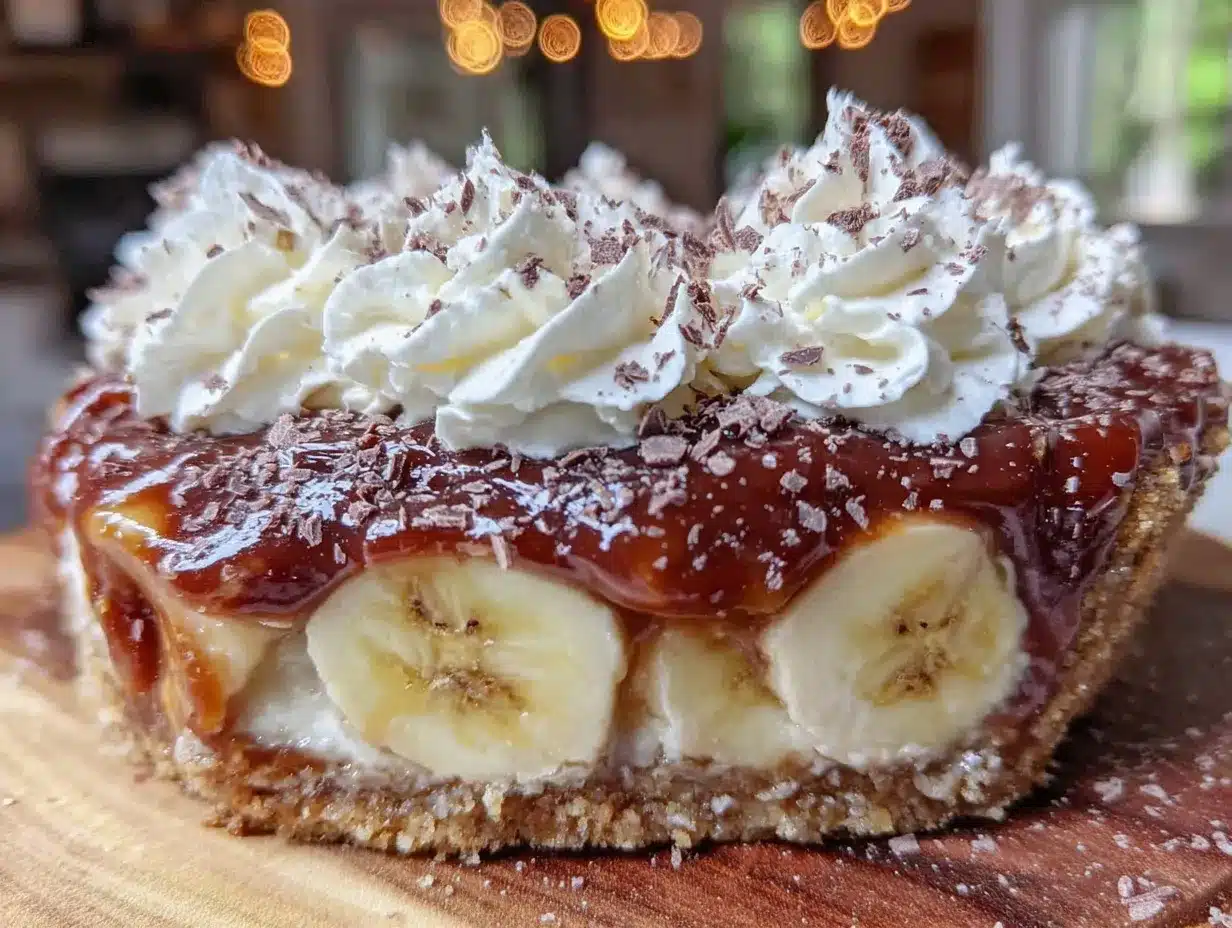
- Assemble the toffee and banana layers (10 minutes): Pour the warm toffee over the chilled crust and spread evenly. Slice the ripe bananas into thin rounds and arrange them carefully on top of the toffee layer. This layering prevents the bananas from turning mushy and keeps the pie neat.
- Whip the cream topping (5-7 minutes): Using an electric mixer or whisk, beat the chilled heavy cream with powdered sugar until soft peaks form. Don’t overbeat—stop when the cream holds shape but still feels smooth. Spread the whipped cream over the banana layer, creating a fluffy, even top.
- Chill and serve (at least 2 hours): Refrigerate the pie for at least two hours to let the layers set and flavors meld. Before serving, garnish with shaved dark chocolate or a light dusting of cocoa powder if you like. Slice gently with a warm knife for clean edges.
Pro tip: If your toffee turns out too thin, don’t panic! Pop it back on low heat for a few minutes to thicken, stirring constantly. Also, if your bananas brown quickly, a light brush of lemon juice keeps them fresh and vibrant.
Cooking Tips & Techniques
Making creamy banoffee pie might seem straightforward, but a few tricks can make a world of difference. First, patience is key when cooking the toffee. Low and slow beats high heat here—rushing risks burning or curdling. I’ve learned that stirring constantly with a wooden spoon prevents lumps and scorched spots.
Another tip is chilling your crust thoroughly before pouring in the toffee. This keeps the crust crisp and stops it from soaking up too much moisture. I once skipped this step, and the crust got soggy within hours—lesson learned!
For perfectly whipped cream, make sure your bowl and beaters are cold. If you’re short on time, pop them in the freezer for 10 minutes before starting. Also, stopping when soft peaks form gives a nice texture that’s creamy but stable enough to hold its shape.
When slicing the pie, warm your knife under hot water and wipe it dry before each cut. This simple trick helps you get neat slices without dragging the layers apart.
Lastly, multitasking helps speed things up. While the crust chills, you can prep your bananas and start the toffee. Just keep an eye on the toffee while it cooks—once it thickens, the rest is smooth sailing.
Variations & Adaptations
- Nutty Twist: Add a sprinkle of toasted pecans or walnuts between the banana and cream layers for extra crunch and a toasty flavor.
- Chocolate Banoffee: Mix a tablespoon of cocoa powder into the toffee layer or drizzle melted chocolate over the whipped cream for a mocha-inspired treat.
- Vegan Version: Use coconut condensed milk, coconut cream, and vegan butter substitutes. Replace heavy cream with chilled coconut cream whipped until fluffy. Bananas remain the same, of course!
- Seasonal Fruit Swap: In warmer months, swap bananas for fresh sliced mango or ripe peaches for a tropical spin.
- Lower Sugar Option: Use a sugar-free condensed milk alternative and reduce powdered sugar in the cream. The natural sweetness of bananas helps balance flavors.
Personally, I once tried adding a layer of crushed ginger biscuits to the crust mix for a spiced variation—it was unexpectedly delicious and added a nice warmth that paired wonderfully with the toffee.
Serving & Storage Suggestions
This creamy banoffee pie is best served chilled, straight from the fridge, so the toffee stays firm and the cream maintains its airy texture. Serve slices on simple white plates to let the golden toffee and banana layers shine.
Pair it with a cup of strong coffee or a light dessert wine like a late-harvest Riesling for a lovely balance. For something non-alcoholic, a mug of chai tea complements the caramel notes beautifully.
Store leftover pie covered in the refrigerator for up to 3 days. The flavors actually deepen over time, though the crust may soften slightly. If you prefer a crisper crust, try serving it within the first 24 hours.
Reheating isn’t recommended as it can melt the cream and alter the texture of the toffee. If you want a warm dessert, consider making individual banoffee tarts where you can reheat the crust before adding the toppings.
Nutritional Information & Benefits
Each slice (assuming 8 slices per pie) contains approximately:
| Calories | ~350 kcal |
|---|---|
| Fat | 18g (mostly from butter and cream) |
| Sugar | 28g (including natural sugars from bananas) |
| Protein | 4g |
| Carbohydrates | 43g |
The bananas provide potassium and dietary fiber, while the dairy ingredients offer calcium and vitamin D. Of course, this is an indulgent dessert, so enjoy it in moderation.
If you’re sensitive to gluten, just swap the crust for a gluten-free biscuit base. For those watching carbs, try replacing the crust with crushed nuts and reducing sugar in the toffee.
Conclusion
This creamy banoffee pie with rich toffee and banana layers is a dessert that feels both nostalgic and fresh. Its balance of smooth cream, sweet bananas, and luscious toffee has won over skeptics in my circle—plus it’s surprisingly simple to make, even on busy days.
Feel free to tweak it to your taste: more bananas, a thicker toffee layer, or a dash of cinnamon in the crust. The best part? It’s hard to go wrong, and it always brings a smile to the table.
I’d love to hear how you make it your own—drop a comment or share your adaptations! Go on, treat yourself to a slice (or two) and savor that creamy, dreamy banoffee goodness. Happy baking!
Frequently Asked Questions
Can I make the toffee layer ahead of time?
Yes! You can prepare the toffee a day in advance and refrigerate it in an airtight container. Warm it slightly before spreading over the crust to make it easier to work with.
What’s the best way to keep bananas from browning?
Brushing banana slices lightly with lemon juice or pineapple juice helps prevent browning and keeps them looking fresh longer.
Can I freeze banoffee pie?
Freezing isn’t recommended because the whipped cream and bananas don’t freeze well and can turn mushy when thawed.
Is there a shortcut to making the toffee layer?
You can use ready-made dulce de leche as a substitute, but homemade toffee has a fresher, richer flavor and better texture.
How do I prevent the crust from becoming soggy?
Chilling the crust before adding the toffee helps. Also, spreading the toffee while it’s warm but not hot creates a barrier that protects the crust from moisture.
Pin This Recipe!
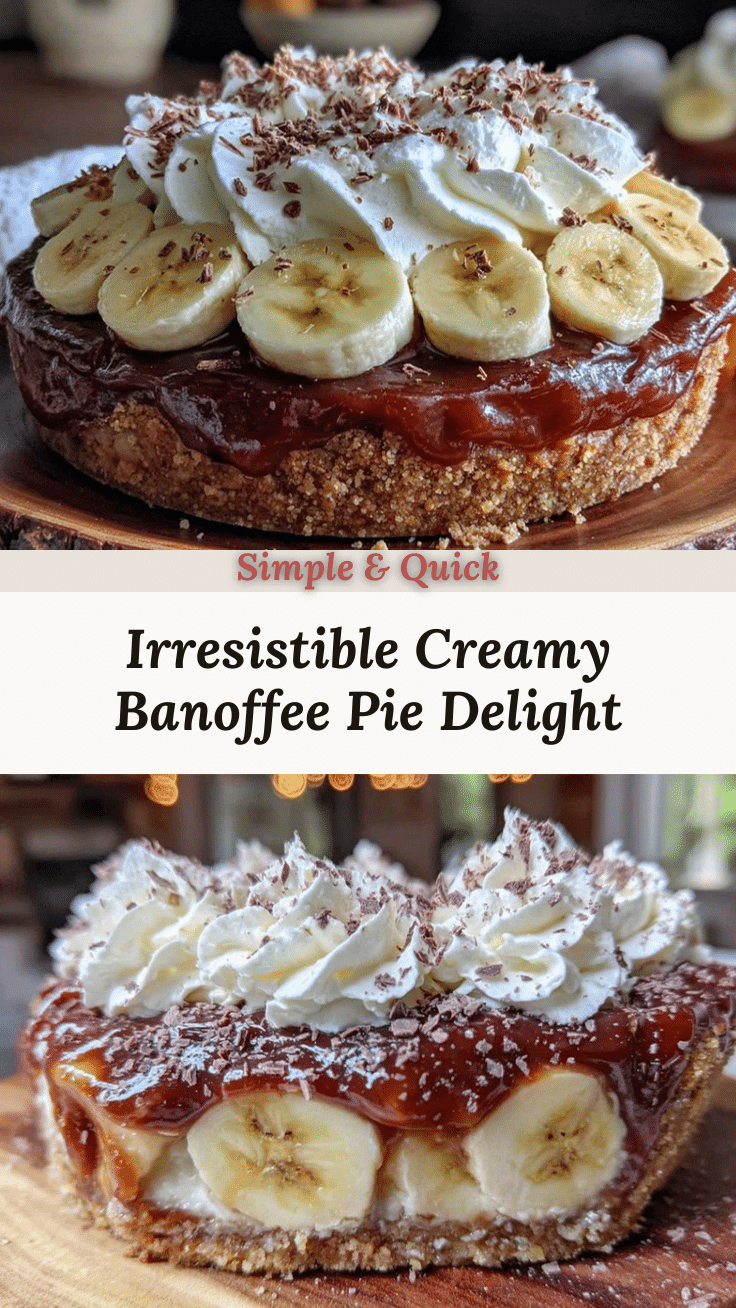
Creamy Banoffee Pie Recipe Easy Homemade Toffee Banana Layers

A luscious banoffee pie featuring layers of rich homemade toffee, ripe bananas, and whipped cream on a buttery biscuit crust. This easy recipe delivers a perfect balance of silky toffee and fresh banana sweetness.
- Prep Time: 10 minutes
- Cook Time: 20 minutes
- Total Time: 2 hours 30 minutes
- Yield: 8 servings 1x
- Category: Dessert
- Cuisine: British
Ingredients
- 200g (7 oz) digestive biscuits or graham crackers, crushed
- 100g (3.5 oz) unsalted butter, melted
- Pinch of cinnamon (optional)
- 1 can (397g / 14 oz) sweetened condensed milk
- 100g (½ cup) light brown sugar
- 50g (1.75 oz) unsalted butter
- 120ml (½ cup) heavy cream
- 1 tsp vanilla extract
- 3 medium ripe bananas
- 300ml (1¼ cups) heavy whipping cream, chilled
- 2 tbsp powdered sugar
- Shaved dark chocolate or cocoa powder for garnish (optional)
Instructions
- Prepare the crust (10 minutes prep + 15 minutes chilling): Crush the digestive biscuits into fine crumbs using a food processor or by placing them in a sealed bag and bashing with a rolling pin. Mix the crumbs with melted butter (and cinnamon if using) until the mixture resembles wet sand. Press this evenly into the base and up the sides of your tart pan. Pop it in the fridge to chill while you make the toffee.
- Make the toffee layer (15-20 minutes): In a medium saucepan, combine the sweetened condensed milk, brown sugar, and butter over low heat. Stir continuously with a wooden spoon to prevent sticking or burning. After the butter melts and sugar dissolves, slowly pour in the cream and add the vanilla extract. Continue stirring gently until the mixture thickens to a smooth, glossy toffee consistency. This should take about 10 minutes—watch closely to avoid scorching. Remove from heat and let it cool s…
- Assemble the toffee and banana layers (10 minutes): Pour the warm toffee over the chilled crust and spread evenly. Slice the ripe bananas into thin rounds and arrange them carefully on top of the toffee layer.
- Whip the cream topping (5-7 minutes): Using an electric mixer or whisk, beat the chilled heavy cream with powdered sugar until soft peaks form. Spread the whipped cream over the banana layer, creating a fluffy, even top.
- Chill and serve (at least 2 hours): Refrigerate the pie for at least two hours to let the layers set and flavors meld. Before serving, garnish with shaved dark chocolate or a light dusting of cocoa powder if desired. Slice gently with a warm knife for clean edges.
Notes
Cook the toffee slowly over low heat and stir constantly to avoid burning. Chill the crust thoroughly before adding the toffee to prevent sogginess. Use a warm knife to slice the pie for clean edges. For dairy-free or gluten-free versions, substitute ingredients as suggested. Brushing banana slices with lemon juice helps prevent browning.
Nutrition
- Serving Size: 1 slice (1/8 of pie)
- Calories: 350
- Sugar: 28
- Fat: 18
- Carbohydrates: 43
- Protein: 4
Keywords: banoffee pie, creamy banoffee pie, homemade toffee, banana dessert, easy banoffee pie, dessert recipe, layered pie