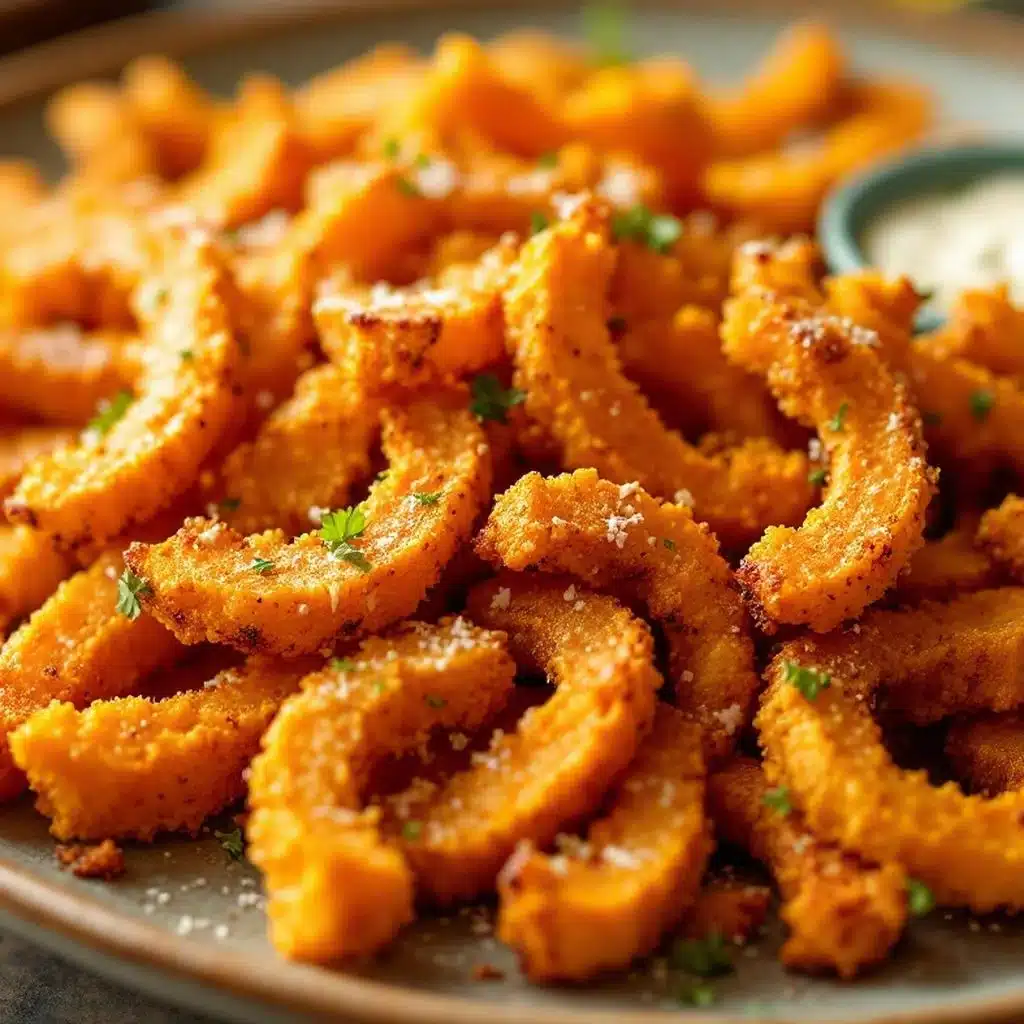
My husband looked at me across the dinner table and said, “Are these… fries?” with this weird mix of suspicion and hope. I’d just pulled a baking sheet out of the oven, and the kitchen smelled like roasted squash and salty Parmesan — but he wasn’t buying it yet. He’s a potato guy through and through, so when I told him these were butternut squash fries, I braced myself for the polite push-around-the-plate move. Instead, he reached for another one. And then another. By the end of the meal, the plate was empty, and he asked if I could make them again next week.
That’s the thing about these crispy Parmesan butternut squash fries. They look like the real deal — golden, craggy, with little bits of cheese clinging to the edges — but they sneak in a whole lot of vegetable without anyone feeling cheated. The squash gets sweet and tender on the inside while the outside turns shatteringly crisp, thanks to a clever coating and a hot oven. And the Parmesan? It melts into these salty, nutty little crisps that make every single bite worth it.
I didn’t set out to trick anyone, honestly. I just had a butternut squash sitting on my counter that I kept walking past, feeling guilty. Soup felt too predictable, and roasting it plain felt boring. So I sliced it into fry shapes, tossed it with some pantry staples, and crossed my fingers. Turns out, crossing your fingers while cooking works more often than you’d think. These fries are now my go-to when I want something that feels indulgent but is actually pretty good for you. No one has to know how easy they are.
Why You’ll Love This Recipe
Let’s be real — getting vegetables into fry form is never a bad idea. But these crispy Parmesan butternut squash fries go beyond just being “healthy-ish.” They’re genuinely delicious, and I’ve tested them enough times to know they deliver every single time. Here’s why they keep showing up on my table:
- Quick & Easy: From cutting board to table in about 35 minutes. No soaking, no double-frying, no complicated steps. Just slice, season, bake, and eat.
- Simple Ingredients: You need a butternut squash, some Parmesan, breadcrumbs, and basic spices. That’s it. No fancy trips to specialty stores.
- Perfect for Fall & Beyond: Obviously they scream autumn, but I make these year-round. They’re great for weeknight dinners, holiday side dishes, or game-day snacking when you want something lighter than traditional fries.
- Crowd-Pleaser: I’ve served these to picky eaters, vegetable skeptics, and full-on squash haters. Every single person has gone back for seconds. The Parmesan does the heavy lifting here.
- Unbelievably Delicious: The contrast between the crispy, salty exterior and the soft, sweet interior is next-level. Dip them in garlic aioli or ranch, and you’ll forget regular fries exist.
What makes this recipe different from all the other squash fry recipes out there? It’s the technique. Most recipes end up with soggy, limp fries that taste more like steamed squash than anything crispy. I figured out that coating the fries in a mix of panko and Parmesan, then baking them at high heat on a wire rack, gives you that crunch without the grease. It’s not rocket science — it’s just a few small tweaks that make a huge difference. This is the version I keep coming back to, and I think you will too.
What Ingredients You Will Need
This recipe uses simple, wholesome ingredients that work together to create something genuinely crave-worthy. Most of these are probably already in your kitchen, which makes this an easy last-minute side dish or snack.
- Butternut squash (1 medium, about 2-3 pounds): Look for one that feels heavy for its size with firm, unblemished skin. You’ll want to peel it and cut it into fry-shaped sticks about ½-inch thick. Pro tip: the pre-cut squash from the grocery store works in a pinch, but whole squash is cheaper and stays fresher longer.
- Parmesan cheese (½ cup, finely grated): Please, please use real Parmesan here — not the green can stuff. The pre-grated kind has anti-caking agents that prevent melting, and you want that cheese to melt into crispy little bits. I recommend a block of Parmigiano-Reggiano if you can swing it. The flavor is nutty and salty in a way that makes these fries addictive.
- Panko breadcrumbs (⅓ cup): Regular breadcrumbs are too fine and won’t give you that craggy, crunchy texture. Panko is the way to go — those big, flaky crumbs create the perfect coating. If you’re gluten-free, use gluten-free panko; it works just as well.
- Olive oil (2 tablespoons): You need enough oil to help the coating stick and to promote browning. Avocado oil works too, but olive oil adds a nice flavor that complements the squash.
- Garlic powder (1 teaspoon): Don’t skip this. It adds that savory depth that makes these fries taste like they’ve been seasoned by someone who knows what they’re doing. Fresh garlic would burn, so stick with powder.
- Paprika (½ teaspoon): Smoked paprika adds a subtle warmth that pairs beautifully with the sweetness of the squash. Regular paprika works too, but smoked is worth seeking out.
- Salt (½ teaspoon, plus more for finishing): Salt is crucial here — it balances the sweetness of the squash and brings out the savory notes in the Parmesan. I like flaky sea salt for finishing, but kosher salt works for the initial seasoning.
- Black pepper (¼ teaspoon, freshly ground): A little heat and earthiness to round everything out.
- Fresh parsley (optional, for garnish): A sprinkle of green makes them look pretty, but it’s totally optional. I often skip it when I’m just feeding my family.
Equipment Needed
You don’t need a lot of fancy equipment for these fries, which is part of why I love making them. Here’s what you’ll need:
- Baking sheet (large, rimmed): A standard half-sheet pan works perfectly. Make sure it’s rimmed so nothing slides off.
- Wire cooling rack: This is the secret to crispy fries. Placing the fries on a wire rack set inside the baking sheet allows hot air to circulate all around them, so they crisp up evenly. If you don’t have one, you can bake them directly on the sheet, but you’ll need to flip them halfway through and they won’t be quite as crispy.
- Sharp chef’s knife and vegetable peeler: Butternut squash is tough. A sharp knife makes cutting it into fry shapes much safer and easier. A Y-shaped peeler works best for the skin.
- Mixing bowls (one large, one small): For tossing the squash with oil and for mixing the coating.
- Measuring spoons and cups: For accuracy, though I often eyebit the seasoning after making these a dozen times.
If you don’t have a wire rack, don’t stress. Just line your baking sheet with parchment paper, spray it with cooking spray, and flip the fries halfway through baking. They’ll still be good — just not quite as uniformly crispy. I’ve done it both ways, and honestly, we ate every single fry regardless.
Preparation Method
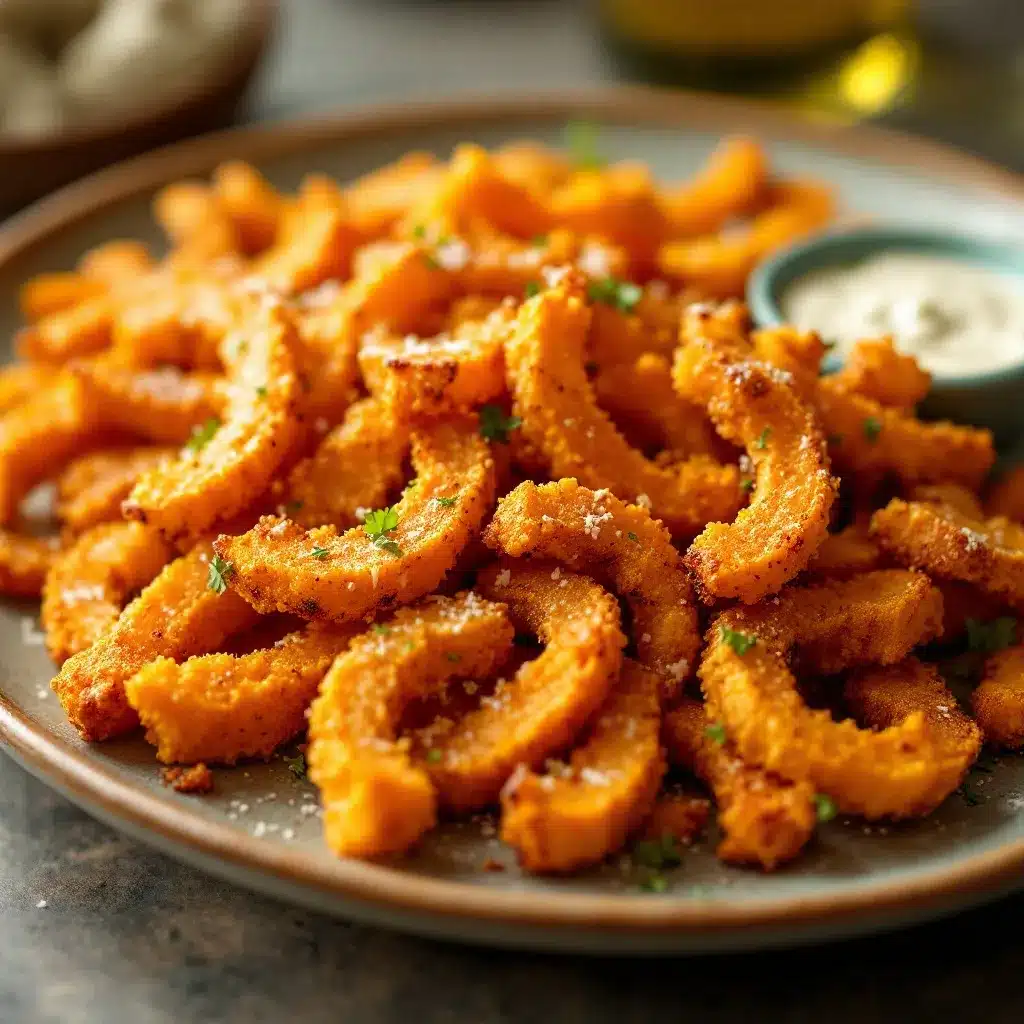
Let’s get to the good part. Follow these steps, and you’ll have a tray of golden, crispy fries that’ll make you forget regular potatoes exist.
- Preheat your oven to 425°F (220°C). Place a wire rack inside a rimmed baking sheet and set aside. Getting the oven hot is crucial — that high heat is what creates the crispy exterior.
- Prep the squash. Using a sharp vegetable peeler, remove the skin from the butternut squash completely. Cut off the top and bottom ends, then slice the squash in half where the narrow neck meets the bulbous bottom. Scoop out the seeds and stringy bits from the bottom half with a spoon. Now, cut both halves into fry-shaped sticks about ½-inch thick and 3 inches long. Try to keep them uniform in size so they cook evenly. This takes about 5-7 minutes, and yes, your hands will get a little tired. That’s normal.
- Pat the fries dry. This step matters more than you think. Excess moisture is the enemy of crispiness. Lay the cut fries on a clean kitchen towel or paper towels and pat them dry. Let them sit for a few minutes while you prepare the coating.
- Mix the coating. In a small bowl, combine the panko breadcrumbs, grated Parmesan, garlic powder, paprika, salt, and black pepper. Stir until everything is evenly distributed. The Parmesan should look like little flecks throughout the breadcrumbs.
- Coat the fries. In a large bowl, toss the dried squash fries with the olive oil until every piece is lightly coated. Don’t drown them — you just want enough oil for the coating to stick. Then, add the panko-Parmesan mixture and toss gently with your hands until the fries are evenly coated. Press the coating onto the fries a little; it doesn’t have to be perfect. Some spots will be more coated than others, and that’s fine. Those bare spots will caramelize and get sweet.
- Arrange on the rack. Place the coated fries in a single layer on the wire rack, making sure they aren’t touching. Crowding them will trap steam and make them soggy. If you have more fries than fit, use a second baking sheet or bake in batches. I know it’s tempting to cram them all in, but trust me — space is your friend here.
- Bake for 20-25 minutes. Place the baking sheet on the middle rack of your preheated oven. Bake for 10 minutes, then rotate the pan and bake for another 10-15 minutes. The fries should be golden brown and crispy on the outside, with some darker spots where the Parmesan has melted and crisped up. The edges will look slightly caramelized, and the kitchen will smell absolutely incredible.
- Cool slightly and serve. Let the fries rest on the rack for 2-3 minutes before serving. This allows them to set and get even crispier. Sprinkle with a little extra flaky salt and fresh parsley if you’re feeling fancy. Serve immediately — these are best hot and fresh from the oven.
A quick note on timing: the exact baking time will depend on how thick you cut your fries and how your oven runs. Thicker fries need a few extra minutes; thinner ones cook faster. Start checking at 18 minutes and go from there. You’re looking for deep golden color and a firm, crispy exterior.
Cooking Tips & Techniques
I’ve made these fries more times than I can count, and I’ve definitely had my share of failures. Here’s what I’ve learned so you don’t have to make the same mistakes I did.
The biggest mistake: skipping the drying step. I once rushed through the process and didn’t pat the squash dry before coating it. The result was a sad, steamy mess of soggy fries that barely held their shape. Butternut squash has a lot of natural moisture, and if you don’t remove some of it before baking, that moisture will steam the coating instead of letting it crisp. Take the extra 2 minutes to pat them dry. Your future self will thank you.
Cutting matters more than you think. I learned this the hard way when I cut some fries too thin and some too thick. The thin ones burned, and the thick ones were undercooked. Aim for ½-inch thickness all around. If you’re not great at cutting uniform shapes, don’t stress — just try to keep them close in size. The ones that are a little off will still taste good; they just might need a slightly different bake time.
Use the wire rack. This is non-negotiable if you want maximum crispiness. The hot air circulating underneath the fries prevents them from sitting in their own steam. If you don’t have a wire rack, flip the fries halfway through baking and use parchment paper. It won’t be quite as good, but it’ll still work.
Don’t skip the high heat. 425°F is the sweet spot. Lower temperatures will dry out the squash before it crisps, and higher temperatures might burn the Parmesan before the squash is cooked through. I’ve tested 400°F and 450°F, and 425°F gives the best balance of crispy exterior and tender interior.
Multitasking tip: While the fries are baking, make a quick dipping sauce. I love these with a simple garlic aioli (mayo + minced garlic + lemon juice) or my roasted red pepper hummus with za’atar spice. The hummus takes about 5 minutes to throw together in a food processor, and it pairs beautifully with the salty, cheesy fries.
Variations & Adaptations
One of the best things about this recipe is how flexible it is. Here are some ways to change it up based on what you have or what you’re craving:
Spicy Parmesan Fries: Add ½ teaspoon of cayenne pepper or red pepper flakes to the coating mixture. The heat cuts through the sweetness of the squash and adds a nice kick. I made these for a football party once, and they disappeared faster than the regular potato fries.
Herb & Garlic Fries: Mix in 1 teaspoon of dried Italian seasoning or herbes de Provence with the panko. You can also add a tablespoon of finely chopped fresh rosemary or thyme. The herbs add an earthy note that makes these feel more sophisticated — perfect for serving alongside a roast chicken or a holiday meal.
Everything Bagel Seasoning Fries: After coating the fries with the panko-Parmesan mixture, sprinkle them generously with everything bagel seasoning before baking. The sesame seeds, poppy seeds, garlic, and onion flakes add incredible texture and flavor. This is my current favorite variation, and I’ve been making it on repeat all fall.
Vegan Version: Swap the Parmesan for ¼ cup of nutritional yeast and ¼ cup of additional panko. The nutritional yeast gives that cheesy, umami flavor without any dairy. Use vegan butter or olive oil for the coating. I’ve tested this for a vegan friend, and honestly, it’s almost as good as the original.
Air Fryer Method: If you have an air fryer, these fries are even crispier. Preheat the air fryer to 400°F (200°C). Arrange the coated fries in a single layer in the basket (work in batches if needed). Cook for 10-12 minutes, shaking the basket halfway through, until golden and crispy. No oil spray needed — the olive oil in the coating is enough.
Different Squash Options: This method works with other winter squashes too. Acorn squash, delicata squash (no need to peel!), and even sweet potatoes all work beautifully. Just adjust the baking time slightly depending on the density of the squash.
Serving & Storage Suggestions
These fries are best served hot, fresh from the oven, when the exterior is at its crispiest and the Parmesan is still melty. I like to pile them on a platter, sprinkle with a little extra flaky salt and fresh parsley, and serve them with a few dipping options.
Dipping sauce ideas: Garlic aioli, spicy ranch, chipotle mayo, honey mustard, or even a simple balsamic glaze. For a fun twist, try them with the creamy dirty martini whipped feta dip — the salty, briny feta is an unexpected but amazing pairing with the sweet squash.
What to serve alongside: These fries are incredibly versatile. Serve them as a side dish with grilled chicken, steak, or fish. They’re amazing alongside a hearty rosemary garlic pot roast for a cozy fall dinner. Or pile them on a sheet pan with some crispy chicken wings for a game-day spread that’ll impress everyone.
Storage: If you have leftovers (unlikely, but possible), store them in an airtight container in the refrigerator for up to 3 days. They will lose their crispiness, unfortunately. To reheat, spread them on a baking sheet and pop them in a 400°F oven for 5-7 minutes until hot and crispy again. The microwave will make them soggy, so avoid it if you can.
Freezing: I don’t recommend freezing these after baking — the texture just isn’t the same. However, you can freeze the coated, unbaked fries. Arrange them on a baking sheet lined with parchment paper and freeze until solid, then transfer to a freezer bag. Bake from frozen at 425°F for 25-30 minutes, adding a few extra minutes as needed.
Flavor development: These are definitely best fresh, but I’ve noticed that the flavors meld together nicely after a day in the fridge. The squash gets even sweeter, and the Parmesan flavor becomes more pronounced. Just don’t expect them to be crispy after refrigeration.
Nutritional Information & Benefits
Let’s be honest — these are still fries, and they’re not a health food. But compared to traditional potato fries, they’re a pretty solid upgrade. Butternut squash is packed with vitamin A (one serving provides over 100% of your daily needs), vitamin C, potassium, and fiber. The Parmesan adds calcium and protein, while the olive oil provides healthy monounsaturated fats.
Here’s the estimated nutrition per serving (about 10-12 fries, assuming 4 servings):
- Calories: 185
- Total Fat: 9g
- Saturated Fat: 3g
- Cholesterol: 10mg
- Sodium: 320mg
- Total Carbohydrates: 22g
- Dietary Fiber: 4g
- Sugars: 4g
- Protein: 6g
Dietary considerations: This recipe is naturally vegetarian. To make it gluten-free, use gluten-free panko breadcrumbs. To make it dairy-free, substitute the Parmesan with nutritional yeast (about ¼ cup) and add an extra tablespoon of panko. The recipe is also relatively low in calories compared to traditional fries, and the fiber content helps keep you full longer.
Potential allergens: This recipe contains dairy (Parmesan) and gluten (panko breadcrumbs). Both can be substituted as noted above.
I don’t count calories obsessively, but I do appreciate knowing that these fries offer some nutritional value beyond just being delicious. It makes the second helping feel a little less guilty, you know?
Conclusion
These crispy Parmesan butternut squash fries have become a staple in my kitchen for a reason. They’re easy enough for a busy weeknight, impressive enough for guests, and healthy enough that I don’t feel bad when I eat half the tray standing at the counter. (Which happens more often than I’d like to admit.)
The magic is in the contrast — the sweet, tender squash against the salty, crispy Parmesan coating. It’s the kind of combination that makes you wonder why you haven’t been making these your whole life. And the best part? You can customize them endlessly. Spicy, herby, cheesy, or plain — they always deliver.
I’d love to hear how these turn out for you. Did you try a variation? Find a new favorite dipping sauce? Burn the first batch and eat them anyway? (I’ve been there.) Drop a comment below and let me know. And if you’re looking for another cozy fall side dish, try my creamy roasted butternut squash soup with maple croutons — it’s the perfect companion to these fries for a full squash-themed dinner.
Happy cooking, and may your fries always be crispy!
Frequently Asked Questions
Why are my butternut squash fries soggy?
Soggy fries usually happen for one of three reasons: the squash wasn’t dried properly before coating, the fries were crowded on the baking sheet, or the oven wasn’t hot enough. Make sure to pat the cut squash dry with paper towels, leave space between each fry on the rack, and bake at 425°F. A wire rack also helps tremendously by allowing air to circulate underneath.
Can I use pre-cut butternut squash from the store?
Yes, absolutely. Pre-cut squash saves time and effort. Just make sure the pieces are relatively uniform in size. If they’re in large chunks, cut them down into fry shapes. The pre-cut squash might be slightly drier than fresh-cut, so you may need to adjust the baking time by a minute or two. Keep an eye on them toward the end.
Do I have to peel the butternut squash?
Yes, for this recipe. Butternut squash skin is tough and doesn’t soften enough during the short baking time to be pleasant to eat. Unlike delicata squash (which has tender, edible skin), butternut squash needs to be peeled. A Y-shaped vegetable peeler makes quick work of it.
Can I make these ahead of time for a party?
You can prep the fries ahead, but I recommend baking them fresh. Cut and coat the fries up to a day in advance, then store them in a single layer in the refrigerator on a parchment-lined baking sheet. Bake them just before serving for the best texture. If you have leftovers, reheat them in a 400°F oven for 5-7 minutes to restore some crispiness.
What’s the best way to cut a butternut squash safely?
Butternut squash can be tricky to cut because it’s dense and round. First, microwave the whole squash for 2-3 minutes to slightly soften it — this makes cutting much easier. Use a sharp chef’s knife and cut off both ends to create flat surfaces. Then, slice the squash in half where the narrow neck meets the bulbous bottom. Stand each piece on its flat end and slice downward to remove the skin. Finally, cut into fry shapes. Take your time and keep your fingers curled under.
Pin This Recipe!
Easy Crispy Parmesan Butternut Squash Fries Recipe

These crispy Parmesan butternut squash fries are golden, craggy, and packed with flavor. A clever coating and hot oven create a shatteringly crisp exterior with a sweet, tender interior, making them a crowd-pleasing side dish or snack.
- Prep Time: 15 minutes
- Cook Time: 25 minutes
- Total Time: 40 minutes
- Yield: 4 servings 1x
- Category: Side Dish
- Cuisine: American
Ingredients
- 1 medium butternut squash (about 2–3 pounds)
- ½ cup finely grated Parmesan cheese
- ⅓ cup panko breadcrumbs
- 2 tablespoons olive oil
- 1 teaspoon garlic powder
- ½ teaspoon paprika (smoked preferred)
- ½ teaspoon salt, plus more for finishing
- ¼ teaspoon freshly ground black pepper
- Fresh parsley for garnish (optional)
Instructions
- Preheat your oven to 425°F (220°C). Place a wire rack inside a rimmed baking sheet and set aside.
- Prep the squash: Using a sharp vegetable peeler, remove the skin from the butternut squash completely. Cut off the top and bottom ends, then slice the squash in half where the narrow neck meets the bulbous bottom. Scoop out the seeds and stringy bits from the bottom half with a spoon. Cut both halves into fry-shaped sticks about ½-inch thick and 3 inches long.
- Pat the fries dry: Lay the cut fries on a clean kitchen towel or paper towels and pat them dry. Let them sit for a few minutes while you prepare the coating.
- Mix the coating: In a small bowl, combine the panko breadcrumbs, grated Parmesan, garlic powder, paprika, salt, and black pepper. Stir until evenly distributed.
- Coat the fries: In a large bowl, toss the dried squash fries with the olive oil until every piece is lightly coated. Add the panko-Parmesan mixture and toss gently with your hands until the fries are evenly coated. Press the coating onto the fries a little.
- Arrange on the rack: Place the coated fries in a single layer on the wire rack, making sure they aren’t touching.
- Bake for 20-25 minutes: Place the baking sheet on the middle rack of your preheated oven. Bake for 10 minutes, then rotate the pan and bake for another 10-15 minutes, until golden brown and crispy.
- Cool slightly and serve: Let the fries rest on the rack for 2-3 minutes before serving. Sprinkle with a little extra flaky salt and fresh parsley if desired. Serve immediately.
Notes
For maximum crispiness, use a wire rack and pat the squash dry before coating. If you don’t have a wire rack, line the baking sheet with parchment paper and flip the fries halfway through baking. The fries are best served fresh from the oven. To reheat leftovers, spread on a baking sheet and bake at 400°F for 5-7 minutes.
Nutrition
- Serving Size: About 10-12 fries
- Calories: 185
- Sugar: 4
- Sodium: 320
- Fat: 9
- Saturated Fat: 3
- Carbohydrates: 22
- Fiber: 4
- Protein: 6
Keywords: butternut squash fries, crispy fries, Parmesan fries, healthy fries, fall side dish, vegetarian fries, easy side dish


