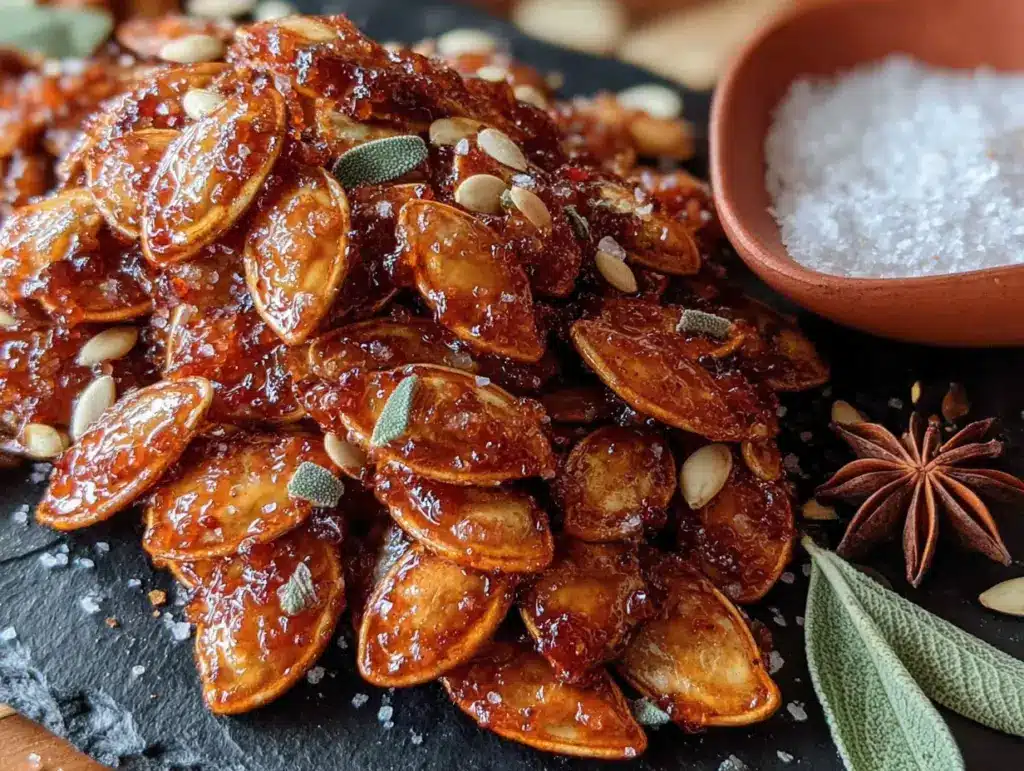
Last October, my neighbor Carla wasn’t trying to impress anyone. I’d stopped by to borrow a ladder—mine had mysteriously vanished after a garage sale—and this warm, toasty, almost buttery smell hit me before I even knocked on her screen door. She opened it with flour on her cheek and said, “Oh, the pumpkin seeds? I just threw some stuff on ’em.” Just threw some stuff on ’em. Honestly, I’ve been chasing that casual genius ever since, and I think I’ve finally cracked the code.
This is not your average, overly-salty, chewy seed situation. These light & crunchy spiced maple roasted pumpkin seeds are a revelation. They have that perfect snap when you bite into them, a hint of warmth from the spices, and a whisper of maple sweetness that doesn’t overpower. I mean, I stood in her kitchen, eating them straight off the baking sheet, making small talk about her tomato plants while secretly plotting how to get the recipe. She shrugged and said, “Maple syrup, salt, and whatever spices are in the cabinet.” That was it.
Maybe you’ve been there—you carve a pumpkin, you’re left with a slimy pile of guts, and you feel a little guilty tossing them. You know that feeling when you want to be resourceful but aren’t sure the payoff is worth the effort? Let me tell you, this recipe changes everything. It turned me into a seed-saving convert. The first time I made them myself, I burned the maple syrup a little (don’t ask), but the second batch? Pure gold. I keep making them because they are the perfect snack—light, crunchy, and just sweet enough to feel like a treat without being dessert. They’re the kind of thing you make once and then find yourself craving on a random Tuesday afternoon.
Why You’ll Love This Recipe
After testing this recipe about five times (and ruining one baking sheet in the process), I can honestly say this version is the one. It’s not just another pumpkin seed recipe you’ll bookmark and forget. This one delivers on every single promise.
- Quick & Easy: From start to finish, you’re looking at about 25 minutes. Most of that is hands-off oven time. Perfect for when you’re already roasting something else or just need a fast, satisfying snack.
- Simple Ingredients: You probably have everything in your pantry right now. Maple syrup, olive oil (or butter), salt, and a few warm spices. No weird health food store finds required.
- Perfect for Fall Snacking: These are my go-to for Halloween parties, Thanksgiving appetizers, or just munching while watching a movie. They also make a fantastic, unexpected gift in a little jar.
- Crowd-Pleaser: I brought a bowl to a potluck last month, and they disappeared in ten minutes. Even the kids who claimed they didn’t like seeds were sneaking handfuls.
- Unbelievably Delicious: The texture is the star here. They are genuinely crunchy, not chewy or tough. The maple and spice combo is warm and cozy without being heavy. It’s that perfect balance of savory and sweet that keeps your hand reaching back into the bowl.
What makes this different from every other roasted seed recipe? It’s the technique. We’re boiling the seeds first. I know, it sounds like an extra step, but trust me—it’s the secret to that light, airy crunch. Boiling them removes the outer membrane and allows them to toast evenly. Plus, the maple syrup is added at just the right moment so it caramelizes without burning. This isn’t just another version; it’s the best version. It’s the kind of snack that makes you close your eyes after the first bite and just… appreciate it. It’s comfort food reimagined—healthier, faster, but with the same soul-soothing satisfaction. Perfect for impressing guests without stress, or turning a simple afternoon into something a little more memorable.
What Ingredients You Will Need
This recipe uses simple, wholesome ingredients to deliver bold flavor and satisfying texture without any fuss. Most of these are pantry staples, especially if you do any fall baking. Let’s break down what you’ll need and why each ingredient matters.
- Fresh Pumpkin Seeds (1 cup / about 120g): These are straight from the pumpkin, rinsed and picked clean of strings. You can use seeds from any variety of pumpkin or even large winter squash. The fresher, the better for texture.
- Water (4 cups / 960ml): For boiling the seeds. This is a crucial step, so don’t skip it. It helps loosen the outer husk and ensures even cooking.
- Salt (1 tablespoon / 18g, plus more for sprinkling): We use salt in the boiling water to season the seeds from the inside out. This is a trick I learned from a chef friend—it makes a huge difference. You’ll also add a pinch after roasting.
- Maple Syrup (2 tablespoons / 30ml): Use the real stuff, not pancake syrup. The flavor is more complex and less cloying. I prefer Grade A Dark Amber for a richer taste, but any pure maple syrup works. (Adds that deep, caramelized sweetness.)
- Olive Oil (1 tablespoon / 15ml): Helps the spices stick and promotes browning. You can use melted butter or avocado oil for a slightly different flavor profile. (Use a light-tasting olive oil so it doesn’t overpower the maple.)
- Ground Cinnamon (1 teaspoon / 2.6g): The backbone of the warm spice blend. It pairs beautifully with the maple syrup and adds that classic fall aroma.
- Ground Ginger (½ teaspoon / 1g): Adds a subtle warmth and a little zing. It cuts through the sweetness and keeps the seeds from being one-dimensional.
- Ground Nutmeg (¼ teaspoon / 0.5g): A pinch of nutmeg adds an earthy, almost floral note. Freshly grated is amazing if you have it, but pre-ground is perfectly fine.
- Ground Cloves (⅛ teaspoon / 0.2g): Just a whisper. Cloves are potent, so a little goes a long way. They add a deep, aromatic warmth that makes these seeds taste incredibly complex.
Ingredient Selection Tips: For the best texture, look for seeds that are plump and intact. Avoid seeds that look shriveled or cracked. I recommend using organic maple syrup from a brand like Crown Maple or Runamok for the most robust flavor. If you don’t have all the spices, you can substitute 1½ teaspoons of pumpkin pie spice for the cinnamon, ginger, nutmeg, and cloves. It won’t be exactly the same, but it will still be delicious. For a dairy-free option, stick with olive oil or avocado oil. If you are watching your sugar intake, you can reduce the maple syrup to 1 tablespoon, but the seeds will be less caramelized and more savory.
Equipment Needed
You don’t need a fancy kitchen to make these seeds. Here’s what you’ll need to get the job done.
- Medium Saucepan: For boiling the seeds. Any 2-3 quart pot works.
- Colander: To drain the seeds after boiling.
- Clean Kitchen Towel or Paper Towels: For patting the seeds dry. Getting them as dry as possible is key for crunchiness.
- Mixing Bowl: A medium bowl for tossing the seeds with oil and spices.
- Baking Sheet: A rimmed baking sheet works best to prevent any maple syrup drips from spilling into your oven. Line it with parchment paper for easier cleanup.
- Parchment Paper: Optional but highly recommended. It prevents sticking and makes cleanup a breeze.
- Spatula or Wooden Spoon: For stirring the seeds on the baking sheet halfway through roasting.
If you don’t have a colander, you can use a fine-mesh strainer. No parchment paper? You can lightly grease your baking sheet with a little extra oil. I’ve made these on a regular baking sheet without parchment, and they still turned out great—I just had to soak the pan afterward. A good, sturdy baking sheet is worth the investment; I’ve had my Nordic Ware one for years, and it distributes heat evenly, which helps the seeds roast uniformly without burning.
Preparation Method
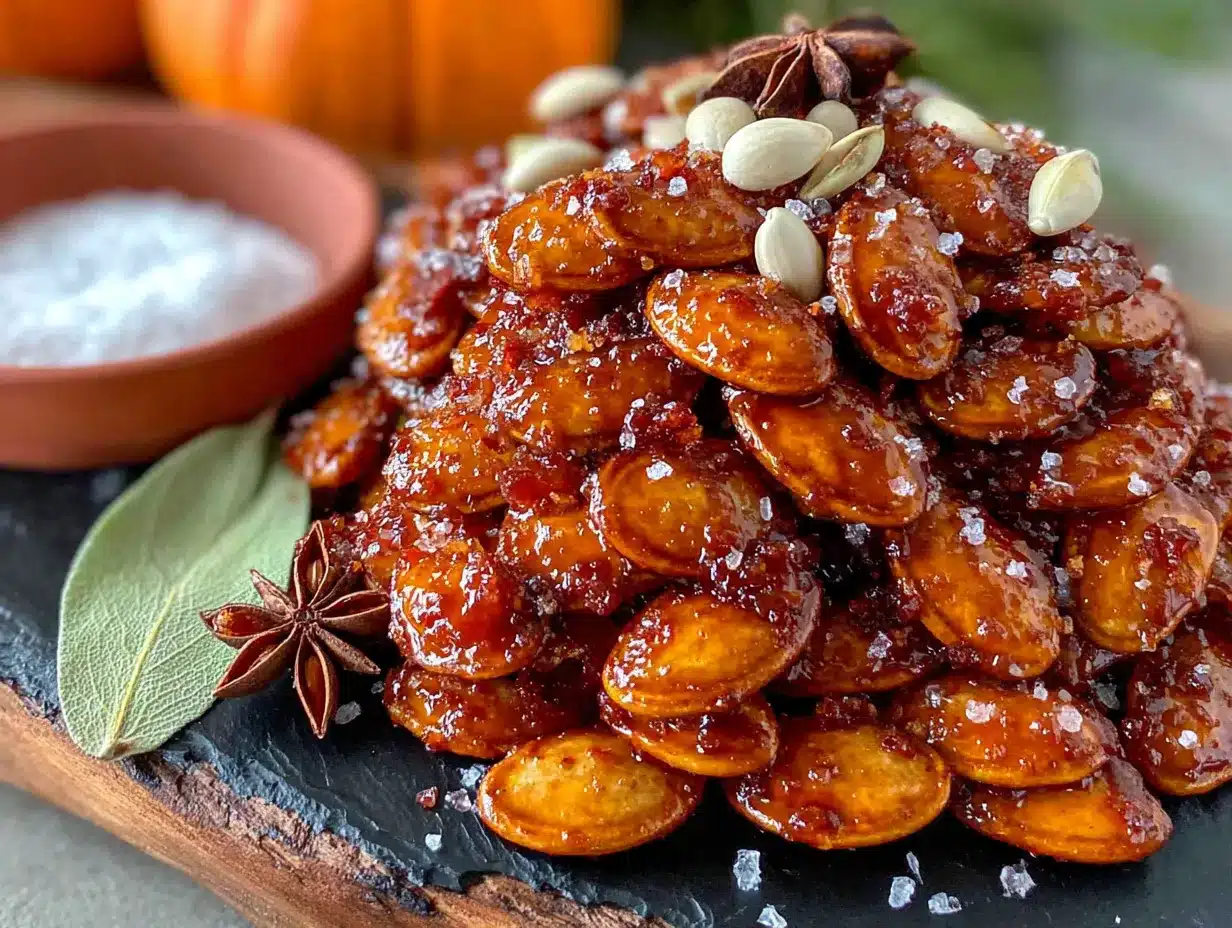
Alright, let’s get roasting! This process is straightforward, but a few key steps make all the difference. Follow along, and you’ll have the crunchiest, most flavorful seeds of your life.
- Preheat and Prep: Preheat your oven to 350°F (175°C). Line a rimmed baking sheet with parchment paper and set it aside. Getting the oven hot and ready ensures the seeds start roasting immediately when they go in.
- Rinse the Seeds: Place your 1 cup of fresh pumpkin seeds in a colander. Rinse them under cool running water, using your fingers to gently rub away any strings or pumpkin guts. It doesn’t have to be perfect—a few small strings are fine—but try to remove the big clumps. This takes about 2 minutes.
- Boil the Seeds: In a medium saucepan, bring 4 cups of water and 1 tablespoon of salt to a rolling boil. Add the rinsed seeds and boil for exactly 10 minutes. This step is non-negotiable. It softens the outer seed coat, which allows the seeds to puff up slightly and roast to a light, airy crunch instead of a dense, hard chew. Set a timer!
- Drain and Dry: After 10 minutes, pour the seeds into the colander and drain well. Spread them out on a clean kitchen towel or a double layer of paper towels. Pat them very dry. I mean really dry. Any excess moisture will turn to steam in the oven and prevent the seeds from getting crispy. Let them sit on the towel for 5 minutes to air-dry a bit more. This is a good time to wipe out your saucepan.
- Mix the Coating: In a medium mixing bowl, whisk together the 2 tablespoons of maple syrup, 1 tablespoon of olive oil, 1 teaspoon of cinnamon, ½ teaspoon of ginger, ¼ teaspoon of nutmeg, and ⅛ teaspoon of cloves. It should smell amazing already.
- Toss the Seeds: Add the dried seeds to the bowl with the maple spice mixture. Stir with a spatula until every seed is evenly coated. Make sure to scrape the bottom of the bowl—you don’t want to leave any of that flavorful syrup behind.
- Spread on Baking Sheet: Pour the coated seeds onto your prepared baking sheet. Spread them out into a single, even layer. Try not to let them clump together too much; a little clustering is okay, but you want them mostly separated for even roasting. If they are in a big pile, they’ll steam instead of roast.
- Roast: Place the baking sheet in the preheated oven and roast for 12 minutes. After 12 minutes, remove the sheet from the oven and give the seeds a good stir with a spatula. This ensures they brown evenly. Spread them back into a single layer and return to the oven.
- Finish Roasting: Roast for another 8-12 minutes, keeping a close eye on them after the 8-minute mark. The seeds are done when they are a deep, golden brown and the maple syrup has caramelized. They will look slightly glossy and feel dry to the touch. They can go from perfect to burnt very quickly, so watch them carefully. My first batch got a little too toasty because I walked away to answer the phone—learn from my mistake!
- Cool Completely: Remove the baking sheet from the oven and let the seeds cool directly on the pan. They will crisp up as they cool. Do not be tempted to eat them yet—they will be soft and chewy right out of the oven. Patience is key! Let them cool for at least 15-20 minutes. Once cool, sprinkle with a tiny pinch of flaky sea salt, if desired.
Cooking Tips & Techniques
I’ve made a lot of mistakes with pumpkin seeds over the years, so you don’t have to. Here are my best tips for getting them perfect every single time.
The Boiling Secret: I cannot stress this enough. Boiling the seeds in salted water for 10 minutes is the single most important step for achieving that light, crunchy texture. If you skip this, the seeds will be much chewier and harder to digest. The salt also seasons the seeds from the inside out, so every bite is flavorful, not just the outside.
Don’t Overcrowd the Pan: If your seeds are piled on top of each other, they will steam. Steamed seeds are sad, soft seeds. Make sure they are in a single, even layer. If you are doubling the recipe, use two baking sheets and rotate them halfway through the cooking time.
Watch the Maple Syrup: Maple syrup has a lower smoke point than sugar, so it can burn easily. That’s why we add a little oil to the mix—it helps buffer the heat. Keep a close eye on the seeds in the last 5 minutes of roasting. You are looking for a deep amber color, not dark brown. If you see wisps of smoke, pull them out immediately.
Cooling is Crucial: The seeds will be soft and slightly bendy when they come out of the oven. This is normal! They need to cool completely to set and become crunchy. If you eat them warm, you’ll be disappointed. Let them sit on the baking sheet untouched for at least 20 minutes. I once tried to rush this by putting them in the fridge, and they got a little soggy from the condensation. Room temperature cooling is best.
Multitasking Strategy: While the seeds are boiling, you can measure out your spices and line your baking sheet. While they are roasting, you can clean up your kitchen. This recipe flows really well and doesn’t require constant attention—just that one stir at the halfway point and a watchful eye at the end.
Variations & Adaptations
This base recipe is fantastic, but it’s also a great starting point for experimentation. Here are a few ways to switch it up based on your mood or dietary needs.
- Spicy Maple: Add ¼ teaspoon of cayenne pepper or a pinch of chipotle powder to the spice mix. The heat from the chili pairs incredibly well with the sweet maple syrup. It gives the seeds a real kick that’s perfect for adults.
- Savory Herb: Skip the maple syrup and the sweet spices. Instead, toss the boiled and dried seeds with 1 tablespoon of olive oil, ½ teaspoon of garlic powder, ½ teaspoon of onion powder, 1 teaspoon of dried rosemary (crushed), and ½ teaspoon of salt. Roast as directed. These are amazing on top of soups or salads.
- Pumpkin Pie Spice Version: If you don’t have all the individual spices, use 1½ teaspoons of pumpkin pie spice mix instead. It’s a perfect shortcut and tastes just like fall in a bowl. I’ve done this many times when I’m in a hurry, and it always works.
- Sweet & Smoky: Add ½ teaspoon of smoked paprika to the maple spice mix. The smokiness adds a whole new layer of complexity that makes these seeds taste almost like a gourmet snack you’d buy at a farmers’ market.
- Dietary Adjustments: These seeds are naturally gluten-free and dairy-free as written (using olive oil). For a lower-sugar option, you can use a sugar-free maple-flavored syrup, but the texture will be slightly different and less caramelized. You can also try using coconut sugar mixed with a little water to make a paste, but I haven’t tested that myself.
My personal favorite variation is the Spicy Maple. I made it for a football party last year, and a friend asked me for the recipe three times. The combination of sweet and heat is just addictive. Don’t be afraid to play with the spice ratios—cooking is about making things taste good to you.
Serving & Storage Suggestions
These seeds are incredibly versatile. Here’s how to serve and store them to keep them at their best.
Serving: Serve them at room temperature. They are fantastic straight out of a bowl as a snack. I love to put them out in a little dish before a meal—they are a great conversation starter. They also make a wonderful topping for creamy butternut squash soup, adding a lovely crunch. Sprinkle them over a simple green salad with apple slices and goat cheese for a textural contrast. They are also amazing on top of oatmeal or yogurt parfaits for a little crunch in the morning. For a festive touch, package them in small cellophane bags tied with twine as party favors for a Halloween or Thanksgiving gathering.
Storage: Store cooled seeds in an airtight container at room temperature. They will stay crunchy for up to 2 weeks. Do not store them in the refrigerator, as the humidity can make them lose their crispness. If they do start to soften a bit, you can re-crisp them in a 300°F (150°C) oven for 3-5 minutes. Let them cool completely before storing again.
How Flavors Develop: Honestly, these seeds taste even better the next day. The flavors meld and mellow overnight. The maple sweetness becomes a little more subtle, and the spices become more integrated. So don’t worry if they don’t all get eaten immediately—they’ll be just as good, if not better, tomorrow. I often make a double batch just so I have some for the week.
Nutritional Information & Benefits
These light & crunchy spiced maple roasted pumpkin seeds are not just delicious—they’re also packed with goodness. Here’s a quick look at what you’re getting in a standard serving (about ¼ cup / 30g).
- Estimated Nutritional Values (per serving): Calories: 180, Fat: 14g, Carbohydrates: 10g, Fiber: 2g, Sugar: 6g, Protein: 7g, Sodium: 180mg. (These are estimates and will vary based on exact ingredients and seed size.)
- Health Benefits: Pumpkin seeds are a fantastic source of magnesium, zinc, and healthy fats. Magnesium is great for muscle function and sleep, while zinc supports your immune system—perfect for the cold and flu season. The fiber and protein make them a very satisfying snack that helps keep you full.
- Dietary Considerations: This recipe is naturally gluten-free and can be made dairy-free by using olive oil or avocado oil. It is suitable for vegetarian and vegan diets. The main allergen to be aware of is that it is made from seeds, which are generally safe for nut-allergy sufferers, but always check your spice blends for cross-contamination if allergies are a concern.
I love that I can feel good about snacking on these. They satisfy that craving for something crunchy and sweet without any of the processed junk from a bag of chips. It’s a wholesome treat that supports your body while delighting your taste buds.
Conclusion
So there you have it—my go-to recipe for turning a pile of pumpkin guts into the most addictive, light & crunchy spiced maple roasted pumpkin seeds you have ever tasted. This recipe is proof that the simplest ingredients, treated with a little care and a few smart techniques, can create something truly special. It’s a little bit of kitchen magic that happens every fall, and I hope it becomes a tradition in your home, too.
Don’t be afraid to make this recipe your own. Tweak the spices, try a savory version, or double the batch because trust me, one batch is never enough. I’d honestly love to hear how they turn out for you. Did you add extra cinnamon? Did you burn them like I did the first time? (It happens to the best of us!) Drop a comment below and let me know your favorite way to enjoy them. And if you’re looking for another easy, wholesome snack, you might enjoy my salted dark chocolate energy bites—they’re just as simple and satisfying. Happy roasting, friends!
Frequently Asked Questions
Can I use store-bought raw pumpkin seeds?
Absolutely! You can use raw, hulled pumpkin seeds (also called pepitas) from the store. You do not need to boil them, as they are already processed. Simply toss them with the oil, maple syrup, and spices and roast for 8-12 minutes at 350°F (175°C), stirring halfway through. Keep a close eye on them as they will cook faster than fresh seeds.
Why are my pumpkin seeds chewy instead of crunchy?
Chewy seeds are almost always the result of not boiling them long enough or not drying them thoroughly before roasting. The 10-minute boil is essential for breaking down the seed coat. Also, make sure you pat them very dry with a towel before adding the coating. Any excess moisture will steam the seeds in the oven.
Can I use this recipe for other types of squash seeds?
Yes, you can! This recipe works wonderfully with seeds from butternut squash, acorn squash, or spaghetti squash. The cooking time may vary slightly depending on the size of the seeds. Smaller squash seeds may need 2-3 minutes less roasting time. Keep an eye on them and look for that golden brown color.
How do I prevent the maple syrup from burning?
The key is to use oil in the coating, which helps buffer the heat, and to watch the seeds carefully in the last 5 minutes of roasting. If your oven runs hot, you can lower the temperature to 325°F (165°C) and roast for a few minutes longer. Stirring the seeds at the halfway point also helps distribute the heat evenly.
Can I make these in an air fryer?
Yes! An air fryer works great for this recipe. After boiling and drying the seeds, toss them with the coating. Preheat your air fryer to 325°F (165°C). Place the seeds in the air fryer basket in a single layer. Cook for 8-12 minutes, shaking the basket every 4 minutes, until golden and crispy. Let them cool completely before eating. They may cook faster than in an oven, so start checking at the 8-minute mark.
Pin This Recipe!
Easy Spiced Maple Roasted Pumpkin Seeds – Perfect Light & Crunchy Recipe
These light & crunchy spiced maple roasted pumpkin seeds are a revelation, with a perfect snap, warm spices, and a whisper of maple sweetness. They’re the perfect snack—light, crunchy, and just sweet enough to feel like a treat without being dessert.
- Prep Time: 15 minutes
- Cook Time: 20-24 minutes
- Total Time: 35-40 minutes
- Yield: 4 servings 1x
- Category: Snack
- Cuisine: American
Ingredients
- 1 cup fresh pumpkin seeds (about 120g)
- 4 cups water (960ml)
- 1 tablespoon salt (18g), plus more for sprinkling
- 2 tablespoons maple syrup (30ml)
- 1 tablespoon olive oil (15ml)
- 1 teaspoon ground cinnamon (2.6g)
- ½ teaspoon ground ginger (1g)
- ¼ teaspoon ground nutmeg (0.5g)
- ⅛ teaspoon ground cloves (0.2g)
Instructions
- Preheat your oven to 350°F (175°C). Line a rimmed baking sheet with parchment paper and set aside.
- Place 1 cup of fresh pumpkin seeds in a colander. Rinse under cool running water, using your fingers to gently rub away any strings or pumpkin guts.
- In a medium saucepan, bring 4 cups of water and 1 tablespoon of salt to a rolling boil. Add the rinsed seeds and boil for exactly 10 minutes.
- After 10 minutes, pour the seeds into the colander and drain well. Spread them out on a clean kitchen towel or a double layer of paper towels. Pat them very dry. Let them sit on the towel for 5 minutes to air-dry.
- In a medium mixing bowl, whisk together 2 tablespoons of maple syrup, 1 tablespoon of olive oil, 1 teaspoon of cinnamon, ½ teaspoon of ginger, ¼ teaspoon of nutmeg, and ⅛ teaspoon of cloves.
- Add the dried seeds to the bowl with the maple spice mixture. Stir with a spatula until every seed is evenly coated.
- Pour the coated seeds onto the prepared baking sheet. Spread them out into a single, even layer.
- Place the baking sheet in the preheated oven and roast for 12 minutes. After 12 minutes, remove the sheet from the oven and give the seeds a good stir with a spatula. Spread them back into a single layer and return to the oven.
- Roast for another 8-12 minutes, keeping a close eye on them after the 8-minute mark. The seeds are done when they are a deep, golden brown and the maple syrup has caramelized.
- Remove the baking sheet from the oven and let the seeds cool directly on the pan for at least 15-20 minutes. Once cool, sprinkle with a tiny pinch of flaky sea salt, if desired.
Notes
Boiling the seeds in salted water for 10 minutes is the single most important step for achieving a light, crunchy texture. Do not skip it. Make sure seeds are in a single layer on the baking sheet to avoid steaming. Watch the seeds carefully in the last 5 minutes of roasting as maple syrup can burn easily. Let seeds cool completely before eating; they will be soft and chewy right out of the oven. Store in an airtight container at room temperature for up to 2 weeks. If they soften, re-crisp in a 300°F (150°C) oven for 3-5 minutes.
Nutrition
- Serving Size: ¼ cup (30g)
- Calories: 180
- Sugar: 6
- Sodium: 180
- Fat: 14
- Saturated Fat: 2
- Carbohydrates: 10
- Fiber: 2
- Protein: 7
Keywords: pumpkin seeds, roasted pumpkin seeds, spiced maple pumpkin seeds, crunchy pumpkin seeds, fall snack, Halloween snack, Thanksgiving appetizer, easy pumpkin seed recipe


