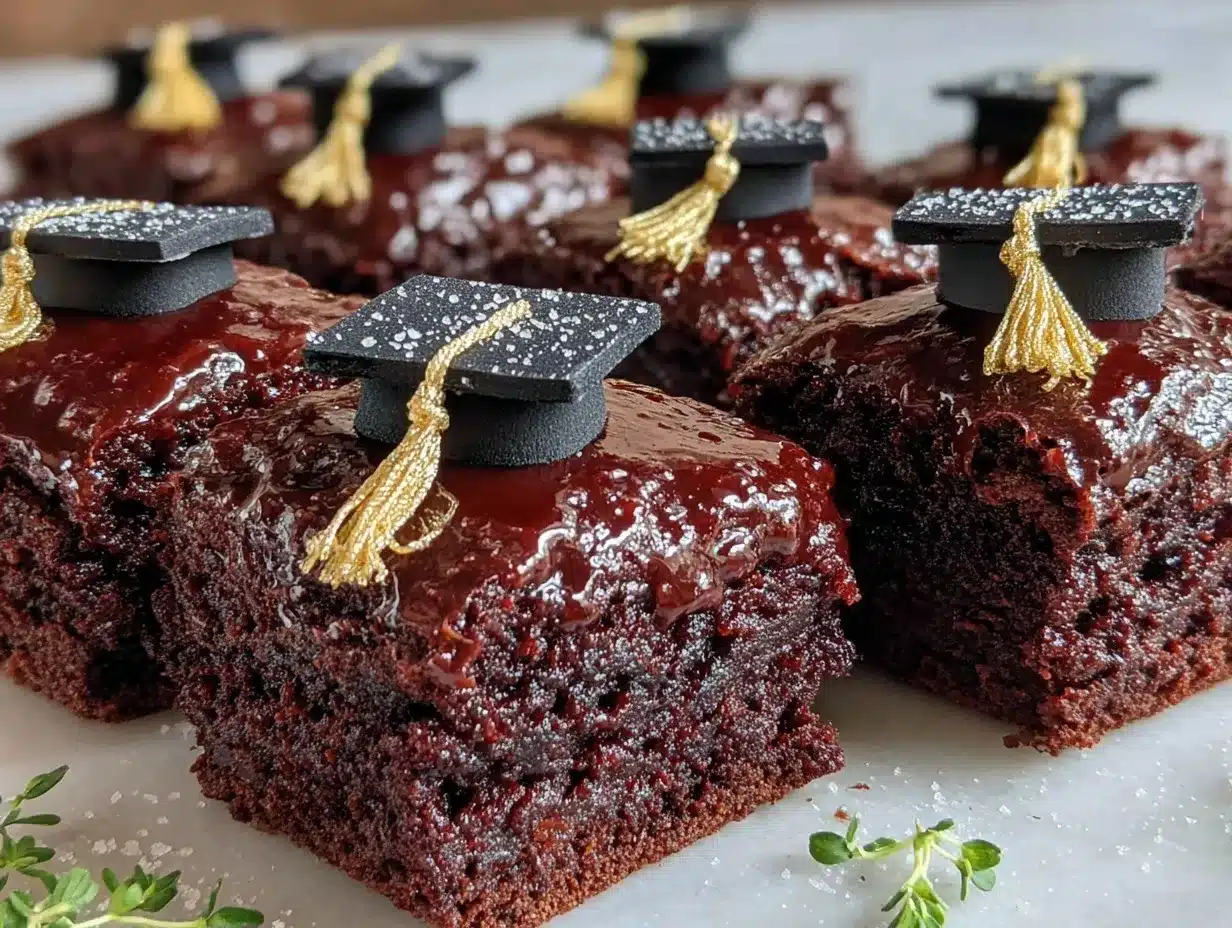
“You won’t believe how these graduation cap brownie bites came to be,” my friend Jenna said as she handed me one during a chaotic backyard get-together last June. Honestly, I was skeptical at first—brownies shaped like graduation caps? It sounded like a Pinterest craft project gone too far. But then I took a bite, and wow, the rich chocolate paired with the crisp, edible gold tassel totally won me over. I mean, it was the kind of treat that made you pause mid-chew and smile.
This recipe actually started on a whim one late night when I realized I forgot to bring a dessert to my nephew’s graduation party (classic me). I had a box of brownie mix and some leftover fondant, so I thought, why not try something fun? The first batch was a mess—some caps were lopsided, some tassels fell off, and I might’ve burned a few edges while juggling the frosting. But hey, the taste was there, and after some tweaking, these Perfect Graduation Cap Brownie Bites became a crowd favorite.
Maybe you’ve been there—wanting a dessert that’s both impressive and easy to make for a special occasion. These bites are just that. They bring together the nostalgic comfort of brownies with a playful, celebratory twist that’s bound to delight graduates and guests alike. Plus, the gold tassels add just the right amount of sparkle without overdoing it. Let me tell you, once you make these, they’ll be on your graduation go-to list too.
Why You’ll Love This Recipe
Let me break down why these Perfect Graduation Cap Brownie Bites have become a staple in my recipe box:
- Quick & Easy: You can whip these up in under an hour, making last-minute party prep totally doable.
- Simple Ingredients: No need to hunt for fancy stuff. Most ingredients are pantry staples or easily found in local stores.
- Perfect for Celebrations: These bites are ideal for graduations, end-of-year parties, or any festive event that calls for a little chocolate cheer.
- Crowd-Pleaser: Kids and adults alike can’t resist the combo of fudgy brownie and a cute, edible decoration.
- Unbelievably Delicious: The fudgy texture paired with a hint of vanilla and a glossy chocolate ganache topping is just next-level comfort food.
What sets this recipe apart is the little gold tassel detail made from edible gold dust mixed with royal icing—a touch that looks fancy but is surprisingly easy to create. Plus, I’ve tested different brownie bases (box mix and scratch) and landed on a version that balances gooeyness and structure just right to hold the cap shape without crumbling. Honestly, it’s the kind of treat that makes you want to close your eyes after the first bite and savor that perfect chocolate hit.
Whether you’re aiming to impress guests without stress or just want a fun way to celebrate a milestone, these brownie bites bring a bit of charm and a lot of flavor without the fuss.
What Ingredients You Will Need
This recipe uses straightforward ingredients that combine to create rich, fudgy brownie bites with a decorative flair. Most are pantry staples, and the gold tassel is surprisingly simple to make with just a few extras. Here’s the breakdown:
- For the Brownie Bites:
- 1 cup (130g) all-purpose flour
- 1 cup (200g) granulated sugar
- 1/3 cup (35g) unsweetened cocoa powder (I prefer Ghirardelli for its rich flavor)
- 1/2 teaspoon baking powder
- 1/4 teaspoon salt
- 1/2 cup (115g) unsalted butter, melted and slightly cooled
- 2 large eggs, room temperature
- 1 teaspoon vanilla extract
- For the Ganache Topping:
- 1/2 cup (120ml) heavy cream
- 4 ounces (115g) bittersweet chocolate, chopped (I like using Valrhona or Lindt)
- For the Gold Tassels:
- 1 cup (120g) powdered sugar
- 1-2 tablespoons water (adjust for consistency)
- Edible gold dust or luster dust (available at baking supply stores)
- Black fondant or black candy melts for the caps (optional for accent)
If you want to keep things gluten-free, you can swap the all-purpose flour for a gluten-free blend. Also, if you’d prefer a dairy-free option, use coconut cream for the ganache and a dairy-free butter substitute. The ingredients are flexible enough that you can make substitutions without losing that classic brownie texture or the celebratory look.
Equipment Needed
- 8×8-inch (20×20 cm) square baking pan – I’ve found glass pans give a nice even bake, but metal works fine too.
- Mixing bowls – at least two, one for wet ingredients and one for dry.
- Whisk and spatula – for mixing and folding the batter.
- Sharp knife or square cookie cutter (about 2 inches / 5 cm) – to cut clean, uniform brownie caps.
- Small saucepan – for heating cream to make ganache.
- Heatproof bowl – to melt chocolate for ganache.
- Pastry bag or small zip-top bag – for piping the gold tassel icing (alternatively, use a toothpick for fine details).
- Brush for edible gold dust – a small food-safe paintbrush works best.
- Cooling rack – to let brownies cool properly before decorating.
If you don’t have a pastry bag, no worries; a zip-top bag with a tiny cut at the corner works just as well. For cutting the brownie caps, I sometimes use a plastic square container lid to trace and cut evenly if I don’t have a cookie cutter handy. Keeping your knife clean and wiping it between cuts helps keep edges sharp and neat.
Preparation Method
- Preheat your oven to 350°F (175°C). Grease your 8×8-inch pan or line it with parchment paper for easy removal. This step sets you up for brownies that don’t stick and come out in perfect squares.
- Mix dry ingredients: In a medium bowl, whisk together 1 cup (130g) flour, 1 cup (200g) sugar, 1/3 cup (35g) cocoa powder, 1/2 teaspoon baking powder, and 1/4 teaspoon salt. This base combines the essentials for a fudgy brownie texture.
- Combine wet ingredients: In another bowl, whisk 1/2 cup (115g) melted butter, 2 large eggs, and 1 teaspoon vanilla extract until smooth and glossy. Make sure the butter isn’t too hot or it will cook the eggs.
- Fold wet into dry: Pour the wet ingredients into the dry mix and gently fold with a spatula until just combined. Avoid overmixing here to keep the brownies tender.
- Bake: Pour the batter evenly into your prepared pan and spread it out smoothly. Place in the oven and bake for 25–30 minutes. A toothpick inserted near the center should come out with a few moist crumbs but not wet batter. This gives you that fudgy, chewy texture.
- Cool: Remove the pan from the oven and place on a cooling rack. Let the brownies cool completely—this is key for clean cutting and decorating. If you rush this, the ganache and fondant won’t set up properly.
- Prepare ganache: Heat 1/2 cup (120ml) heavy cream in a small saucepan until it just begins to simmer (bubbles at edges). Remove from heat, add 4 ounces (115g) chopped bittersweet chocolate, and let sit for 2 minutes. Stir gently until smooth and shiny. Let it cool slightly until it thickens to a spreadable consistency.
- Cut brownie caps: Using a sharp knife or 2-inch (5 cm) square cookie cutter, cut brownies into neat squares. Try to keep edges clean and even. A quick tip: warm your knife under hot water and dry it before slicing for smoother cuts.
- Top with ganache: Spread a thin layer of ganache on each brownie square to give a glossy finish and help the tassels stick.
- Make gold tassels: In a small bowl, mix 1 cup (120g) powdered sugar with 1–2 tablespoons water until thick but pipeable. Add edible gold dust and mix well. Transfer to a piping bag or zip-top bag with a tiny corner cut. Pipe tassels on each brownie cap. Let dry for at least 30 minutes.
- Optional finishing touch: Use small pieces of black fondant or melted black candy melts to create the square base of the cap or the button in the center. Attach with a dab of ganache or icing.
- Serve and enjoy: Arrange your perfect graduation cap brownie bites on a platter and watch them disappear fast!
Cooking Tips & Techniques
Here are some things I learned the hard way while perfecting these brownie bites:
- Don’t overbake: Brownies can go from fudgy to dry in a heartbeat. Keep an eye at the 25-minute mark and test with a toothpick. A few moist crumbs are your friend.
- Cool completely before cutting and decorating: Patience here pays off big time. Warm brownies crumble and smear, making the caps look sloppy.
- Use a sharp knife for cutting: A dull knife tears the brownie edges. I like to wipe and warm my knife between cuts for cleaner squares.
- Ganache consistency matters: If it’s too runny, it will soak into the brownie and lose that shiny look. Let it cool and thicken slightly before spreading.
- Practice piping tassels on parchment paper first: This helps you get a feel for the flow and thickness. If your icing is too runny, add a bit more powdered sugar.
- Multitask by preparing ganache while brownies bake: Saves time and keeps your workflow smooth.
Honestly, the first few tries might feel fiddly, but once you get the hang of the piping and cutting, these treats come together pretty quickly. And hey, if a tassel breaks or a cap isn’t perfect, it still tastes amazing!
Variations & Adaptations
Feel like switching things up? Here are some tasty ways to customize your graduation cap brownie bites:
- Flavor twists: Add a teaspoon of espresso powder to the brownie batter to intensify the chocolate flavor. You can also fold in chopped nuts or chocolate chips for extra texture.
- Diet-friendly versions: Try a gluten-free brownie mix or swap butter for coconut oil for a dairy-free version. Use vegan chocolate for ganache to keep it plant-based.
- Colorful tassels: Mix different edible luster dust colors like silver, rose gold, or school colors to match your grad’s theme.
- Alternative shapes: Use a small circle or star-shaped cookie cutter to make unique cap shapes if you want to get creative.
- Personalized messages: After ganache sets, pipe on initials or graduation year with contrasting royal icing for a personal touch.
I once made these with raspberry-flavored ganache for a friend’s daughter—super tasty and a bit unexpected. The key is to keep the balance between fudgy brownie and decorative flair.
Serving & Storage Suggestions
Serve the brownie bites at room temperature for the best texture and flavor. They look great arranged on a platter with a few fresh berries or mint sprigs for color contrast—trust me, it’s a simple touch that makes a difference.
Pair these treats with coffee, milk, or a sparkling punch to round out your celebration table. They also travel well, so they’re perfect for potlucks or taking to a party.
Store leftovers in an airtight container at room temperature for up to 3 days. If your house is warm, refrigeration helps keep ganache firm but can dry brownies out slightly—just bring them back to room temperature before serving.
You can freeze these bites for up to 2 months. Wrap individually in plastic wrap and place in a freezer-safe container. Thaw overnight in the fridge and bring to room temp before eating. Flavors actually deepen a bit after resting!
Nutritional Information & Benefits
Each Perfect Graduation Cap Brownie Bite (based on 24 pieces) contains approximately:
| Calories | Fat | Carbohydrates | Protein |
|---|---|---|---|
| 110 kcal | 6g | 14g | 1.5g |
These bites provide a moderate amount of energy, mostly from carbohydrates and fats. The cocoa powder is a source of antioxidants, and dark chocolate ganache adds some beneficial flavonoids.
If you’re mindful of allergens, note this recipe contains gluten, dairy, and eggs, but can be adapted for some restrictions. I appreciate that these treats offer a little celebration indulgence without overly complex ingredients or prep.
Conclusion
These Perfect Graduation Cap Brownie Bites combine the best of both worlds: the rich, comforting taste of homemade brownies and a festive, whimsical design that’s sure to impress any graduate. They’re approachable enough for busy bakers yet special enough to make a statement on your celebration table.
Feel free to play with the colors, flavors, and decorations to suit your style and occasion. Honestly, once you make these, you’ll find yourself coming back to the recipe for birthdays, anniversaries, or just a fun weekend treat.
If you try them out, I’d love to hear how your tassels turned out or any creative twists you added. Share your thoughts, photos, or questions in the comments below—let’s celebrate good food and great moments together!
Here’s to making memories one delicious bite at a time.
FAQs
Can I make these brownie bites ahead of time?
Yes! You can bake and decorate them a day in advance. Store in an airtight container at room temperature or in the fridge if it’s warm. Just bring to room temp before serving.
What if I don’t have edible gold dust for the tassels?
No worries! You can pipe tassels with plain royal icing or use colored sugar sprinkles for a fun alternative. Metallic food pens also work well for decoration.
How do I prevent the brownies from sticking to the pan?
Line your baking pan with parchment paper, leaving an overhang. This makes lifting out the brownies easy and keeps edges clean.
Can I use a boxed brownie mix instead of homemade batter?
Absolutely! Just bake according to package instructions and follow the cutting and decorating steps. The key is letting them cool completely before decorating.
What’s the best way to pipe tassels if I’m a beginner?
Start by practicing on a piece of parchment paper to get comfortable with the pressure and flow. A small zip-top bag with a tiny cut is a great beginner tool if you don’t have a pastry bag.
Pin This Recipe!
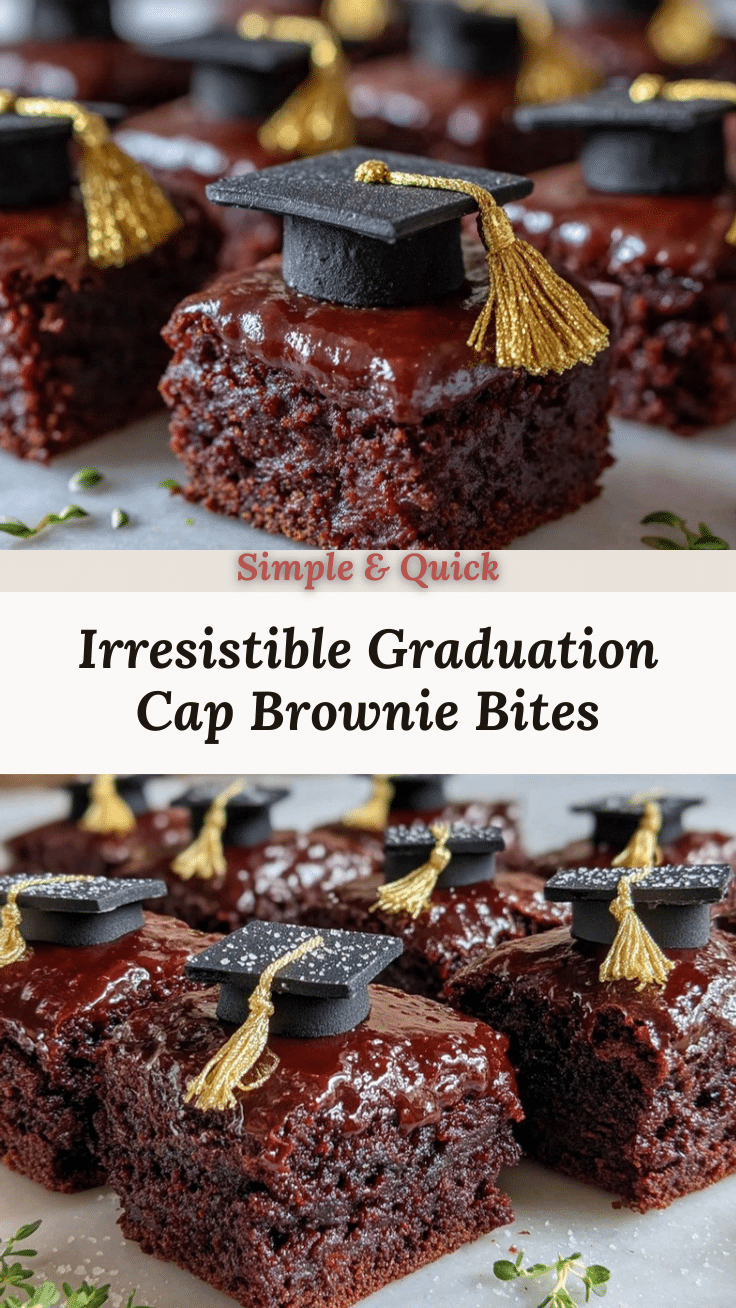
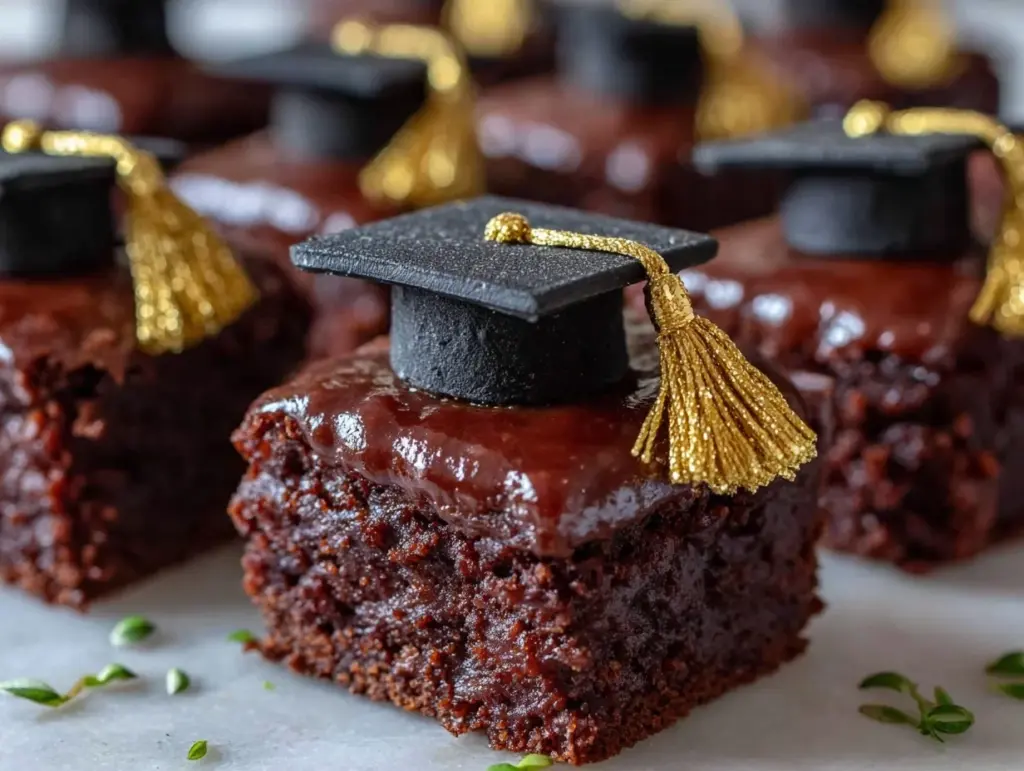
Perfect Graduation Cap Brownie Bites Easy DIY Gold Tassel Treats
These fudgy brownie bites shaped like graduation caps feature a glossy chocolate ganache topping and edible gold tassels, perfect for celebrations and easy to make.
- Prep Time: 15 minutes
- Cook Time: 30 minutes
- Total Time: 45 minutes
- Yield: 24 servings 1x
- Category: Dessert
- Cuisine: American
Ingredients
- 1 cup (130g) all-purpose flour
- 1 cup (200g) granulated sugar
- 1/3 cup (35g) unsweetened cocoa powder
- 1/2 teaspoon baking powder
- 1/4 teaspoon salt
- 1/2 cup (115g) unsalted butter, melted and slightly cooled
- 2 large eggs, room temperature
- 1 teaspoon vanilla extract
- 1/2 cup (120ml) heavy cream
- 4 ounces (115g) bittersweet chocolate, chopped
- 1 cup (120g) powdered sugar
- 1–2 tablespoons water
- Edible gold dust or luster dust
- Black fondant or black candy melts (optional)
Instructions
- Preheat your oven to 350°F (175°C). Grease an 8×8-inch pan or line it with parchment paper.
- In a medium bowl, whisk together flour, sugar, cocoa powder, baking powder, and salt.
- In another bowl, whisk melted butter, eggs, and vanilla extract until smooth.
- Pour wet ingredients into dry ingredients and gently fold until just combined.
- Pour batter evenly into prepared pan and bake for 25–30 minutes until a toothpick inserted comes out with a few moist crumbs.
- Remove from oven and cool completely on a cooling rack.
- Heat heavy cream in a small saucepan until it begins to simmer. Remove from heat, add chopped chocolate, let sit 2 minutes, then stir until smooth. Let cool until spreadable.
- Cut cooled brownies into 2-inch squares using a sharp knife or cookie cutter.
- Spread a thin layer of ganache on each brownie square.
- Mix powdered sugar with water until thick but pipeable, add edible gold dust and mix well.
- Transfer icing to a piping bag or zip-top bag with a tiny corner cut and pipe tassels on each brownie cap. Let dry at least 30 minutes.
- Optionally, use black fondant or melted candy melts to create the square base or button on the cap, attaching with ganache or icing.
- Arrange brownie bites on a platter and serve.
Notes
[‘Do not overbake to keep brownies fudgy; test with a toothpick at 25 minutes.’, ‘Cool brownies completely before cutting and decorating for clean edges.’, ‘Warm and dry knife between cuts for smoother brownie squares.’, ‘Let ganache cool to a spreadable consistency to avoid soaking into brownies.’, ‘Practice piping tassels on parchment paper before decorating brownies.’, ‘Prepare ganache while brownies bake to save time.’, ‘Substitute gluten-free flour and dairy-free ingredients for dietary needs.’]
Nutrition
- Serving Size: 1 brownie bite (1 of
- Calories: 110
- Fat: 6
- Carbohydrates: 14
- Protein: 1.5
Keywords: brownie bites, graduation treats, chocolate brownies, gold tassel, party dessert, easy brownies, celebration dessert